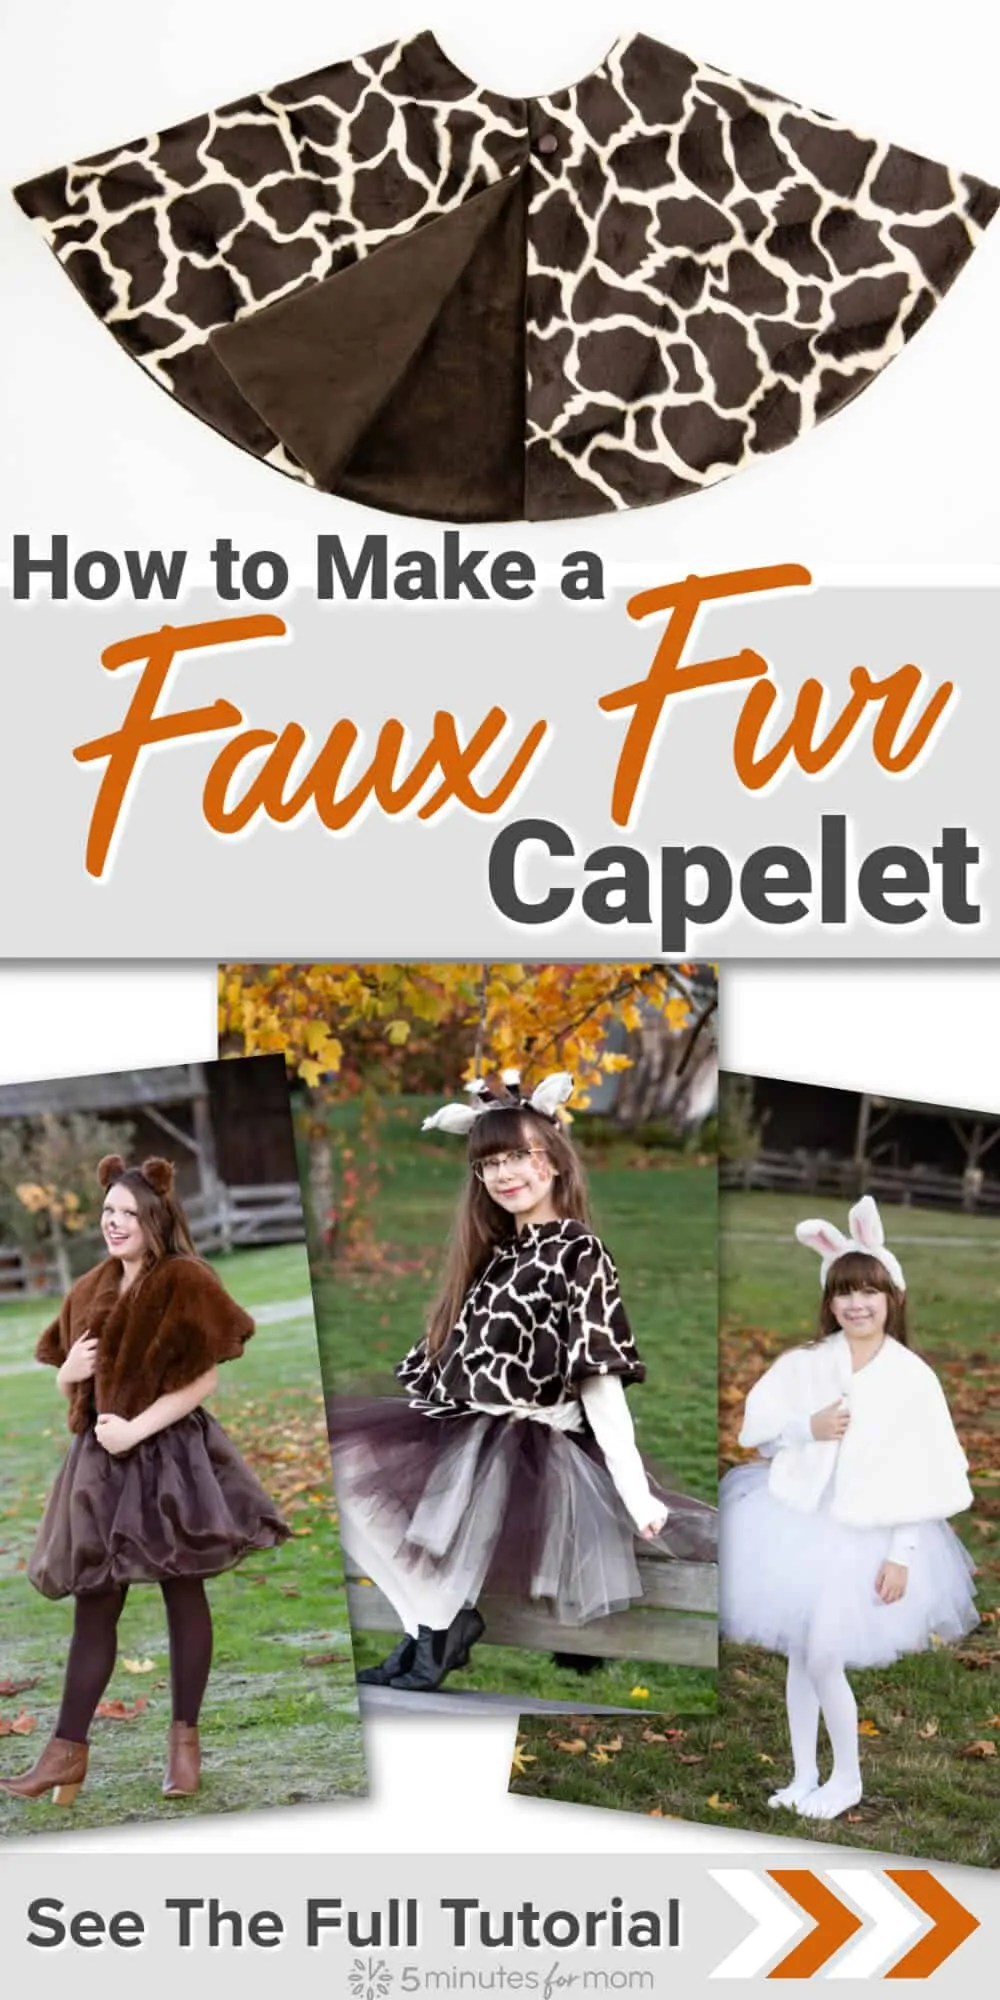
A faux fur wrap or capelet is the perfect, luxurious solution for staying warm while looking glamourous. Whether you need to top off a Halloween costume, an evening gown, or a wedding dress, in this post we show you how to make a capelet pattern and sew a stunning faux fur capelet.
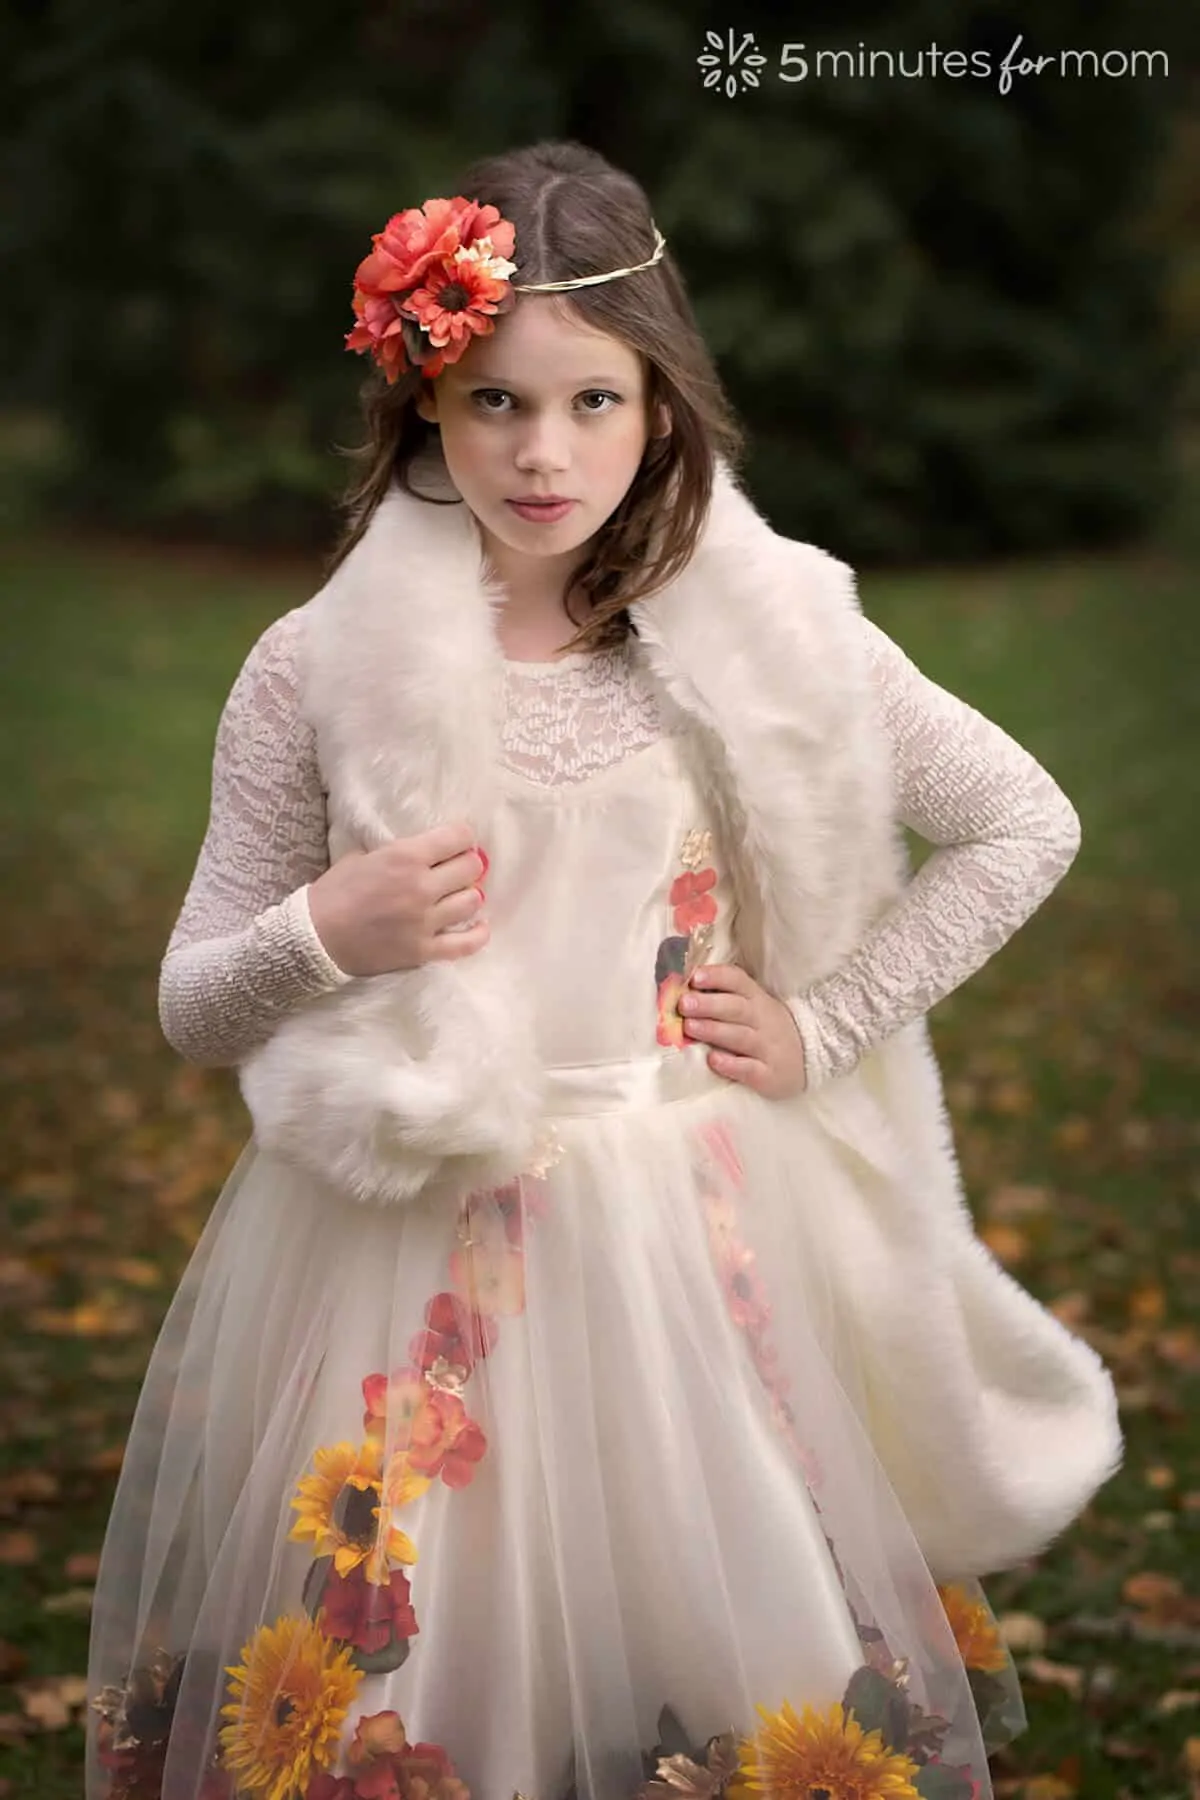
If you want to take a special occasion outfit to the next level, or treat your little girl to a princess experience, add a faux fur capelet or faux fur wrap.
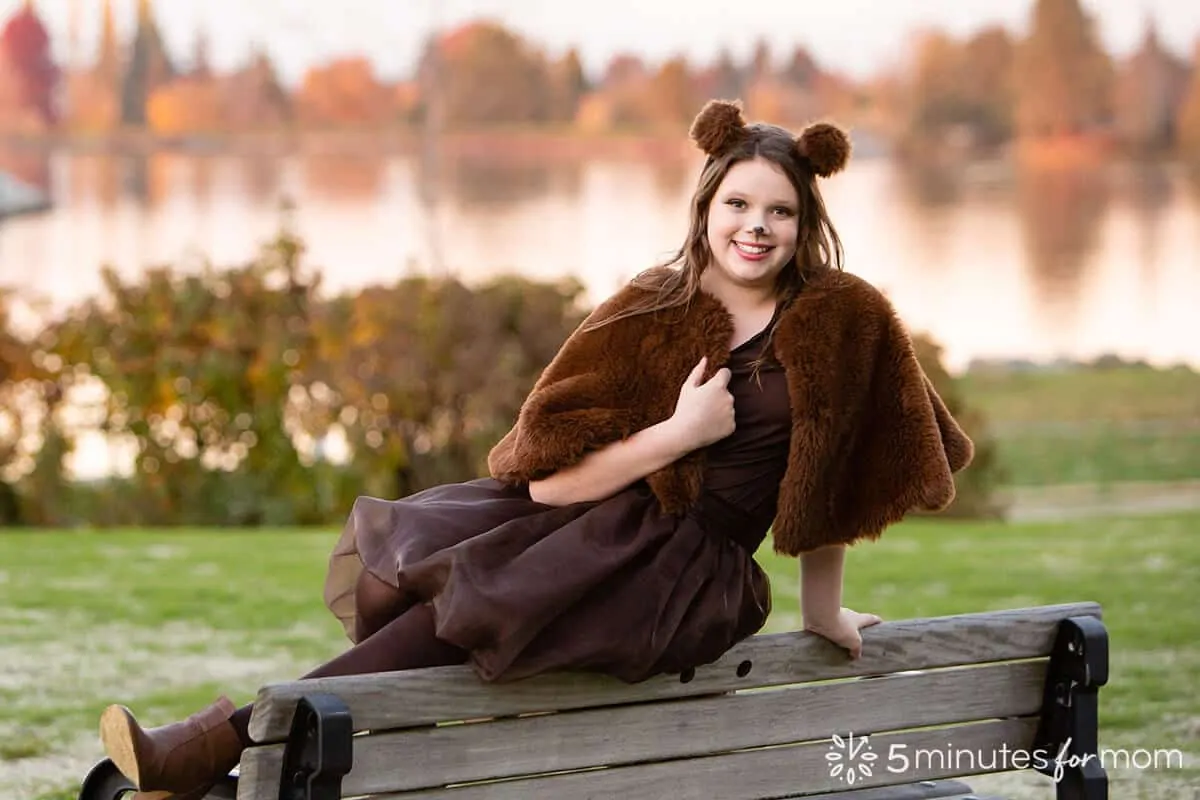
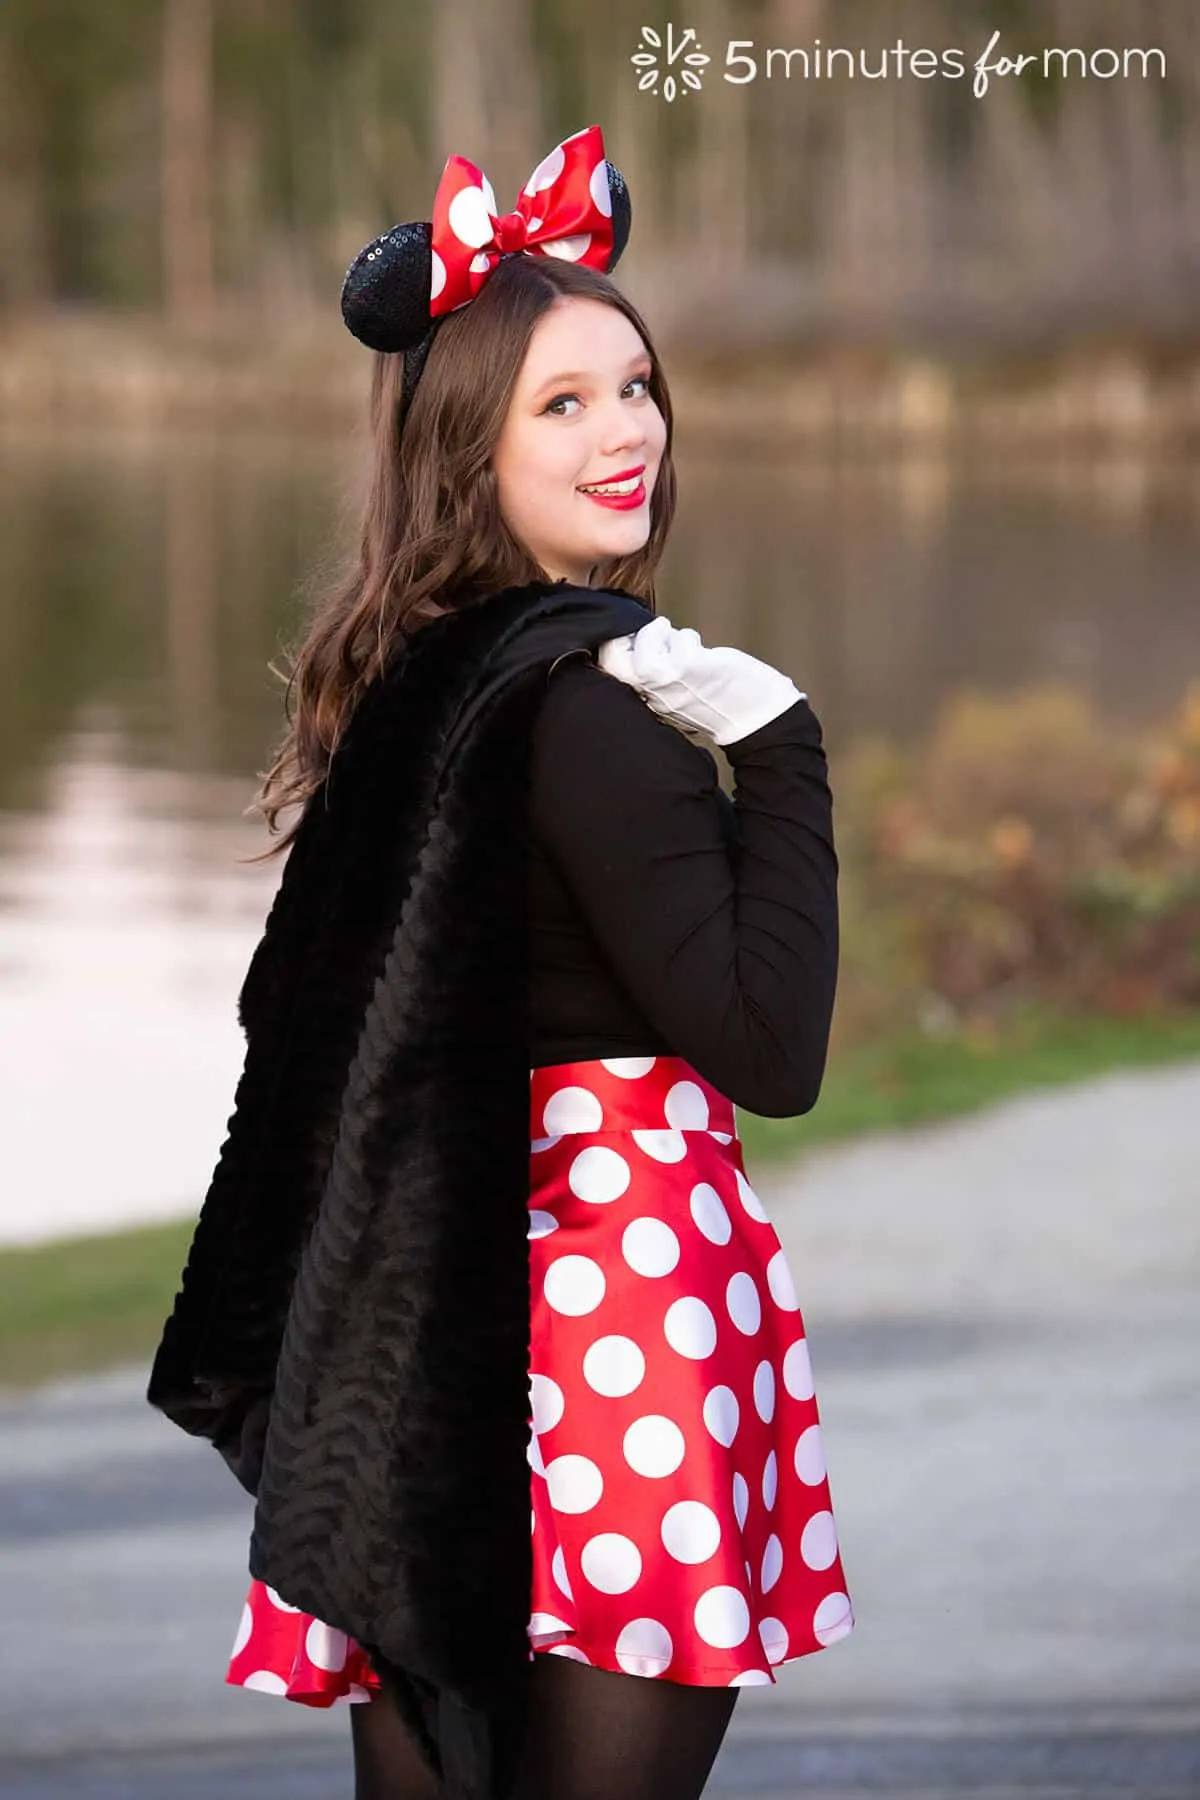
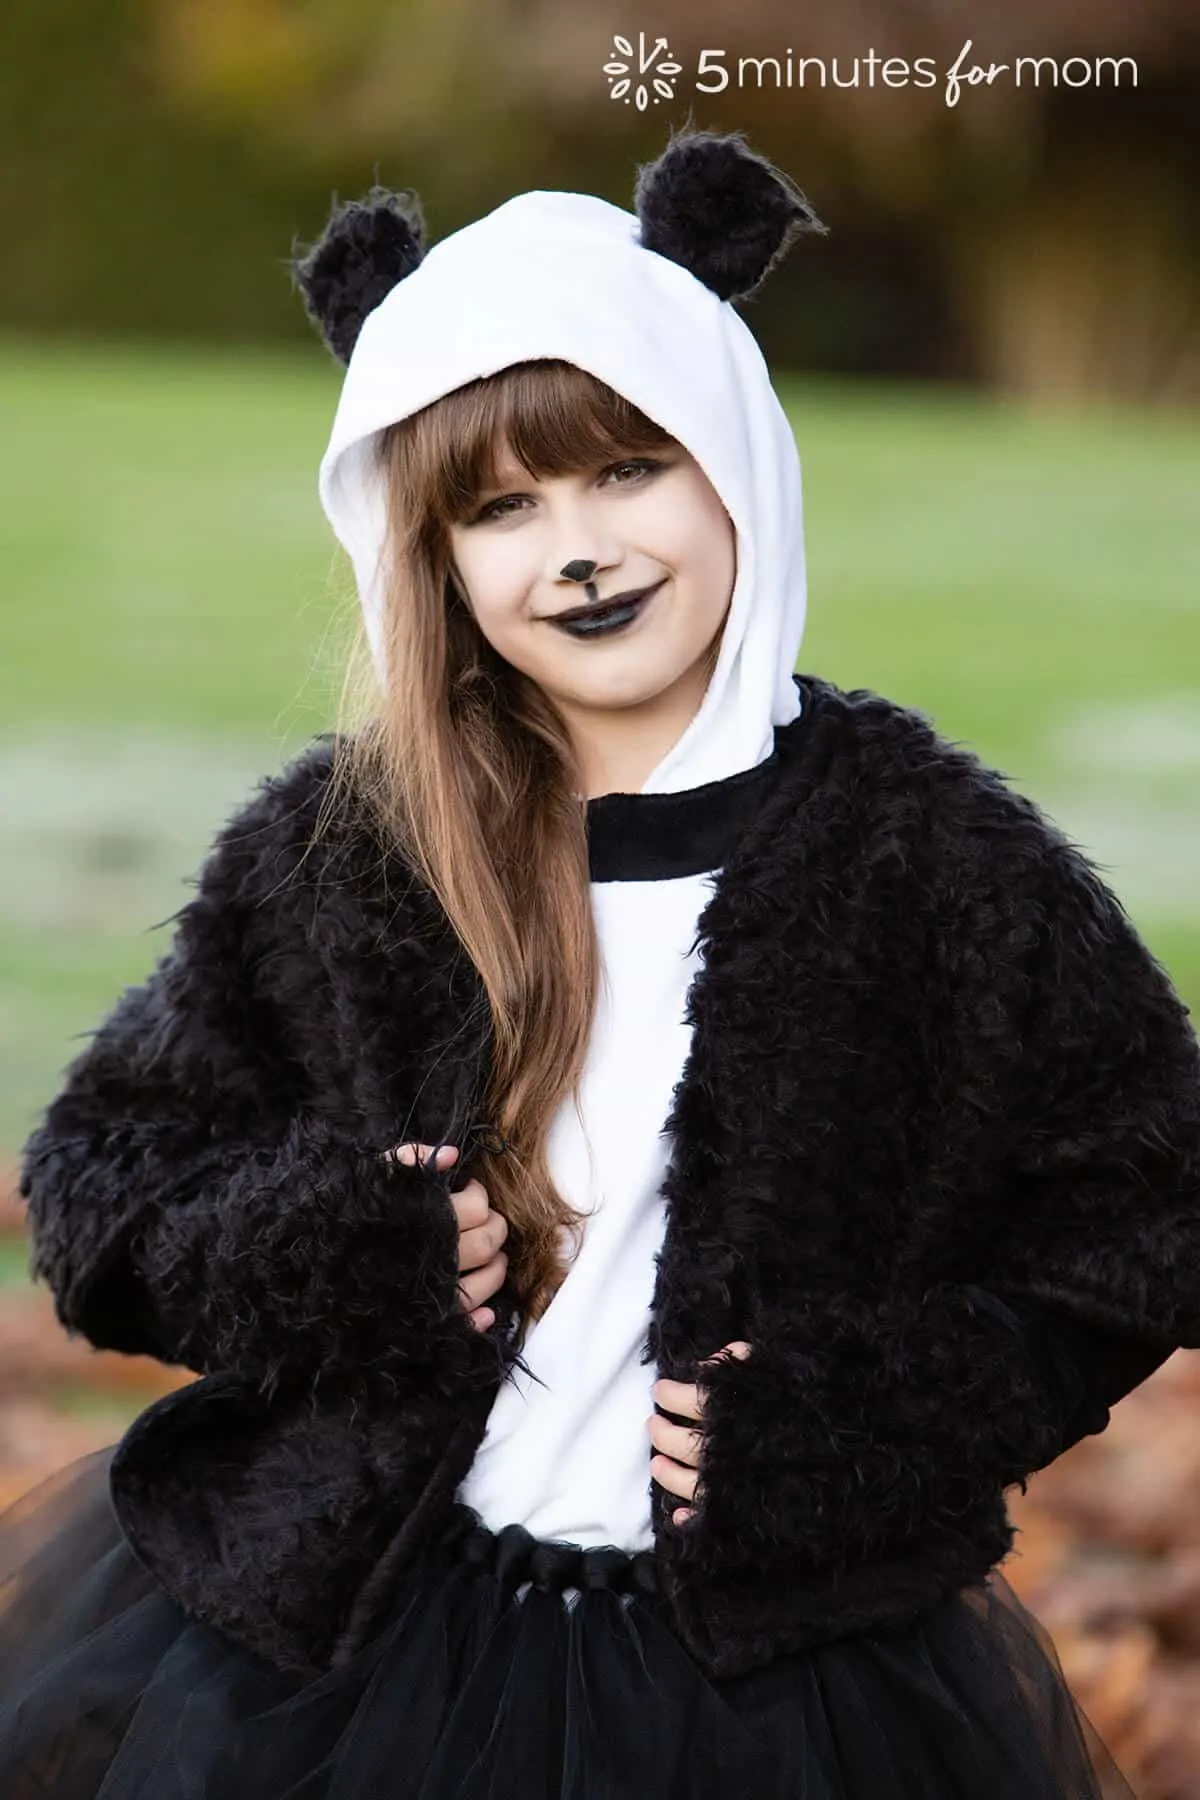
Faux fur capes and wraps protect you from the cold while making you feel like you just stepped into the glamour of old Hollywood. Faux fur capelets are also an adorable and practical option for girls to wear with their Halloween costumes or Christmas dresses.
Over the last decade, I have sewn over a dozen faux fur capelets and wraps for my daughter, nieces, photography clients, and myself.
I use plush or faux fur capelets and faux fur wraps for photography shoots, evening dresses, special occasions, and Halloween costumes.
How to Sew a Faux Fur Capelet or Faux Fur Wrap
Step 1 – Choose Your Fabric
You can sew capelets and wraps in an endless variety of fabrics from faux fur to fleece to knits and more.
To decide what kind of fabric you want to use, consider where you will be wearing the capelet or wrap, how warm you need it to be, and your fabric budget.
You will also need to decide what kind of fabric you want to use as the lining. Sometimes, you can use the same kind of fabric for the lining as you do for the outer fabric, and other times you want to use a lighter weight fabric such as a soft minky fleece or an elegant satin.
While some faux fur can be expensive, sewing your own faux fur capelet or wrap will still save you considerable money over purchasing a ready-made faux fur capelet.
I often find gorgeous faux fur remnant fabric that is marked down and very affordable.
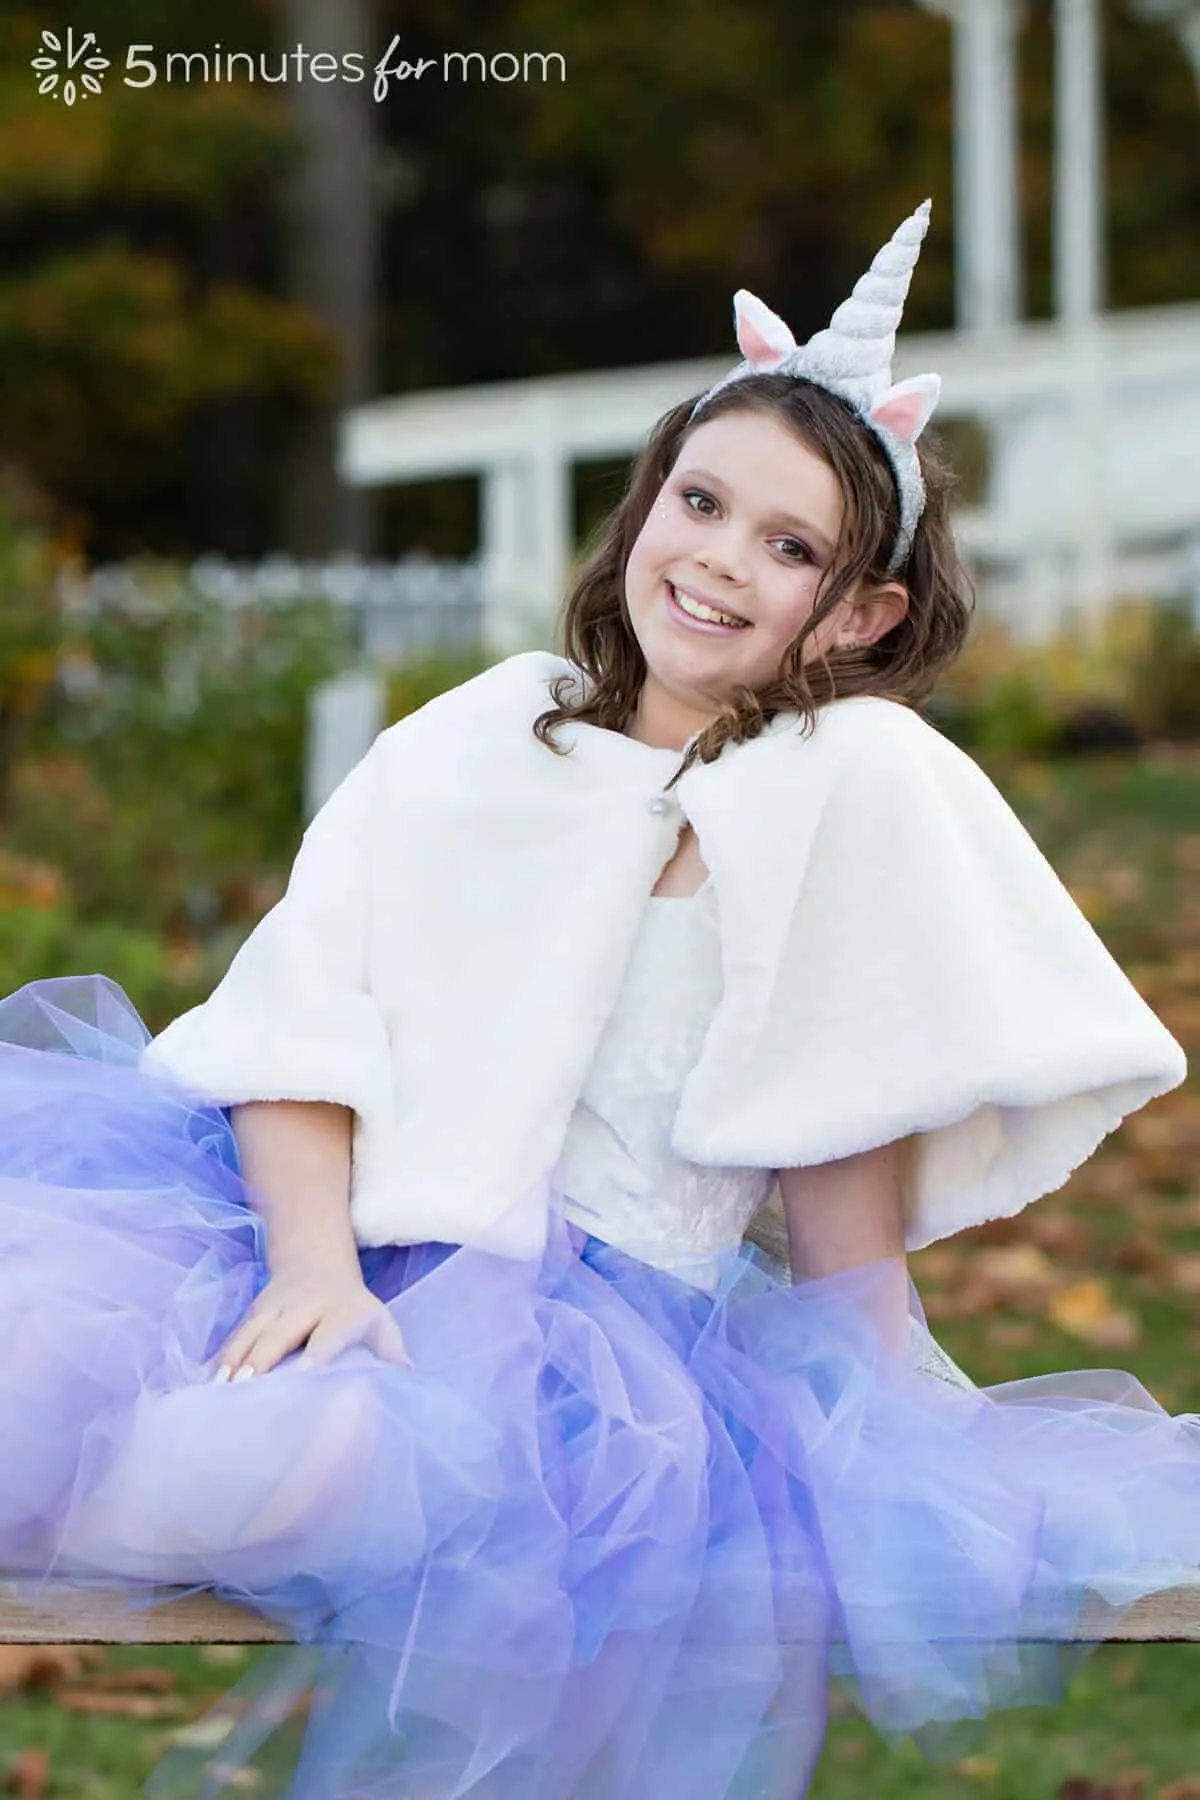
For your faux fur capelet or wrap, you can also consider plush fabric. I made two gorgeous white plush capelets a few years ago for my niece’s bunny costume and my daughter’s unicorn costume.

Because the plush fabric was lightweight and draped well, I was able to line the capelet with the same plush fabric creating the softest, coziest capelet you could imagine. The girls LOVED their capelets and were so cozy and warm.
Minky fleece is also a great plush fabric for capelets and wraps. There are so many high quality, silky soft plush minky fabrics available. You could use a luxe cuddle plush minky or a velvety soft textured dimple minky or a beautiful rose minky fabric with a rosette embossed design.
Smooth minky fleece is perfect for lining capes, capelets, and wraps. I often use smooth minky fleece to line my faux fur capelets and wraps so that the inside of the capelet or wrap is super soft and warm.
Depending on the size of the capelet you are making, you will need between 1/2 to 1 meter/yard of each your outer fabric and your lining fabric.
If you are making a rectangular wrap and the width of your fabric is 150cm (60″) it will be long enough so you only need 1/3 of a meter/yard. If you are using a smaller piece of fabric and your wrap isn’t long enough to drape through your arms, you can use a button or closure to hold your wrap in place as you would with a capelet.
I usually make my wraps about 150cm (59″) long and between 30-46cm (12-18″) deep.
If you want a long, sweeping wrap that is longer than the width of your fabric, you can stitch two pieces together. Place the seam in the center back and with the plush or faux fur fabric, the seam will be almost invisible. If you don’t want a seam in your wrap and your fabric isn’t as wide as you need it to be, you may need to splurge on a couple of meters or yards. But then you have plenty of fabric to line the wrap or you can make an extra wrap or two.
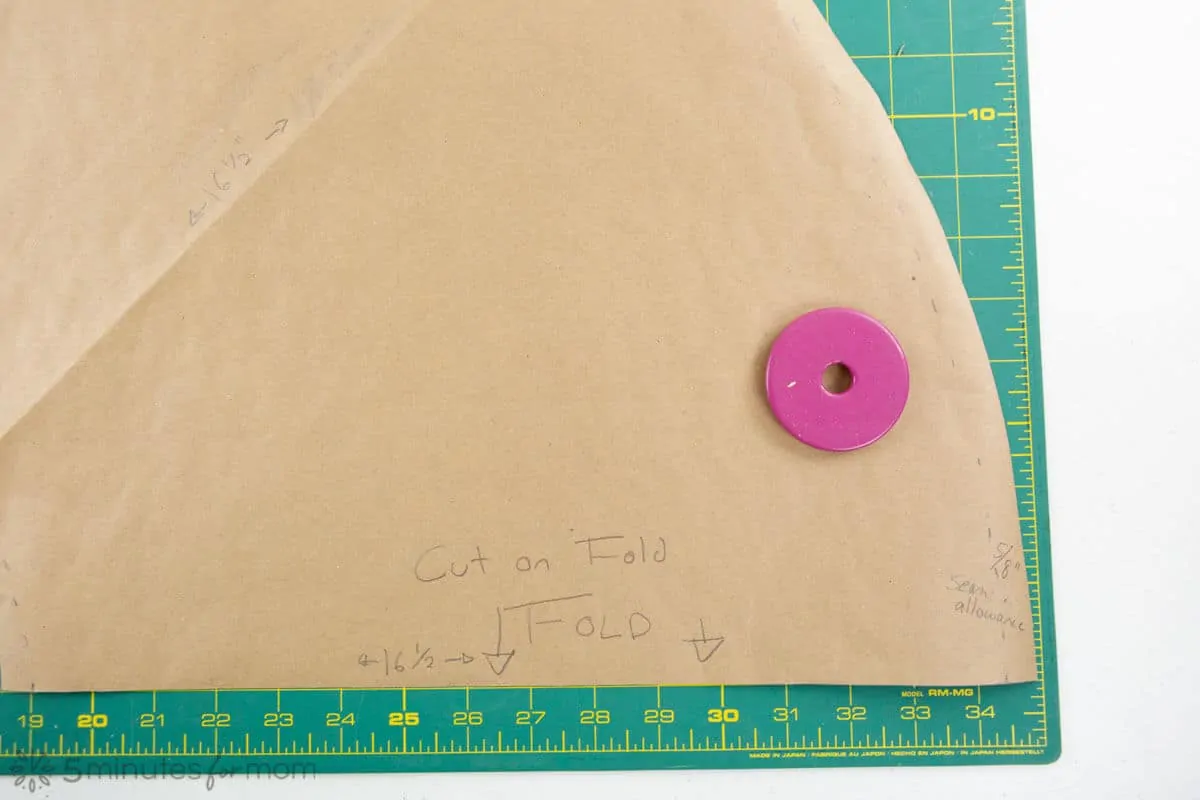
Step 2 – Draft Your Capelet Pattern
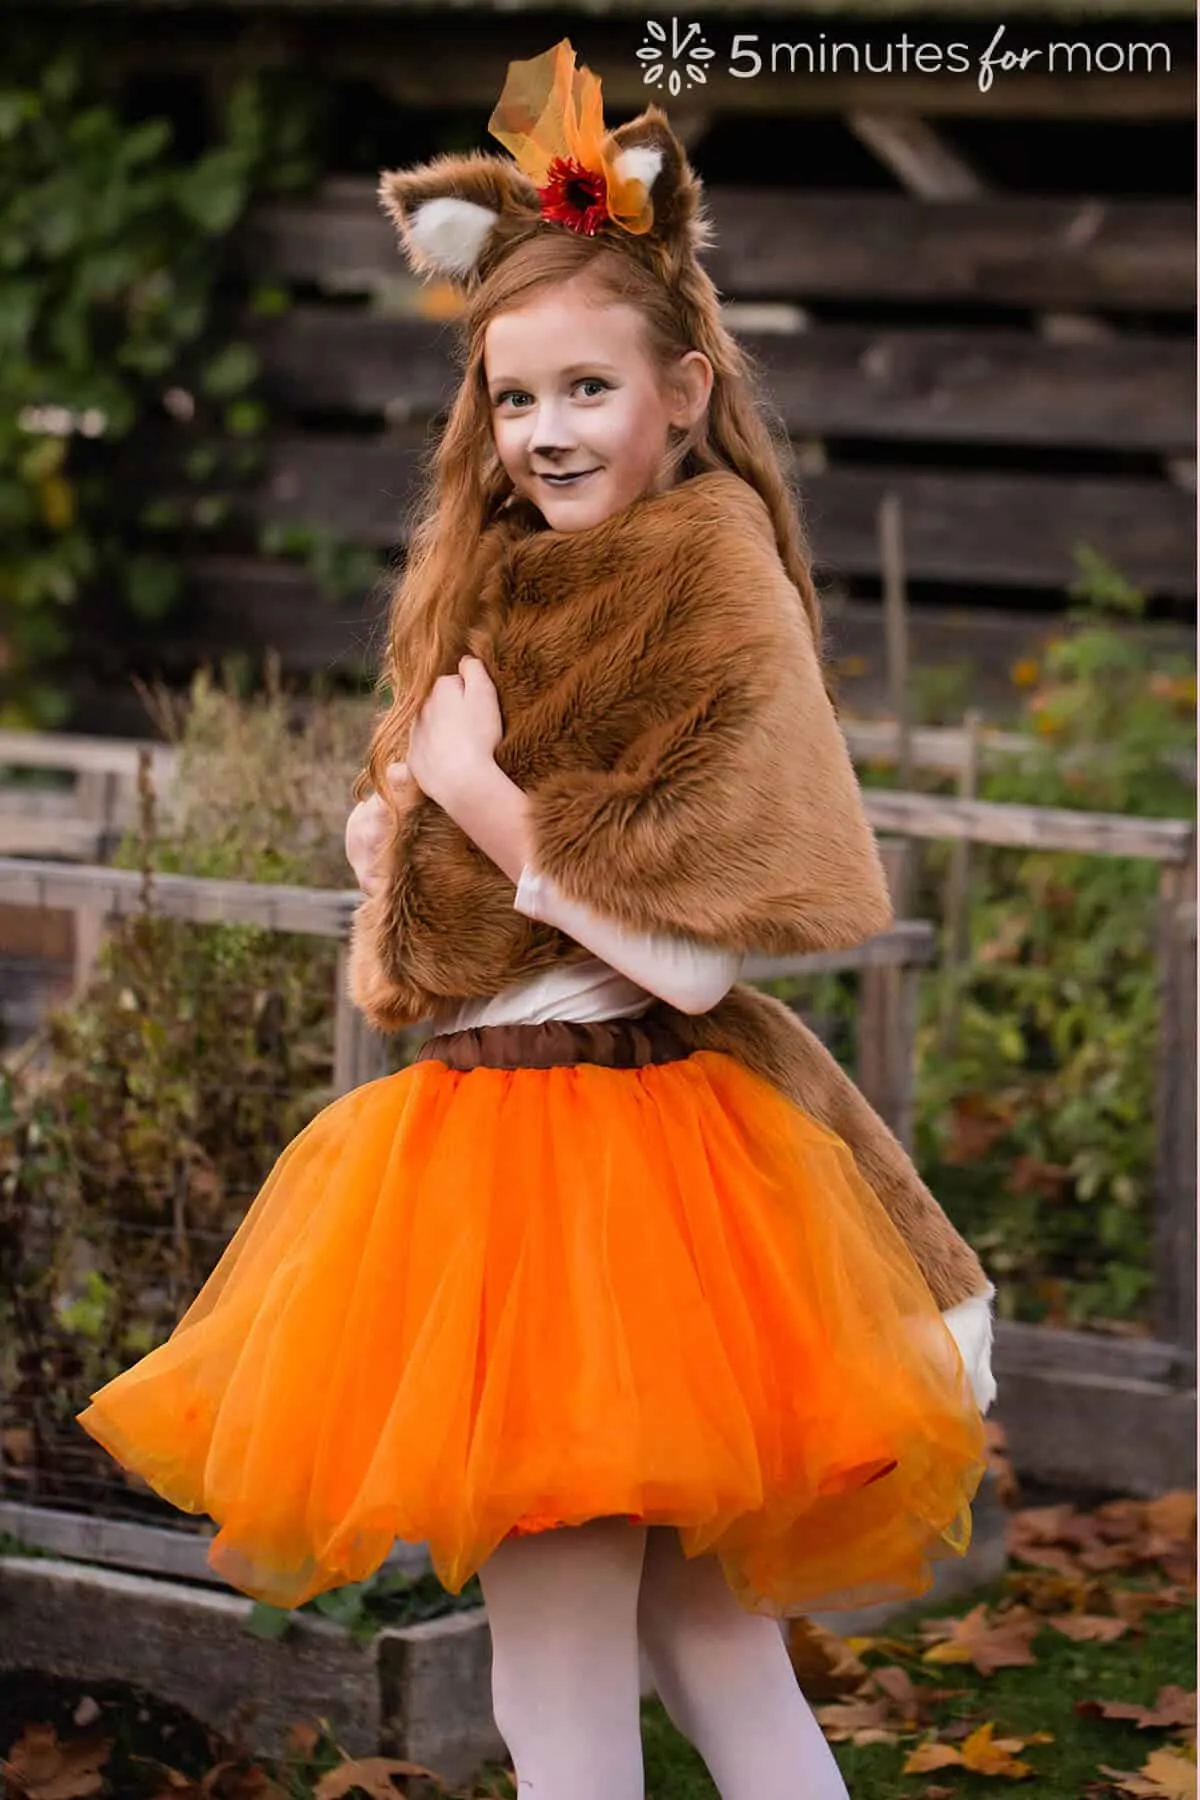
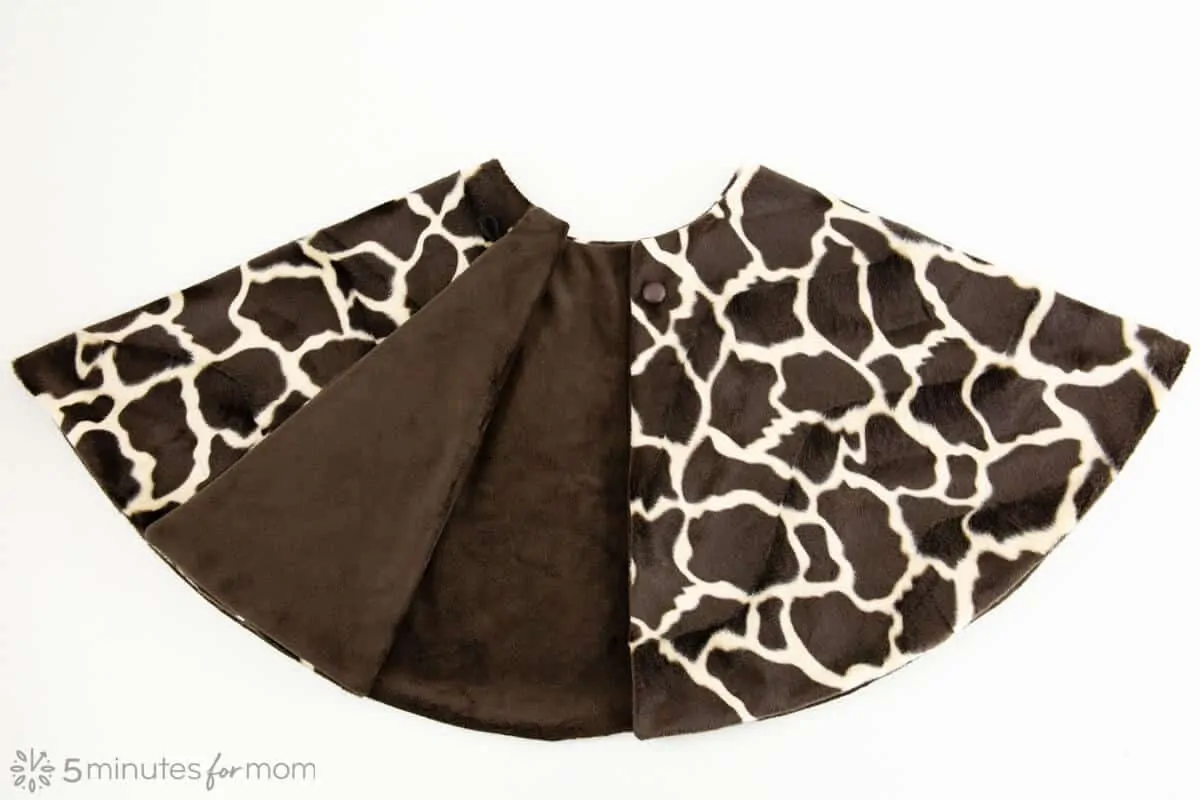
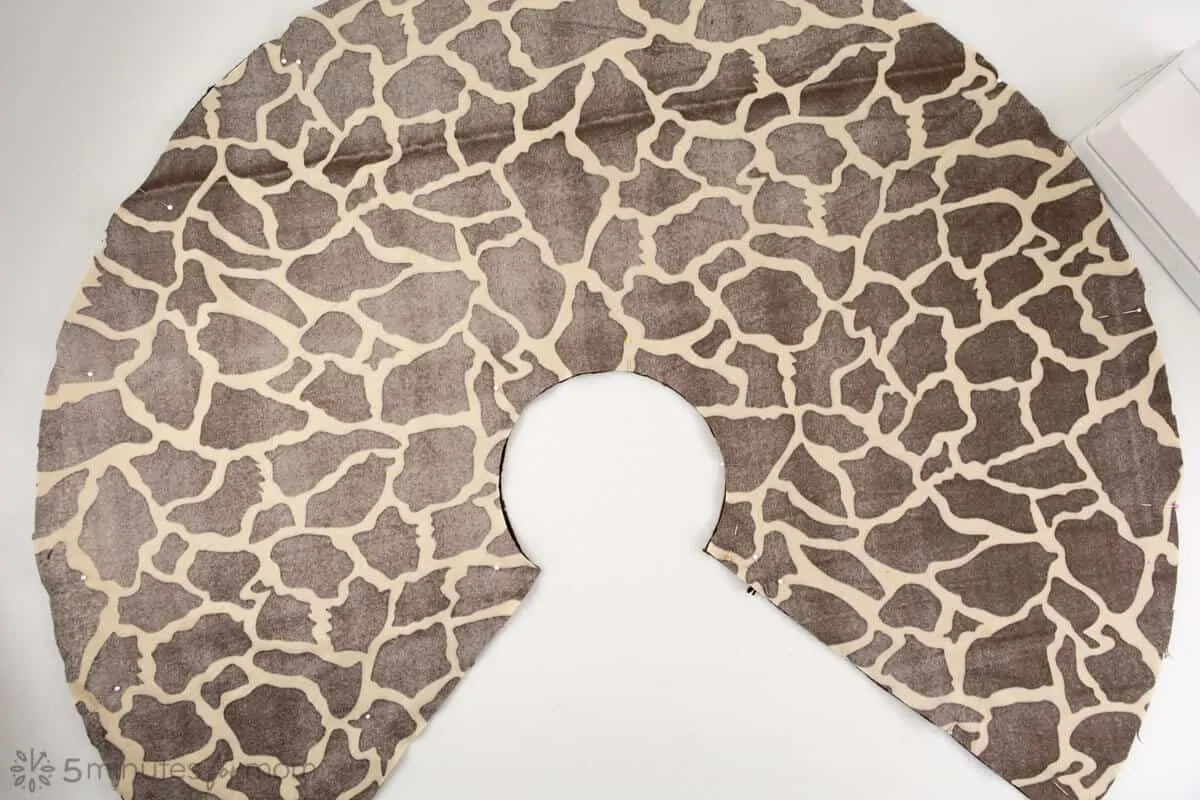
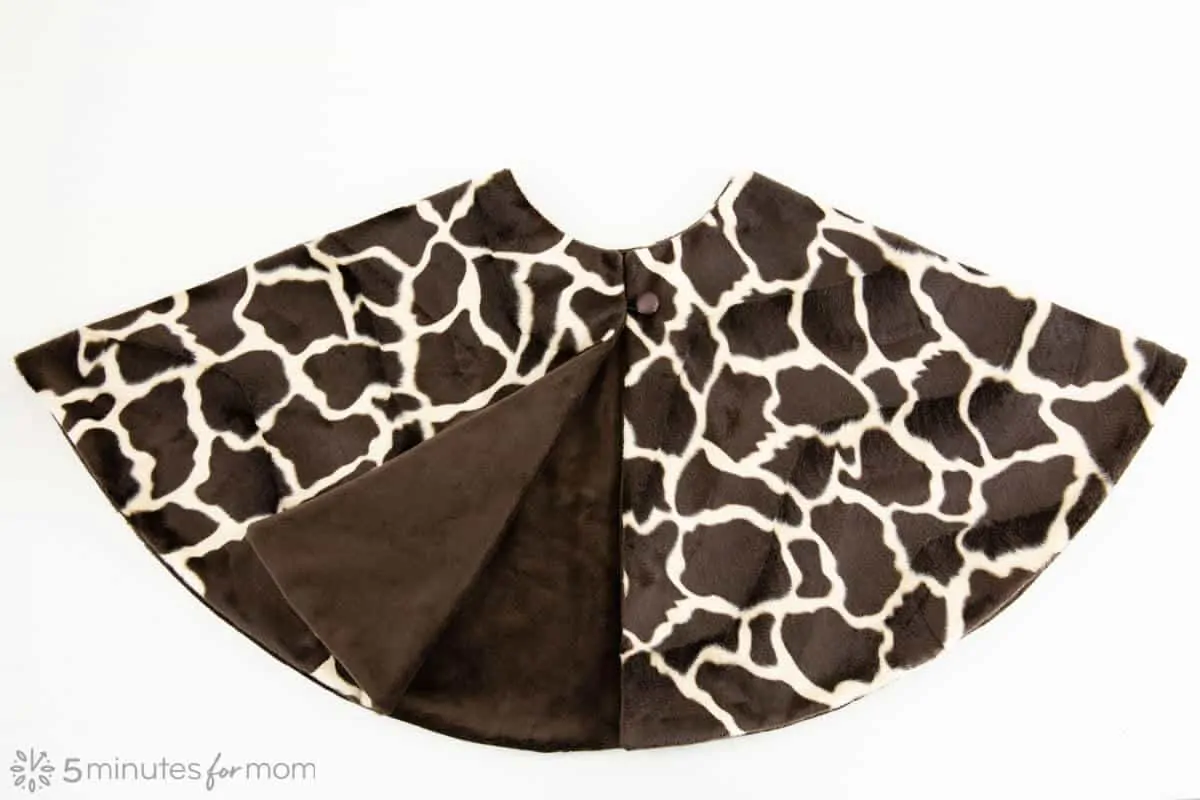
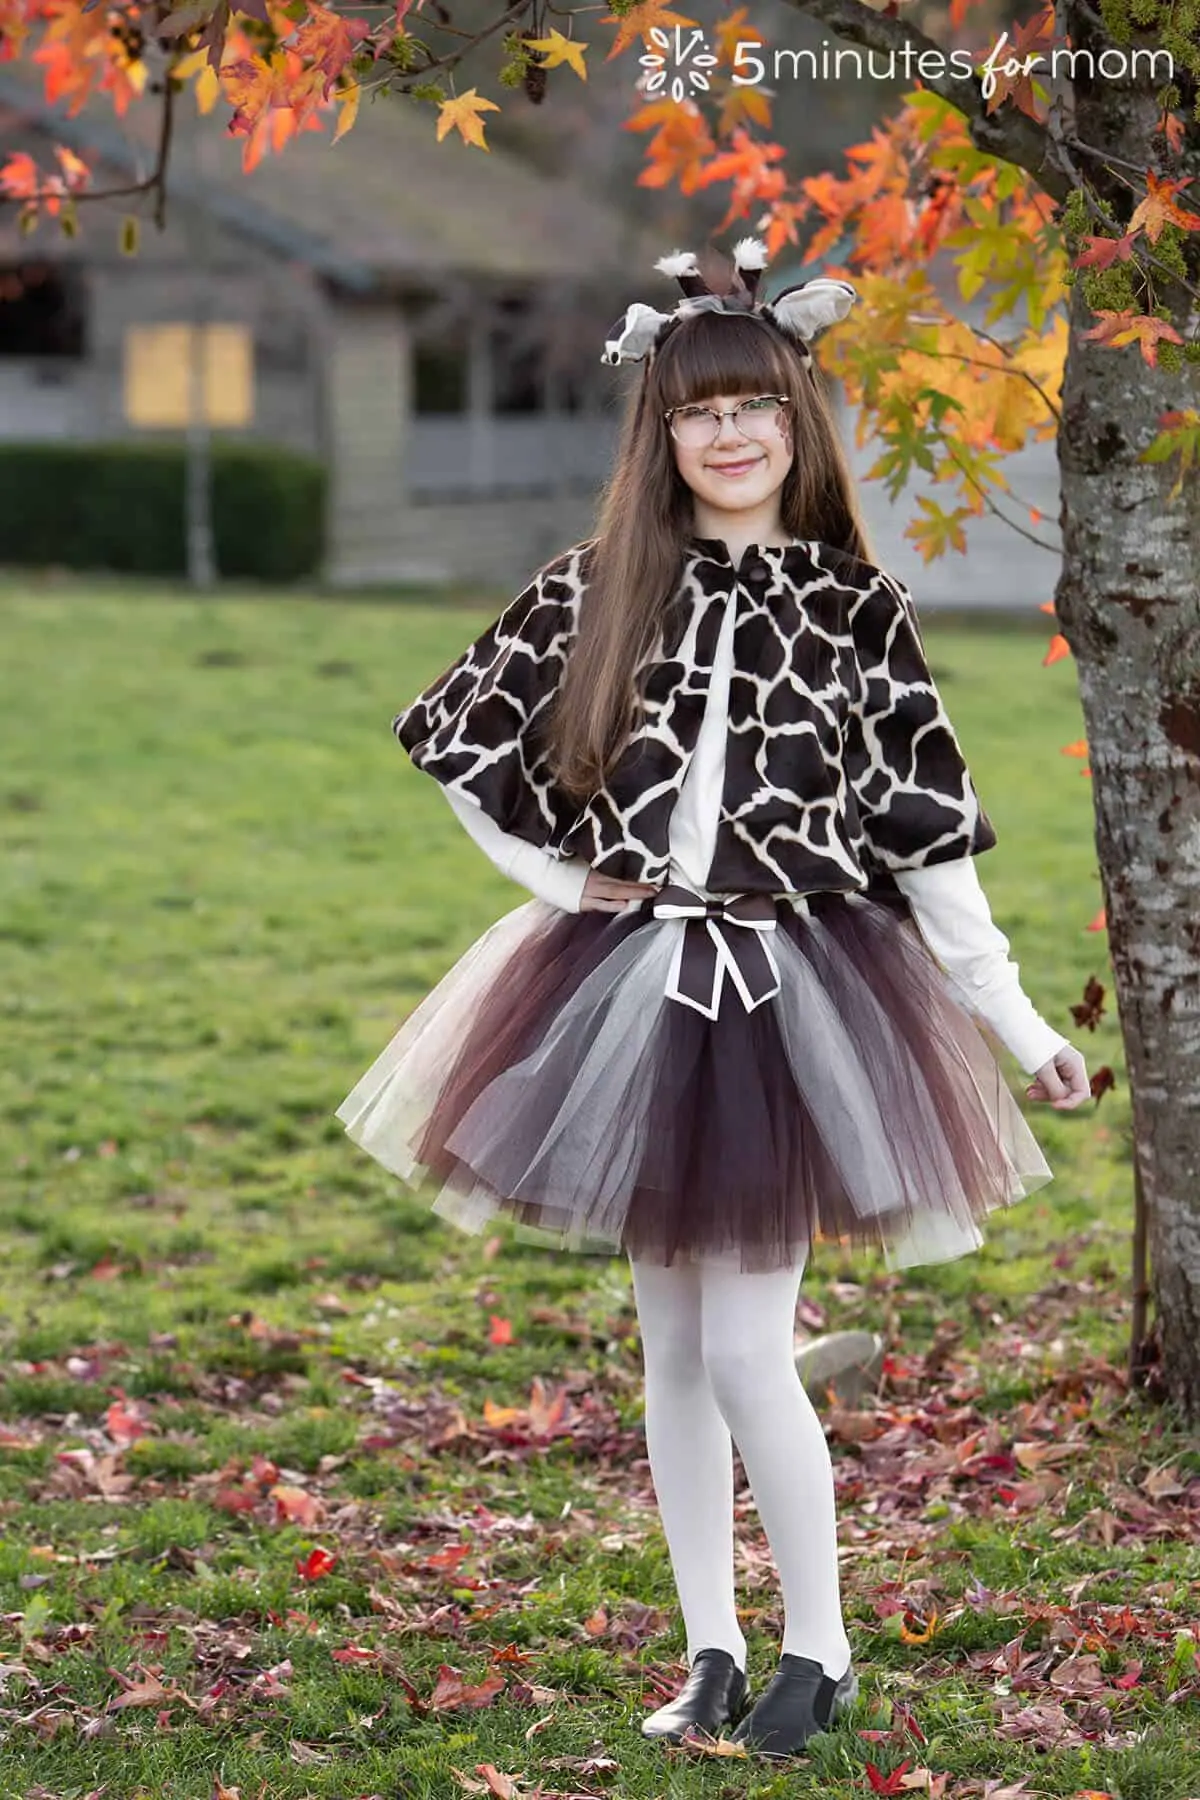
For my capelet patterns, I draft a simple three-quarter circle skirt pattern. On a lighter fabric that drapes well, I may use the full 3/4 pattern, as I did for this giraffe costume.
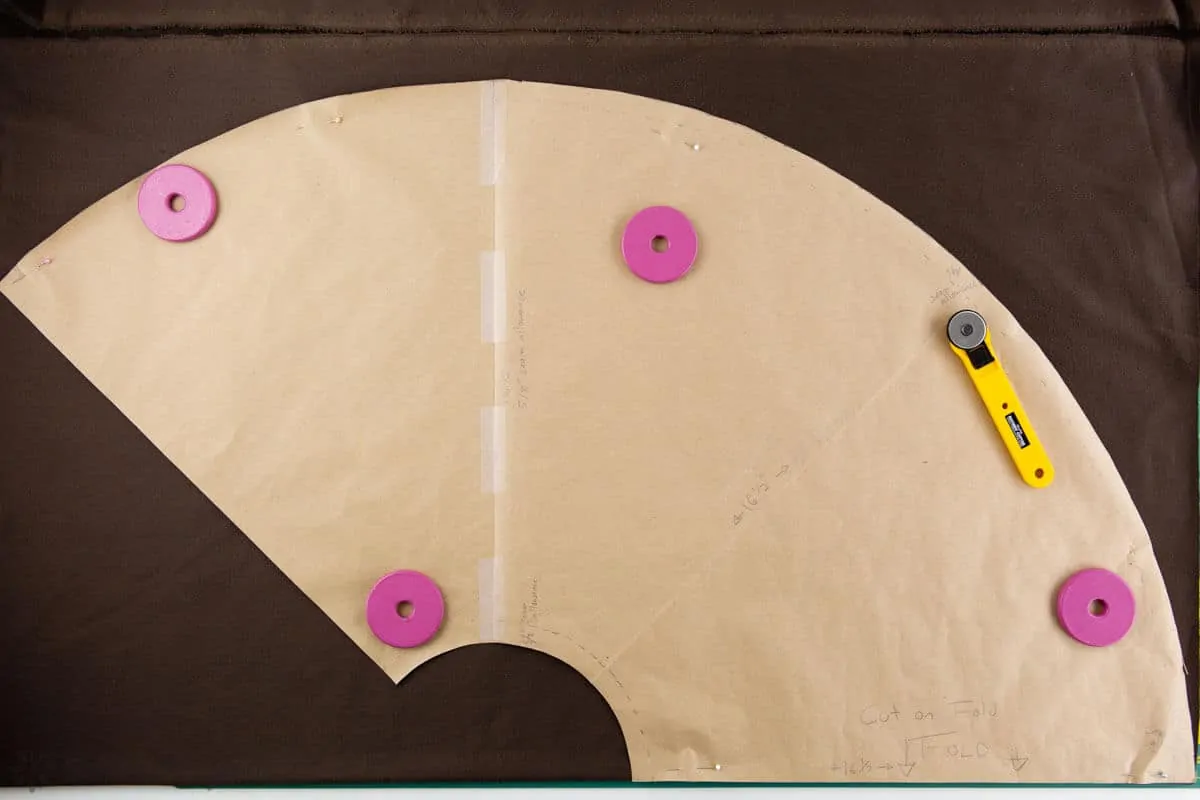
But for other capelets with stiffer faux fur fabric, or if I don’t want the capelet to have as much fabric at the front, then I size the three-quarters down until it is more like five-eighths of a circle.
To draft your pattern, you can measure around your neck where you want the top of the capelet to rest and use that number as you would for a waist measurement in a circle skirt formula.
For a three-quarter circle with seam allowances, you can use this formula:
Radius = 1.33*circumference / 2Ï€
In other words:
Radius = 1.33 multiplied by (Waist Measurement + ease) divided by 6.28
For this giraffe three-quarter circle capelet for my niece, I used a radius of 10cm (4″).
If you want a wider neck, that reveals more of the collarbone, you may want to use a radius around 12.5cm (5″).
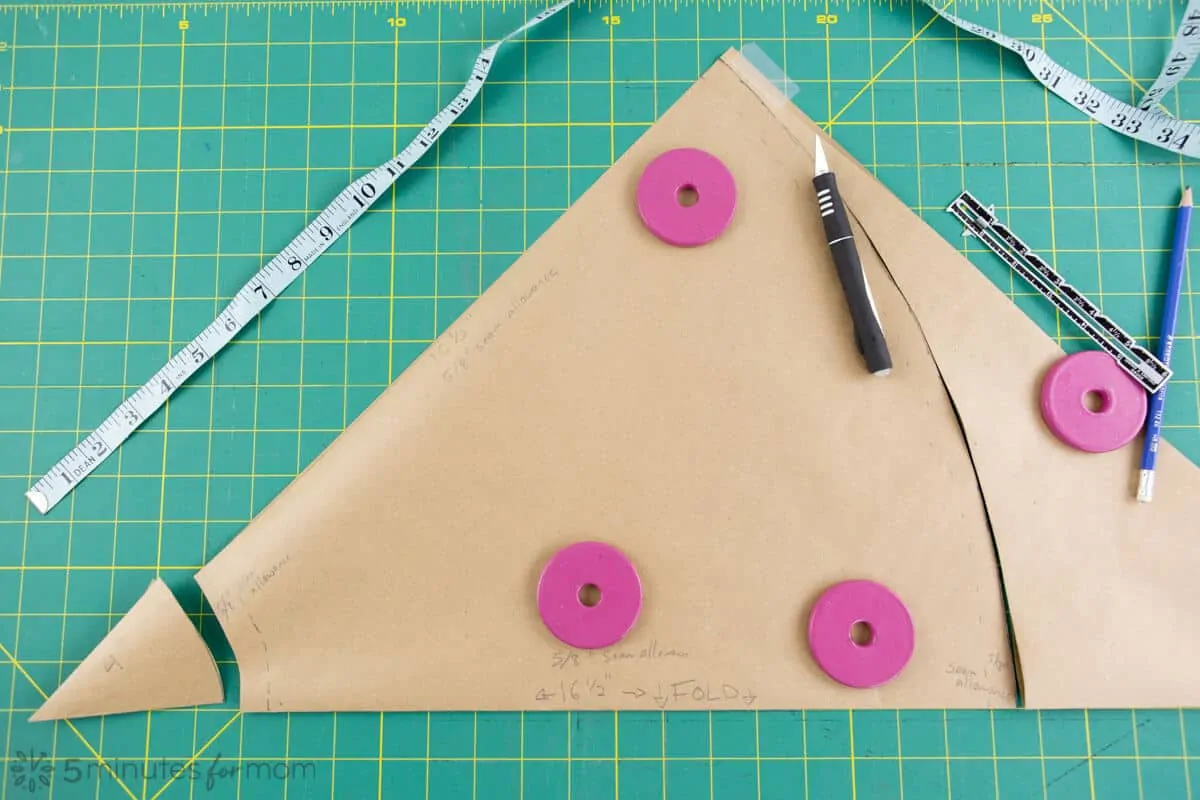
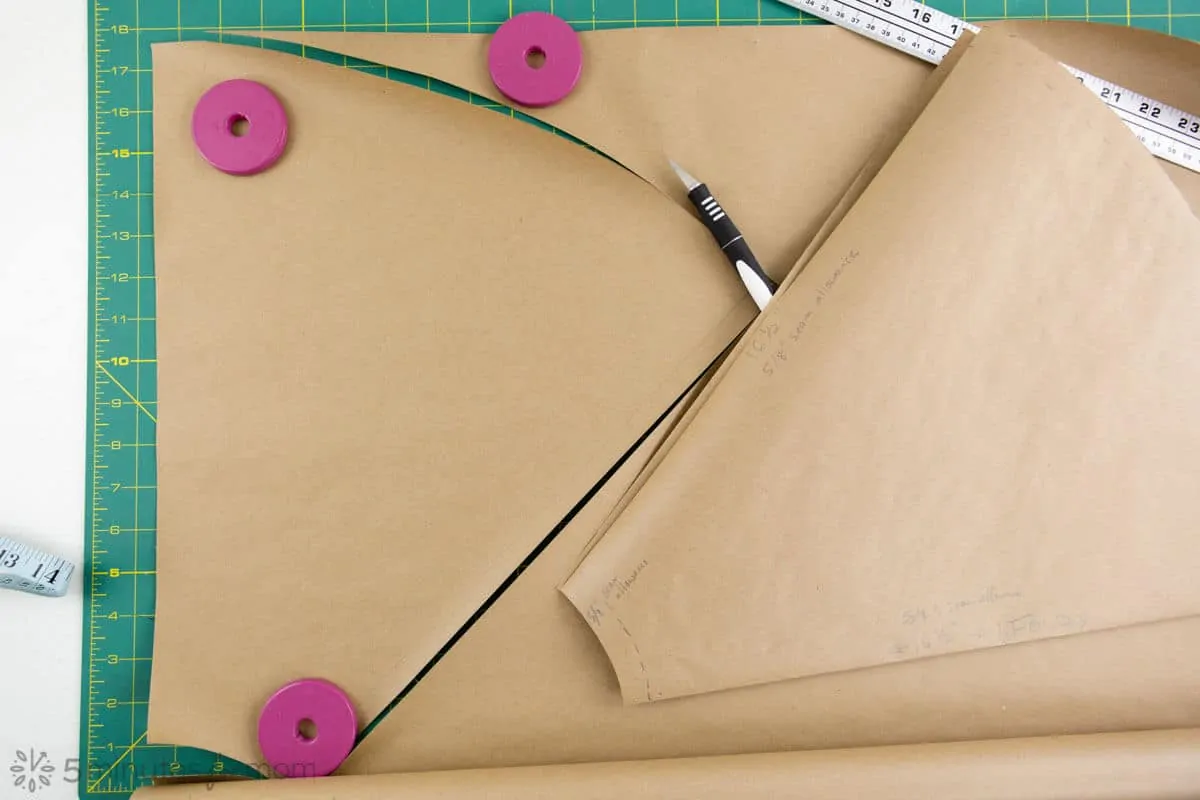
To turn your half-circle pattern into a three-quarter circle or a five-eighths circle, trace the half pattern that is folded in half (so it is a quarter of a half-circle). Cut out that quarter and tape it to the half-circle capelet pattern. (For a five-eighths circle, just fold the extra quarter that you drew in half.)
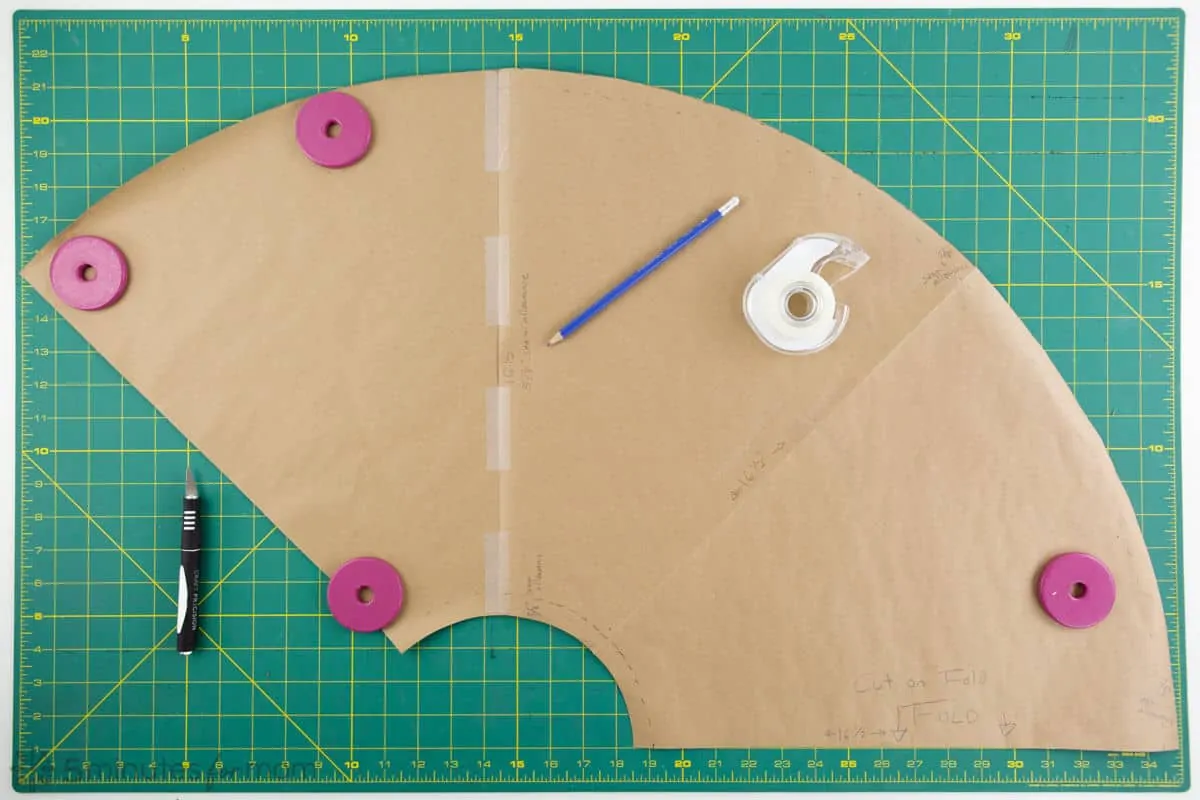
REMEMBER that your capelet pattern needs to be placed on a FOLD.
You may wish to make a toile (test garment) with an inexpensive piece of fabric to test your capelet pattern and sizing.
If you are making a wrap, then your pattern is as simple as a long rectangle. As I mentioned above, I size my wraps about 150cm (59″) long and between 30-46cm (12-18″) deep.
Step 3 – Cut Fabric
You can cut your circle skirt pattern (capelet pattern) on the fold, with your fabric folded lengthwise, with selvage to selvage. But to save the most fabric, you may want to fold your fabric as shown below, so that your fabric is only folded up to the amount required.
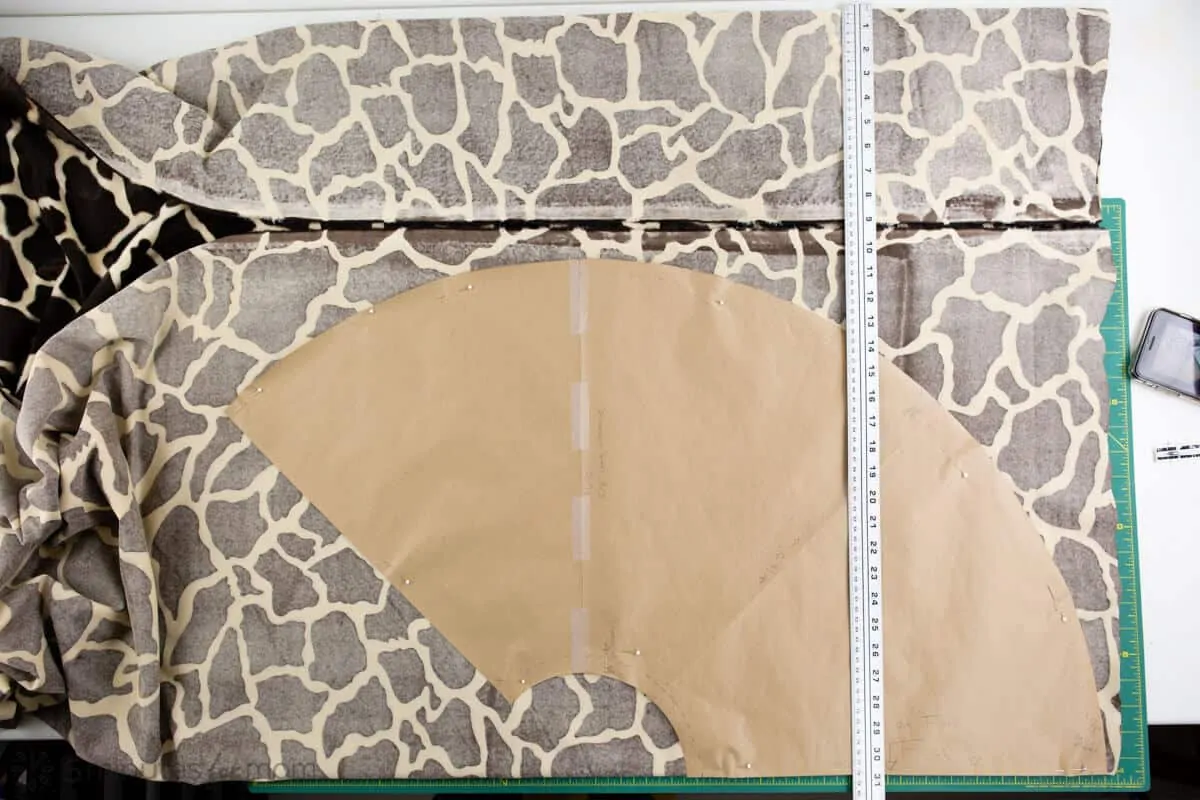
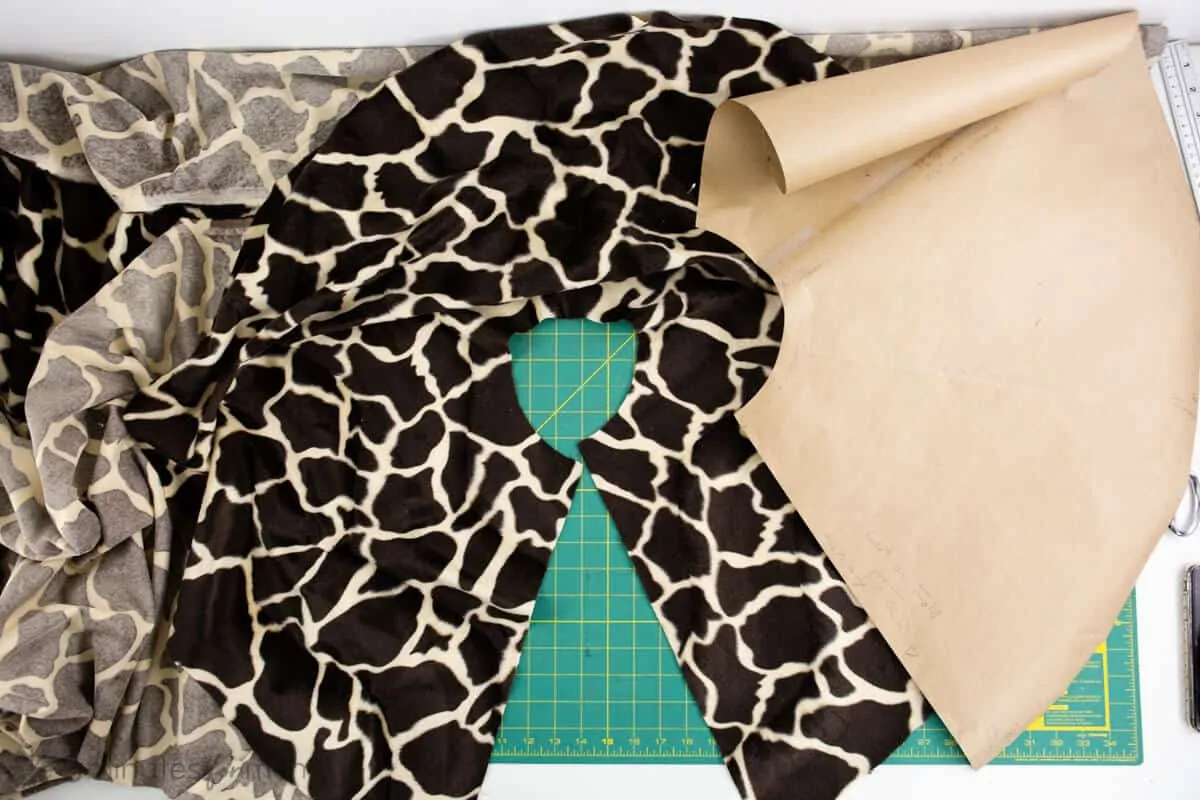
Cut one piece from your outer fabric and one from your liner fabric.
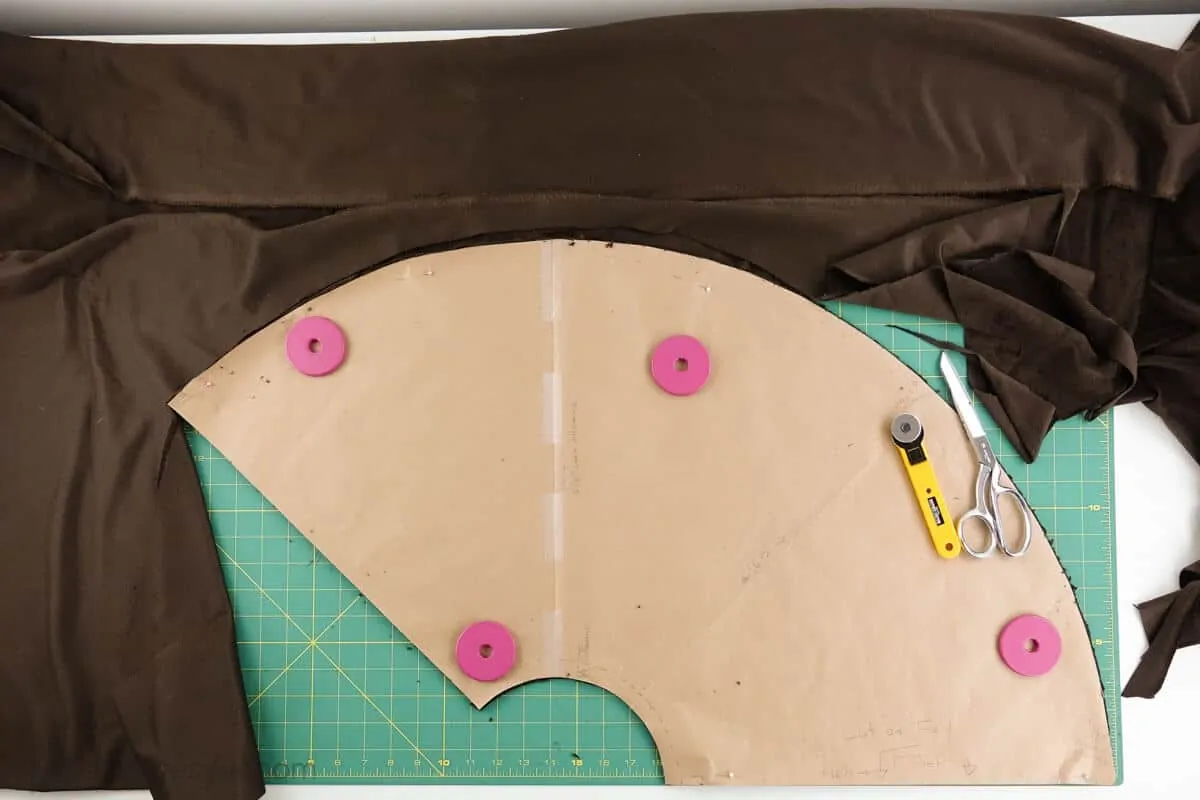
Please note that faux fur and plush fabrics are incredibly messy! You will have fluff and fur everywhere.
Step 4 – Pin and Sew
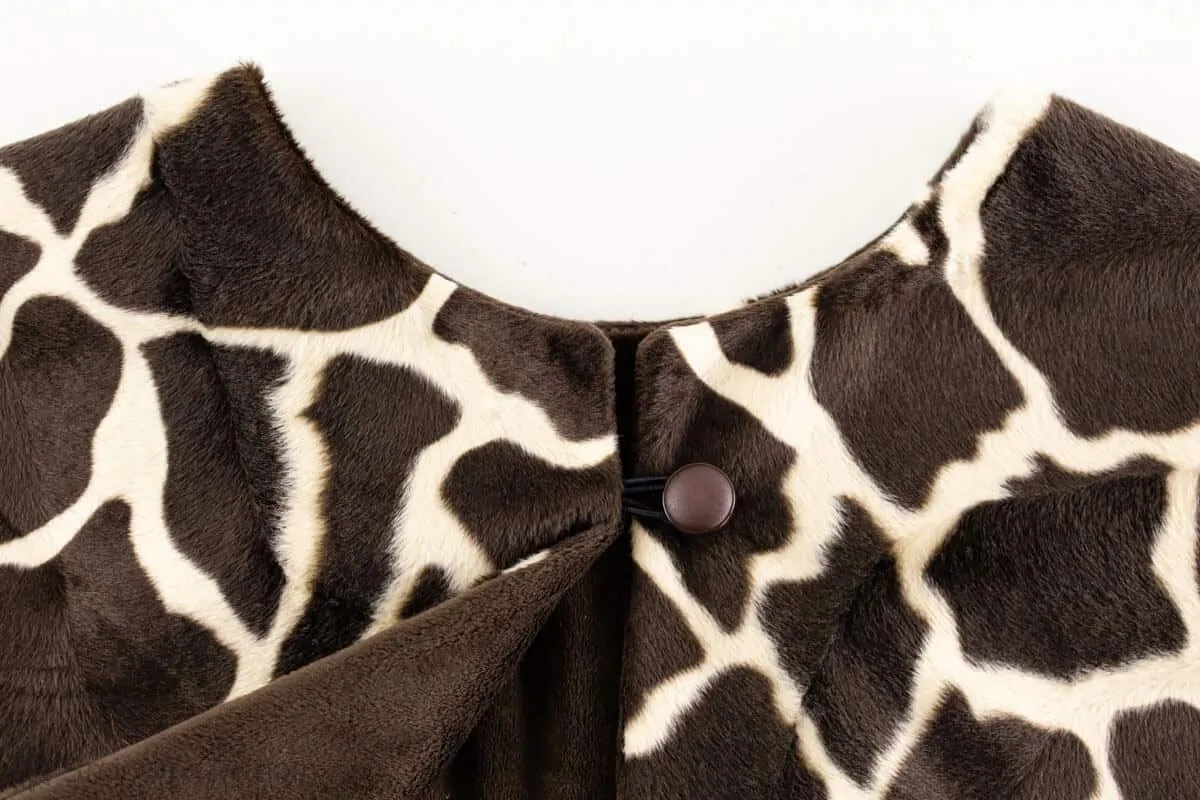
With right sides together, pin your outer fabric to your liner fabric, making sure to mark an opening of about 15cm (6″) at the center back so that you can turn your capelet or wrap after sewing.
If you are using a button as a closure and you don’t want to attempt a buttonhole through your thick fabric, you will need to sew in a loop of elastic near the top of one side of the capelet.

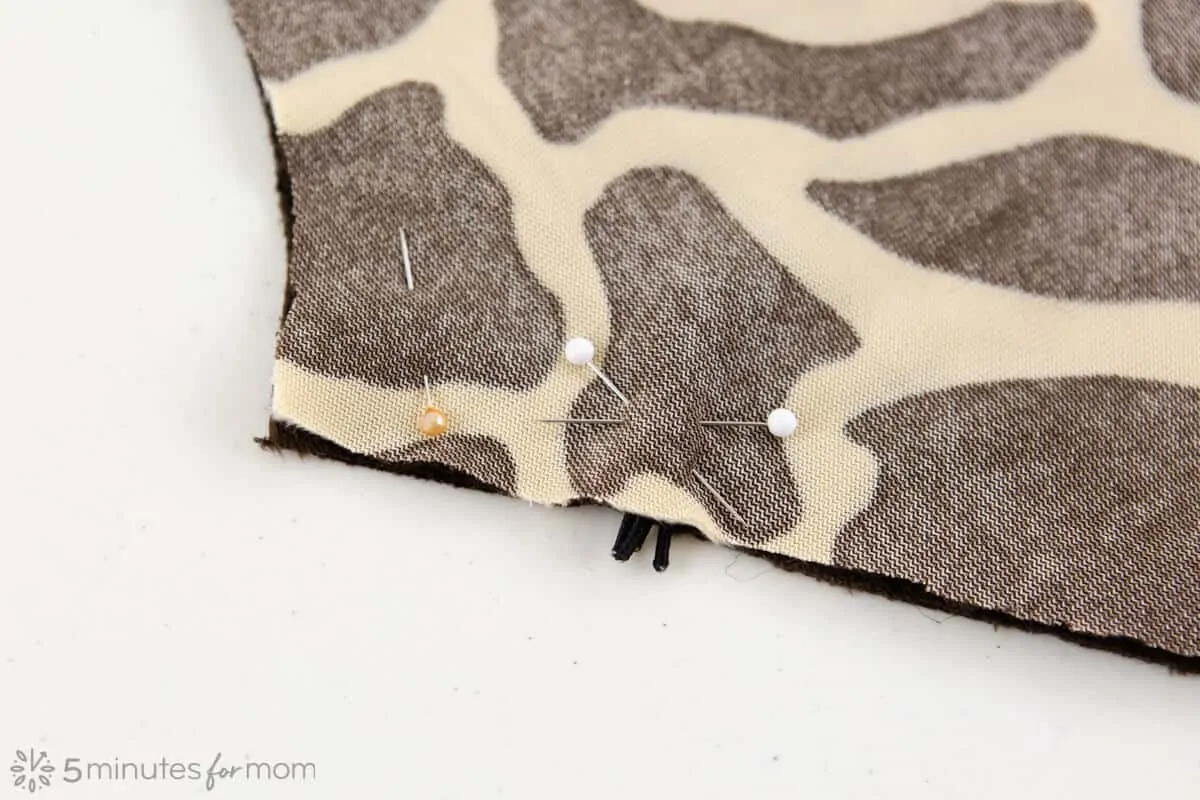
In order for the loop to stick out of the finished garment, you need to sandwich the loop so that it is facing inside when you pin the right sides together.
Using a heavyweight sewing needle, sew around the capelet with a straight stitch.
After sewing, you can turn inside out and try it on and check the size.
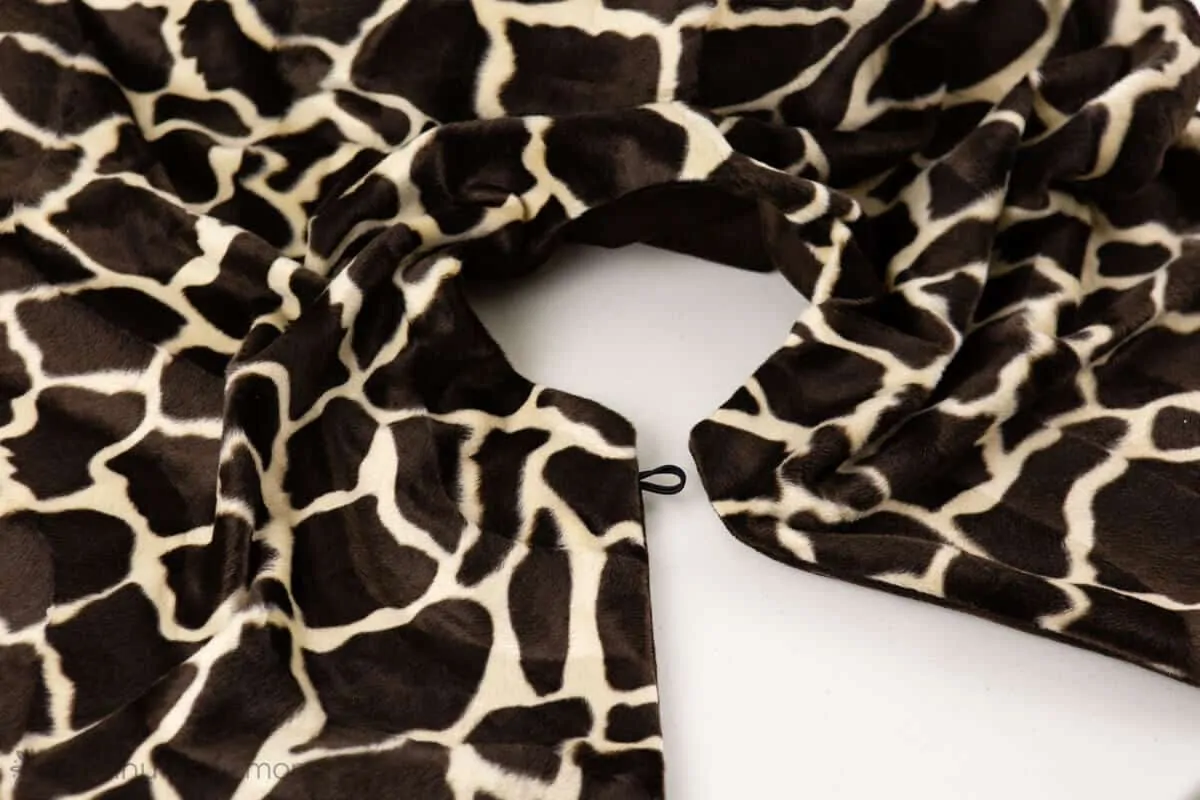
If you don’t need to make any adjustments, turn inside out again and trim your seam allowance.
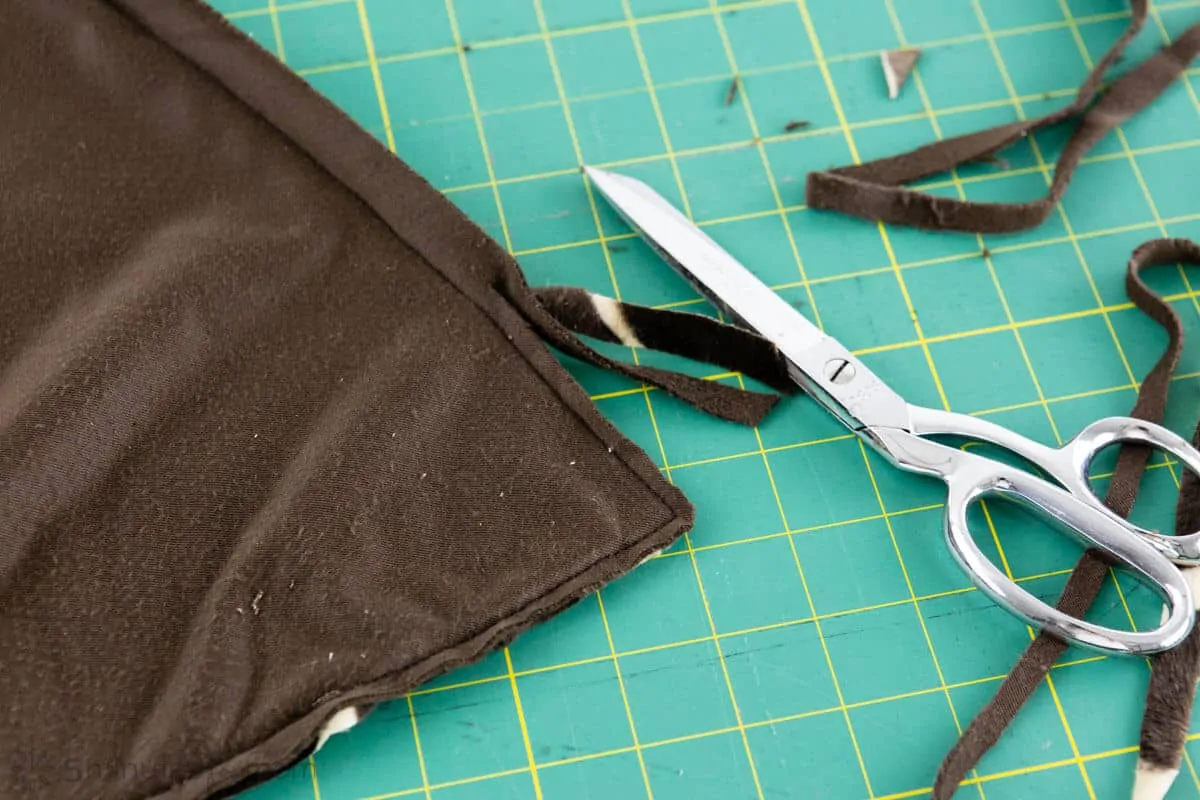
In past years, I have serged some of my faux fur and plush fabrics to try and control the insane amount of flying fluff. But my serger was not pleased with that decision and it seized up and I had to send it in for repair.
So, I don’t personally advise using a serger on faux fur. If you want to tame your fluffy seam allowances, you could zig-zag them. And when you are finished sewing, you will want to give your machine a thorough dusting.
Step 5 – Add Button and Sew Opening Closed
Turn your capelet or wrap right side out and hand sew on your button, if you are using one.
Once everything is as you want it, hand sew or carefully machine stitch the opening closed at the bottom back of your capelet or wrap.
And you are done! Congratulations — it is gorgeous!
More Costume Sewing Tutorials
Don’t miss these DIY costumes and sewing tutorials…
Written by Janice Croze, co-founder of 5 Minutes for Mom


This was so helpful, thanks so much!!
Thank you! Just what I was looking for!