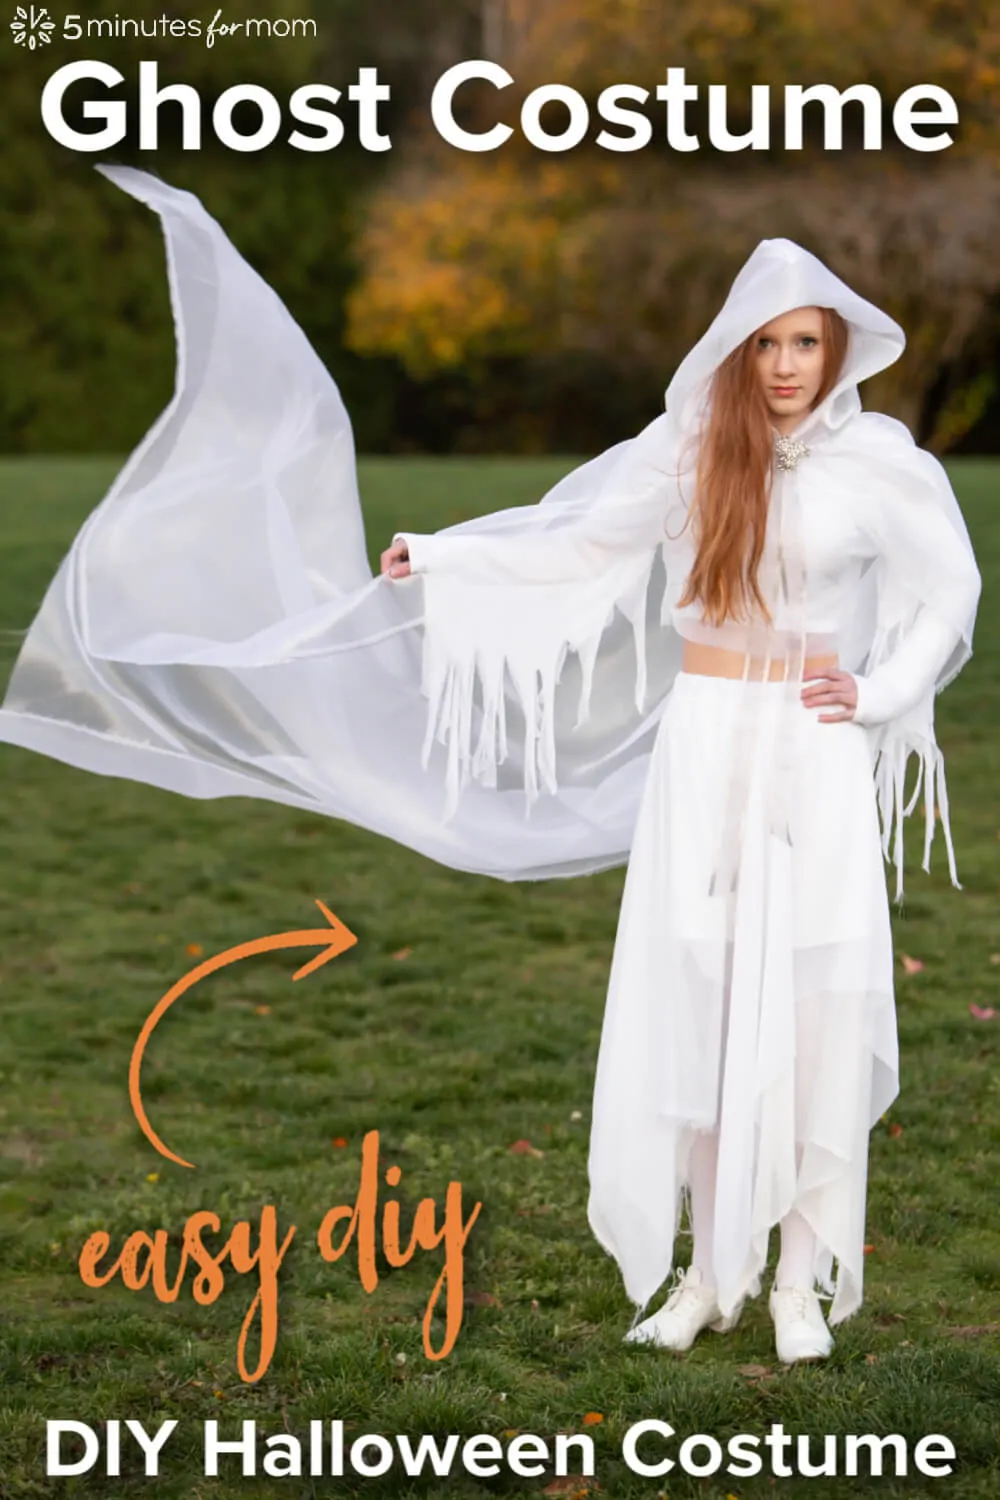
This DIY Ghost Costume is stunningly spooky and easy to make. Girls will love showing off this costume when trick-or-treating or attending a Halloween party. Keep reading to find out how to make a ghost Halloween costume for kids, teens, and women.

I love making Halloween costumes for our girls. Each year I work with our girls to design costume ideas and I love seeing their creativity grow as they sketch out their plans and we turn them into reality.
Last year, my 14-year-old niece Julia decided to make a pretty ghost costume with a cape full of flowing fabric and a haunting hood. We created this unique and fabulous DIY Ghost Costume and I’ve updated the tutorial for this Halloween season with more details on how to make the cape.

UPDATE: See Part 2 for a detailed tutorial on how to make the handkerchief skirt and torn sleeve top.
How To Make A Ghost Costume
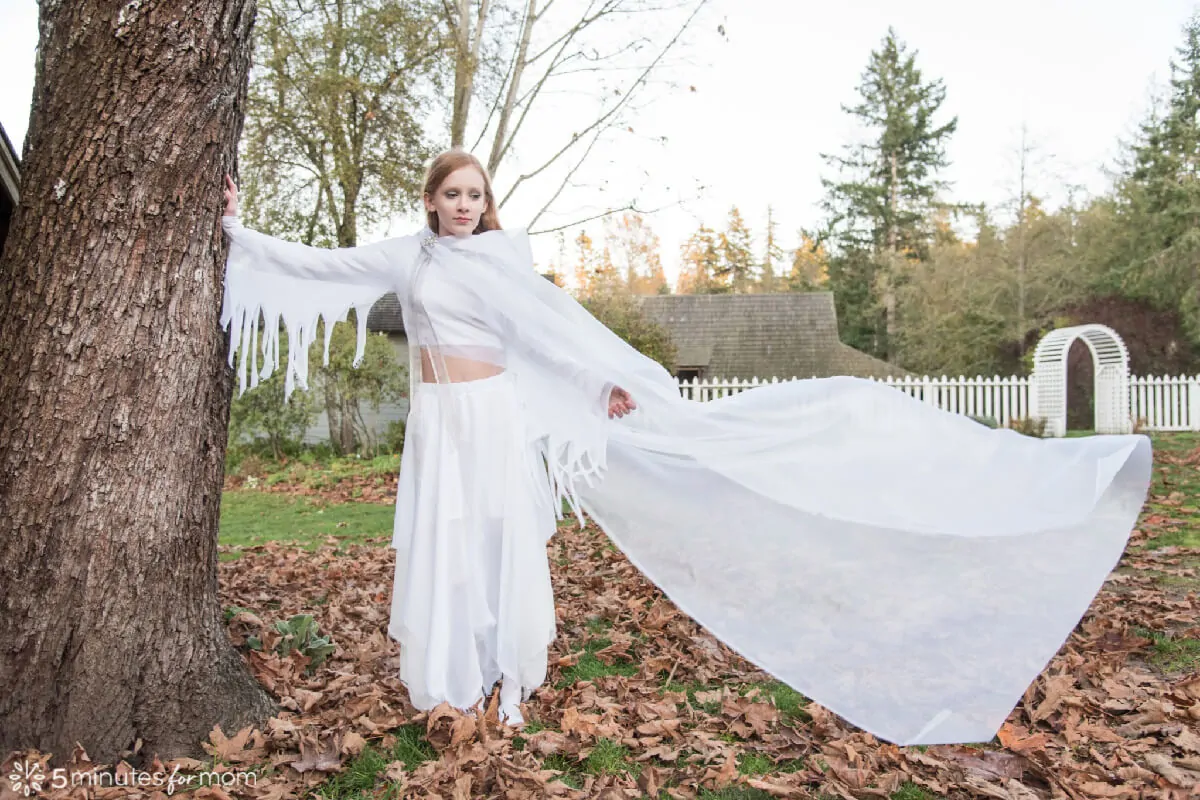
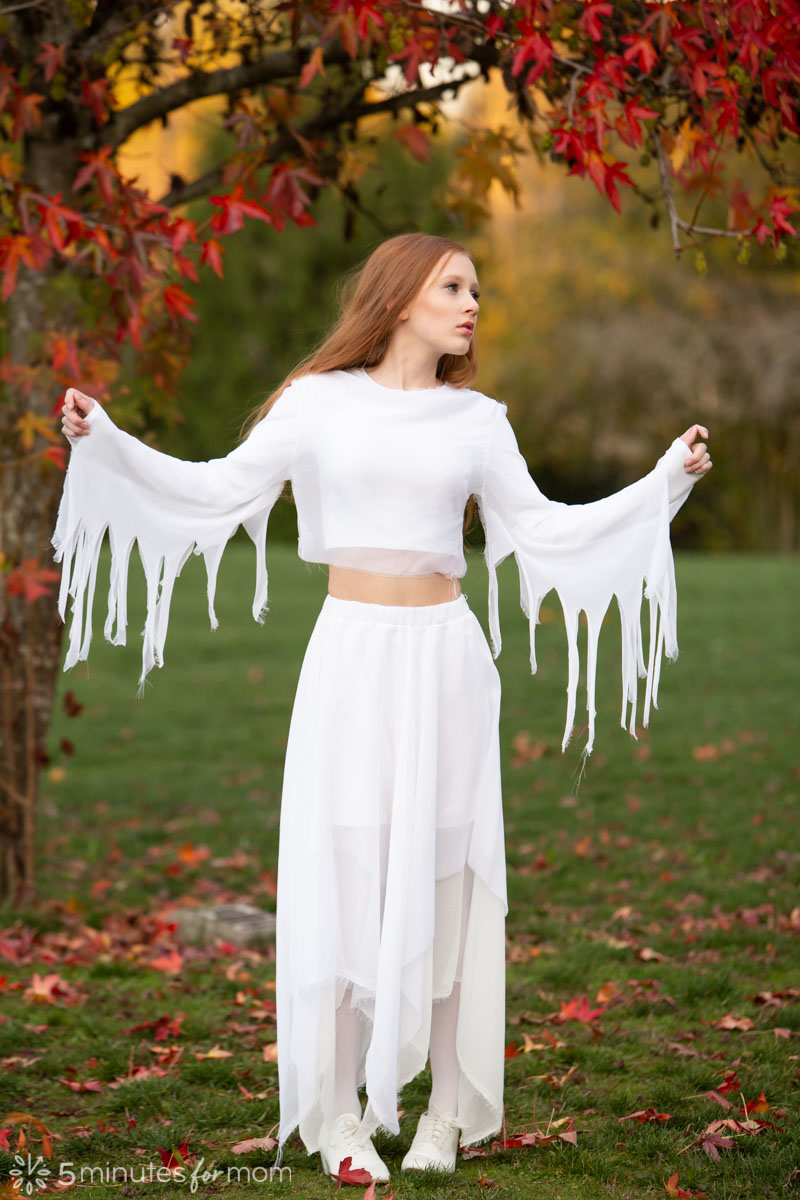
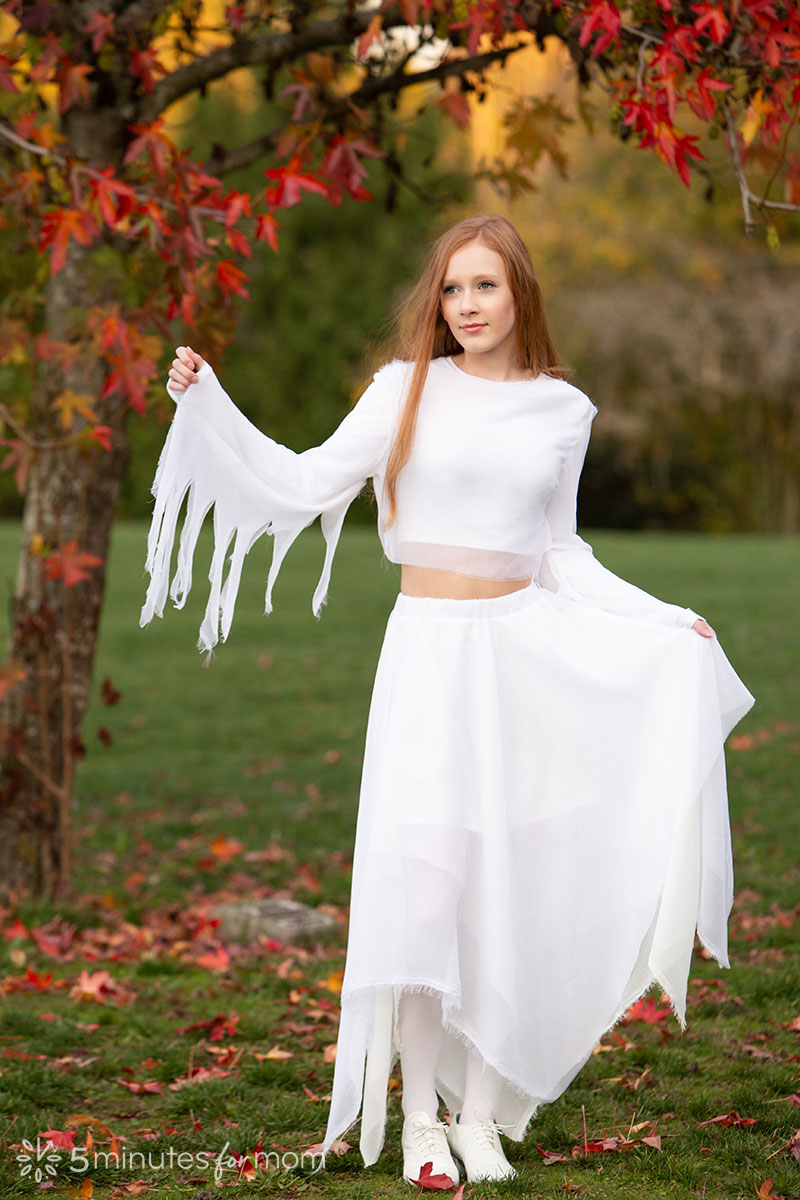
For our costume, in addition to our hooded cape, we sewed a handkerchief skirt and a cowl neck top with long, shredded sleeves.
But if you are in a hurry, or you don’t have a sewing machine, you can just make the hooded cape and use a store-bought skirt and top. While it is faster to use a sewing machine to make the cape, you can definitely sew the cape by hand.
You can see how to make the handkerchief skirt and torn sleeve top in part 2 of our tutorial.
In this post, we will focus on how to make the ghost cape.
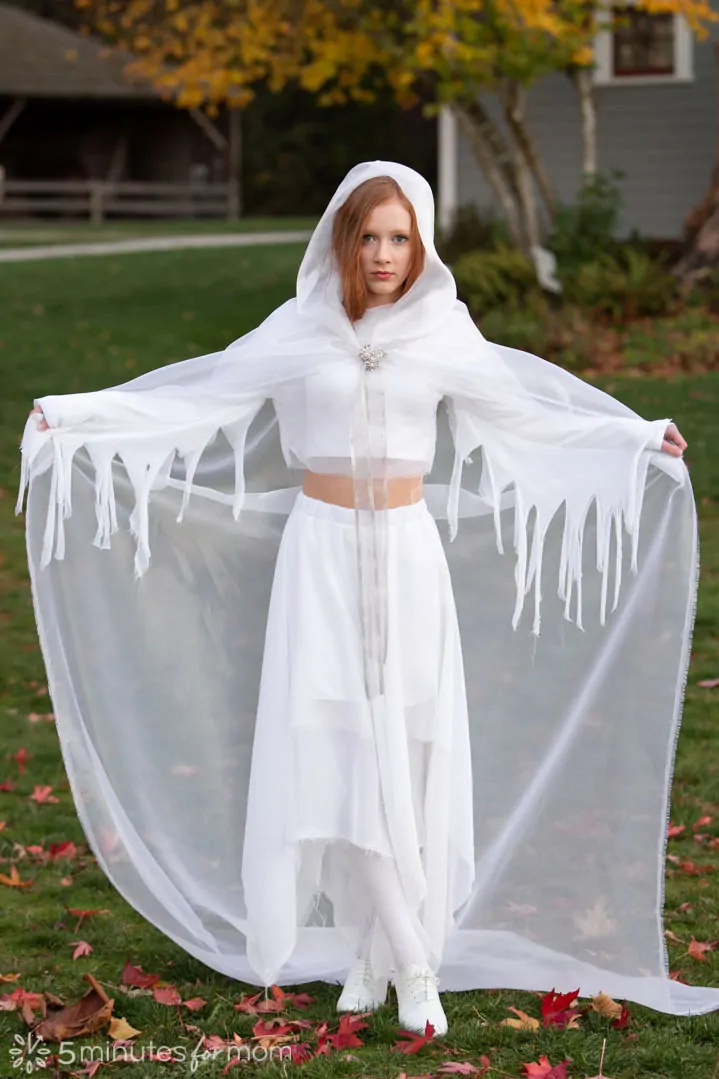
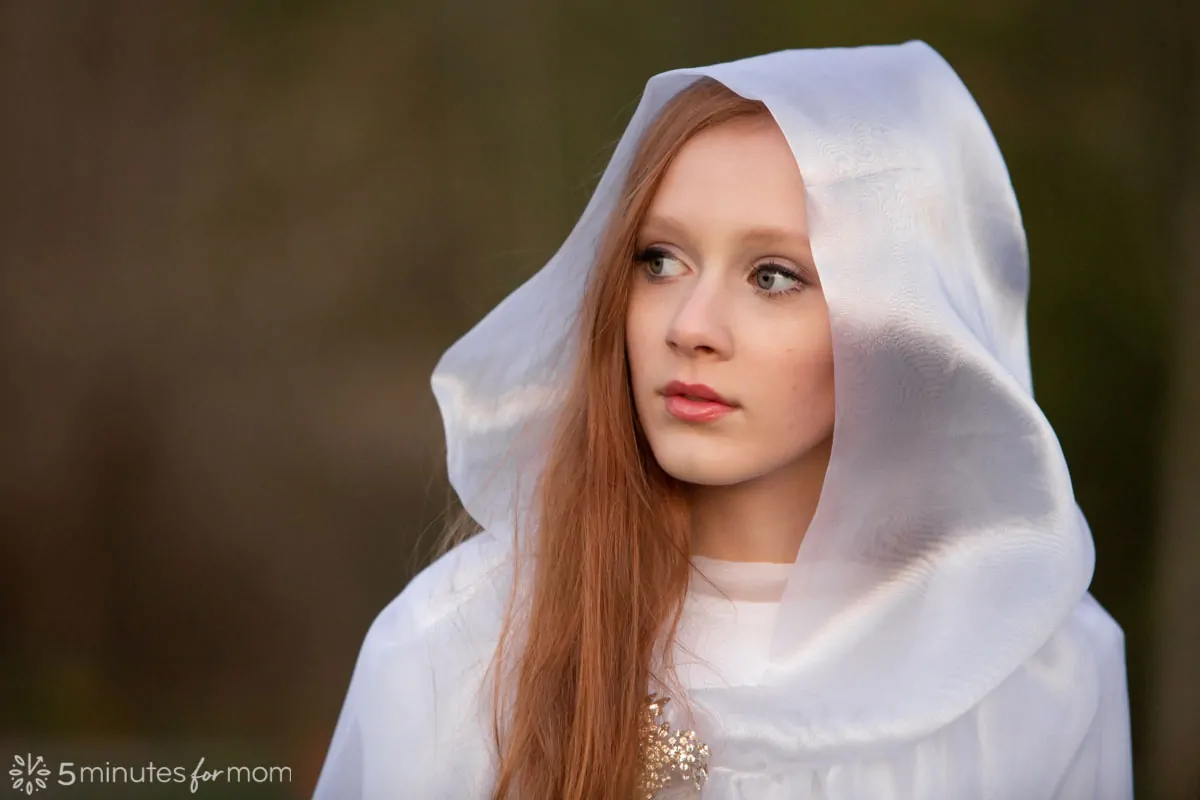
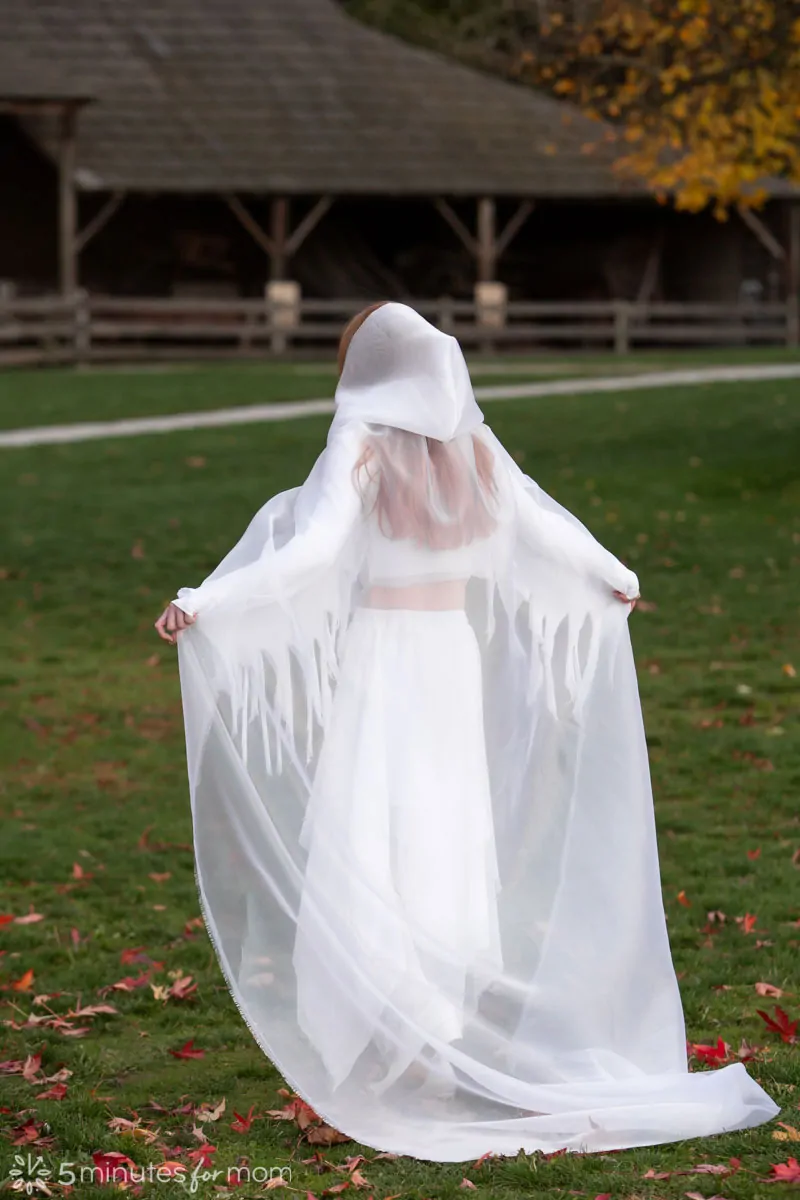
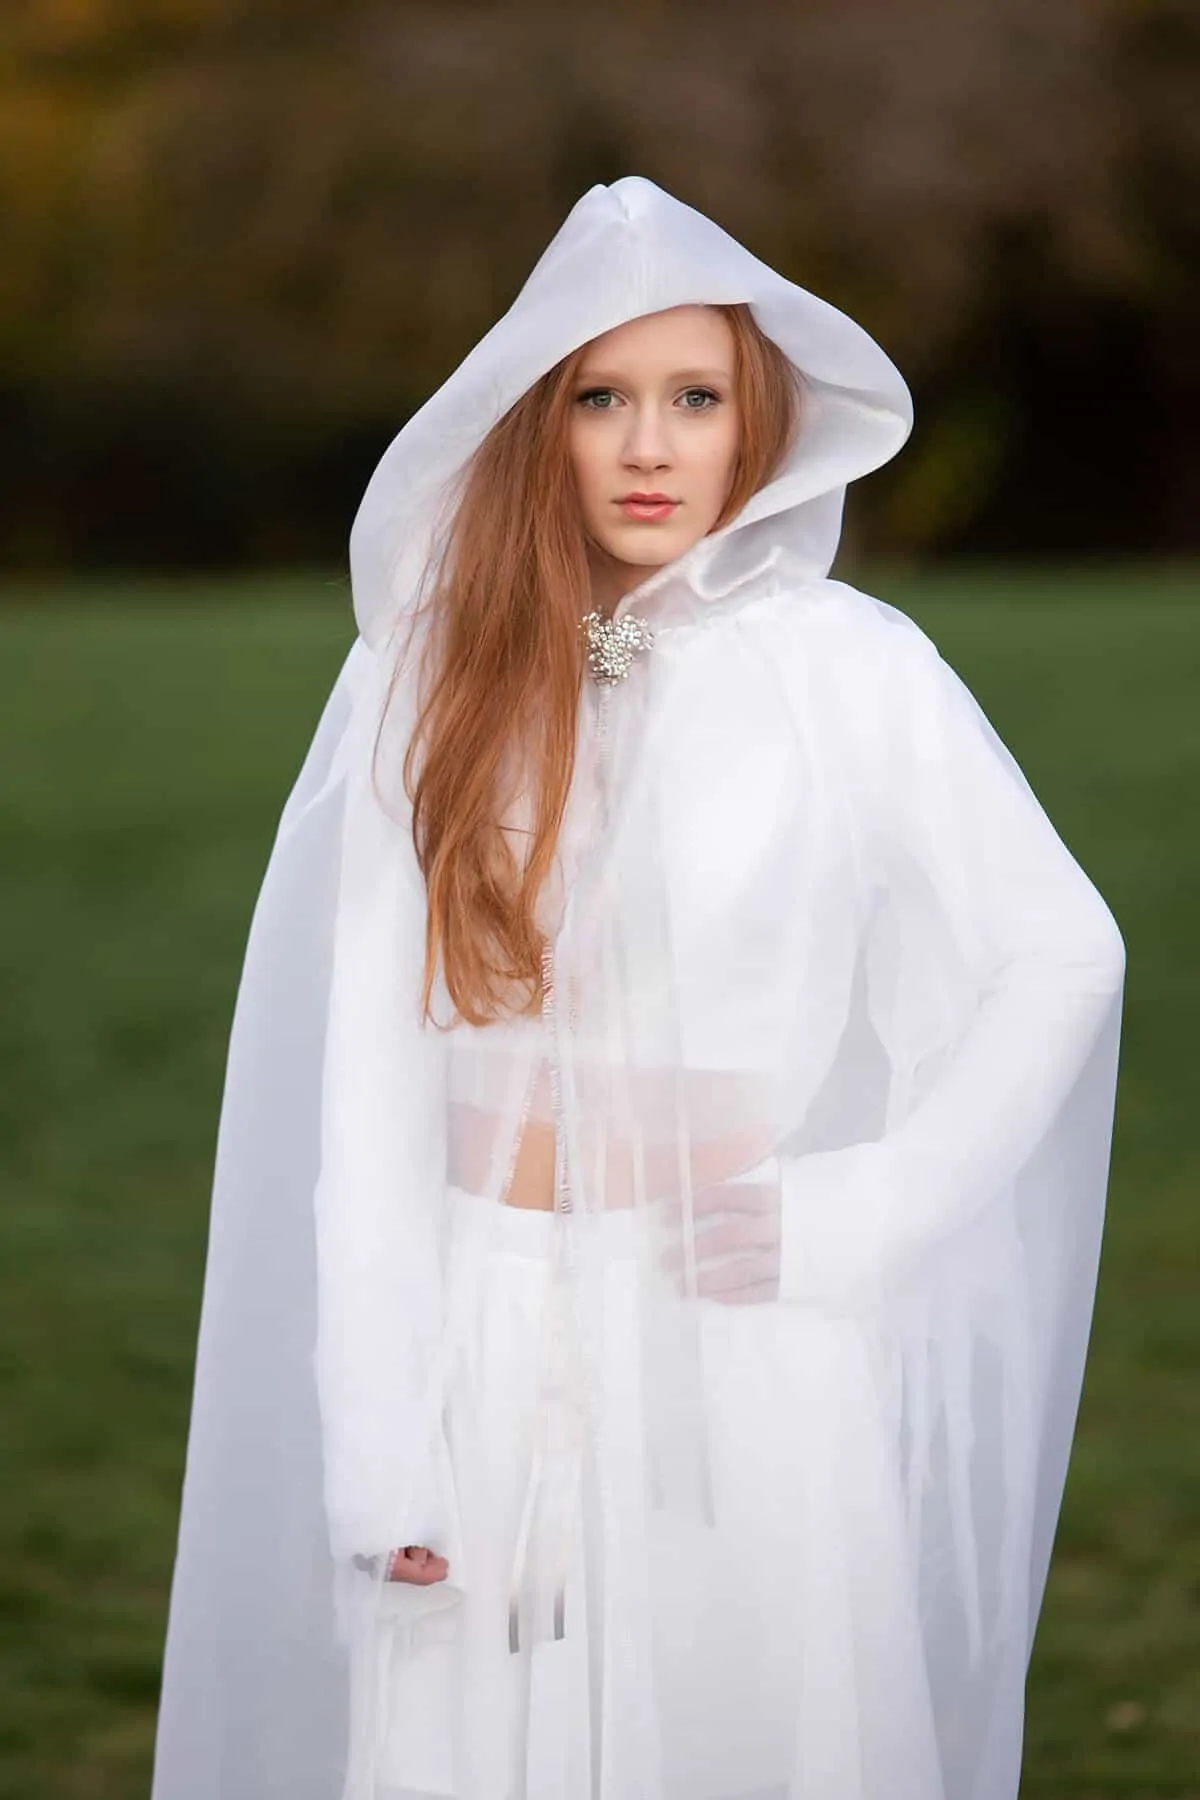
We are thrilled with how well our ghost costume turned out.
The organza fabric we used for the hooded cape gives the costume a shimmering, luxurious quality.
We were going to make the cape from sparkling white tulle but opted for organza instead. I am so glad we did. I love how the cape almost glows in the light.
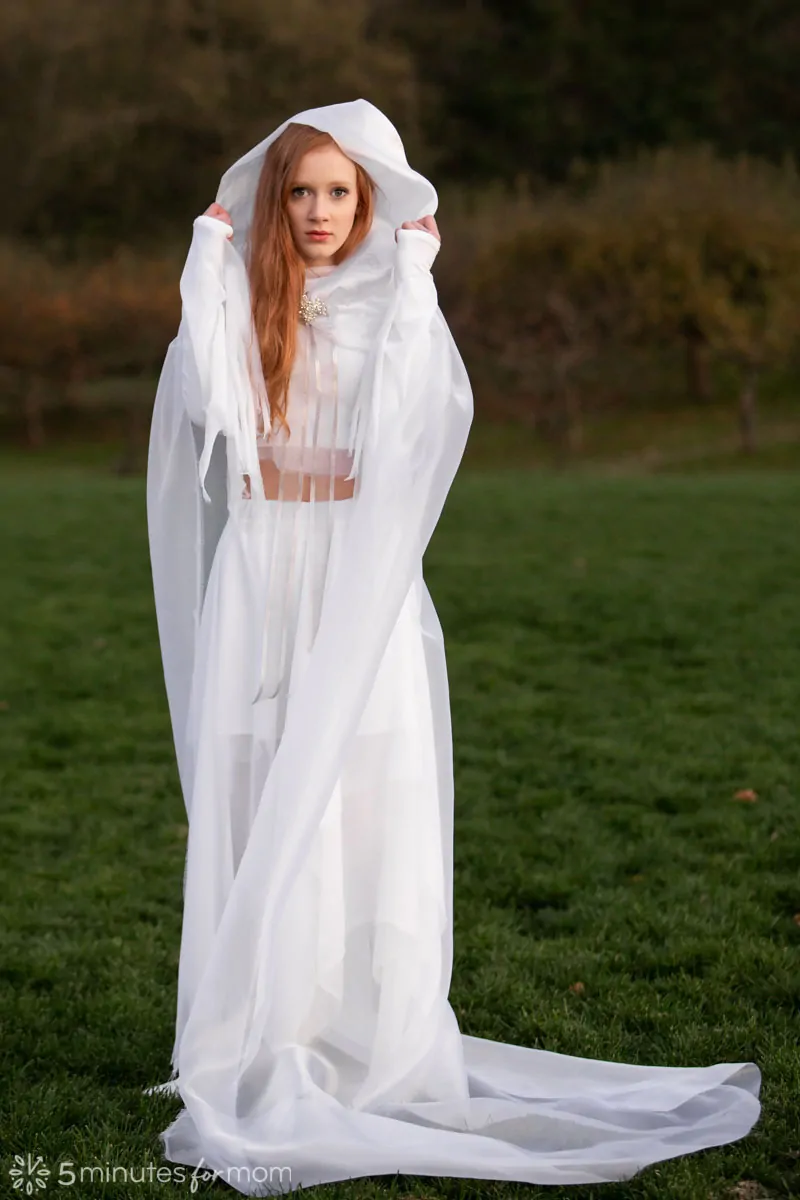
One of the challenges with making a DIY ghost costume is that it can block vision, making it hard for kids to see while trick or treating.
Since this ghost costume uses a hood that doesn’t cover your face, it’s much safer for kids or teens to wear while out on Halloween night.
For our version of this ghost costume, we wanted the cape to be extra long and flowing for our Halloween photoshoot. But to make it more practical for trick-or-treating or wearing to a Halloween party, we would recommend you make the cape shorter so that it is ankle length or use safety pins to pin it up.
The design of this DIY ghost costume also allows you to wear it without the cape for a different look. If you are at a party or at school, you can remove the cape and still be ghostly.
How to Make a Ghost Cape Tutorial
For our ghost cape, we used a white shimmery organza.
I had actually bought a sparkling white tulle, but we decided to use this organza that I had in my fabric stash because it made the hooded cape look so luxurious and gorgeous.
The amount of fabric you will need for your cape will depend on your height (or the height of your child) and how long you want your cape to be. We wanted our cape to trail behind and blow in the wind for our photoshoot, so we made ours extra long.
If you are making your cape for a child, you won’t want it to trail behind as much as ours did.
We used about 3½ yards of organza for our cape.
Ghost Costume Supplies
- White organza — 2 to 3½ yards, depending on cape size
- Ribbon — 1-1½ yards
- Brooch or clasp (optional)
- White thread
- Scissors Measuring tape
- Sewing machine or hand sewing needle
DIY Ghost Costume Instructions
Step 1 – Take Measurements
In order to determine the size of your hood and the length of your cape, you will need to take some measurements.
For your hood:
Measurement A – the “height” of your hood: Measure from the middle of the top of your head to the top of your back and add 1-3 inches, depending on how oversized you want your hood. Then, since your fabric will be doubled, times that number by 2. We made our hood very big, so the fabric width was 36″, (15″ plus 3″ and then doubled.)
Measurement B – the “depth” of your hood: Measure from the middle of the back of your head to the middle of your forehead and add 1 inch if you want a large hood. Again, since your fabric will be doubled, times that number by 2. Our fabric length was 24″, (11″ plus 1″ and then doubled.)
So you will need a piece of fabric that is Measurement A x Measurement B. In our case, that would be 36″x24″.
For your cape:
Measure from the bottom of your neck to the floor and then add as much as you want for extra length. Julia’s measurement was 54,” but we made her cape 85″ long.
Our organza was 60″ wide, from selvage to selvage. We wanted the raw look of the selvage, so we simply left our fabric width uncut.
So the dimensions of our cape fabric were 85″ x 60″.
Step 2 – Cut Hood Fabric
The KEY to making the hood of your DIY ghost costume is to fold it in fourths before you cut.
Fold your fabric widthwise and then lengthwise, so the front of your hood will be on the fold. (See photos below.)
So in our case, we have our fabric folded up from the bottom at least 12 inches and then we have folded it in from the side (hotdog style) at least 18 inches.
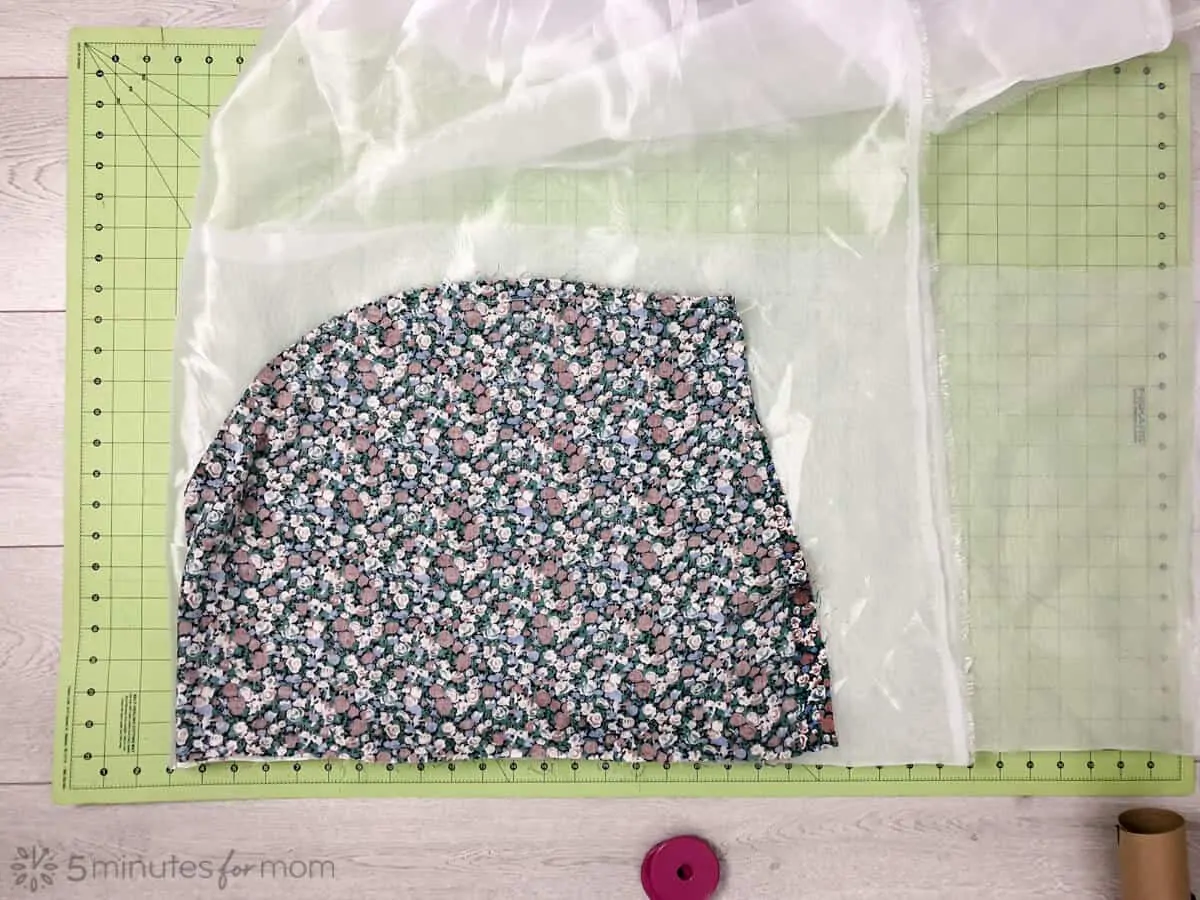
(Note: In the above photo, my original pattern/toile pictured is larger than my final pattern. But this is the only photo I have that shows how I folded my fabric.)
You can cut yourself a hood pattern shape as I did, creating a curve that drops lower at the front of the neck, or you can simply cut a rectangle and then just round the top back of the hood.
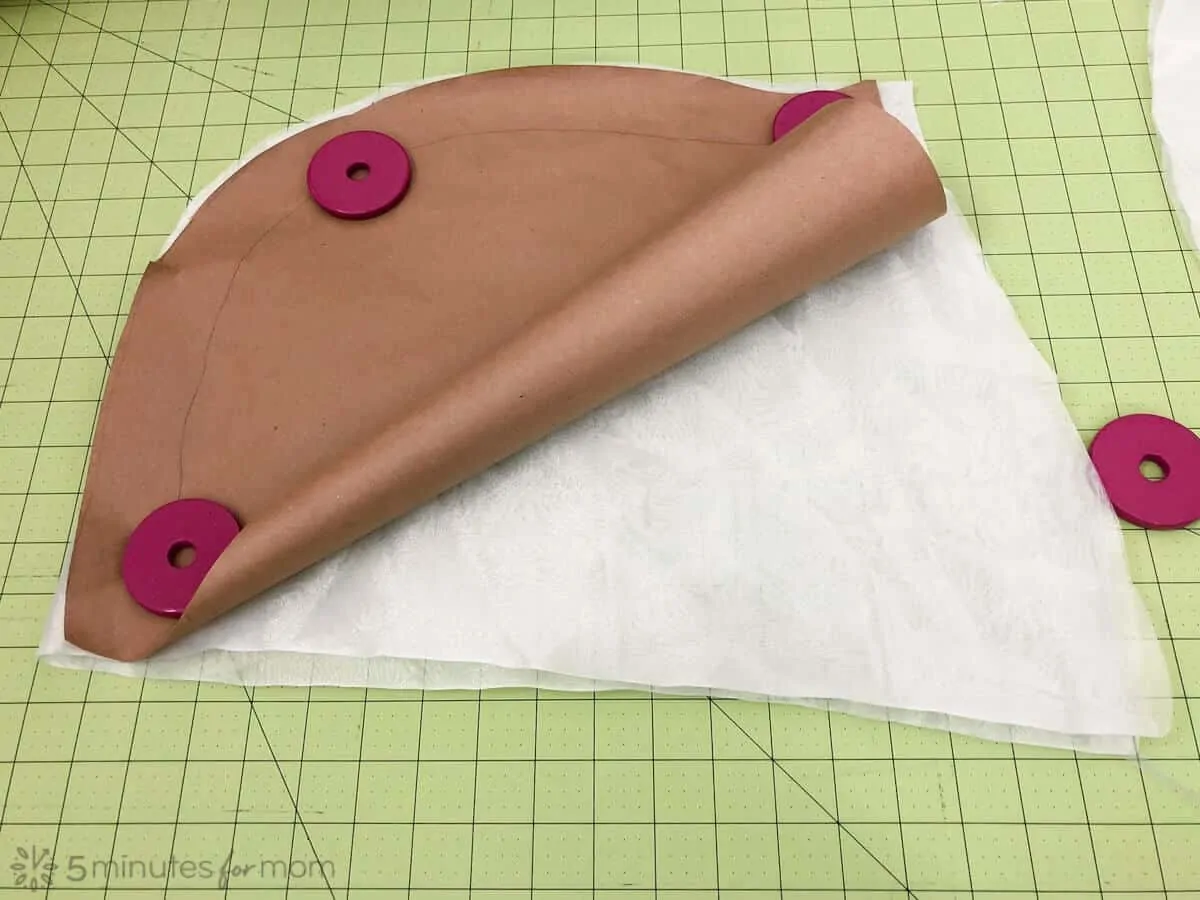
Place your pattern with the front opening along the bottom fold and the top of the hood along the left fold so that the front of the top of the hood is on the double-folded corner.
Step 3 – Sew Hood
Pin hood to keep the fabric from slipping.
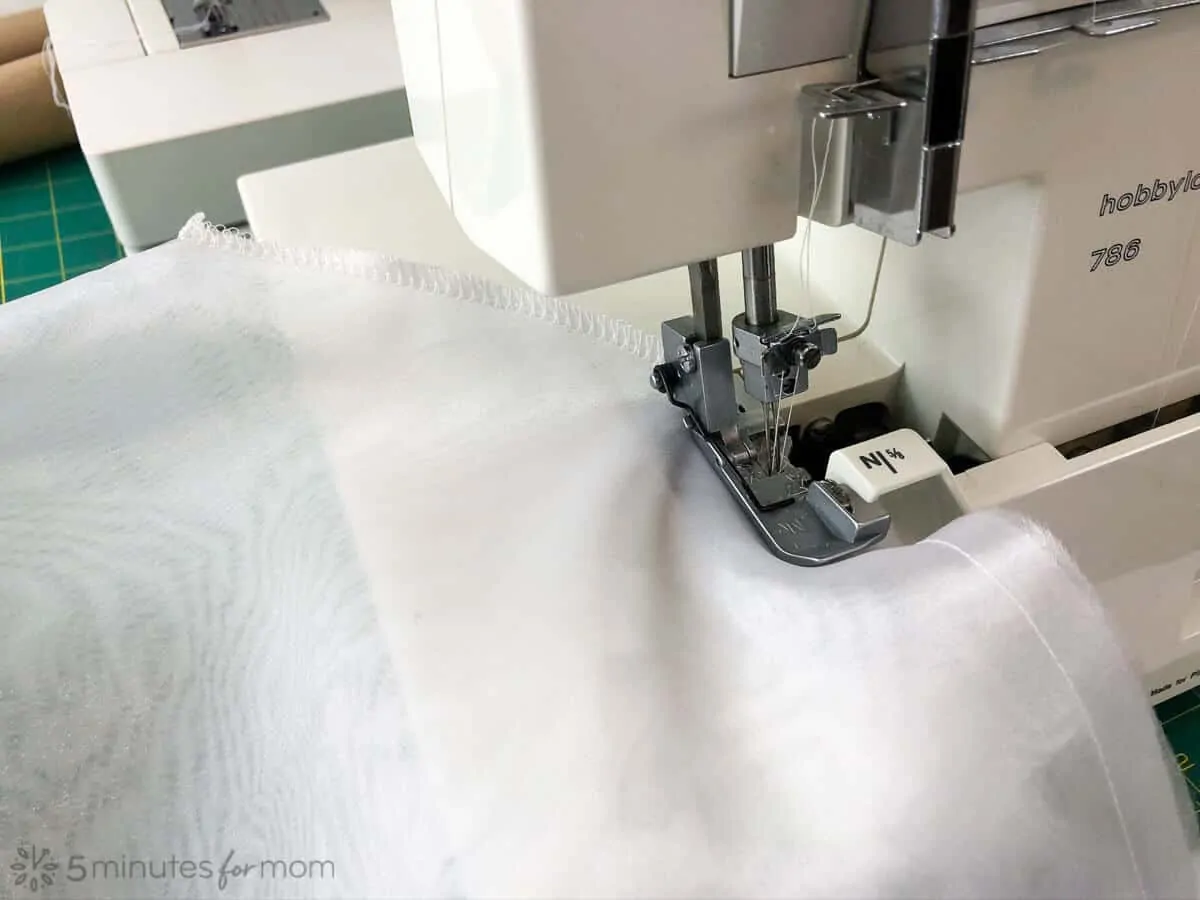
Sew a curved seam from the midpoint of the top of the hood to the bottom of the neck/top of the back.

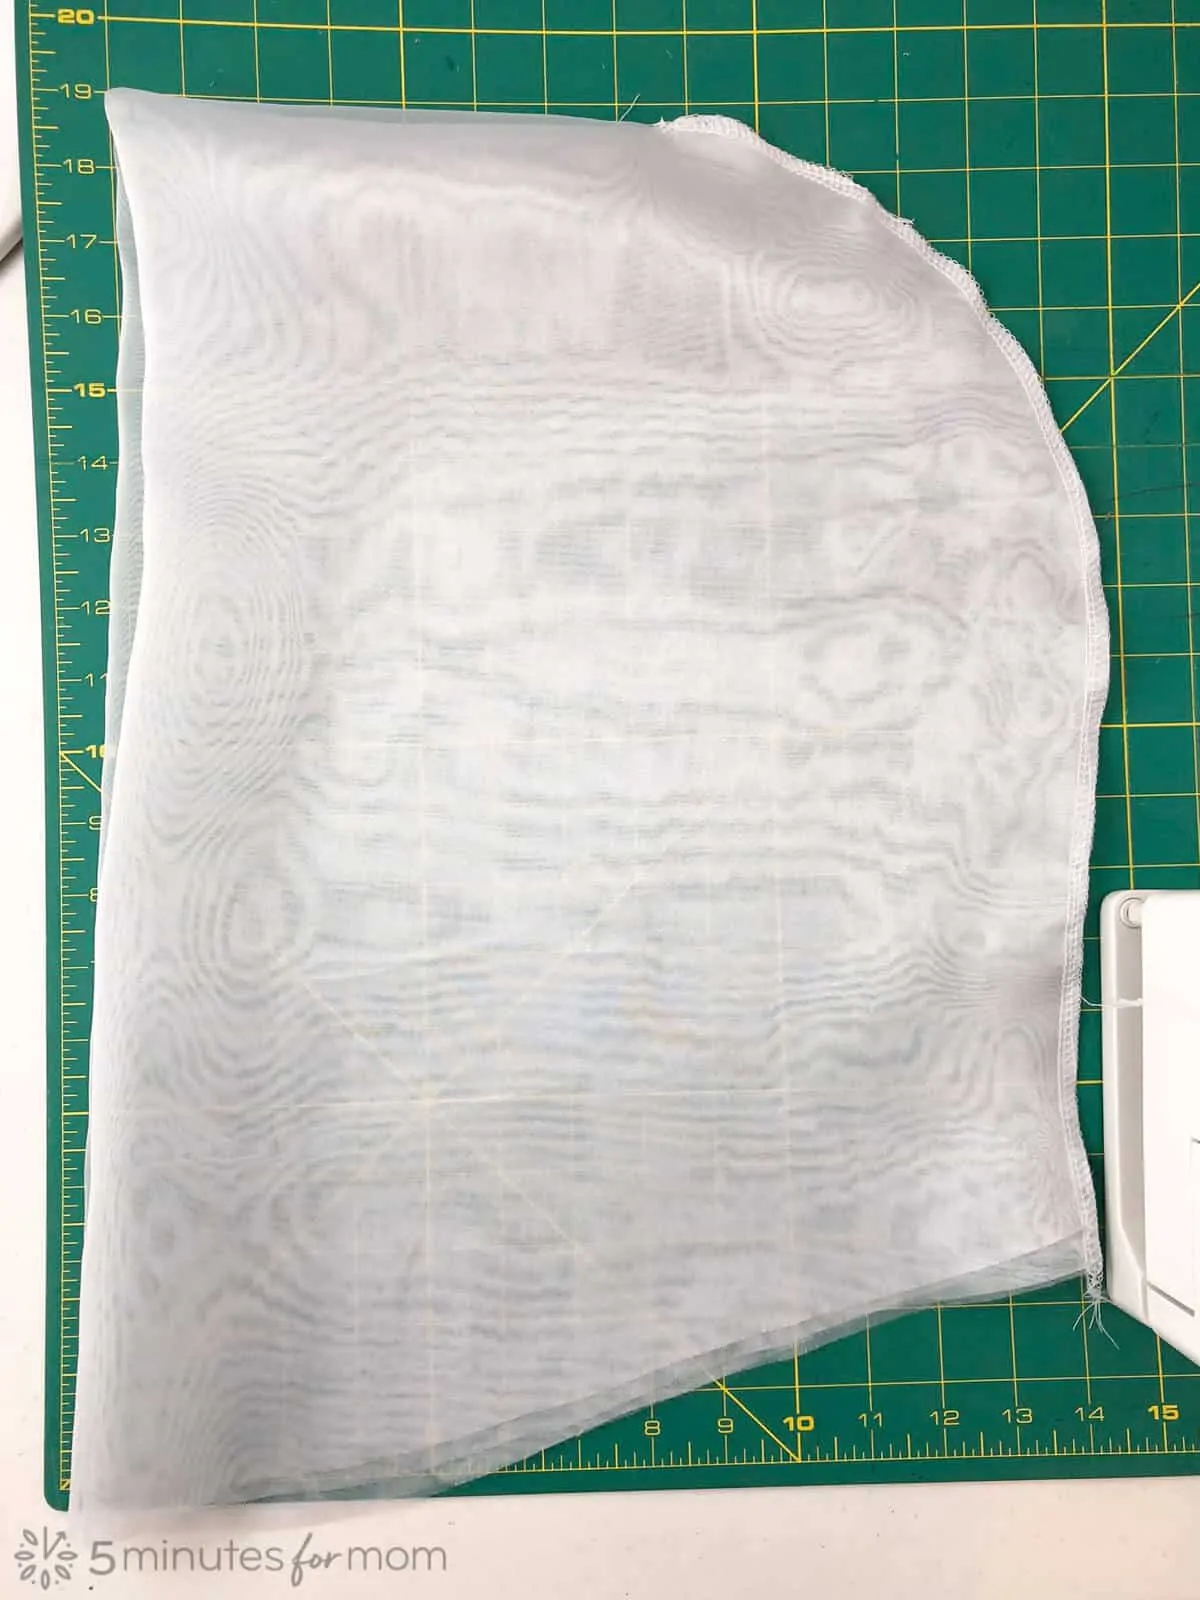
To finish our seams, I serged the seam allowance. If you don’t have a serger, you can trim your seam allowance and use a zig-zag stitch along the raw edges to keep the fabric from fraying.
Step 4 – Cut Cape Fabric
If you haven’t already, cut the rectangle of fabric for your cape.
Since our cape is not lined and is just one layer of organza, all I had to do was cut one large rectangle.
Our fabric was 60″ wide and so I cut a rectangle that was 85″ x 60″.
We left all of the edges of our DIY ghost costume raw since we liked the look of the selvages and the raw edges appeared more “ghostly.”
Step 5 – Attach Hood to Cape
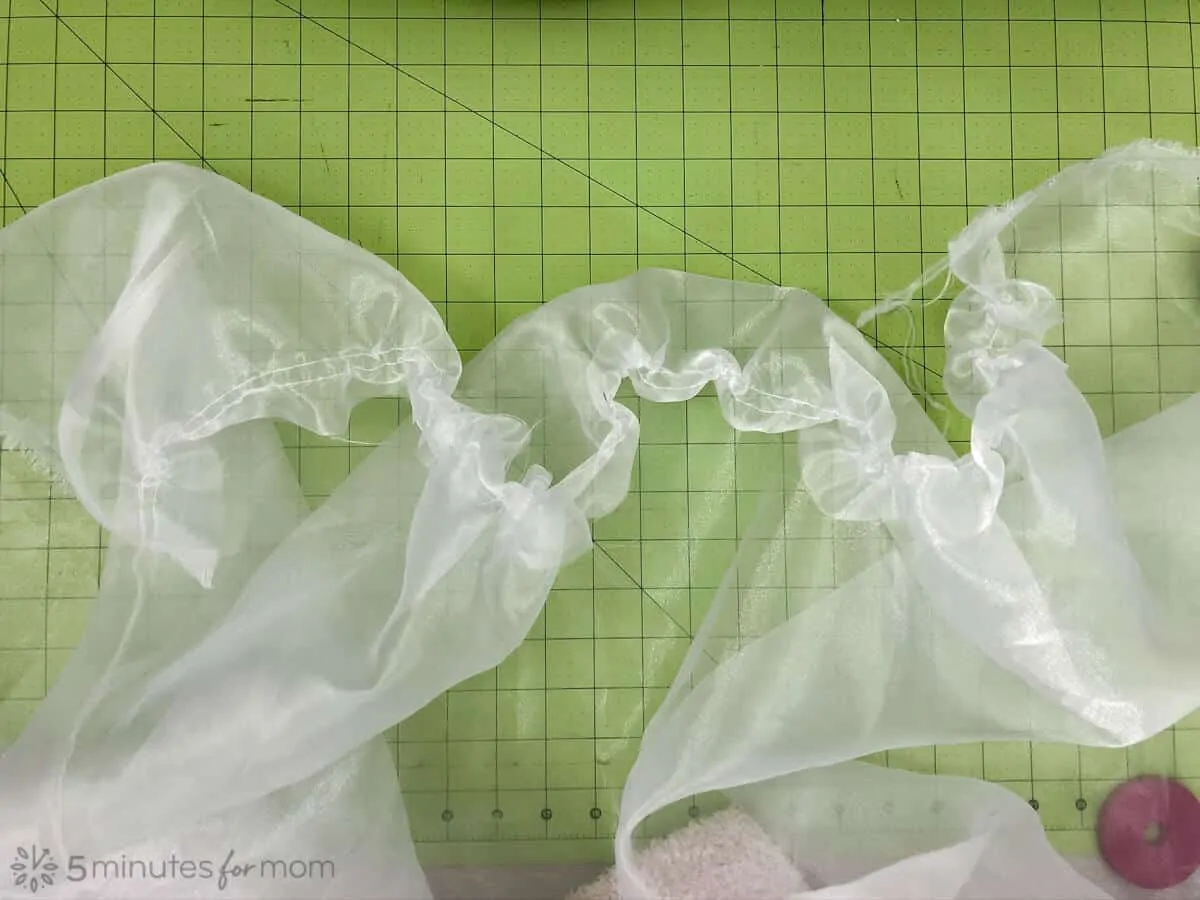
Before sewing the hood to the cape, you will need to gather the fabric of the top of the cape so that it is the same width as the bottom of the hood.
Sew two or three basting stitches along the top raw edge of the cape. Pull the bobbin threads to gather the fabric, distributing the gathers evenly until the fabric is the same width as your hood’s bottom raw edge.
Pin the raw edge of the bottom of the hood and the top raw edge of the cape right sides together.
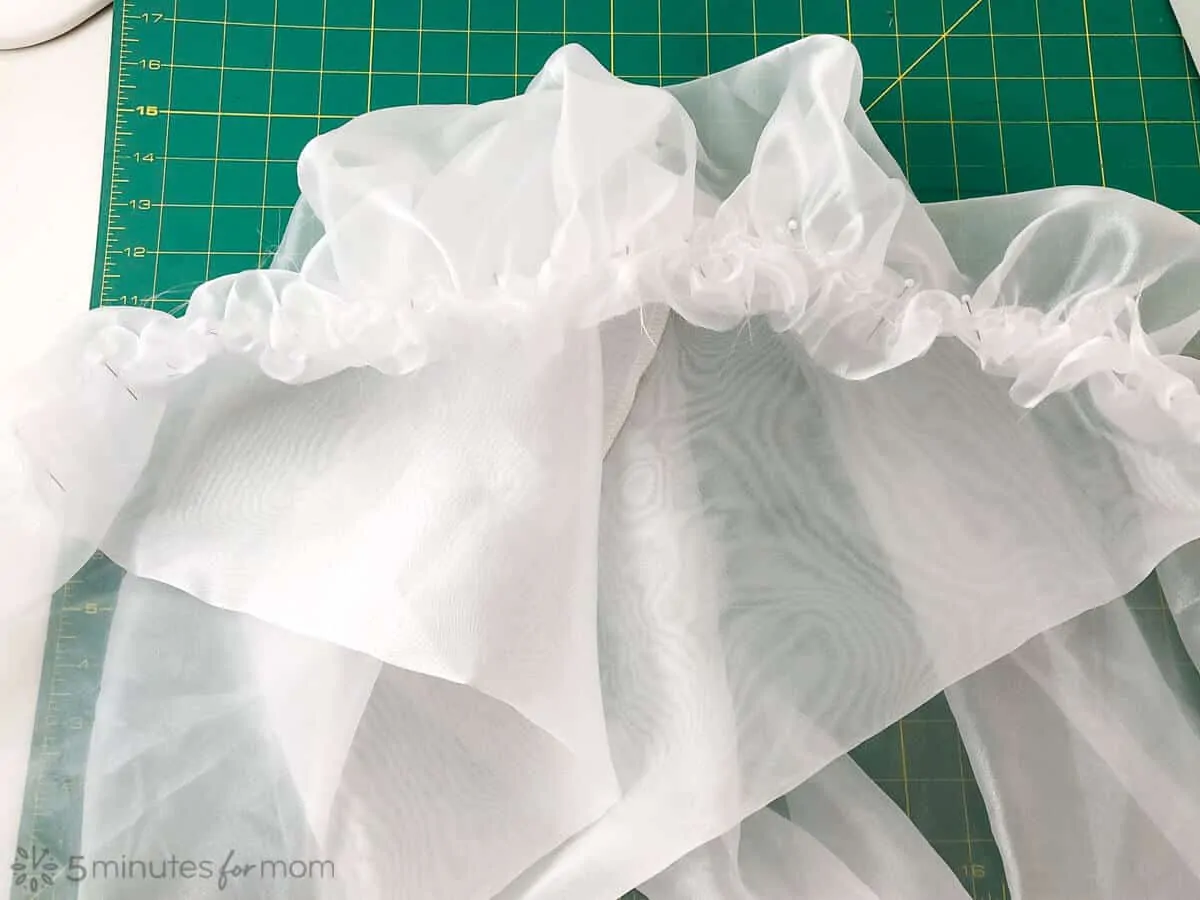
Stitch together.
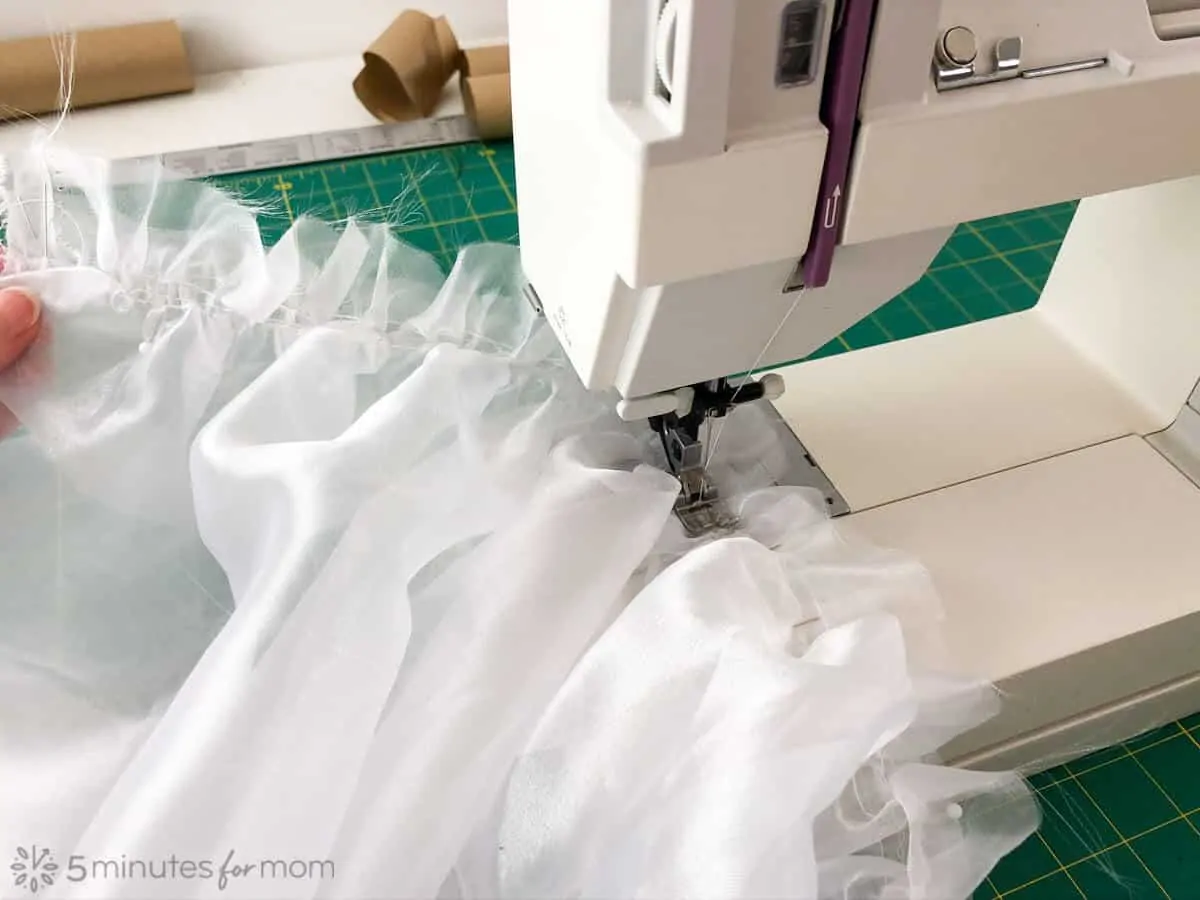
Try on your cape and check fit.
If your sizing is correct, you can finish the seam. To finish my neckline, I serged the seam allowance. If you don’t have a serger, trim your seam allowance and use a zig-zag stitch along the raw edges to keep the fabric from fraying andy tidy the seam allowance
Step 5 – Finish with Ribbon and Clasp
Finish the inside of the neckline seam by stitching a soft ribbon along the seam to cover the seam allowance and make the cape neckline more comfortable against the skin.
You can use the ribbon to tie the cape or use a brooch or clasp as we did.
See Part 2 for a detailed tutorial on how to make the handkerchief skirt and torn sleeve top.
We hope this ghost cape tutorial helps you with your own DIY ghost costume – please let us know how your costume turns out and feel free to ask us any questions.

Written by Janice Croze, co-founder of 5 Minutes for Mom
Talk with me: @5minutesformom and Facebook.com/5minutesformom
Pin with me at pinterest.com/5minutesformom
See More Of Our Halloween Costumes
We have made so many Halloween costumes for our girls over the years and had such fun doing it. We hope our costumes give you ideas and inspiration to create your own.
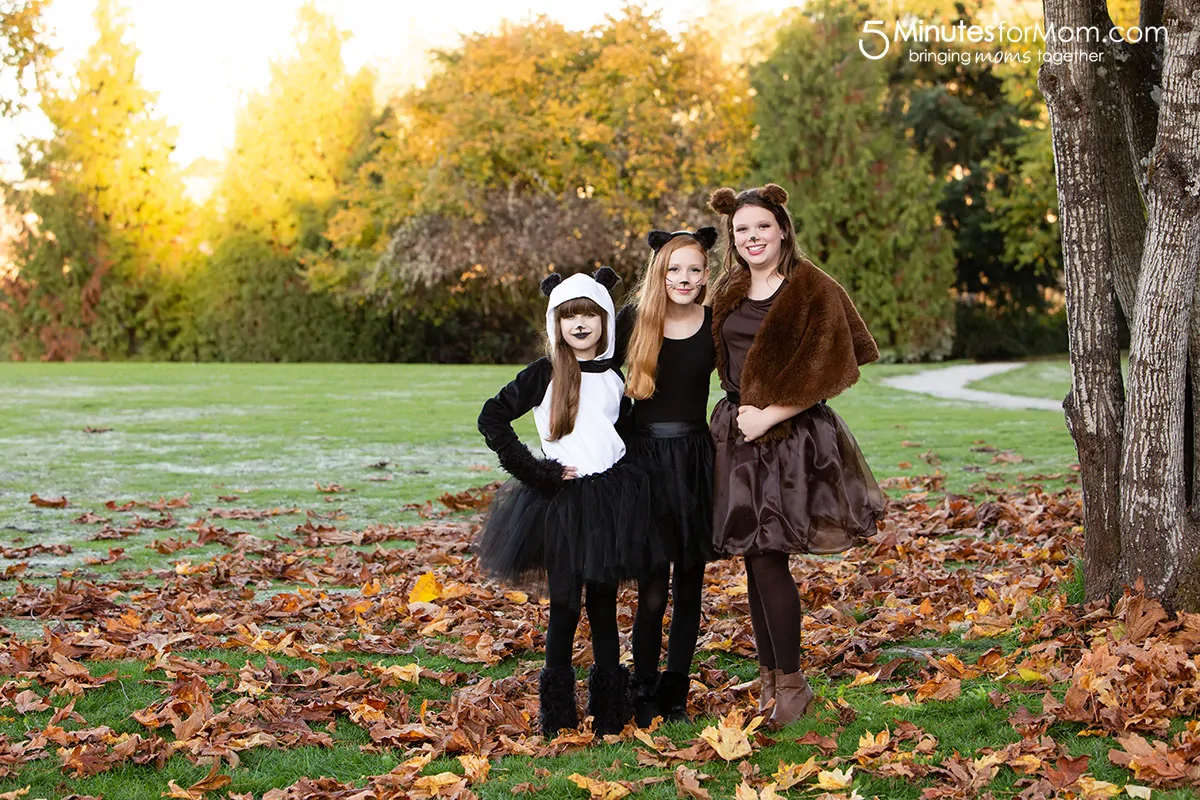
Last year, we made three teen Halloween costumes that work well for older girls and young women. Sophia dressed as a panda bear, Olivia was a brown bear, and we made Julia a pretty black cat costume.
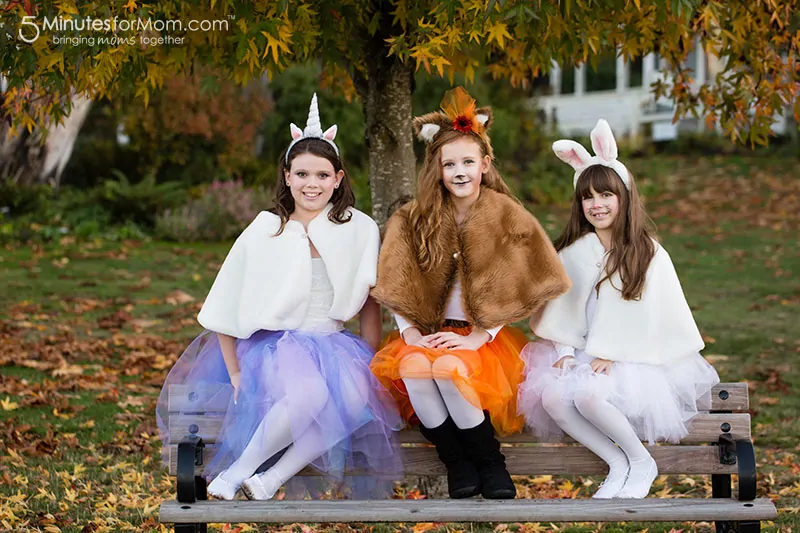
And the year before they wore these unicorn, fox, and bunny costumes.
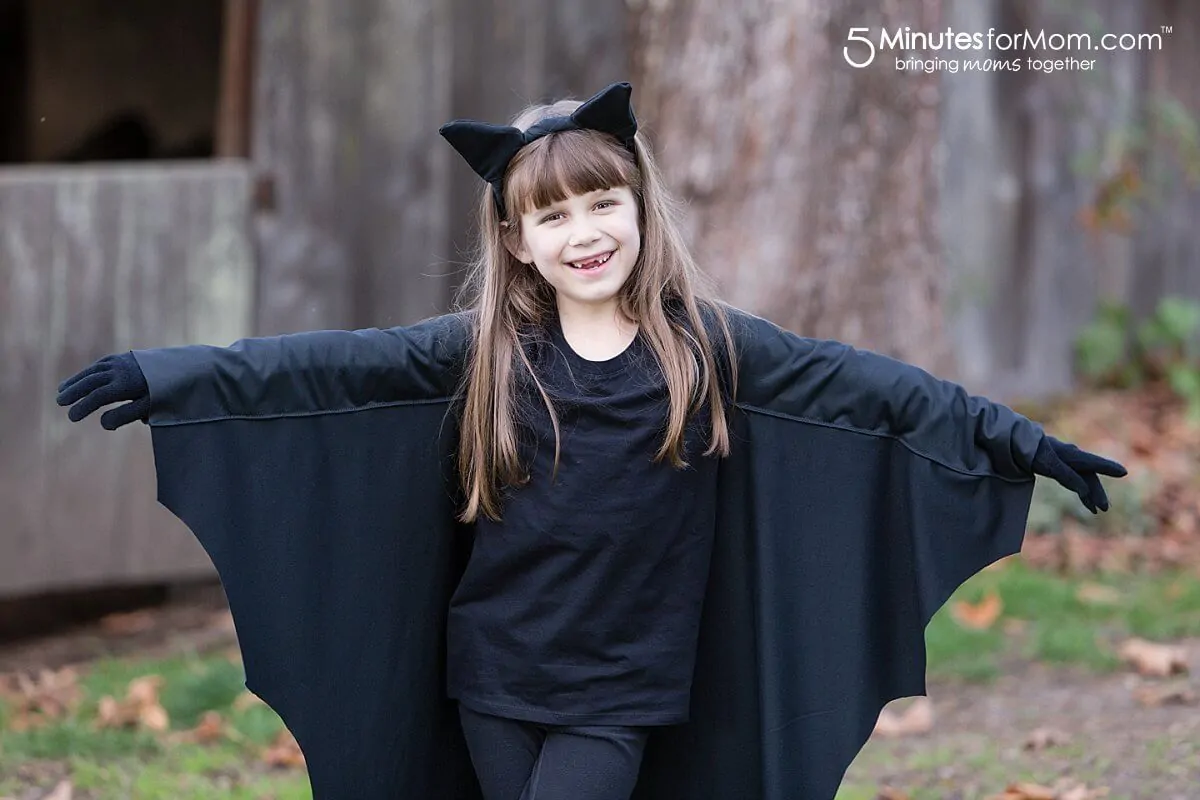
We’ve made so many cute costumes over the year, but one of our most popular is this super easy to make DIY Bat Costume.
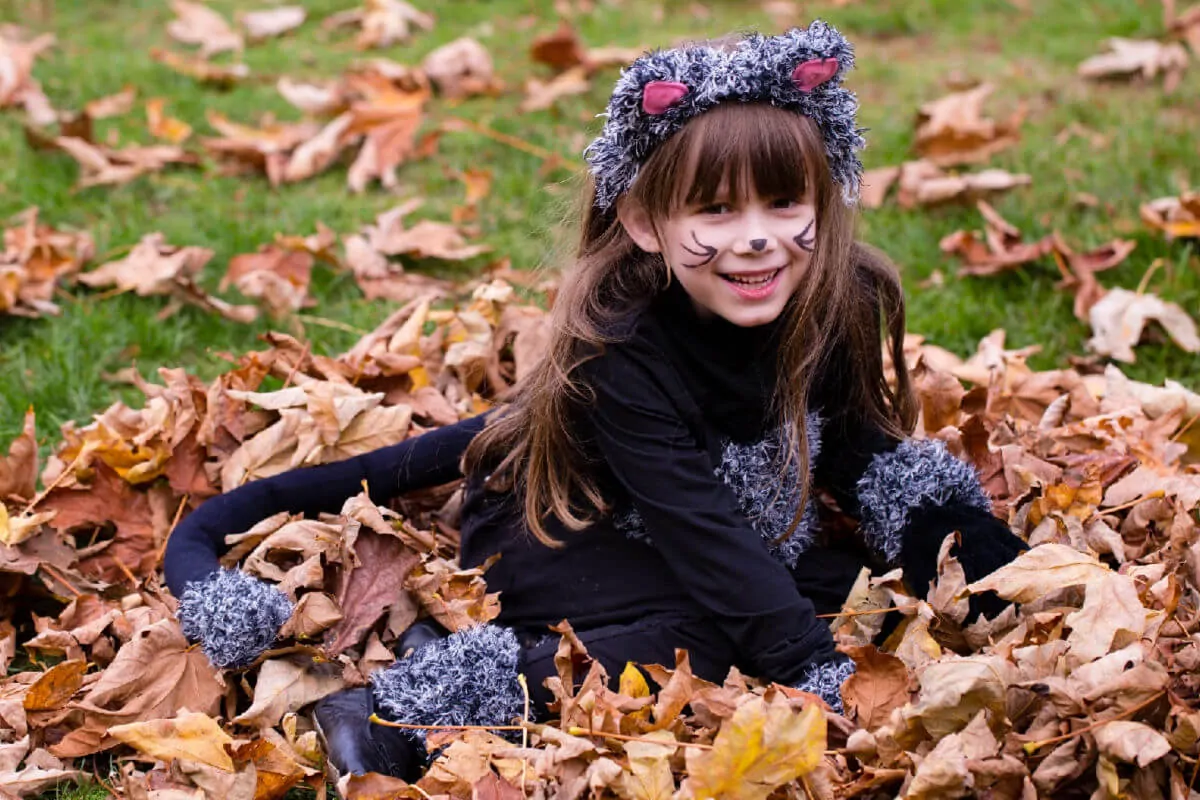
And one of my personal favorites was when the girls were young and we made these adorable cat costumes for kids.


