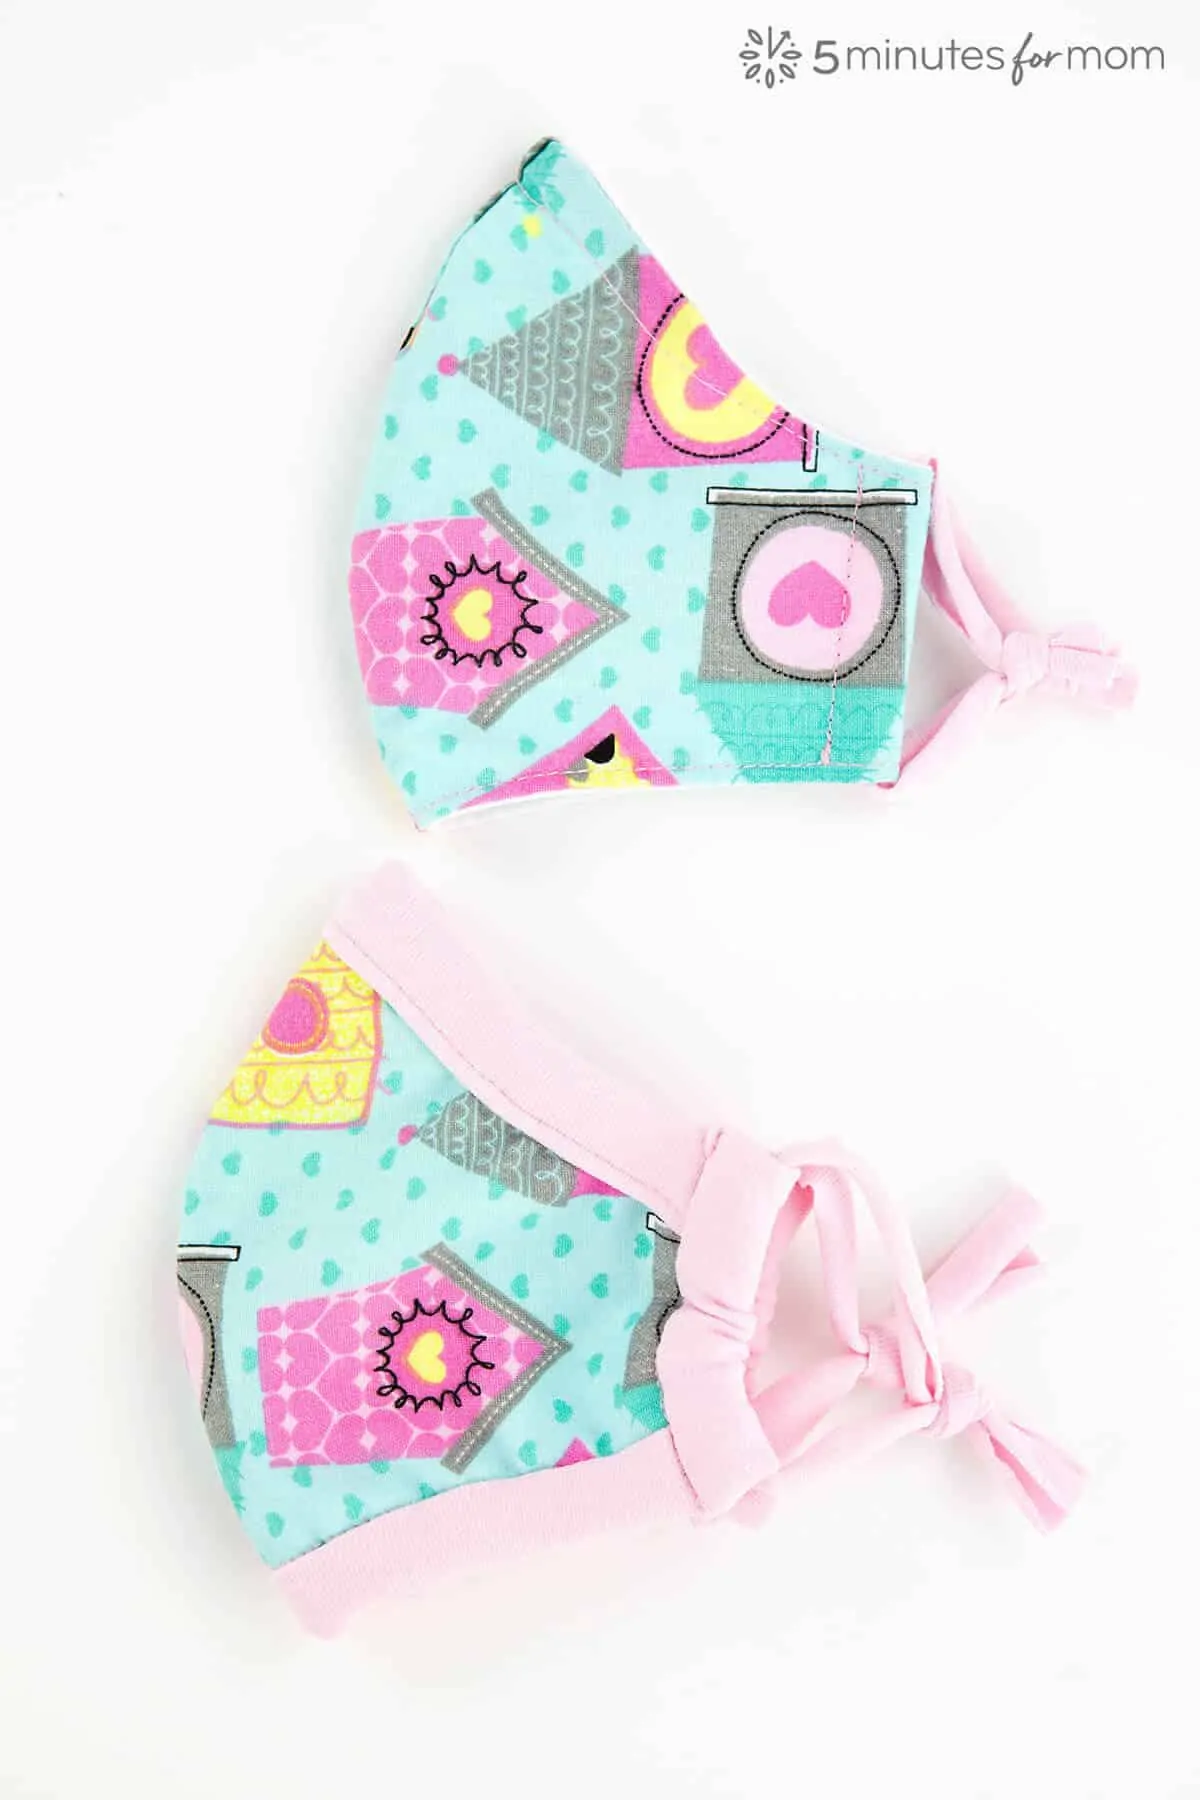
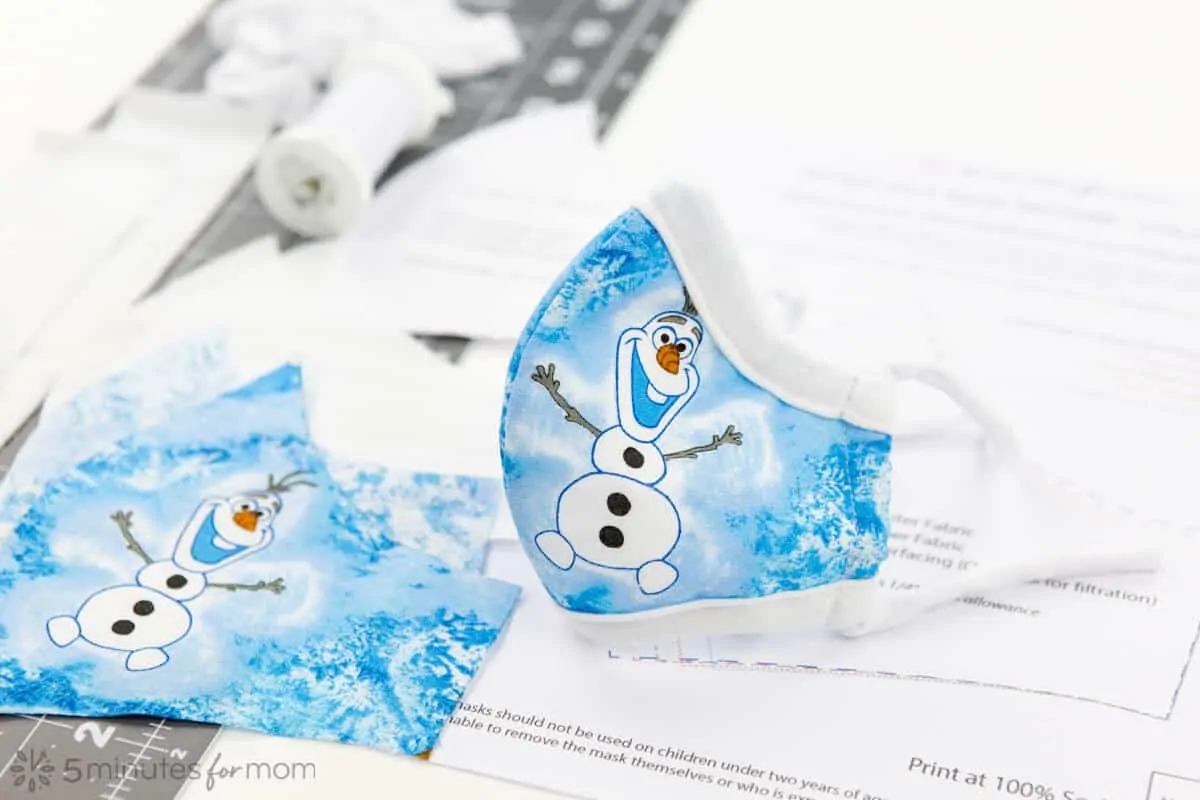
This face mask sewing tutorial shows you how to make a great fitting face mask, without the extra step of adding knit binding around the edges of the mask.
Last week, we published our free Best Fitted Face Mask Pattern PDF in 9 Sizes along with a sewing tutorial demonstrating how to make our Fitted Face Mask WITH Knit Binding. In this post, we have our second tutorial detailing how to make our Fitted Face Mask WITHOUT the knit binding trim.
Fitted Face Mask – Part 2 – Without Knit Binding

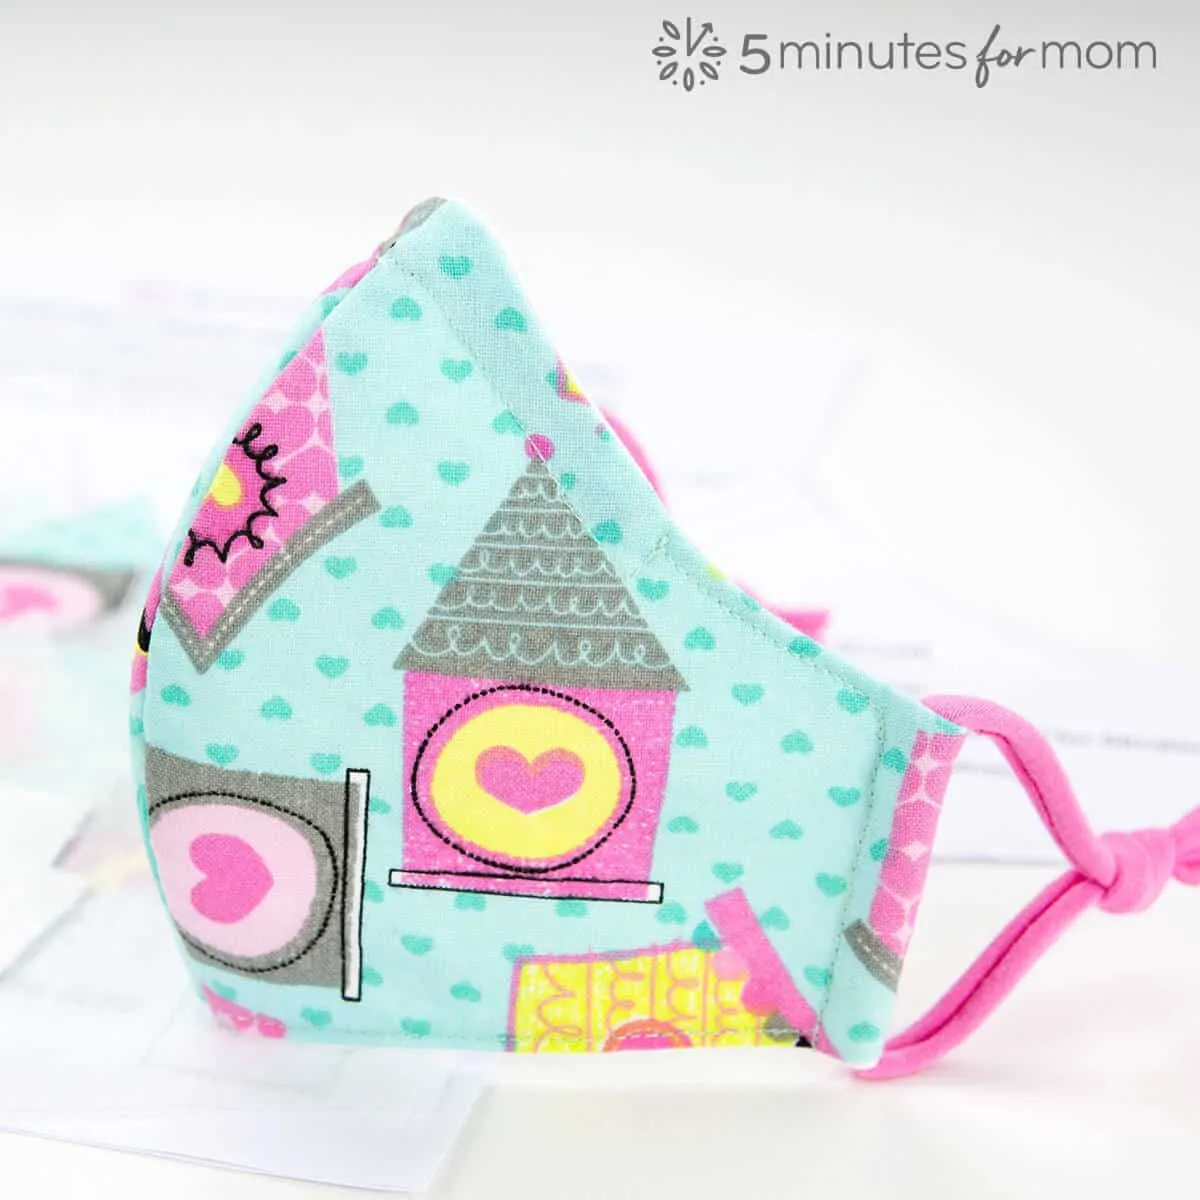
We have spent months creating, testing, and improving our Fitted Face Mask Pattern. It is a comfortable, easy-to-wear face mask that has a snug, cozy fit with no gaps for air to sneak in or out around the sides.
We are thrilled to share our free pattern and two free tutorials with you. (If you missed our first post with this pattern, you can find it here: Best Fitted Face Mask Pattern PDF in 9 Sizes – 4 Adult and 5 Kids Sizes)
Our Best Fitted Face Mask Pattern works with two different design options — one with knit binding trim around the edges of the mask and one without the binding trim.
The knit binding is a bit more work to make, but it is super comfy and cozy while giving extra protection from air escaping or entering around the edges of the mask. Children especially love the soft fabric that gently stretches to fit perfectly around their face and under their chin.
The basic version without the knit trim is faster to make and you don’t need to have the extra knit fabric for the trim.
If you choose to make the basic version, follow this comprehensive face mask sewing tutorial to help you easily sew your own mask from our free printable fitted face mask sewing pattern.
Our Best Fitted Face Mask Pattern is free to download and comes in five child sizes and four adult sizes.

Both versions of the mask, with or without knit binding, use the same pattern.
We have the tutorials for both versions available for free download as well.
Face Mask Sewing Tutorial
DOWNLOAD PATTERNS HERE:
Fitted Face Mask Pattern – Adult Sizes
Fitted Face Mask Pattern – Child Sizes
DOWNLOAD INSTRUCTIONS HERE:
Fitted Face Mask with Knit Binding INSTRUCTIONS
Fitted Face Mask without Knit Binding INSTRUCTIONS
To read the instructions online, scroll down for the Fitted Face Mask without Knit Binding tutorial in this post or click over to view the Best Fitted Face Mask Pattern Tutorial Part 1, which includes the instructions for making our Fitted Face Mask with the knit binding trim.
For help choosing which size of our face mask pattern you should make, click over to view our Fitted Face Mask Sizing Chart in Part 1, Best Fitted Face Mask Pattern PDF in 9 Sizes – 4 Adult and 5 Kids Sizes.
How to Sew the Best Fitted Face Mask (without Knit Trim)
Supplies
- Best Fitted Face Mask Pattern – Free Download for Adult or Child Sizes
- Woven cotton fabric for outer layer (1/4 yard for 5-6 masks, depending on mask size)
- Woven cotton fabric for lining layer (1/4 yard for 5-6 masks, depending on mask size)
- Interfacing (sew-in, lightweight or medium weight) – optional for added filtration
- Aluminum nose piece (or DIY alternative such as a coffee bag tie)
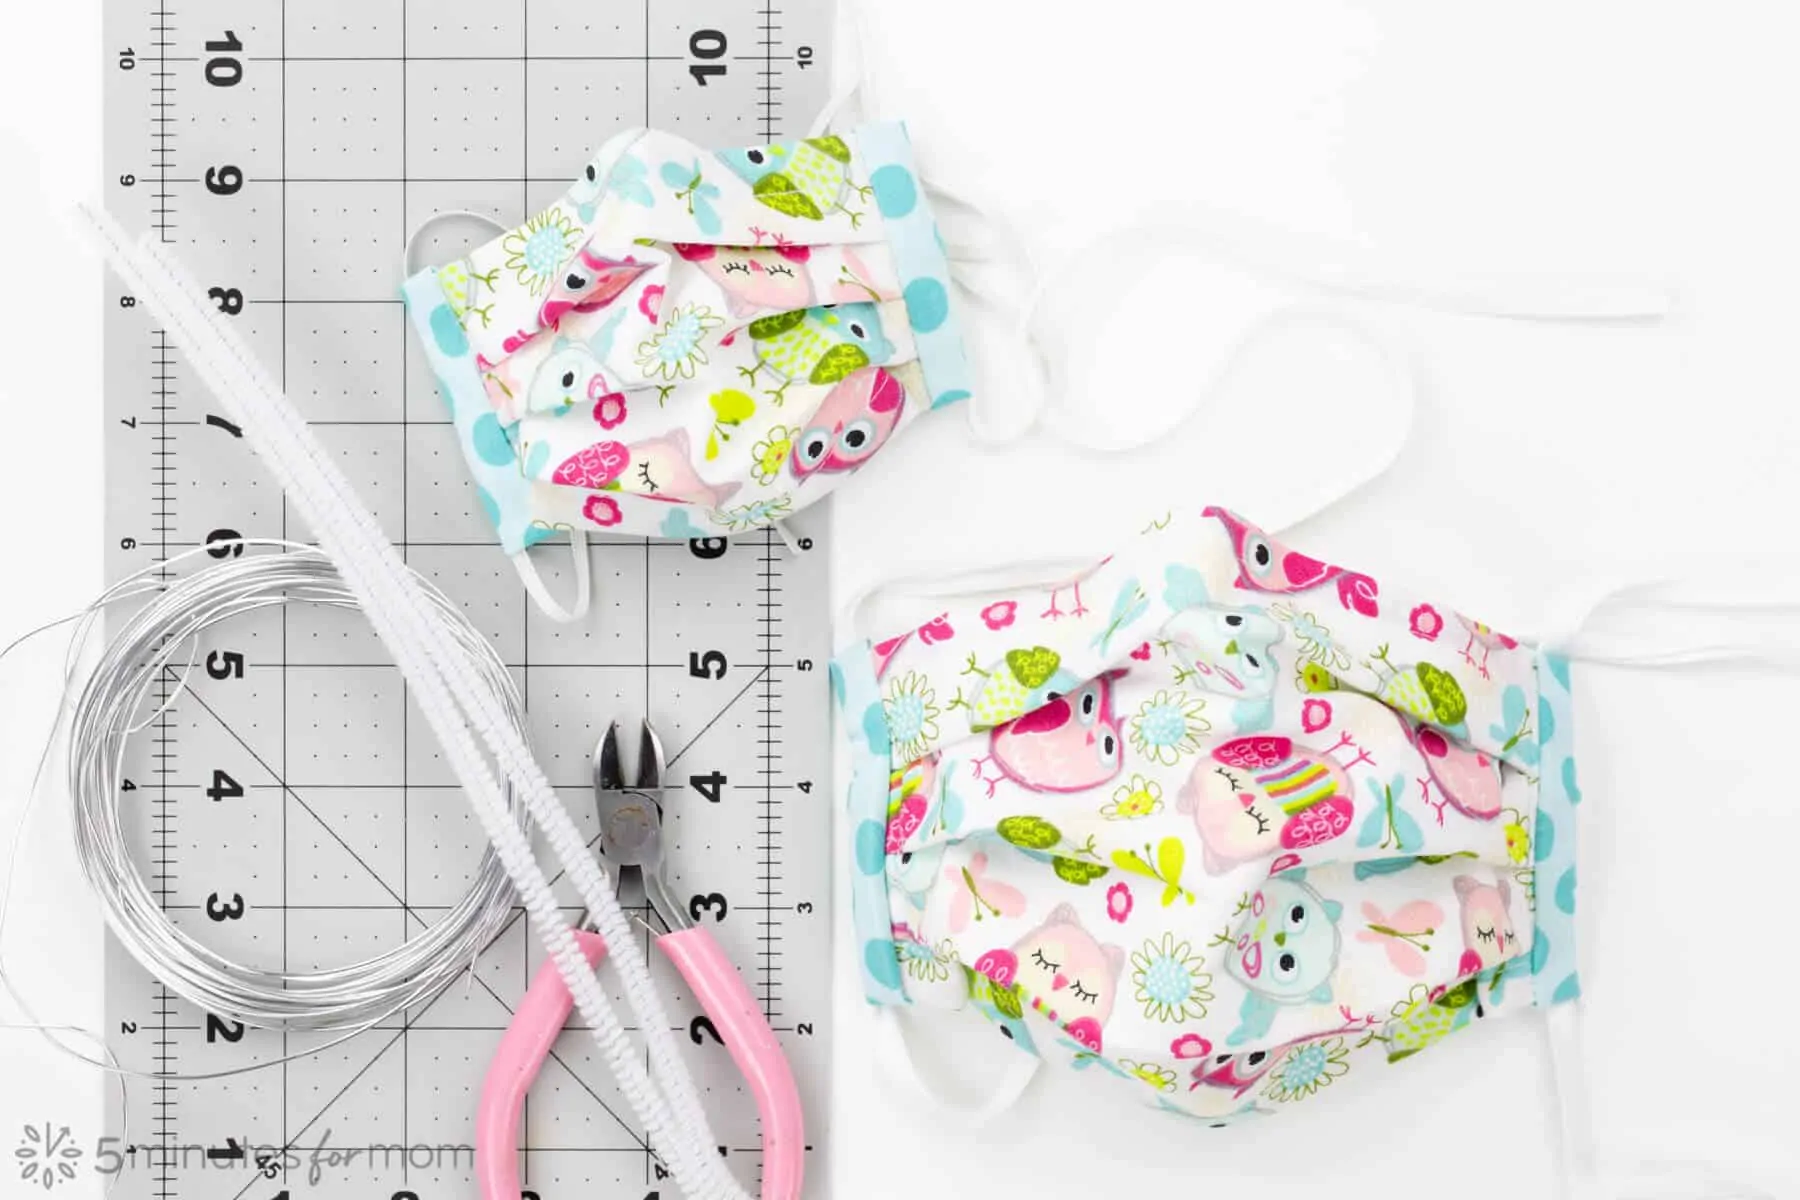
- Knit fabric strip – 3/4″ wide and approximately 25″ long OR two 10″ long pieces of 1/8″ elastic (or 3/4″ knit strips) – See our post on How to Make Ties for Face Masks using Knit Fabric for more information
- Thread
- Scissors
Note About Filtration Layer
We use non-woven, sew-in, lightweight interfacing for our face mask. We prefer to use sew-in versus fusible interfacing in order to avoid any glue.
The interfacing does not guarantee filtration but adds another layer of protection while still allowing the mask to be breathable. This interfacing layer is optional and when making kids masks, we often skip this layer to make the mask as lightweight as possible. Cloth face masks are NOT replacements for N95.
Free Printable Face Mask Patterns in Multiple Sizes
Below you’ll find two printable pdf files – one that includes four adult sizes and one that includes five child sizes – and printable pattern instructions.
Fitted Face Mask Pattern – Adult Sizes
Fitted Face Mask Pattern – Child Sizes
Fitted Face Mask with Knit Binding INSTRUCTIONS
Fitted Face Mask without Knit Binding INSTRUCTIONS
Fitted Face Mask without Knit Binding Instructions
The instructions in this face mask sewing tutorial are very similar to those in our other blog post for making a mask WITH knit binding. We’ve included all the steps again here to make it easy for you.
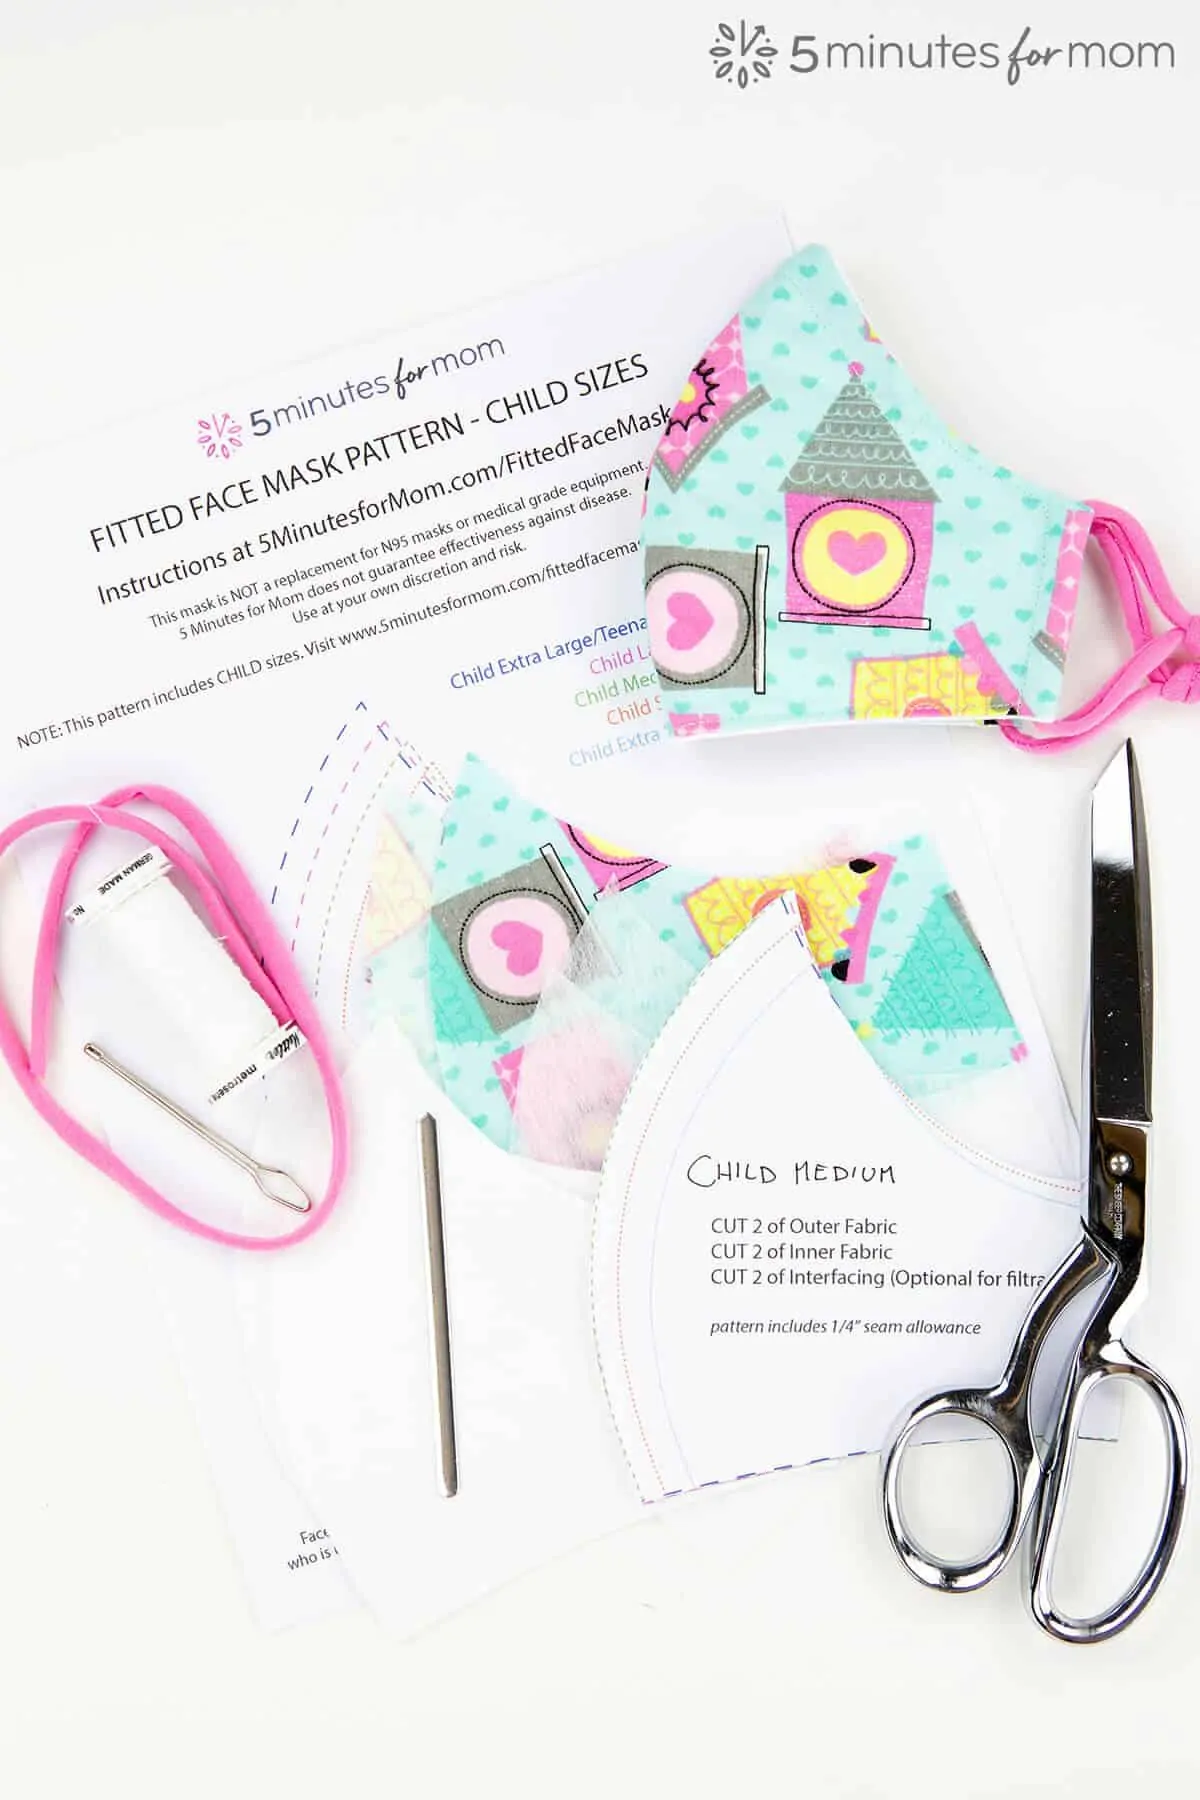
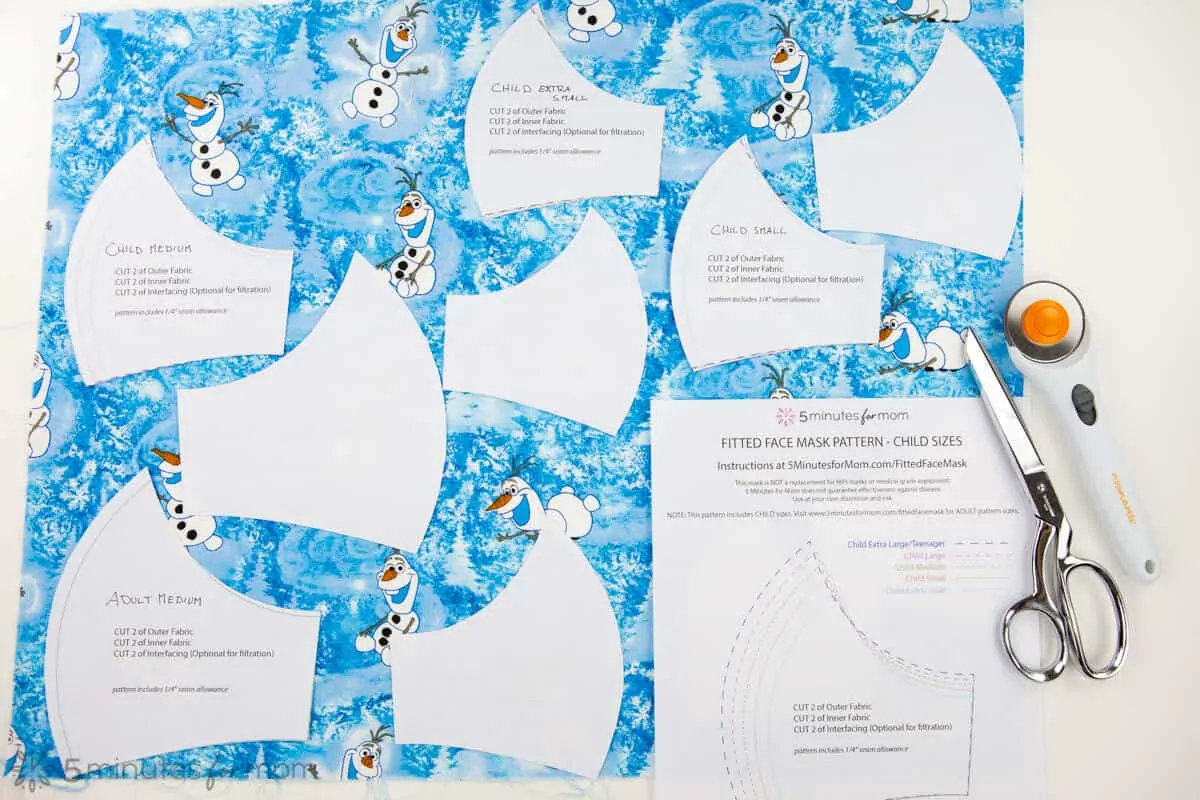
1. Print The Pattern
Download and print our free Best Fitted Face Mask Pattern in Adult Sizes or Child Sizes. Cut out pattern piece in your preferred size. (These are the same patterns used in Best Fitted Face Mask Pattern WITH Knit Binding.)
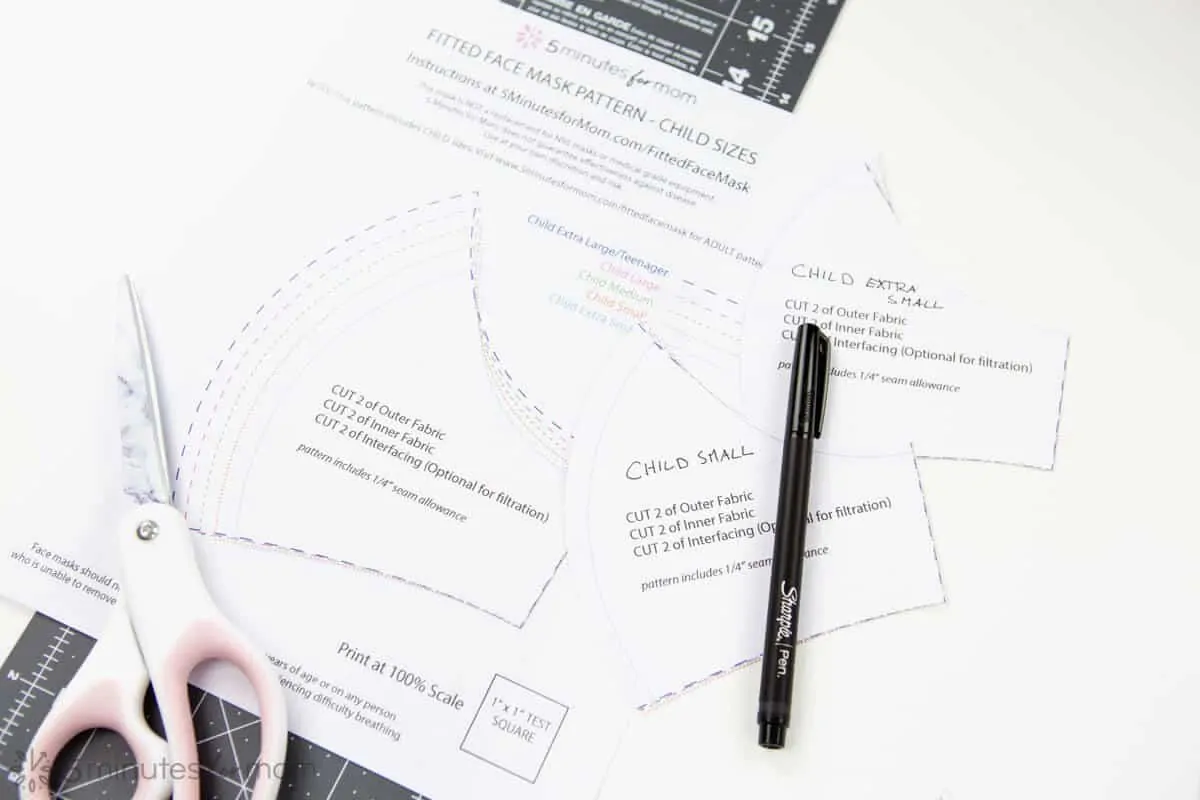
(It can be helpful to print extra copies of the pattern so you can dovetail the pattern pieces and make the best use of your fabric.)
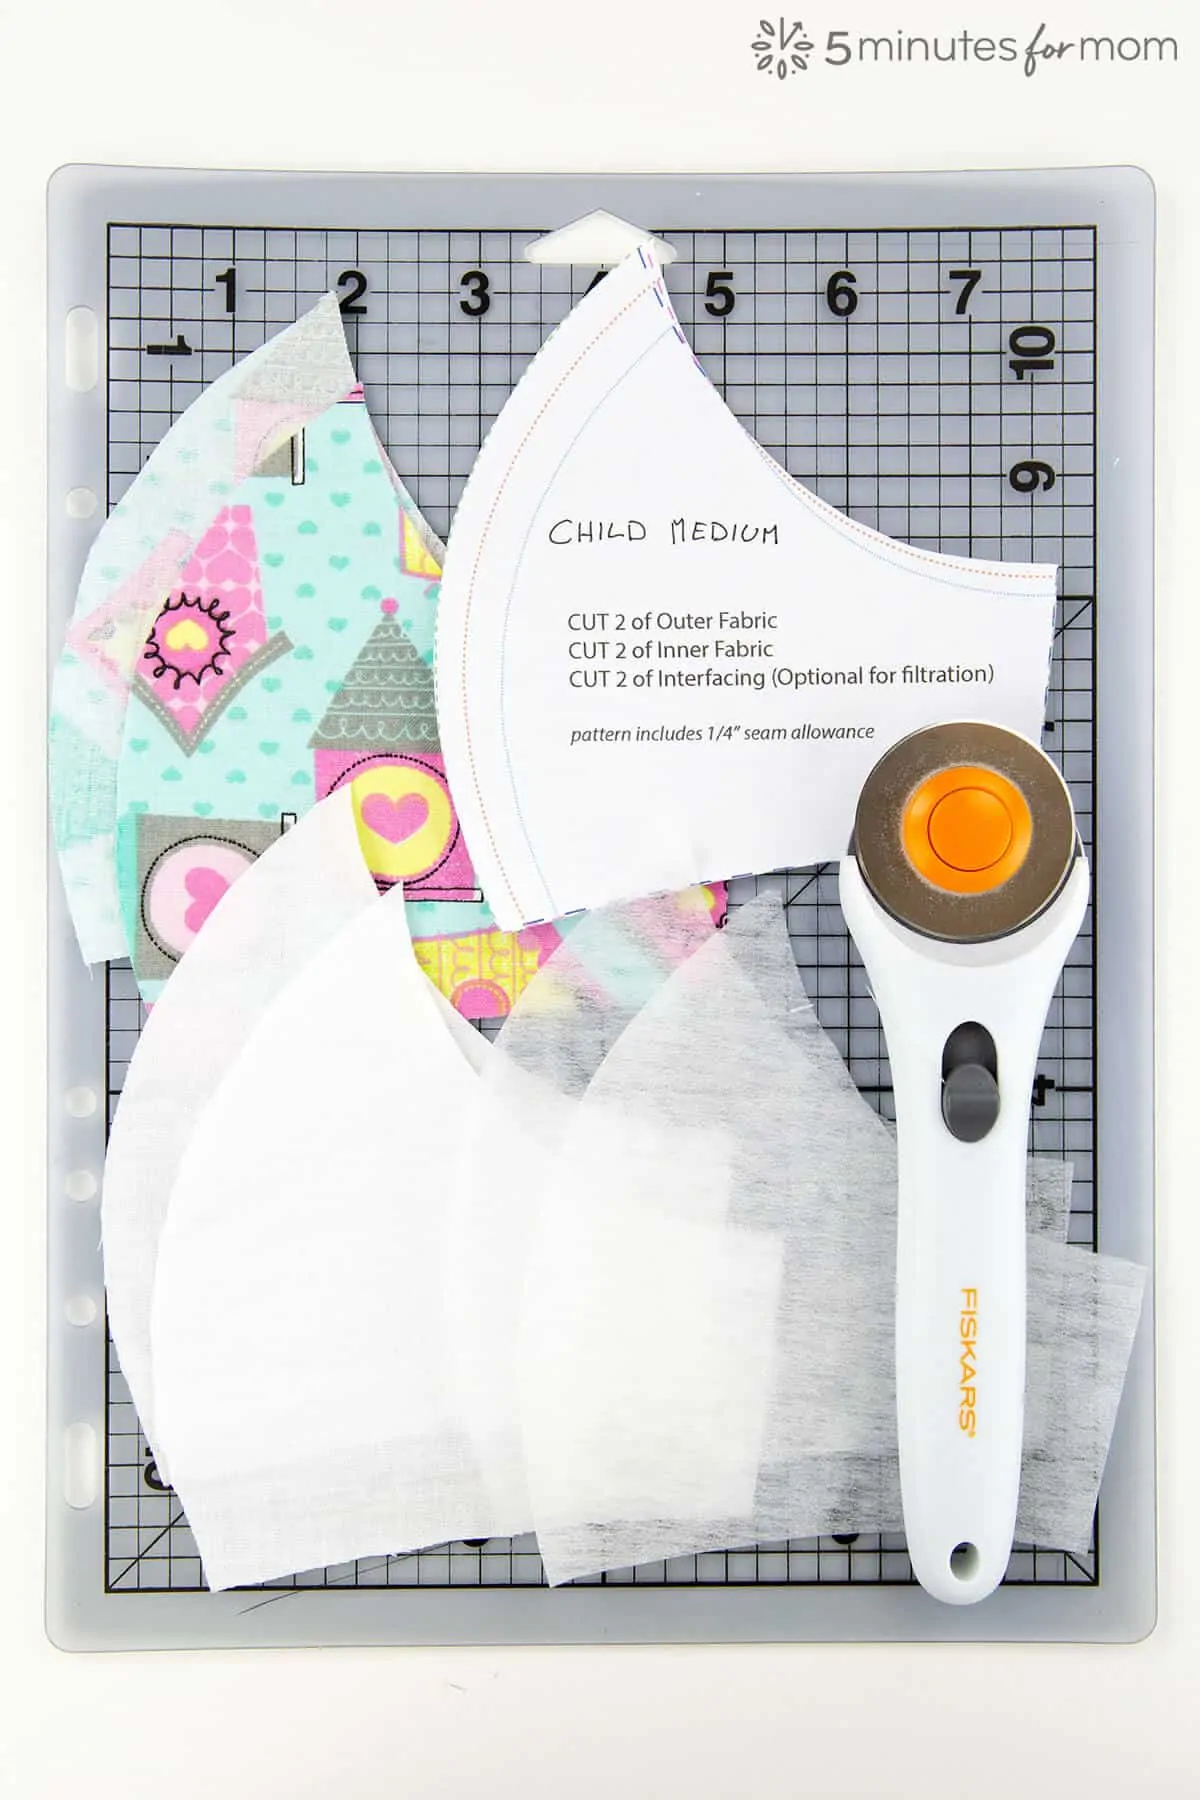
2. Cut Pieces From Fabric
First, fold the fabric for the outer part of the mask in half. You get TWO mirrored pieces when you cut the FOLDED fabric.
Note that if your fabric has a pattern where you want a certain part to show on the mask, you can mirror the pattern (flip it over horizontally) when cutting.
If you are cutting ONE layer of fabric at a time and you want to create a mirrored piece, then FLIP the pattern piece over horizontally when cutting the fabric for the second piece. Thus the right side/patterned side of the fabric will be facing the correct way.
Repeat the cutting process with liner fabric, once again cutting while the fabric is folded or flipping the pattern piece for the second cut if cutting one layer of fabric at a time, and with the interfacing fabric.
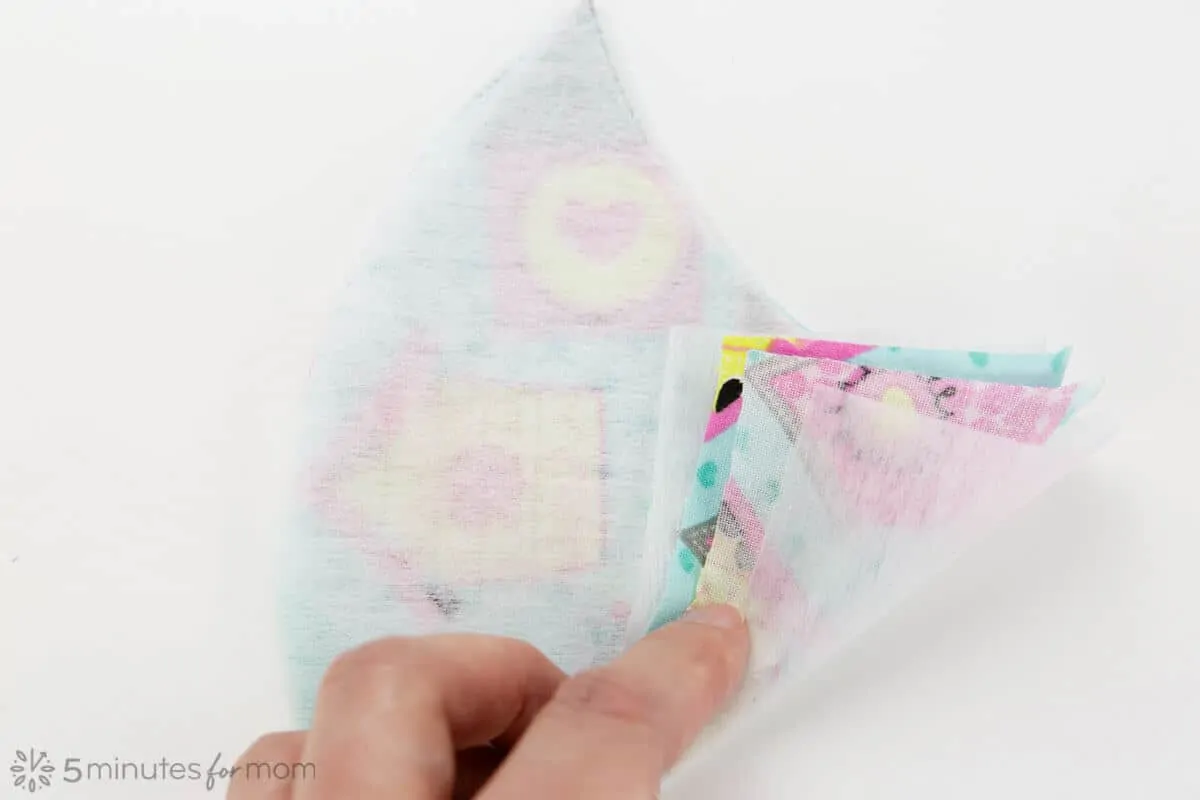
3. Sew The Center Seams
Place the RIGHT SIDES (the nice sides of the fabric) together. Then sew the center seam on the outer fabric pieces and on the lining fabric pieces using a 1/4″ seam allowance.
Please note: If you are adding an interfacing layer, then sandwich the two interfacing pieces around the outer fabric pieces before you sew the center seams. Then sew the center seam with the four layers as shown in the photos below.
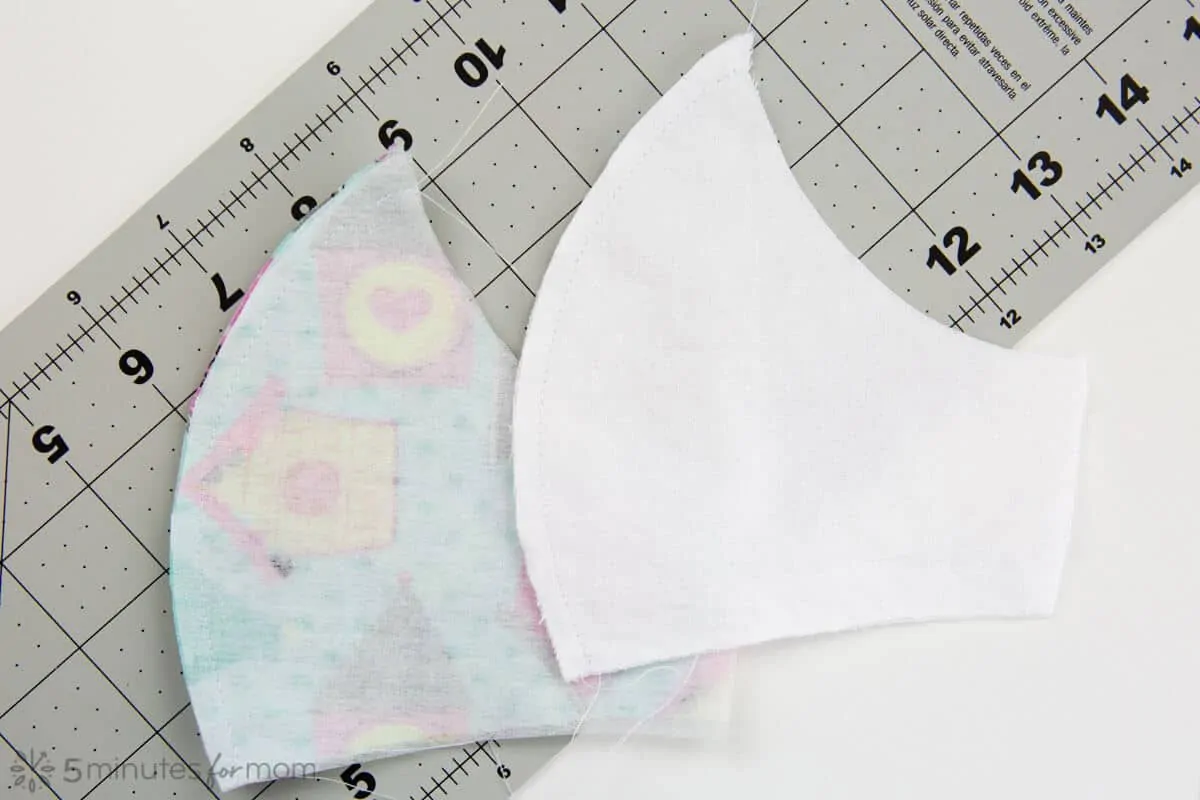
Trim the seam allowances and/or use pinking shears to reduce the fabric bulk.
4. Sew The Layers Together
If you are NOT using the knit trim/binding, use the following directions. If USING knit binding, click over to follow directions for the fitted face mask WITH knit binding in our Fitted Face Mask Tutorial Part 1.
Finger press (or press with an iron) the center seam to one side of the mask on the outer layer. On the lining layer, press the center seam to the opposite side.
With RIGHT SIDES together, so that the wrong sides of the fabric are facing outwards, pin the outer piece and lining piece together. If you are using interfacing, the interfacing will be on the outside, on top of the outer fabric.
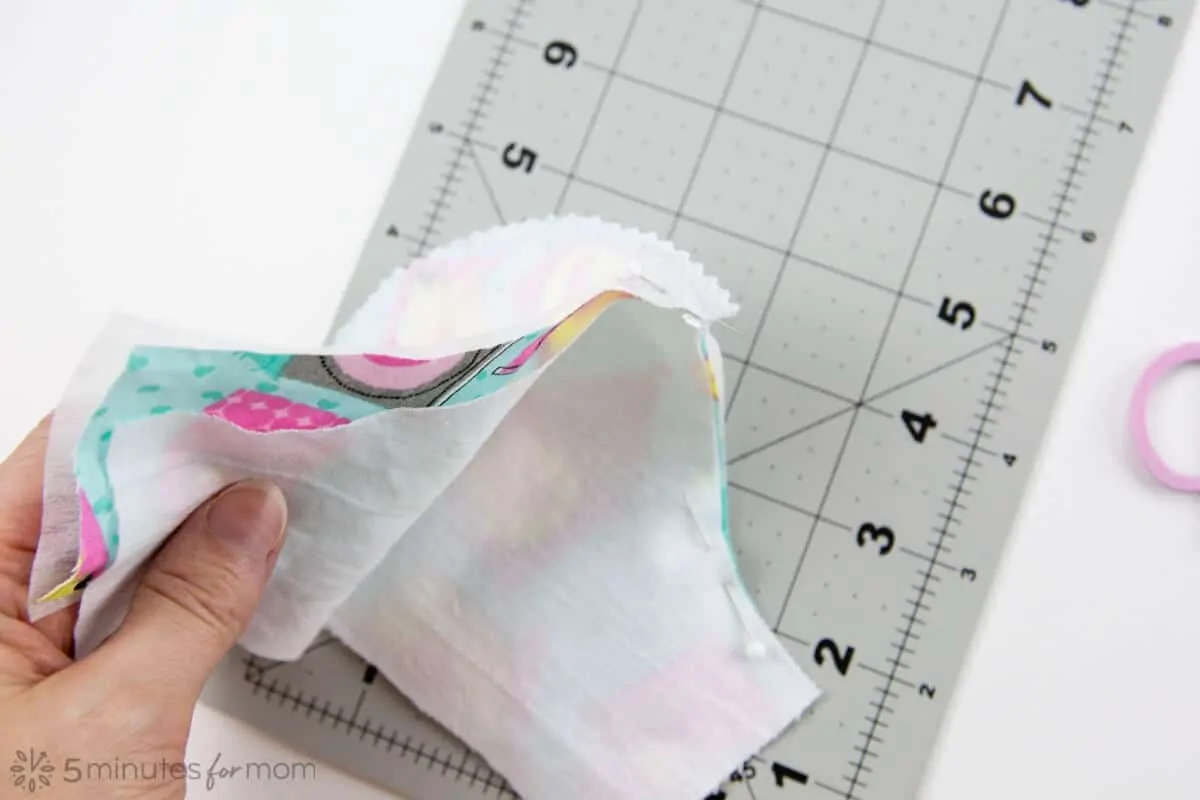
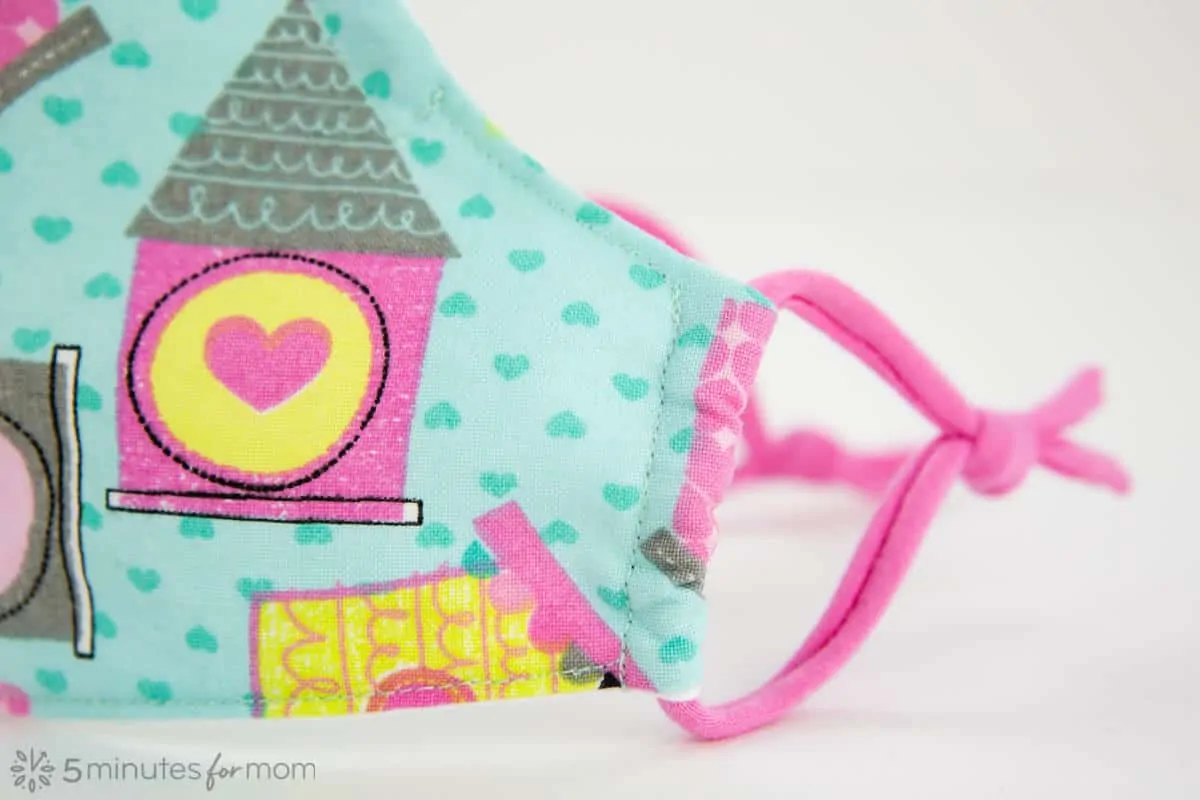
Stitch along the top and bottom edges of mask with a seam allowance of 1/4â€. DO NOT stitch over the sides of the mask!
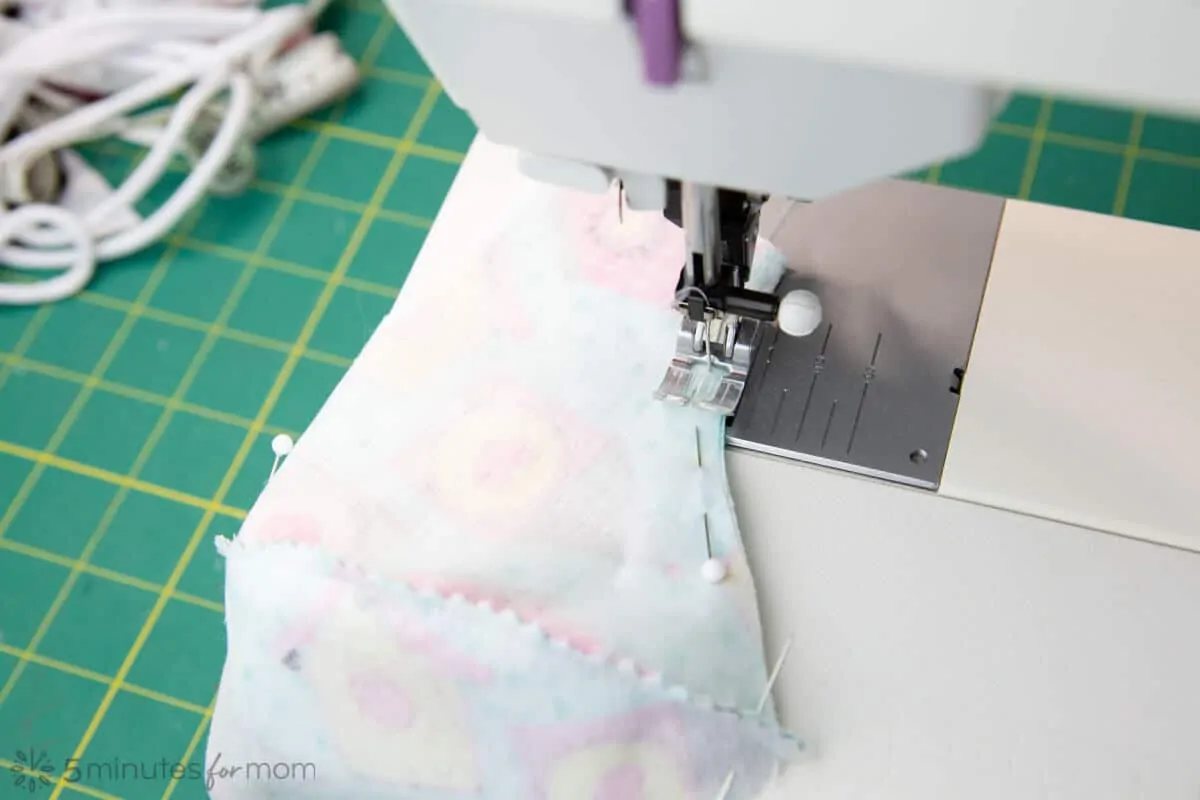
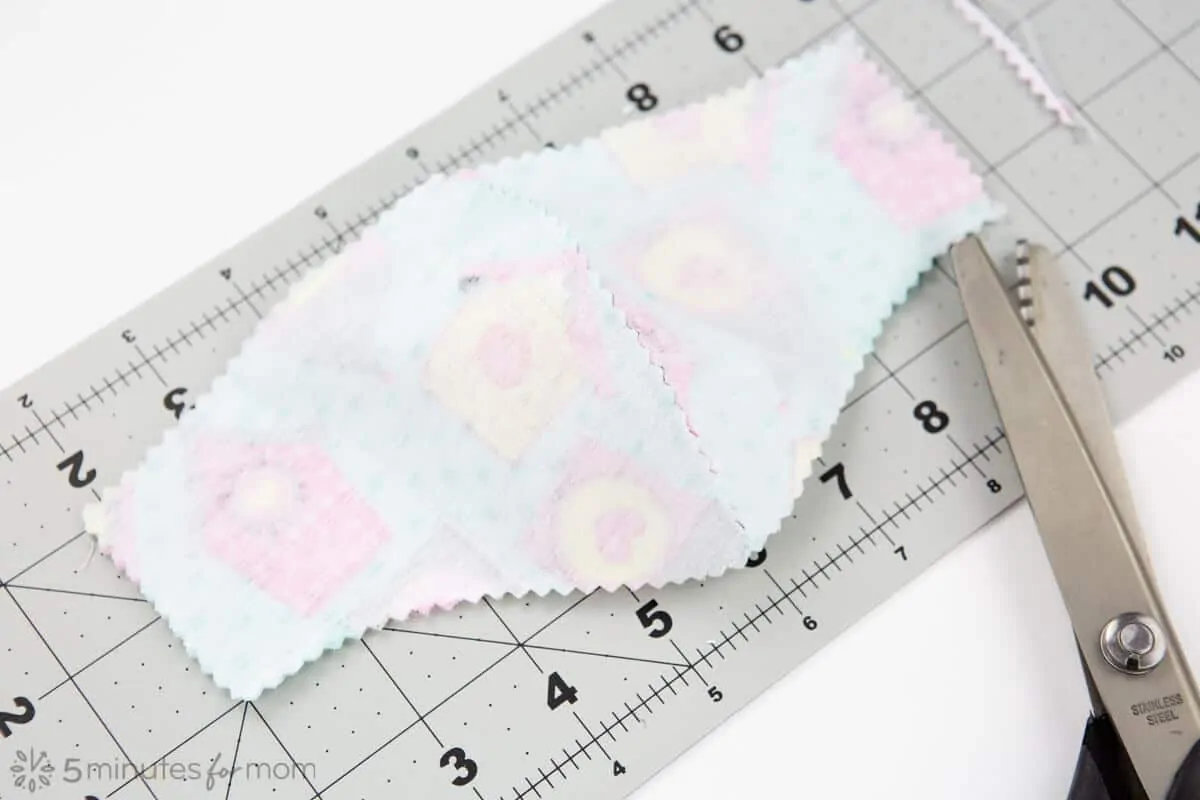
Then trim seam allowances and snip curves (or trim with pinking shears,) rounding the top corner. You can also trim the sides of the mask so that the edges are even – but do NOT sew the sides shut. You still need to turn your mask and make your side casings/channels.
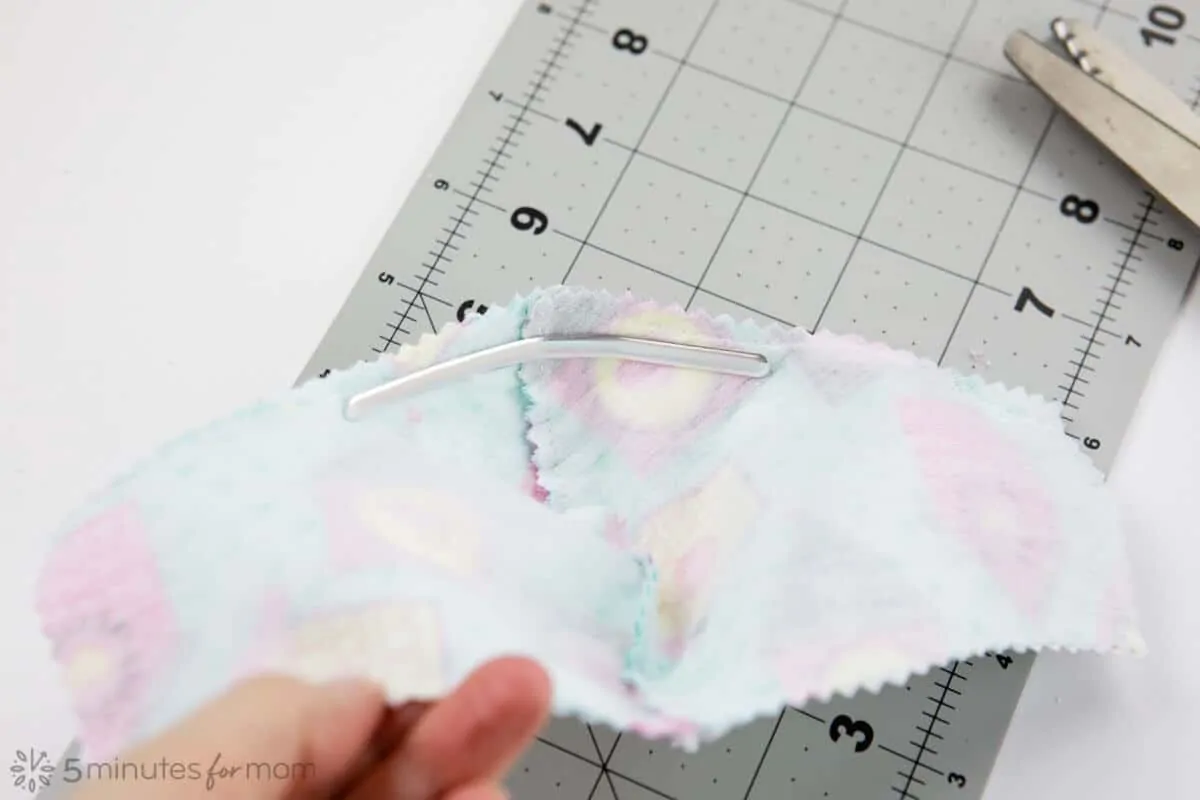
Remove the backing of the flexible nose piece and place the nose wire with the sticky sharper side of the nose piece attached to the interfacing or the wrong side of the outer fabric if you are not using interfacing. We are placing the smoother side of the nose piece face down on your nose for a more comfortable fit.
Place the ends of the nose piece right next to stitching with the center of the nose piece as close to the top of the center of the mask as possible. You may need to bend the nose piece slightly to get the best fit.
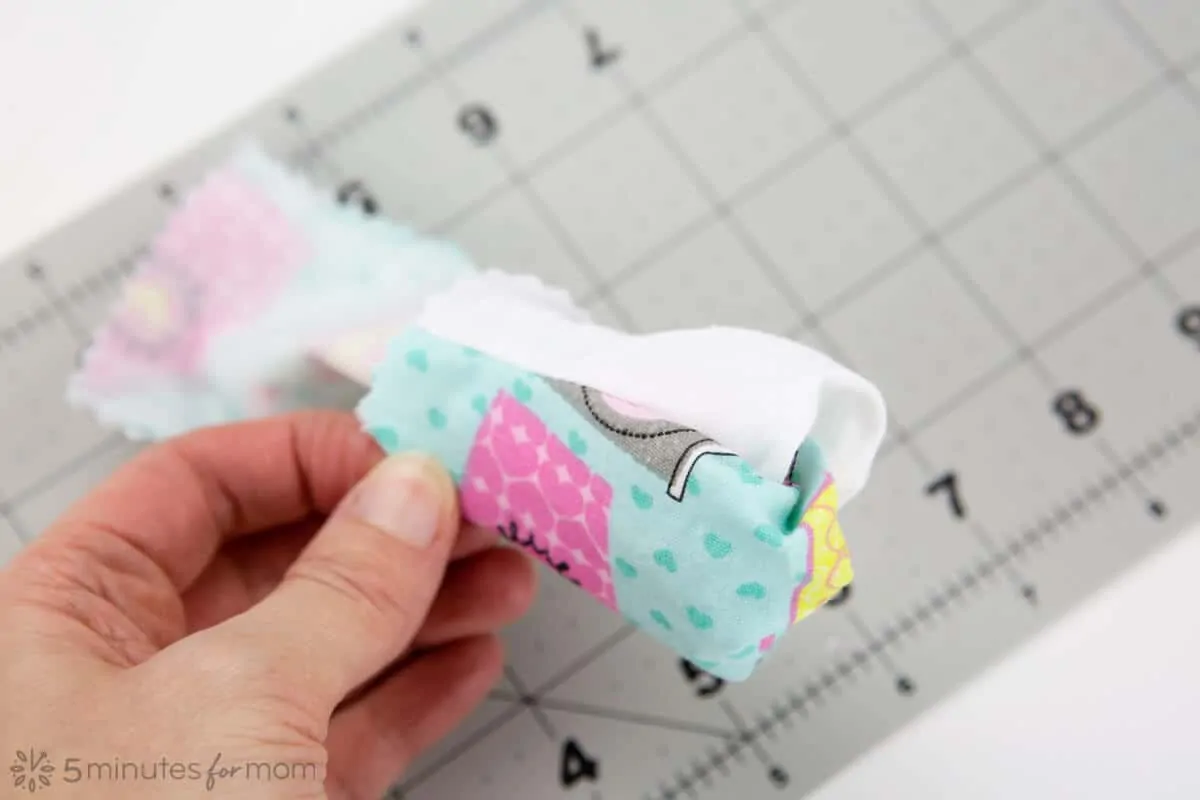
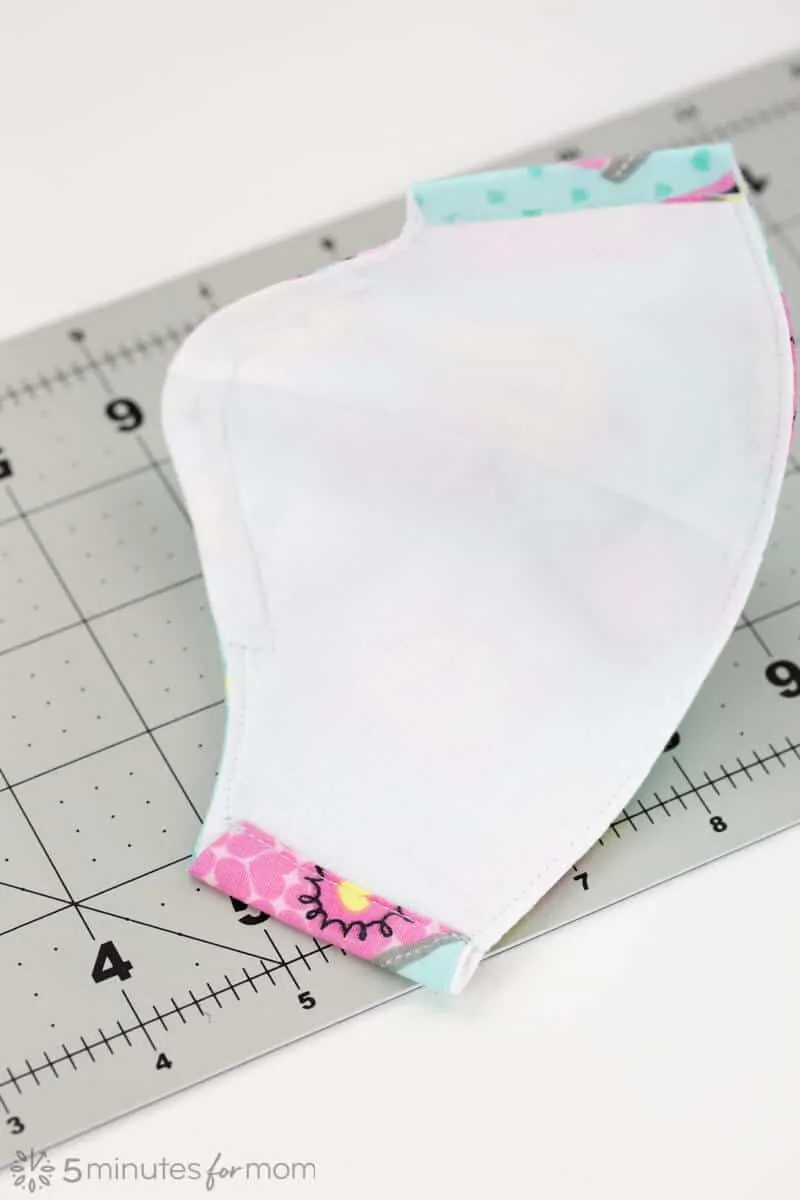
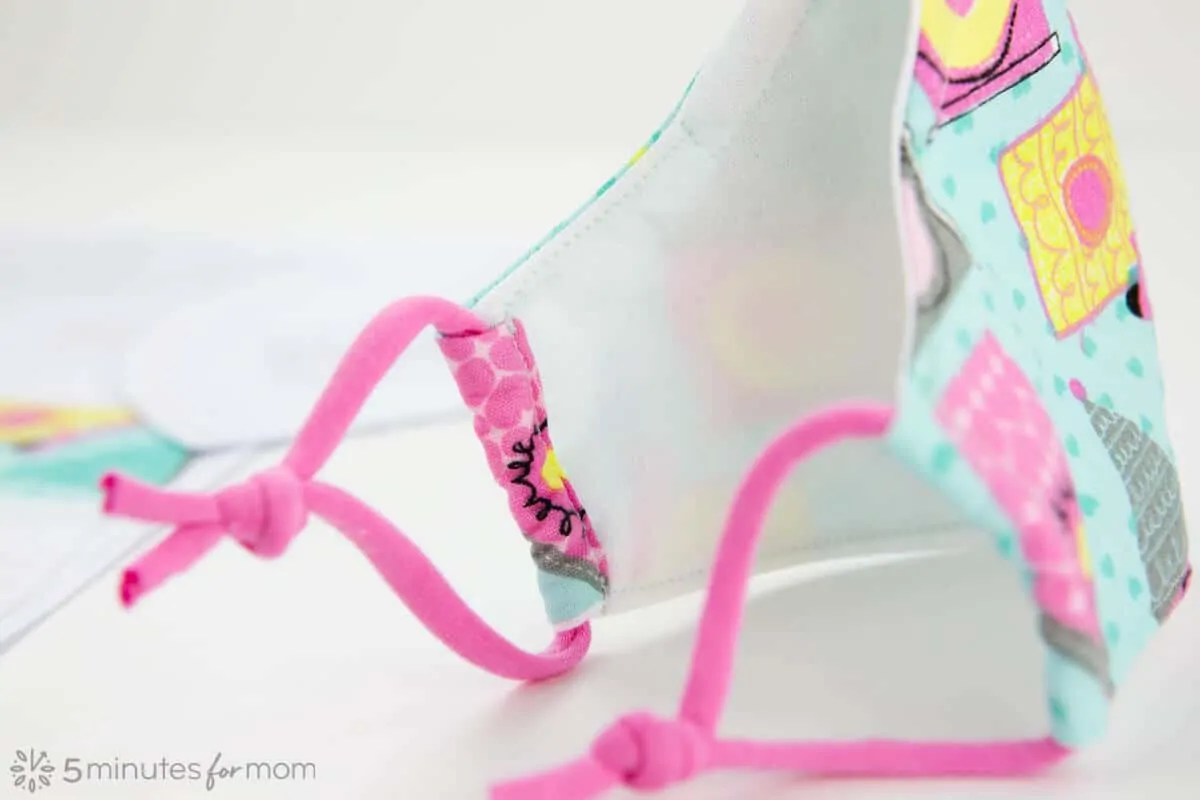
5. Turn Mask Right Side Out
Through one of the side openings, turn the mask right side out, keeping the nose piece in place as you turn.
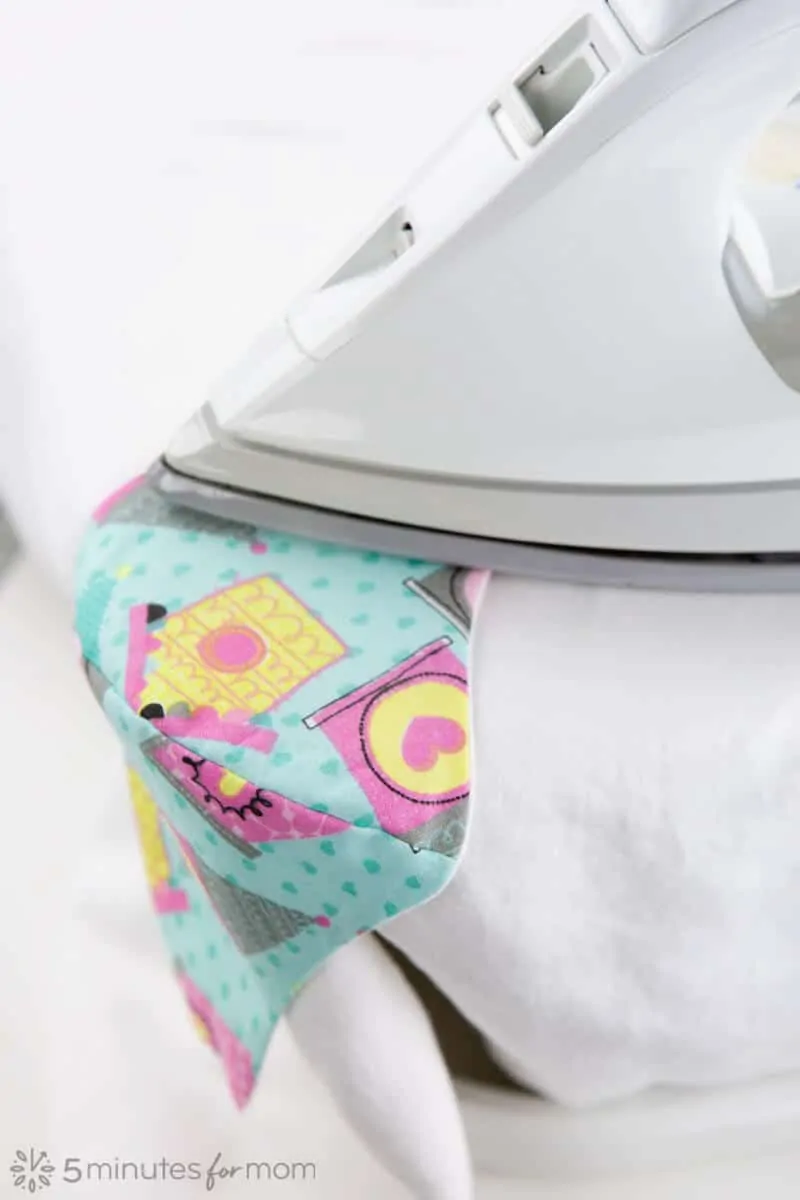
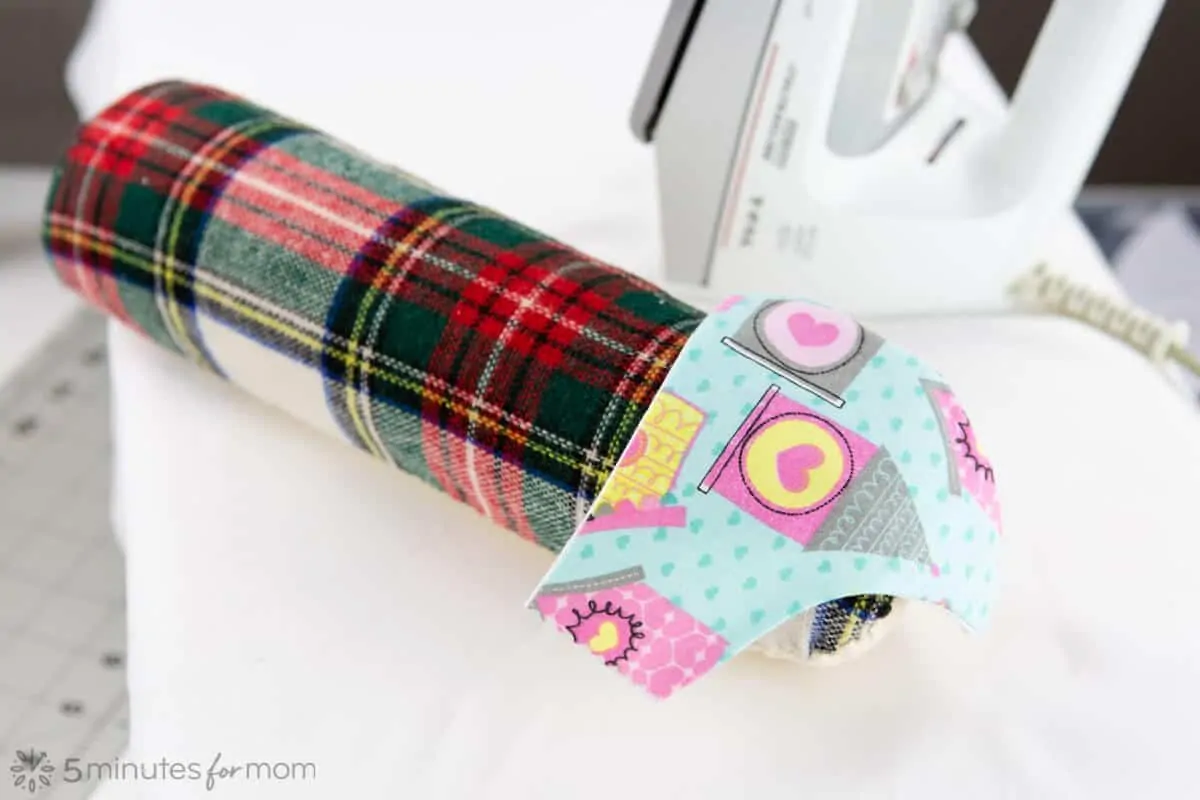
After turning the mask, press it with a hot iron, shaping the curved edge using the corner of your ironing board or using a sewing ham.
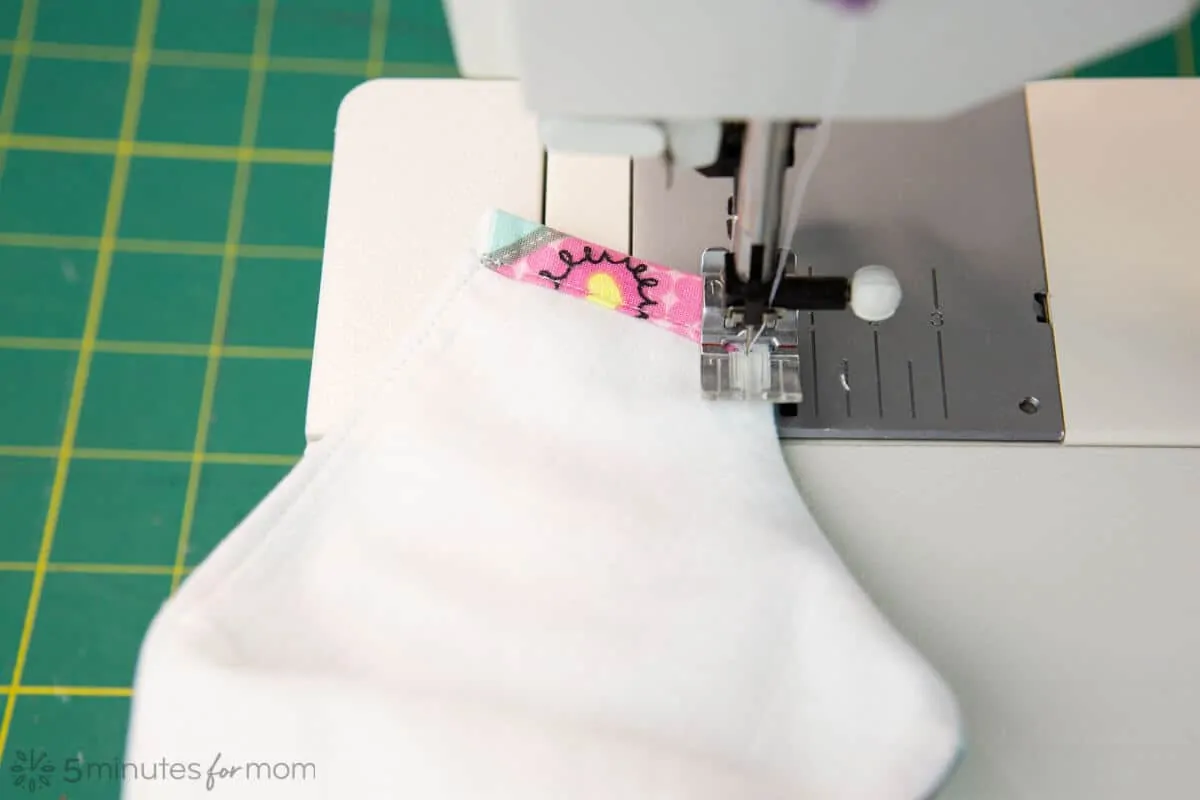
6. Sew Casings/Channels for Ties/Elastic
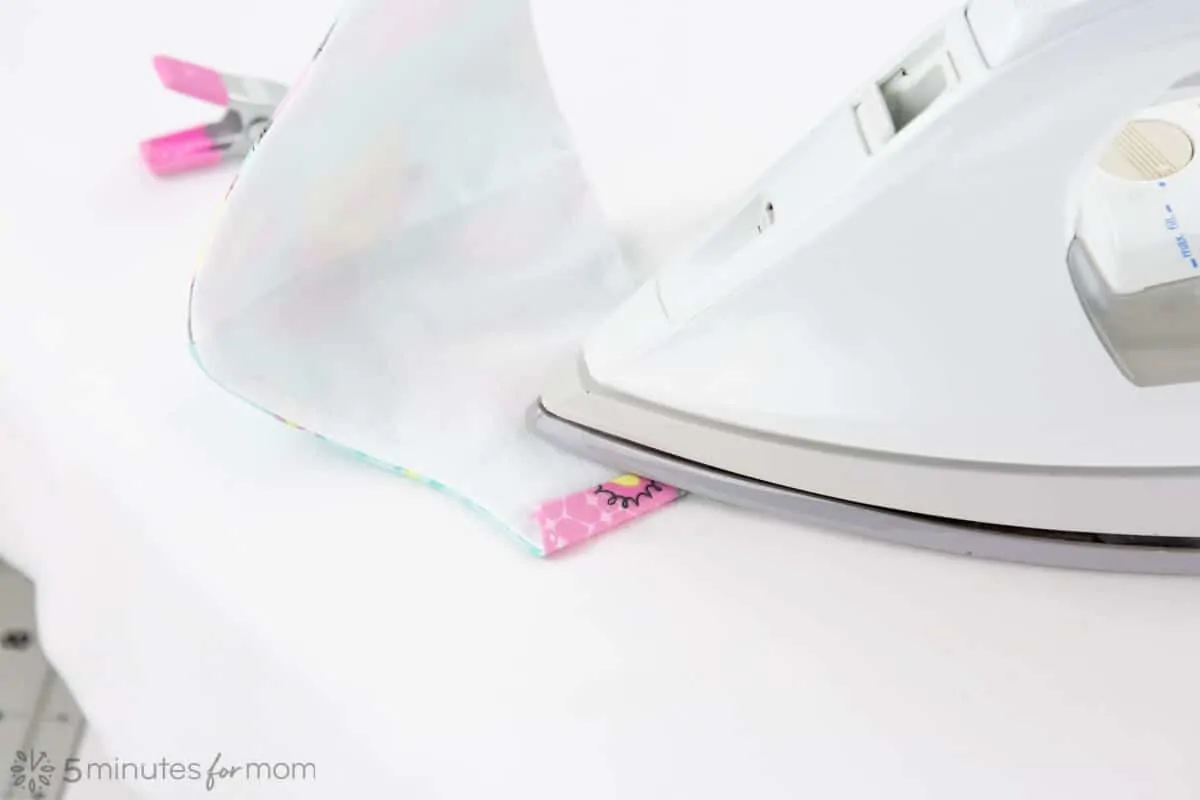
To make a channel for the knit ties or elastic, fold and press each side of the mask over by 1/4″ and then again 1/2″. Pin or clip to hold.
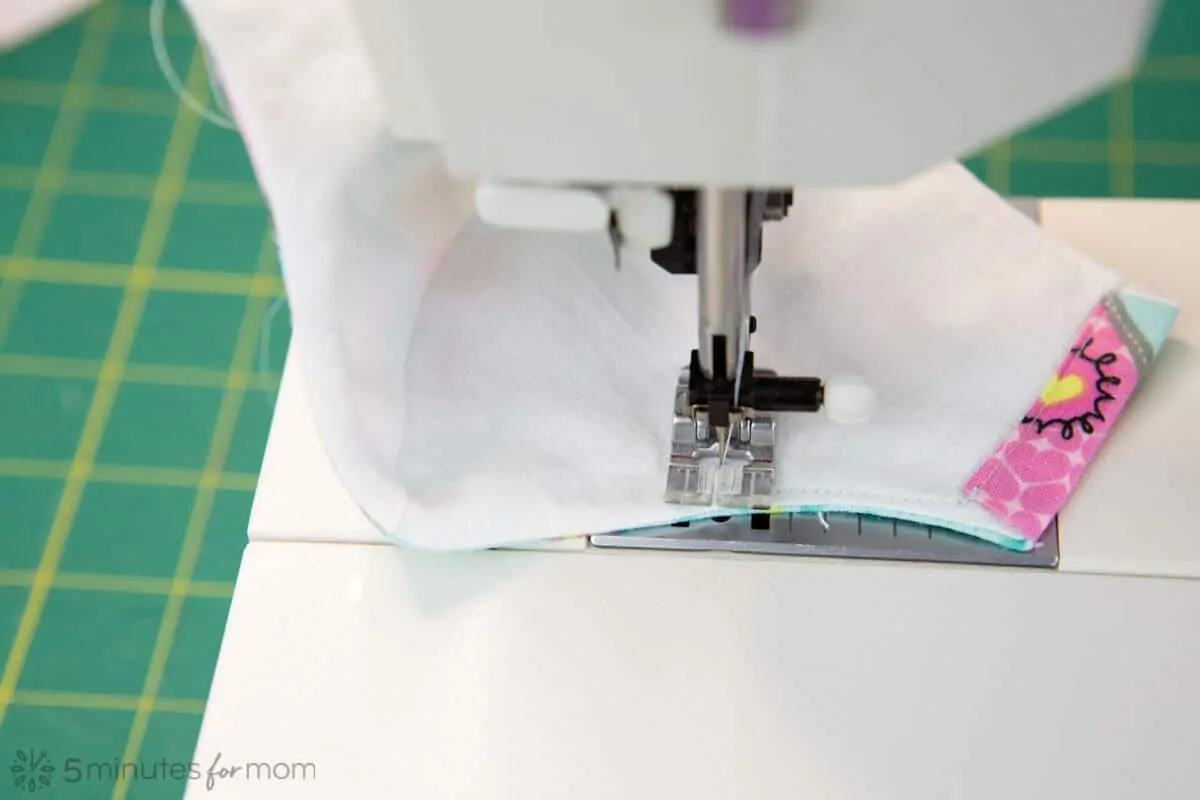
Starting at the top of the right casing, stitch the casing 1/16″-1/8″ from the inside folded edge of the casing, backstitching to reinforce stitching at the top and bottom of the casing edge. At the bottom of the casing, with the needle lowered in the fabric, lift the presser foot and turn the mask to continue to stitch 1/8″ around the bottom edge of the mask.

Continue stitching around the mask, stitching the left casing in place, again turning the mask with the needle lowered in the fabric. Backstitch again to reinforce the stitching along the top and bottom of the casing.
IMPORTANT: When you are stitching along the top edge of the mask, you will need to sew AROUND the nose piece. When you are 1/4 inch from the end of the nose piece, lower the needle, lift presser foot, and rotate the fabric. Sew inwards 1/2″, backstitching to reinforce the stitching. With needle lowered, rotate fabric to sew along the bottom edge of the nose piece, about 1/2†from the top of mask, sewing VERY carefully below the nose piece. If you hit the nose piece, you will break your needle. So sew slowly and carefully.
When you are 1/4″ past the end of the nose piece, rotate fabric again and finish stitching 1/8″ from the top of the mask until joining the stitching at the top of the right casing.
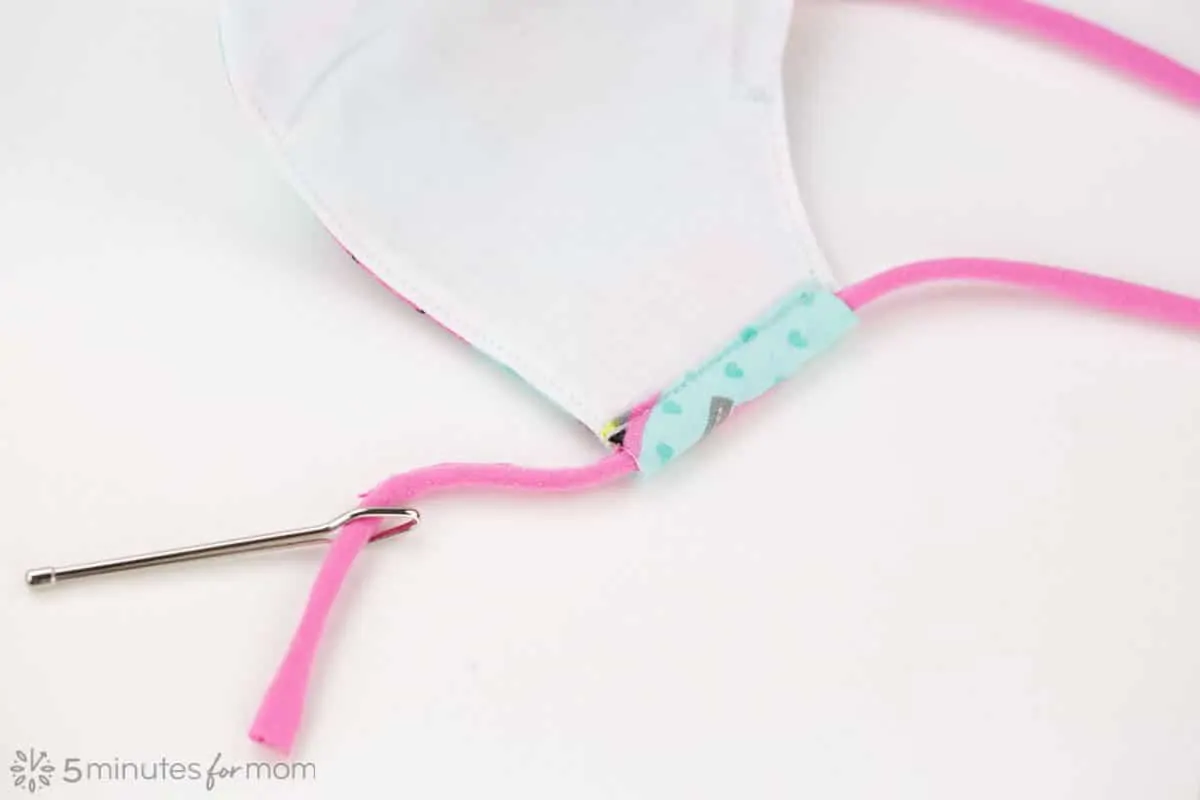
7. Thread Ties or Elastic Throw Casings/Channels
Using a bodkin, safety pin, or a bobby pin, thread the elastic or knit ties through the sides of the mask.
As we mentioned in Part 1 of our Fitted Face Mask post, we recommend using stretchy knit ties. They give the best and most comfortable fit. (See how to make your own knit ties with t-shirts or leggings in our post How to Make Ties for Face Masks using Knit Fabric.)
While many people like having masks loop around their ears, using ties that go around the top of the head and the back of the neck allow you to tie your mask on firmly without tugging or hurting your ears. It is easier to get your mask on and off with ear loops, but the fit isn’t as good.
For kids who have to take their masks on and off at school, ear loops are best.
You can use two sets of knit ties or, as we do, use one 25″-28″ long knit strap that loops around the top of the head and ties at the base of the neck.
Another option is to use what is called an “ear saver.” It’s a piece of fabric or elastic stretches across the back of your head and attaches to the ear loops. This takes pressure of your ears and can improve the fit of the face mask.
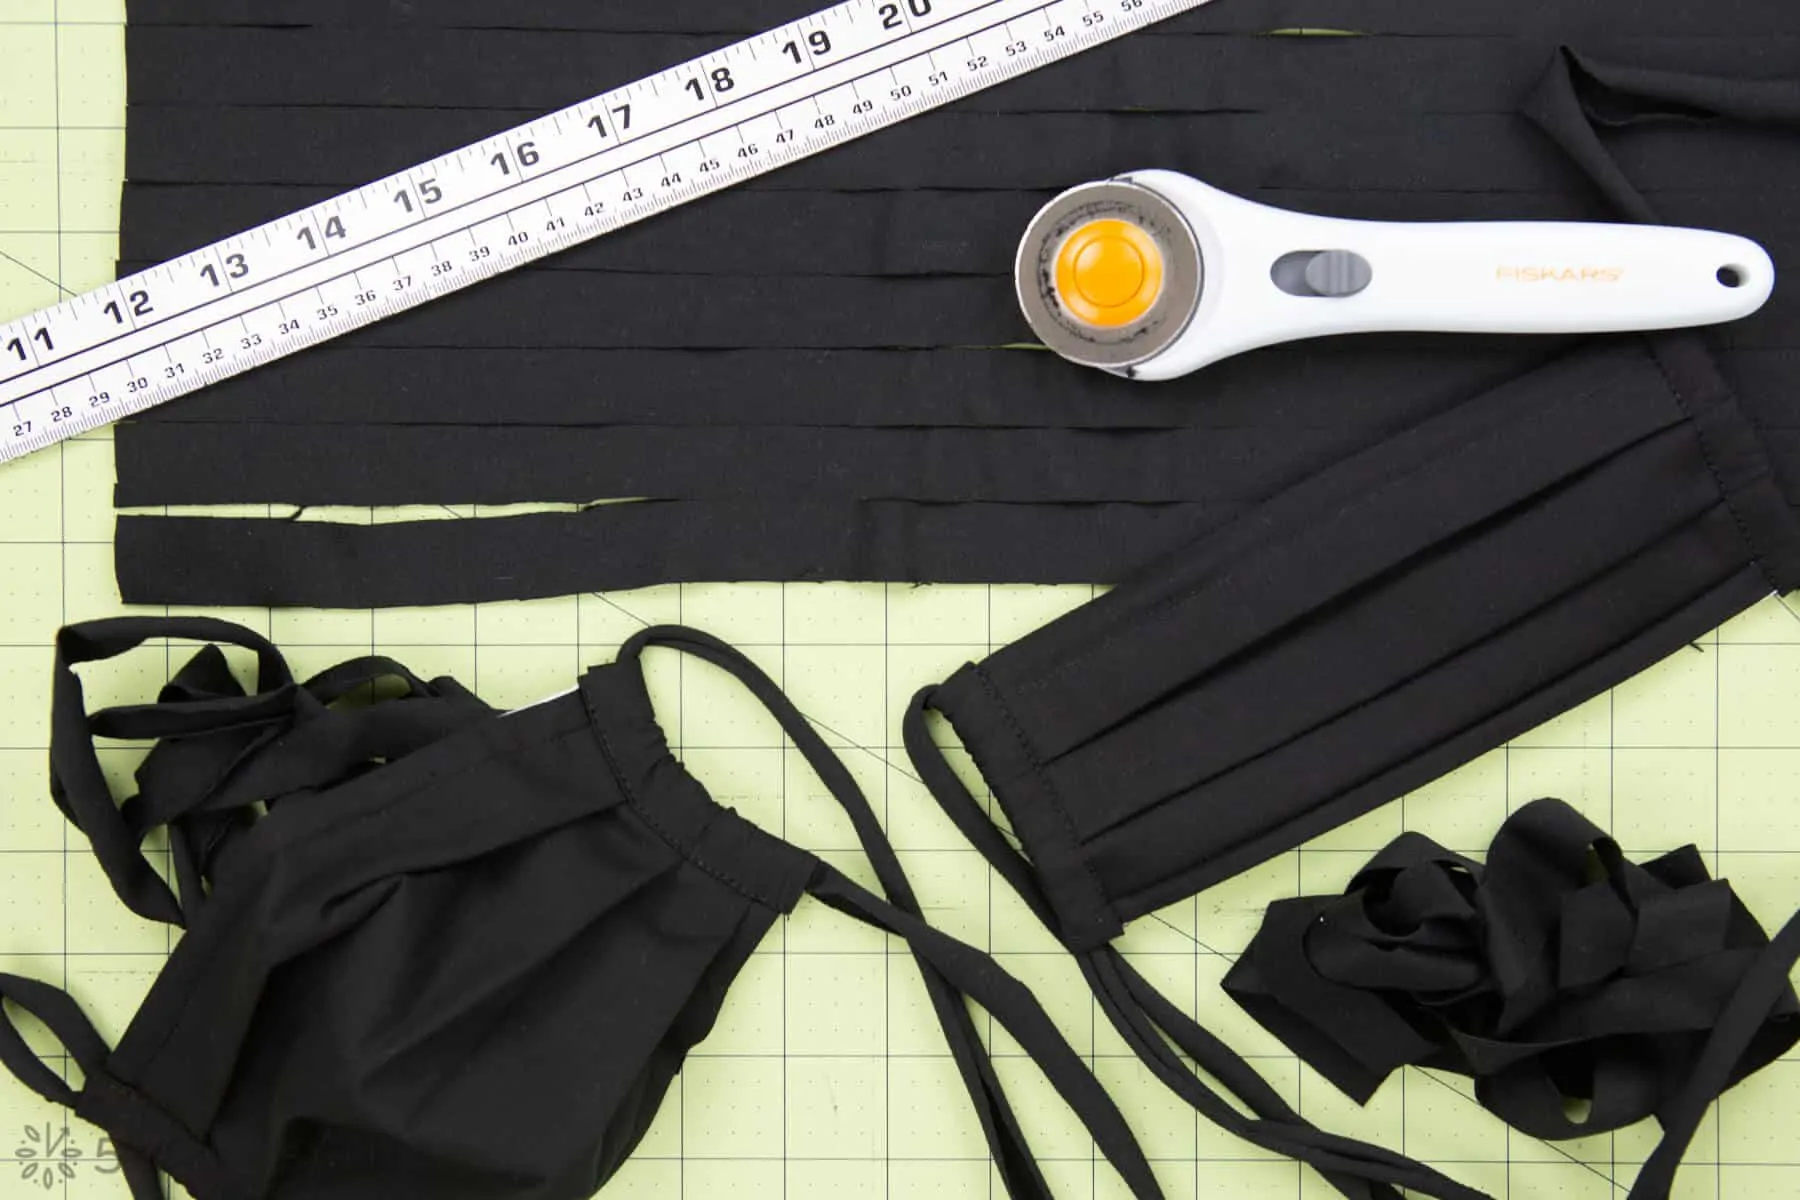
To make knit ties, just cut long strips of light or medium weight knit fabric 3/4″ wide. Then STRETCH the strips. The fabric will ravel at the sides to form a “t-shirt yarn.”
If your knit fabric is too lightweight, it will disintegrate and drop tiny balls of fabric. But NO WORRIES!
Lightweight knit fabric makes perfect stretchy “spaghetti straps” that are perfect for face mask ties.
Click over to read how to make knit spaghetti straps in our post How to Make Ties for Face Masks using Knit Fabric.
Trim your straps to size. If you’re using ear loops, we’ve found that 8″-10″ long knit strips work well. If you’re using one piece that loops at the top of the head and ties at the back of the neck, then cut it to be 25″-30″ long.
Then use a bodkin, safety pin, or bobby pin to thread the ties through the casings.
If you are using your knit ties around the ears, you can tie them with knots so that they are adjustable. Once you know the correct size and fit for your masks, you can sew the ear loops if you prefer.
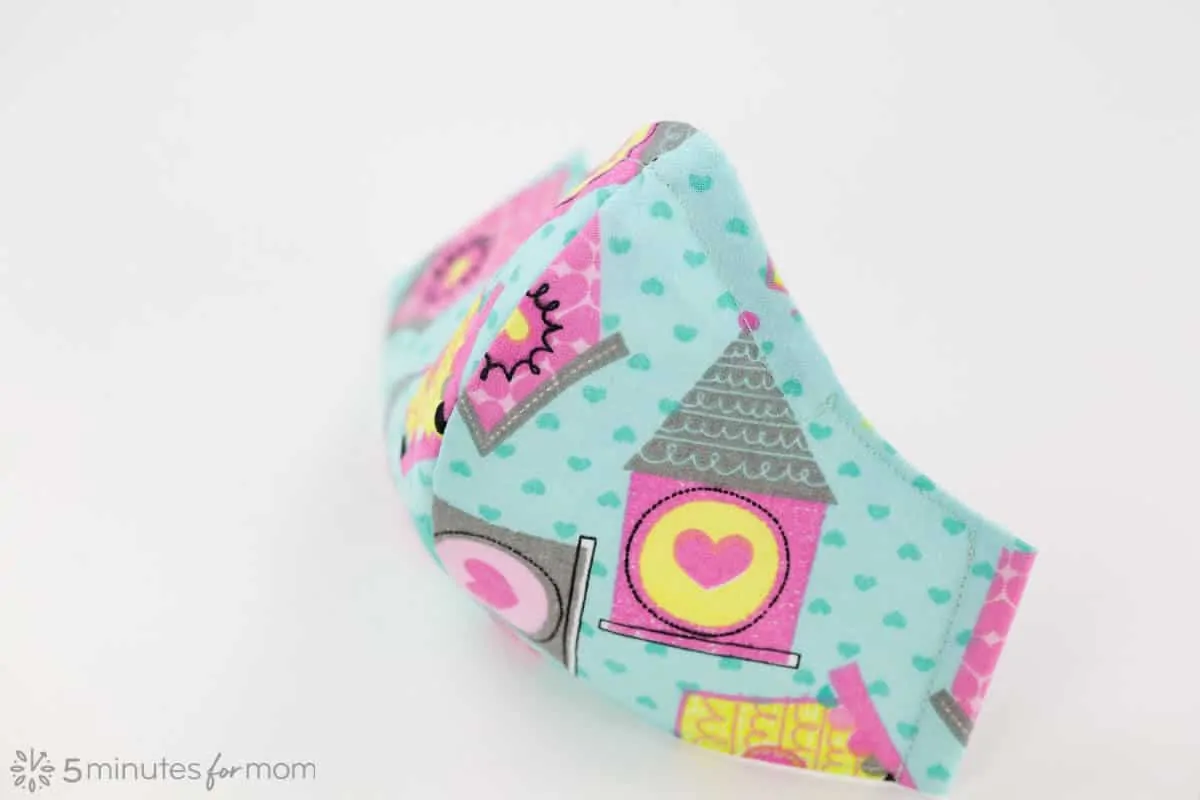
And you are done!
We hope you love your new masks and we hope you and your loved ones stay safe and healthy.
More Homemade Face Mask Tutorials
In case you missed our first Fitted Face Mask Pattern tutorial, click over to our post Best Fitted Face Mask Pattern PDF in 9 Sizes which includes the tutorial demonstrating how to make our Fitted Face Mask with Knit Binding.
To learn how to sew a pleated face mask, click over to our DIY cloth face mask pattern and tutorial which also includes pattern sizes for adults and children.
If you like a pleated face mask with a filter pocket, click over to our Pleated Face Mask with Filter Pocket Pattern and Tutorial.

Find out how easy it is to make fabric ties for face masks with knit fabric from old t-shirts or leggings. We prefer to use these comfy face mask ties instead of elastic.
Please note: This tutorial is for a non-medical face covering and is not intended to prevent disease or protect the wearer from disease. Please use this tutorial and face mask at your own discretion.
Written by Janice Croze, co-founder of 5 Minutes for Mom
Talk with me: @5minutesformom and Facebook.com/5minutesformom
Pin with me at pinterest.com/5minutesformom