Preserve precious memories while you create a unique Mother’s Day gift with this photo transfer to fabric craft idea. Transfer kids’ artwork, childhood handprints, handwritten recipes, and more onto cotton or linen to make decorative tea towels.
You and your kids (teenagers too!) will love this latest DIY in our ongoing sponsored partnership with Testors.com.
Looking for some new ideas to craft with your family this spring?
 We are thrilled to host another Testors Crafternoon to help you and your family have fun creating memories together.
We have a special Mother’s Day craft project where everyone in the family can join in the fun.
You might wonder how everyone can get involved in making image transfer tea towels — but hear me out…
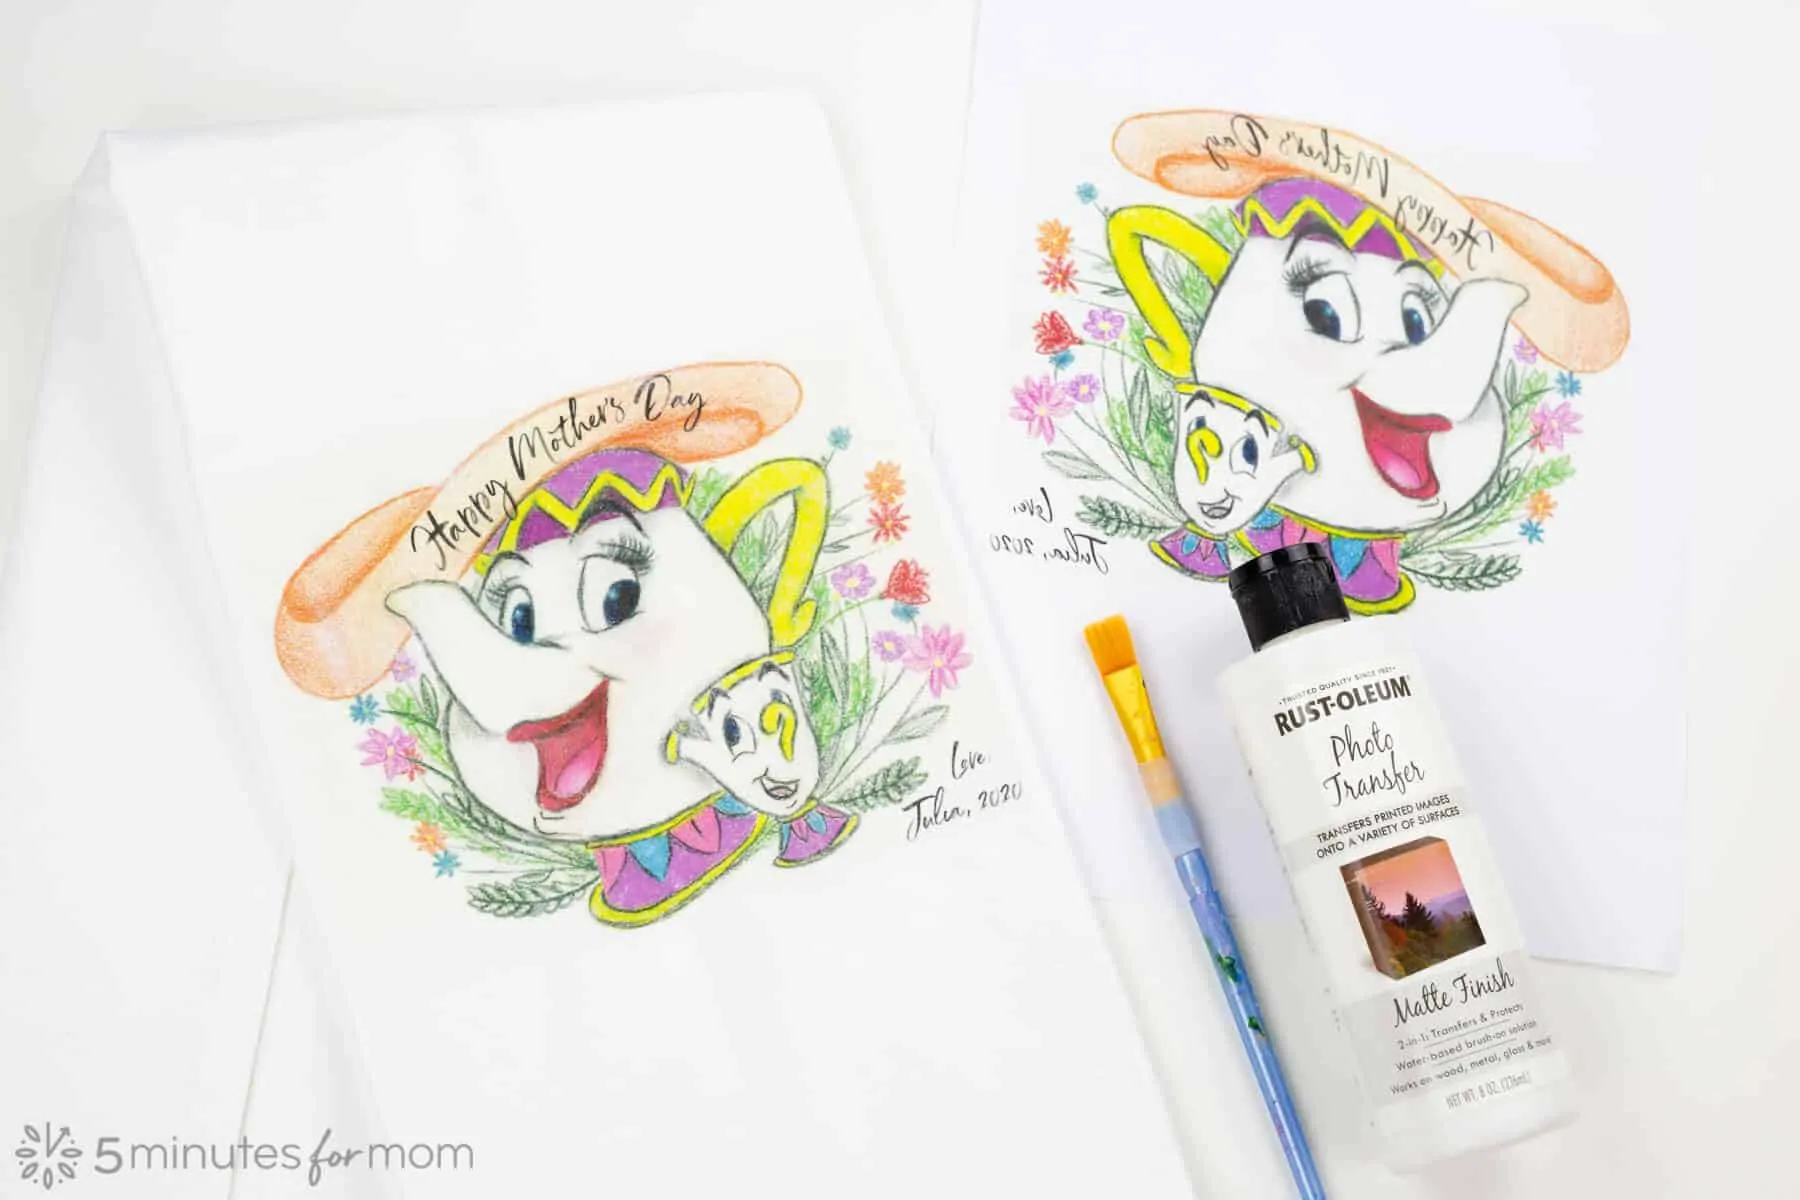
For this project, all your kids, from little ones to tweens and teens, can create any drawing, painting, or message they want to transform into family heirlooms.

And the adults in the house can participate too.
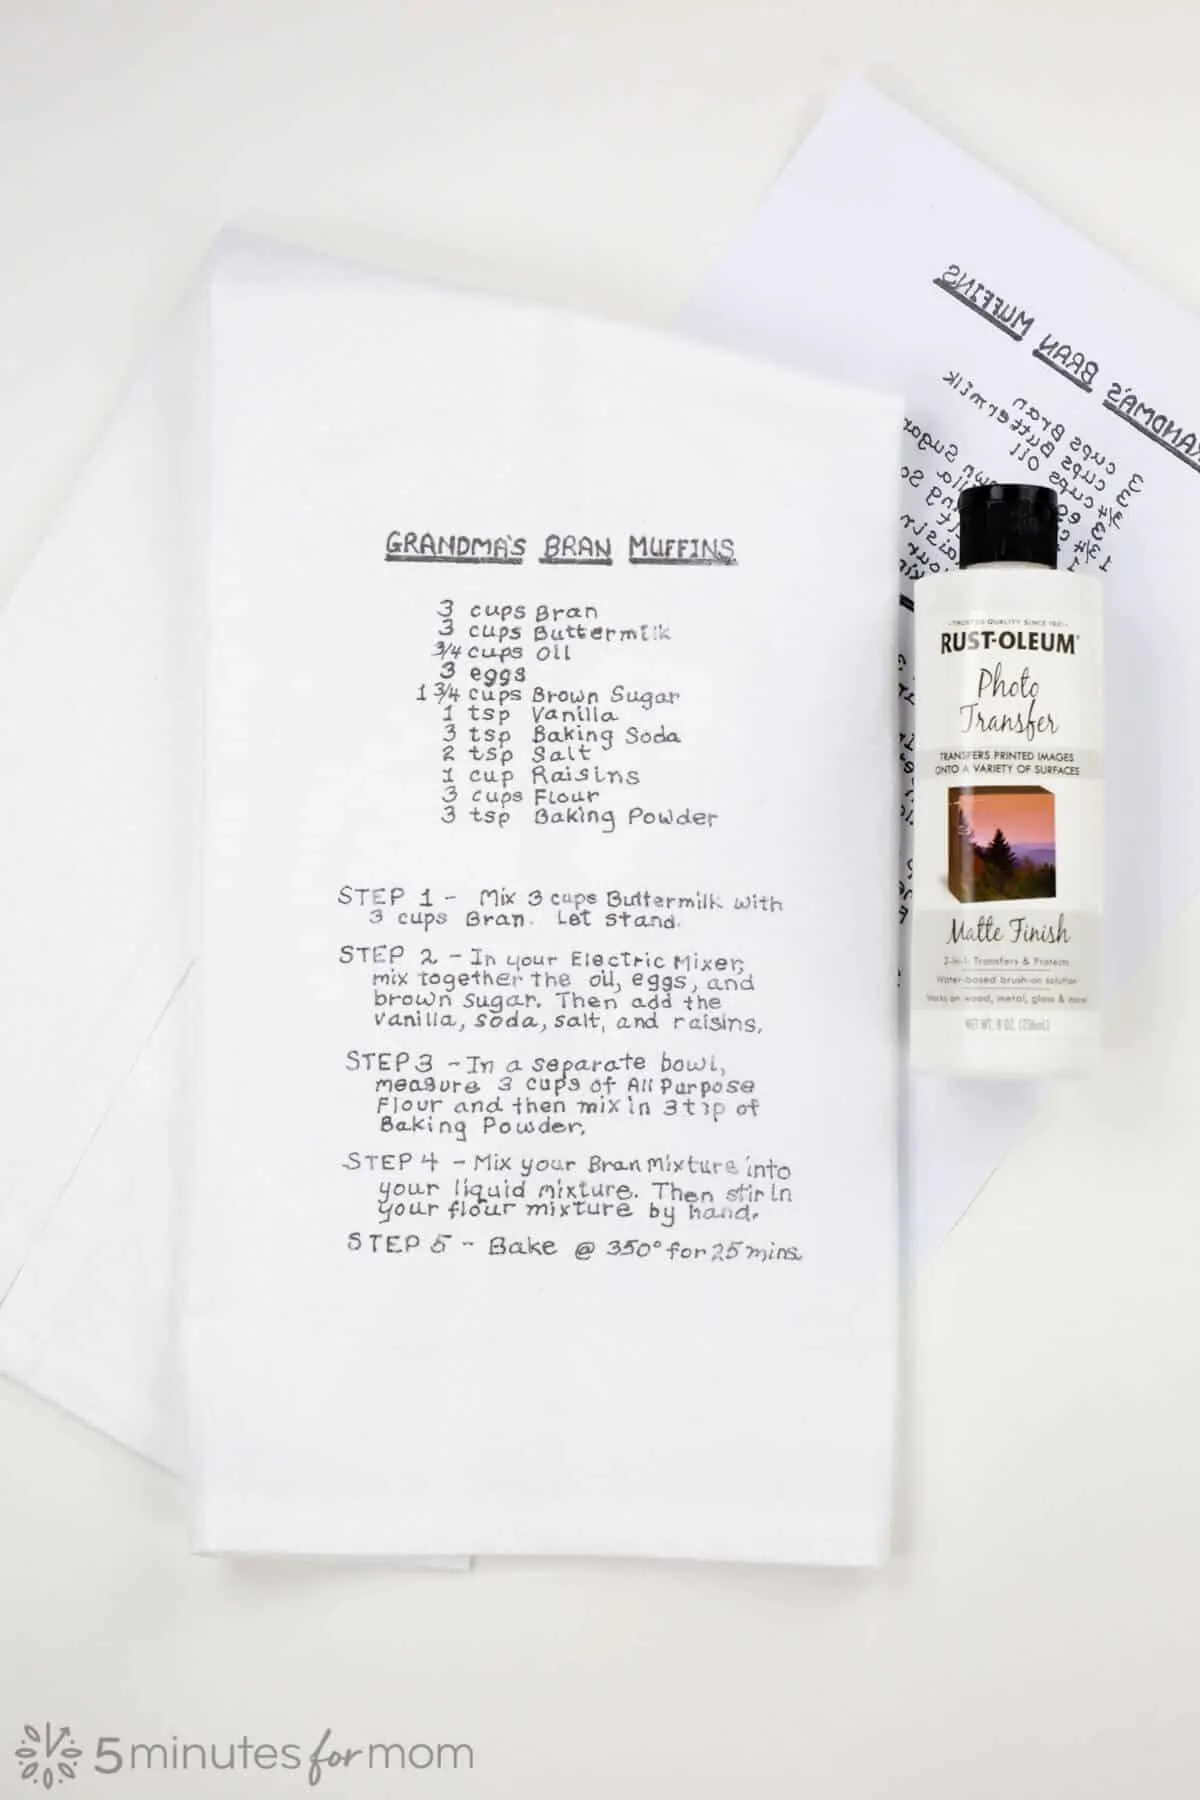
Handwritten recipes, messages, and poems are a wonderful way to make a personalized memento.
I had my mom write out a copy of her Bran Muffin recipe, the one she always made when I was growing up, to preserve not just the recipe, but her handwriting with a DIY recipe tea towel.
Adults can also dig through children’s old artwork to find treasures to hold onto.
My son is eighteen now and my daughter is twelve. This past week, I spent some time sorting through my stashes of old cards and artwork they made when they were little.
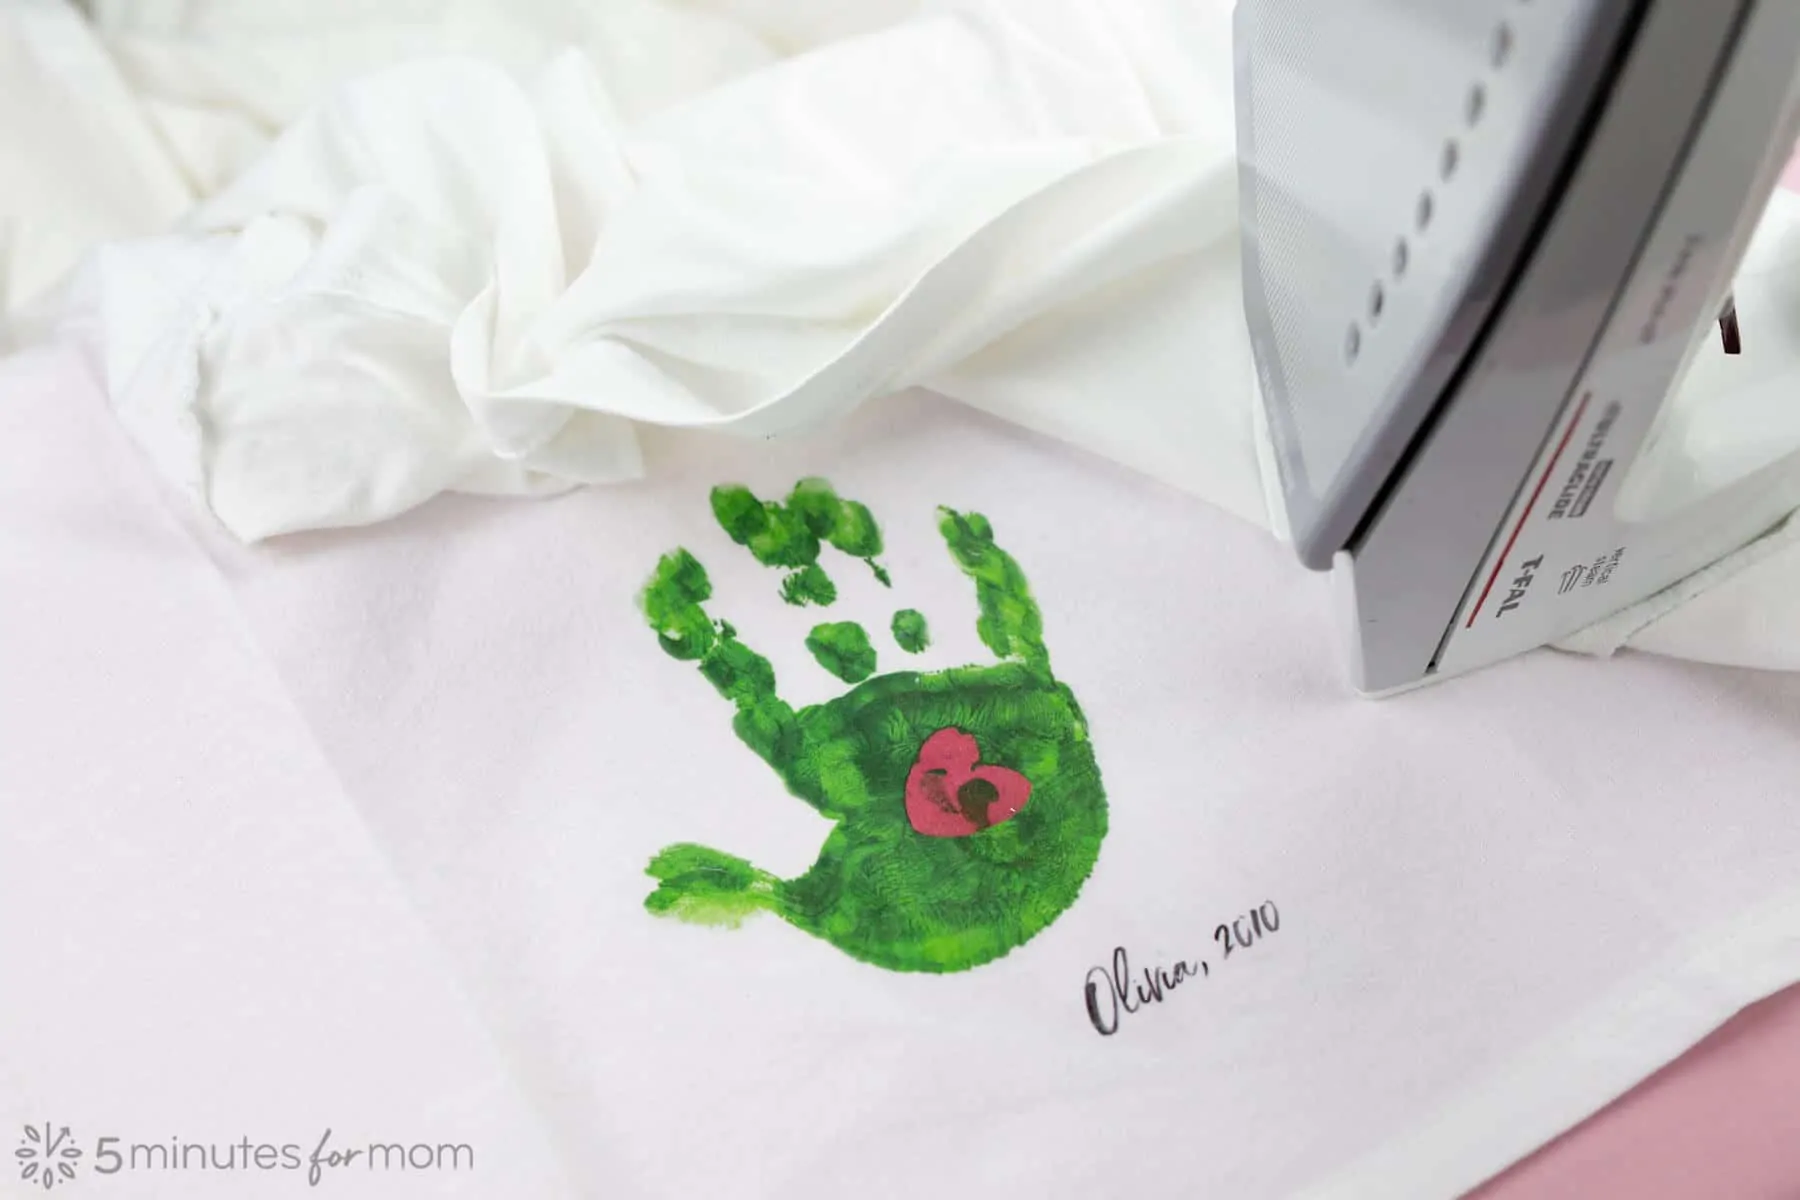
I photographed and scanned some special pieces so that I can make sure I have them forever and I used some of them to make these decorative tea towels.
![]()
I can’t believe my babies are grown up now. It is so amazing to be able to use something they made when they were little and turn it into a new memento to hold onto.
If you or family members want to sew, sewing a tea towel is super simple. Basically, all you are doing is hemming a rectangle. If you don’t have a sewing machine, you can even sew it by hand.
But if you aren’t in the mood to sew, you can buy plain white tea towels online. Just make a quick online order and you will be good to go.
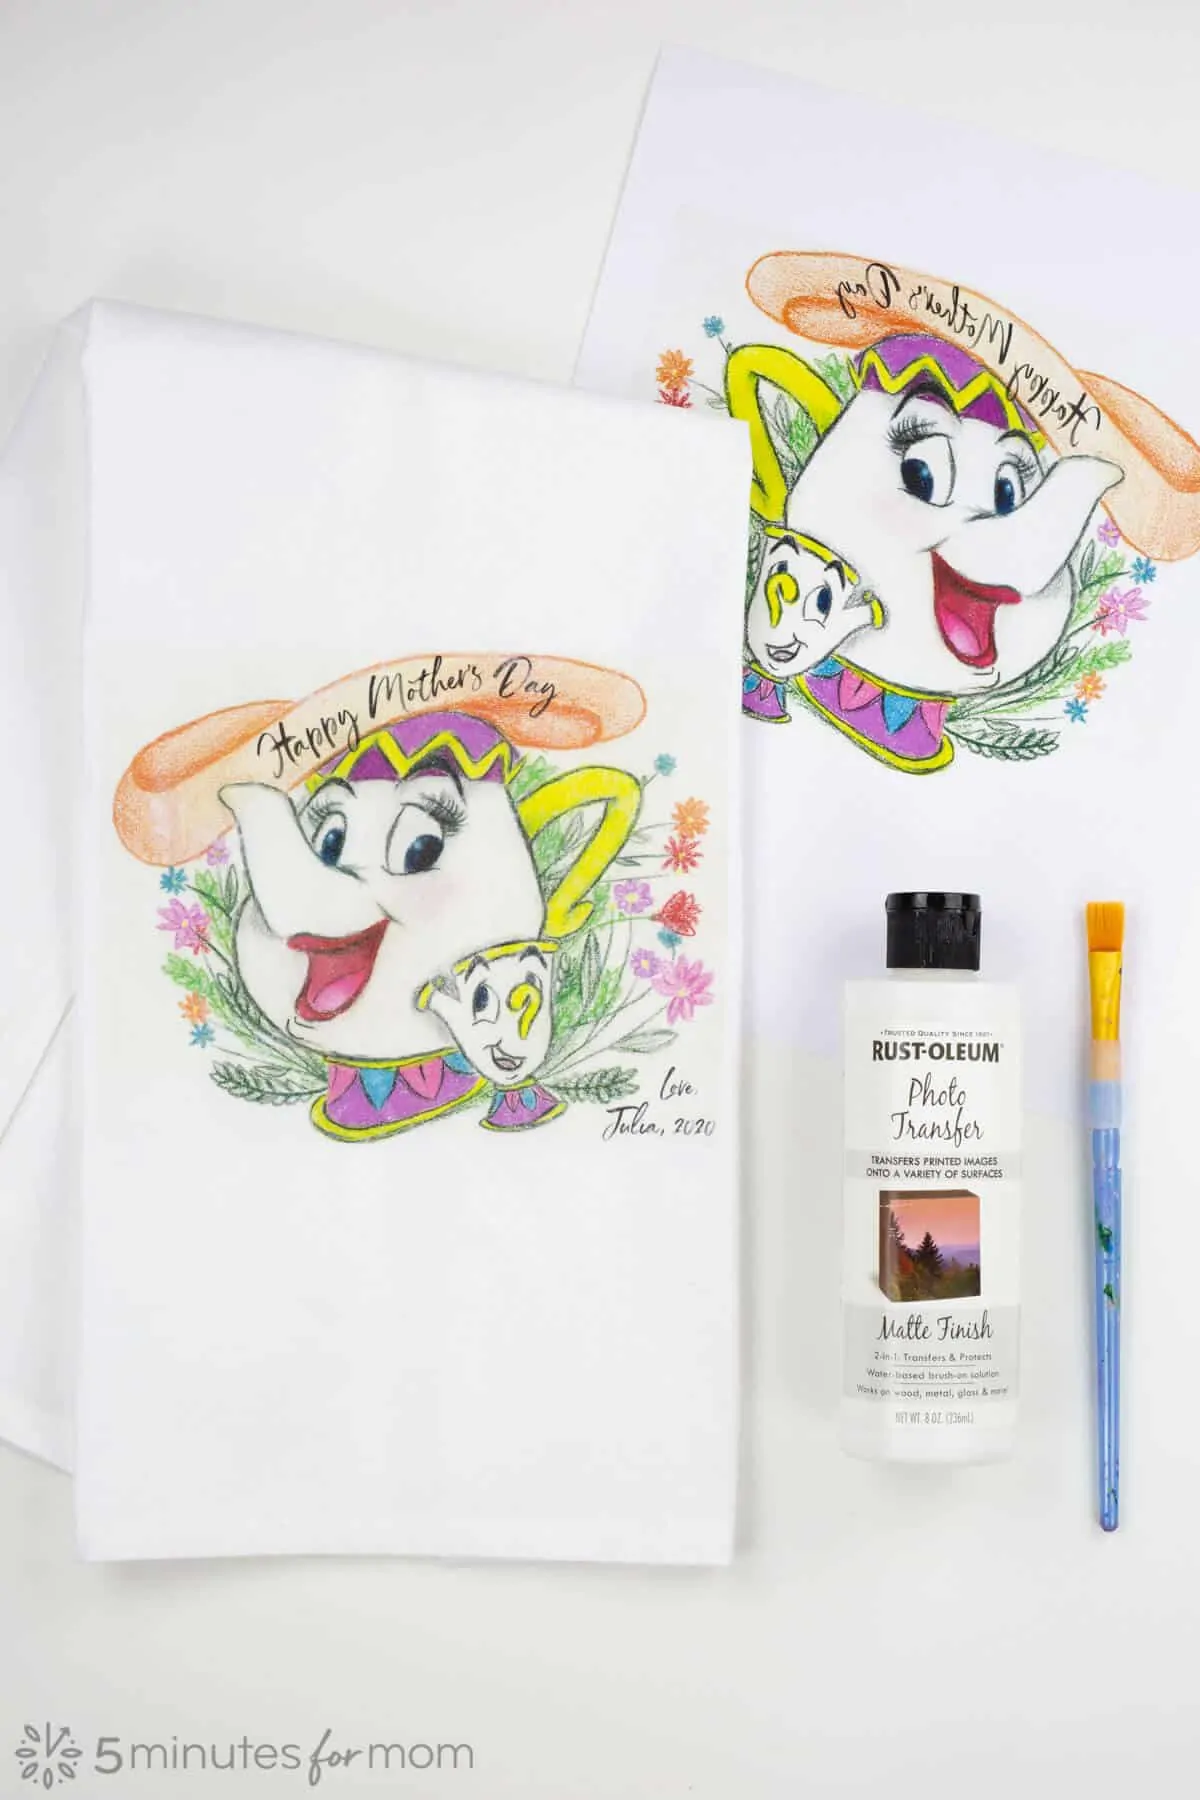
So if you are looking for a creative family activity, grab some Rustoleum Photo Transfer and make something wonderful…
How to Make a Photo Transfer Tea Towel
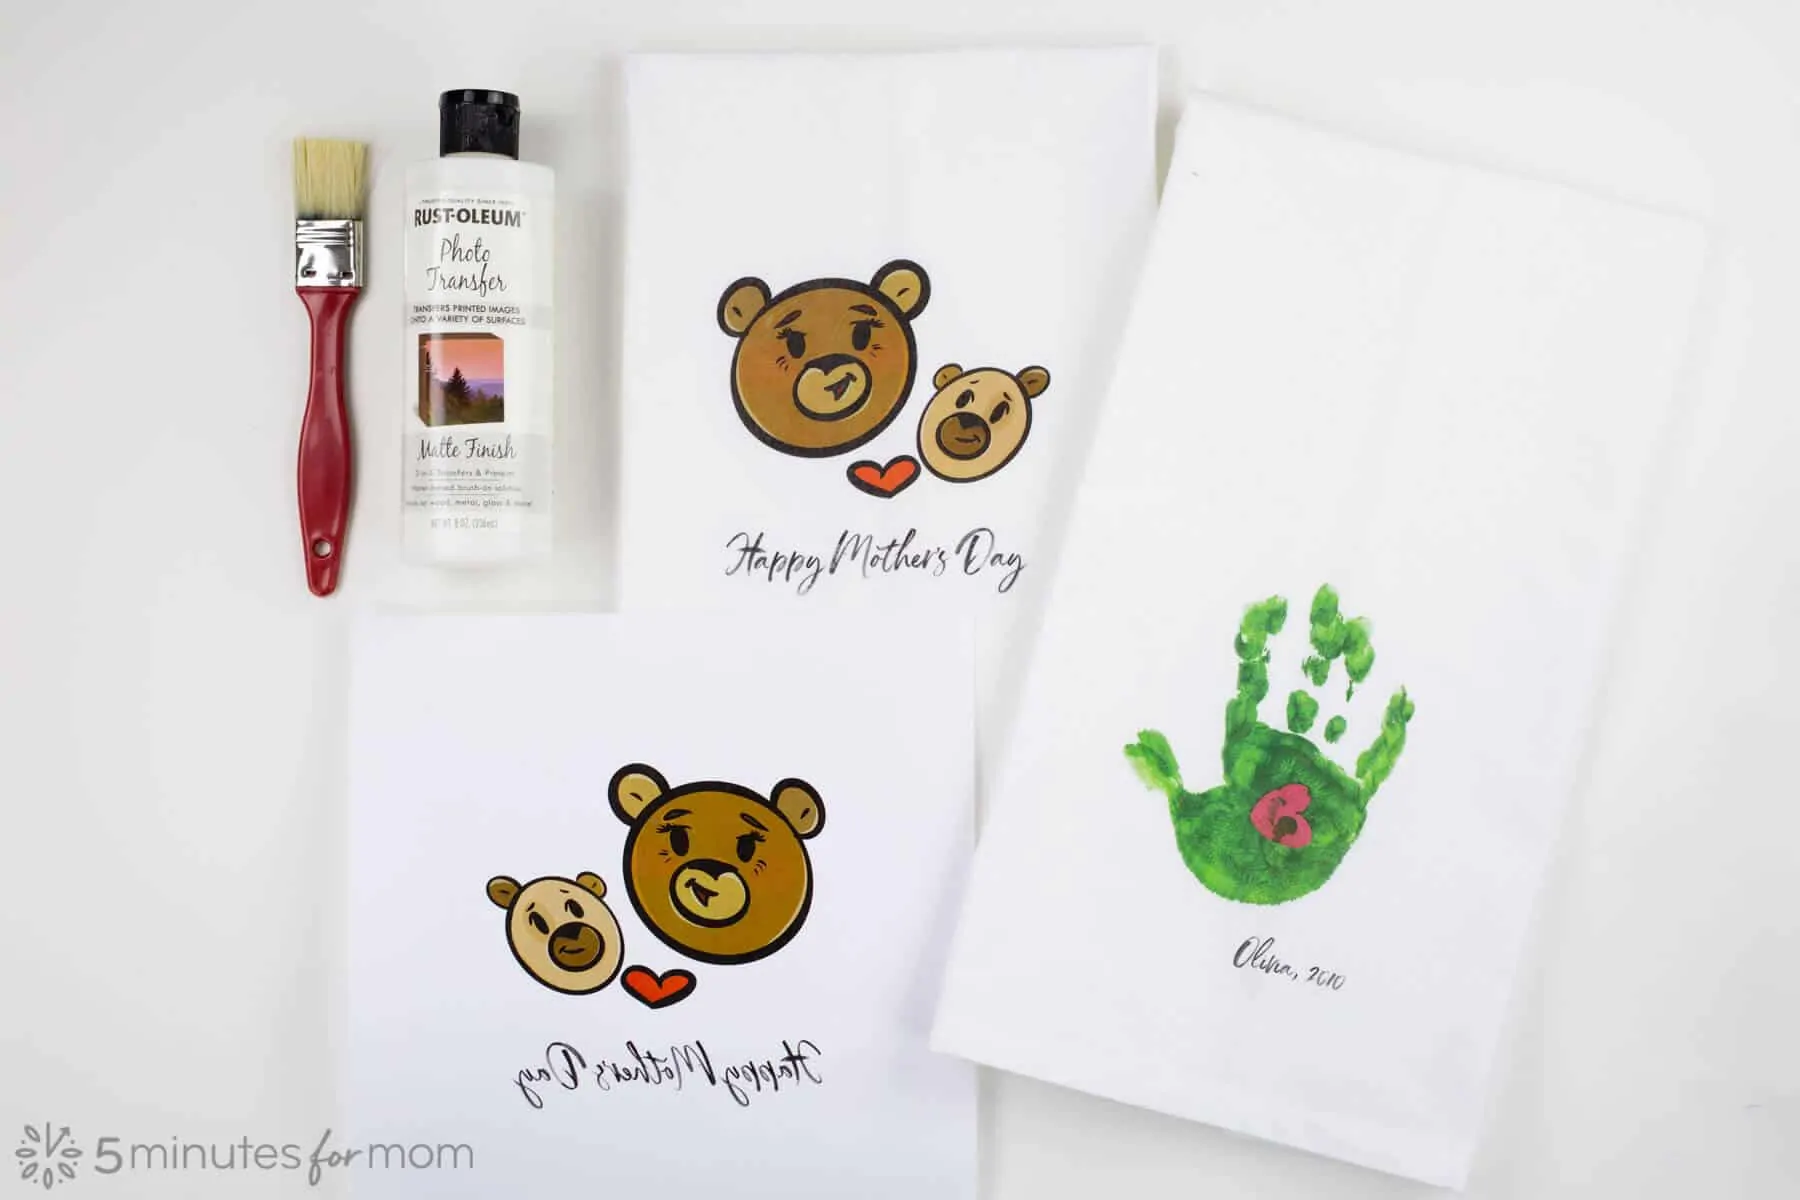
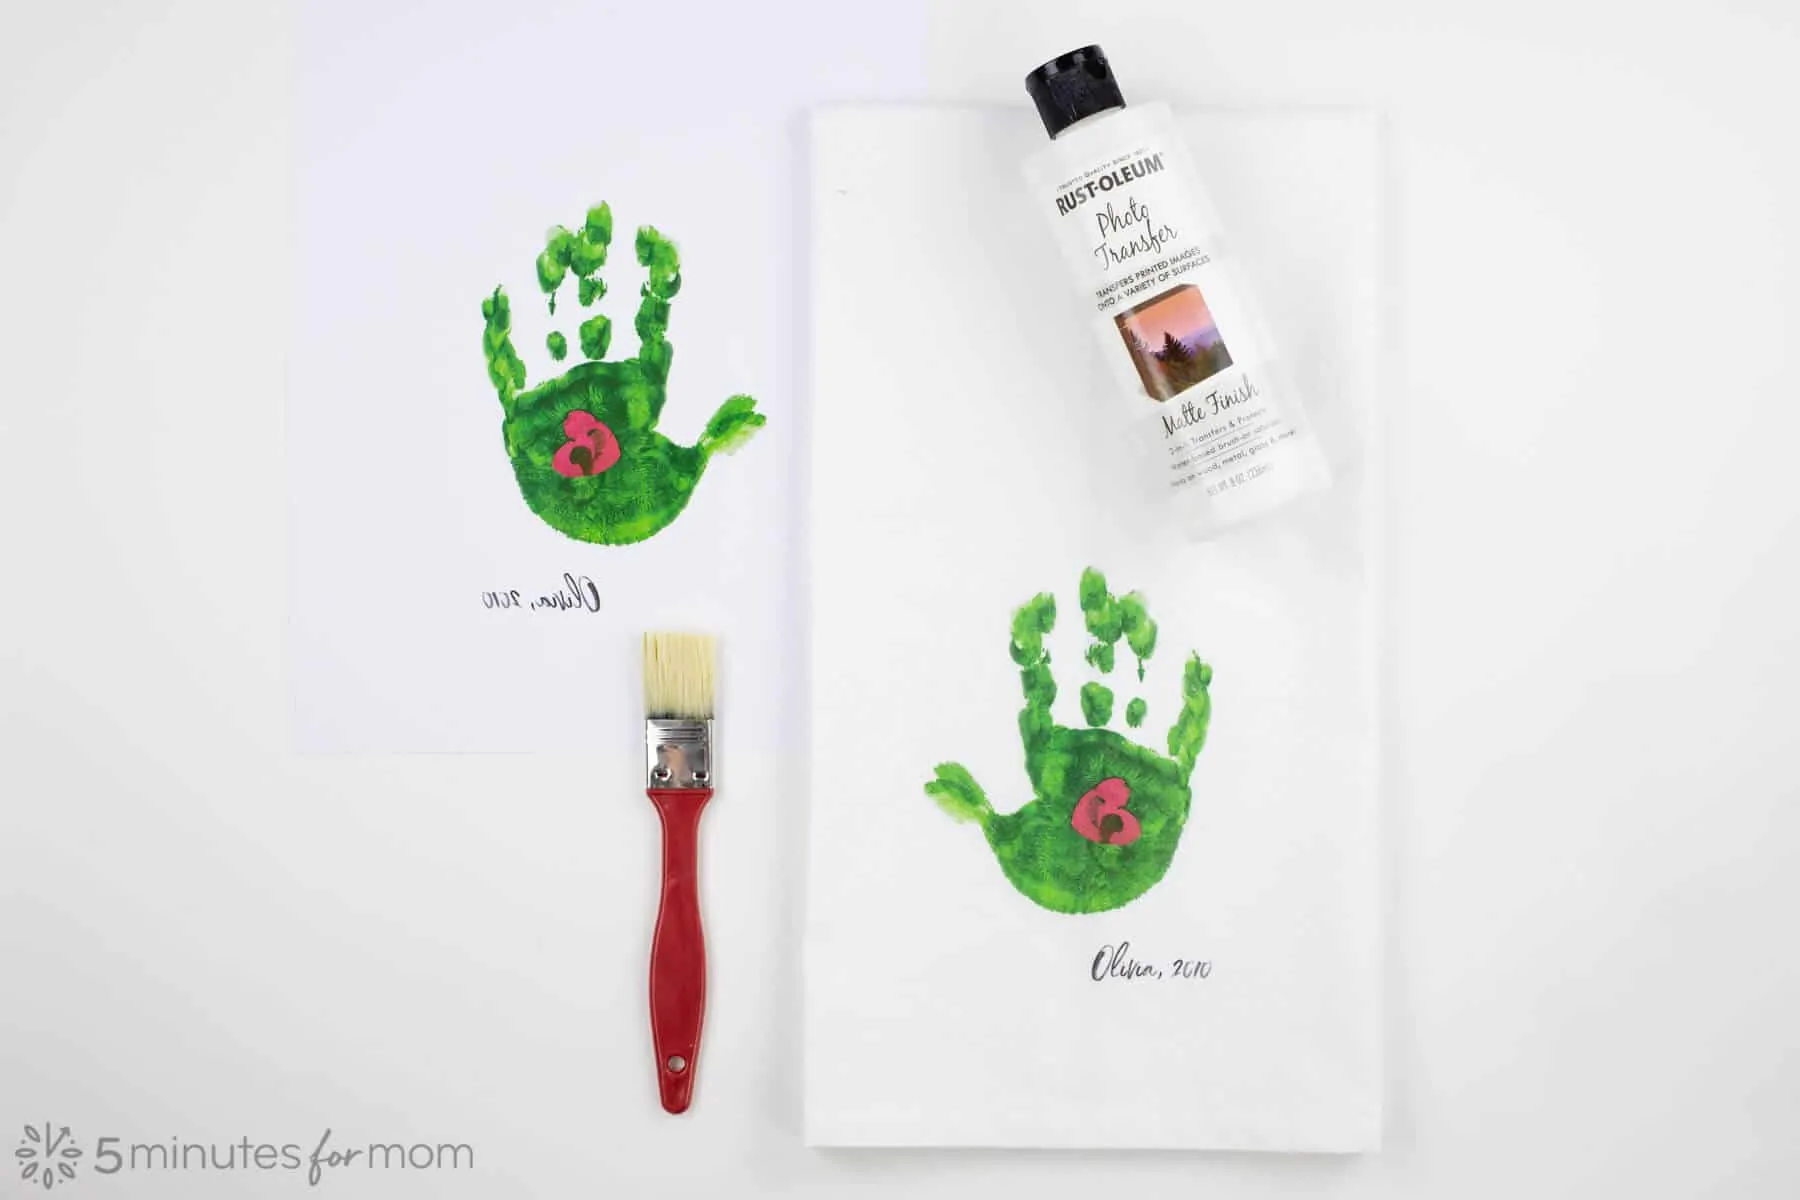
Supplies
- Rustoleum Photo Transfer
- Paintbrush
- Artwork flipped horizontally and printed on standard paper using LASER printer
- Small cloth or rag
- Iron and ironing board
- Pressing cloth (to protect the iron when pressing finished transferred artwork)
- Cotton or linen tea towels – or cotton or linen fabric to make tea towels
Where To Buy Rust-Oleum Photo Transfer
You can buy Rust-Oleum’s Photo Transfer online from The Home Depot:
Step One – Sew Your Tea Towel
If you are using pre-made tea towels, skip to Step Two.
To make a decorative tea towel that will photo transfer to fabric well, you can use woven cotton or linen, or a cotton/linen blend.
The dimensions on your tea towel are totally up to you.
If you measure all the tea towels in your house, you will notice that tea towels range in size. Most tea towels are around 16 by 28 inches or 18 by 30 inches but some flour sack tea towels as large as 31 by 31 inches.
Depending on the dimensions of your fabric, you can make your tea towels whatever size you want to get the most out of your fabric.
For example, my fabric was 60″ wide and I bought a few yards so that I have extra for making DIY cloth face masks.
When I trim off the selvage, the fabric is about 58″ inches wide.
So I folded my fabric in half, lengthwise (selvages together,) and cut my tea towels 29″ x 17″.
I wanted my towels a bit thinner, so I cut mine at 17″ wide. But if you have one yard of fabric, then you can simply cut yours 29″ x 18″ and that will allow you to have four towels per yard of fabric.
How to Make a Tea Towel
- Pre-Wash and Iron Fabric
Before you cut your fabric for your tea towels, prewash your fabric and iron it. You will want your fabric smooth and wrinkle-free when you measure and cut.
- Cut Fabric
Using the dimensions of your fabric, work out the best size for your tea towels so that you can get the most towels out of your fabric.
An average tea towel is around 16″ x 28″ and it can vary. So whatever size works best for you will be fine. If you want your tea towels to be smaller, such as decorative “finger towels,” you can make your towel around 11″ x1 8″. But just remember that your design space on a finger towel will be considerably smaller.
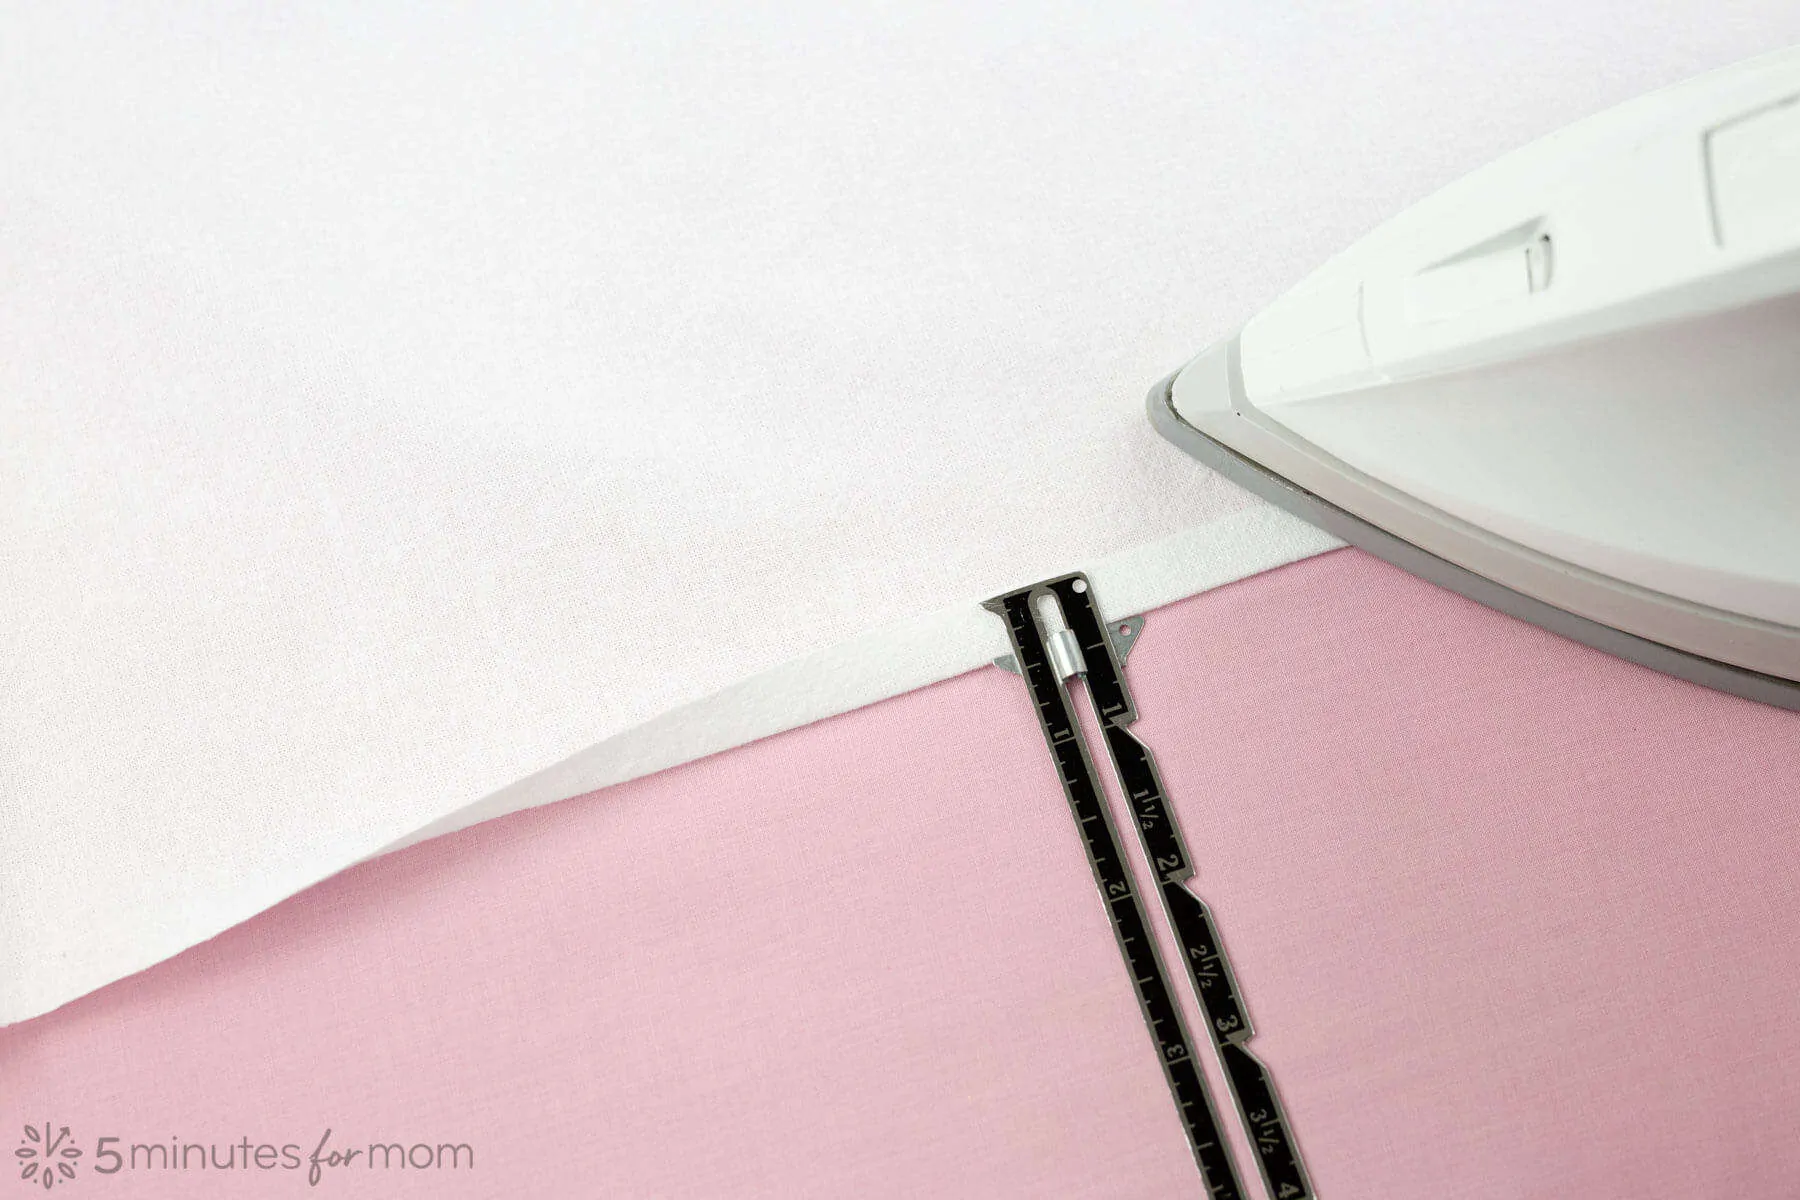
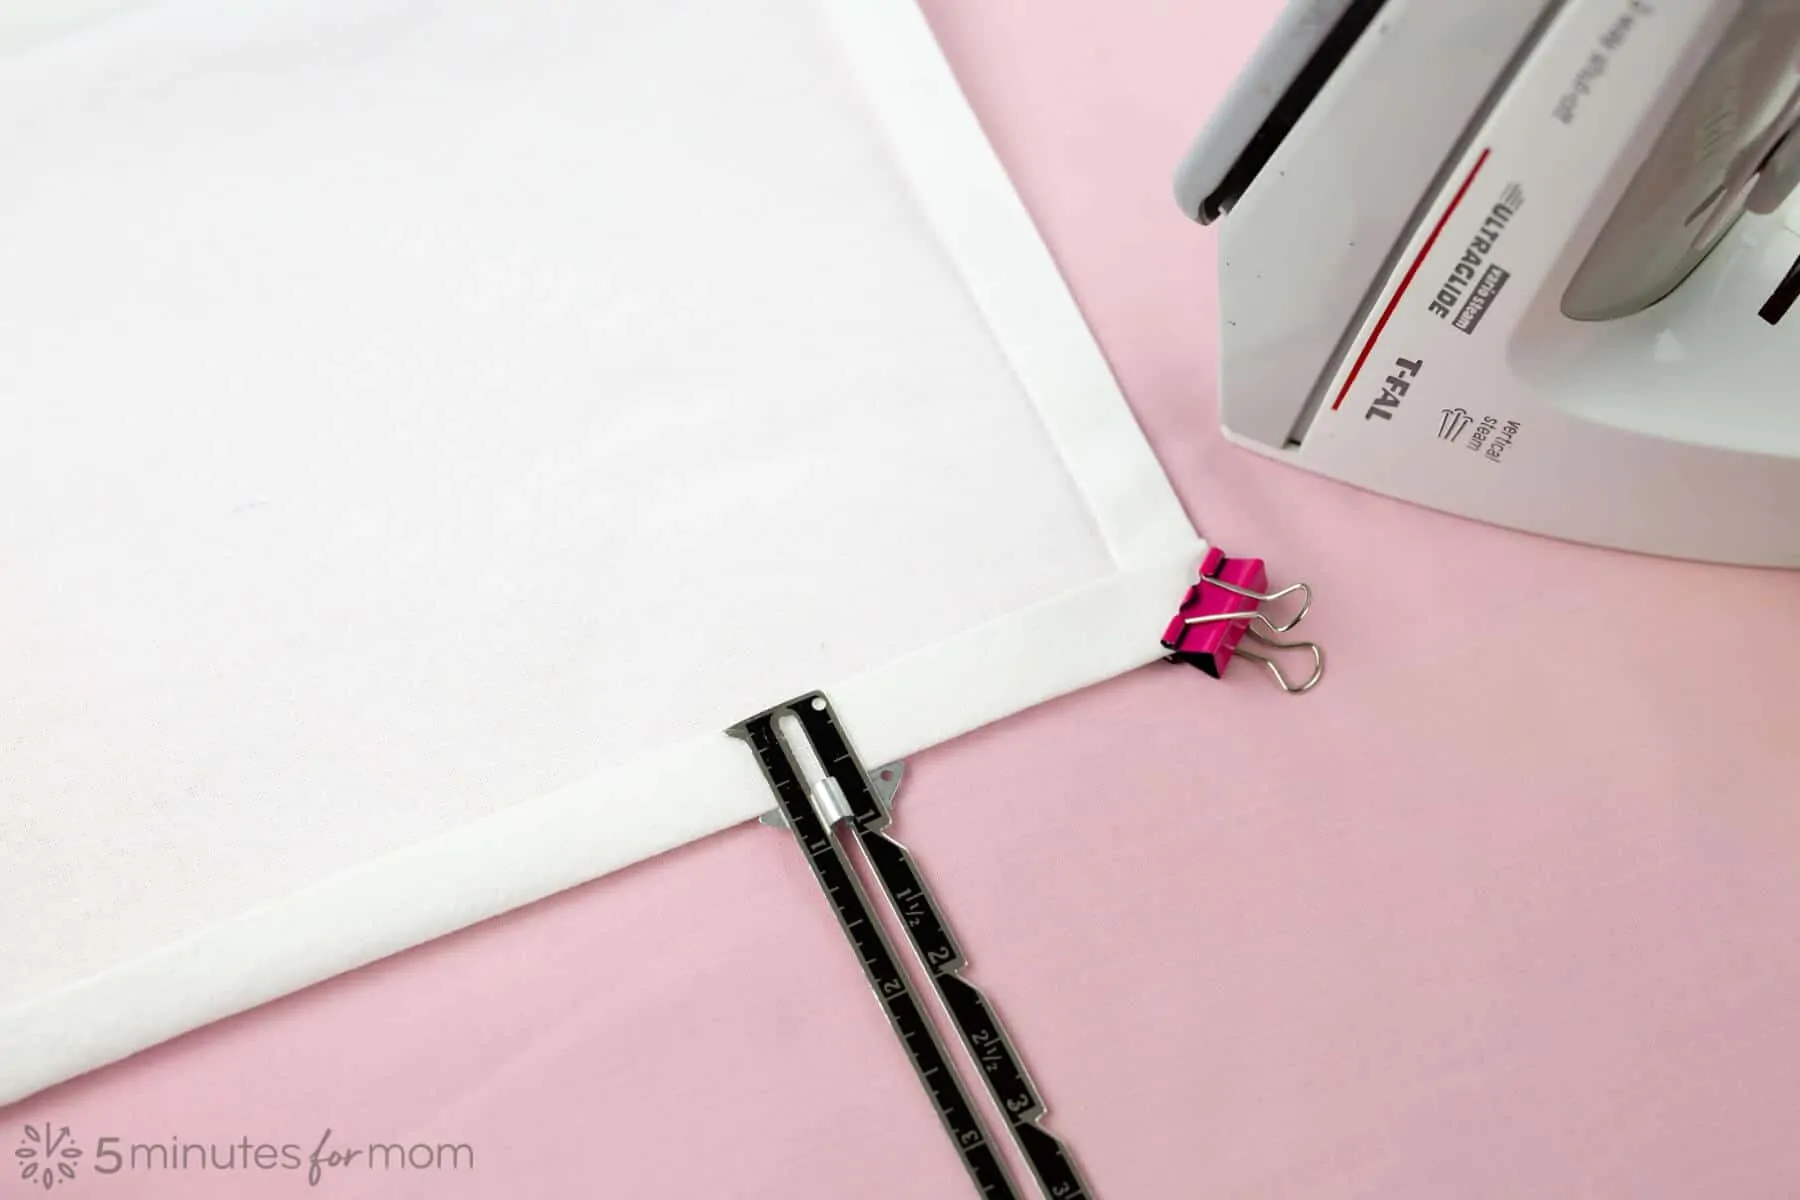
- Fold Hems and Iron
On each side of your fabric rectangle, fold over about 3/8″ and iron in place. Start with the two long edges and then fold the short edges.

Next, fold over each side once more, about 1/2″ or 5/8″ this time, to enclose the fabric’s raw edge, ironing and pinning in place as you work around all four sides of the rectangle.
Again, you can start folding with the two long edges and then fold the short edges.
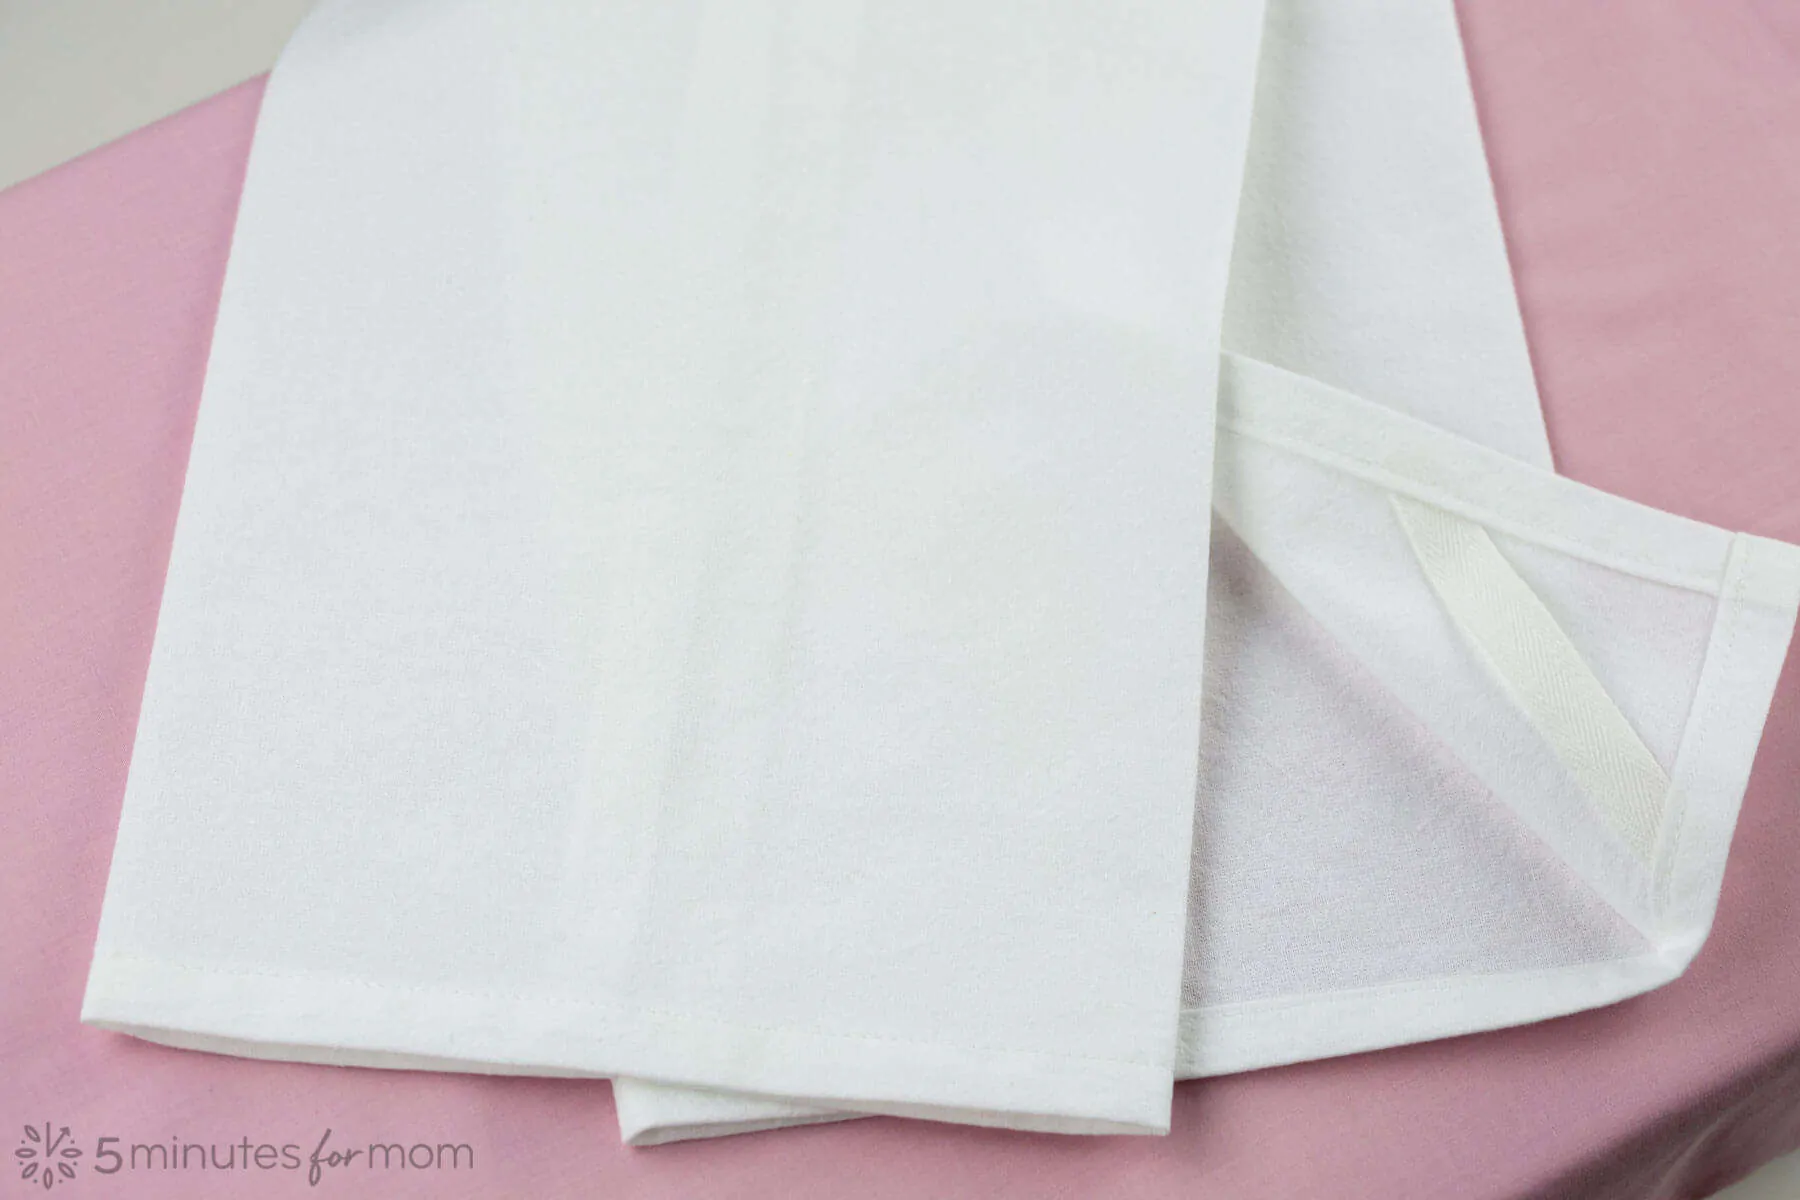
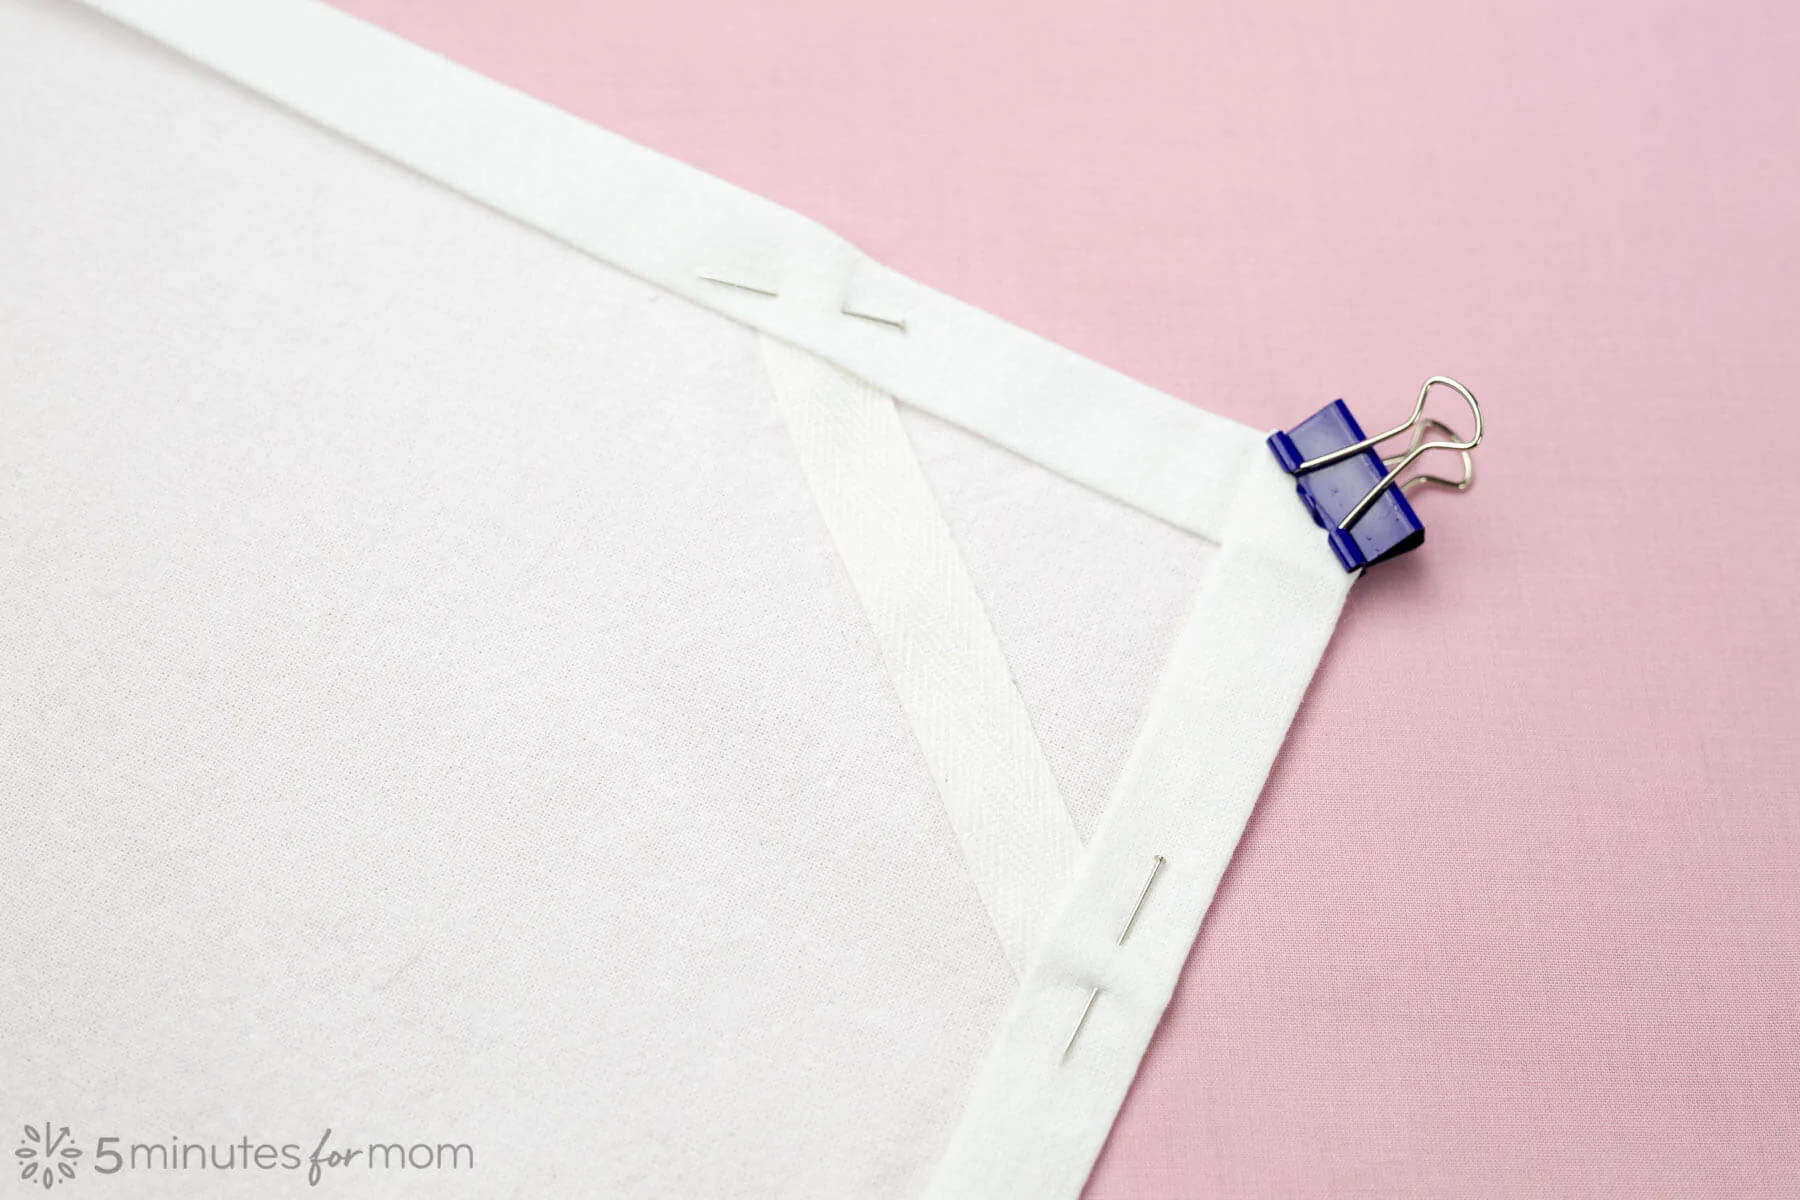
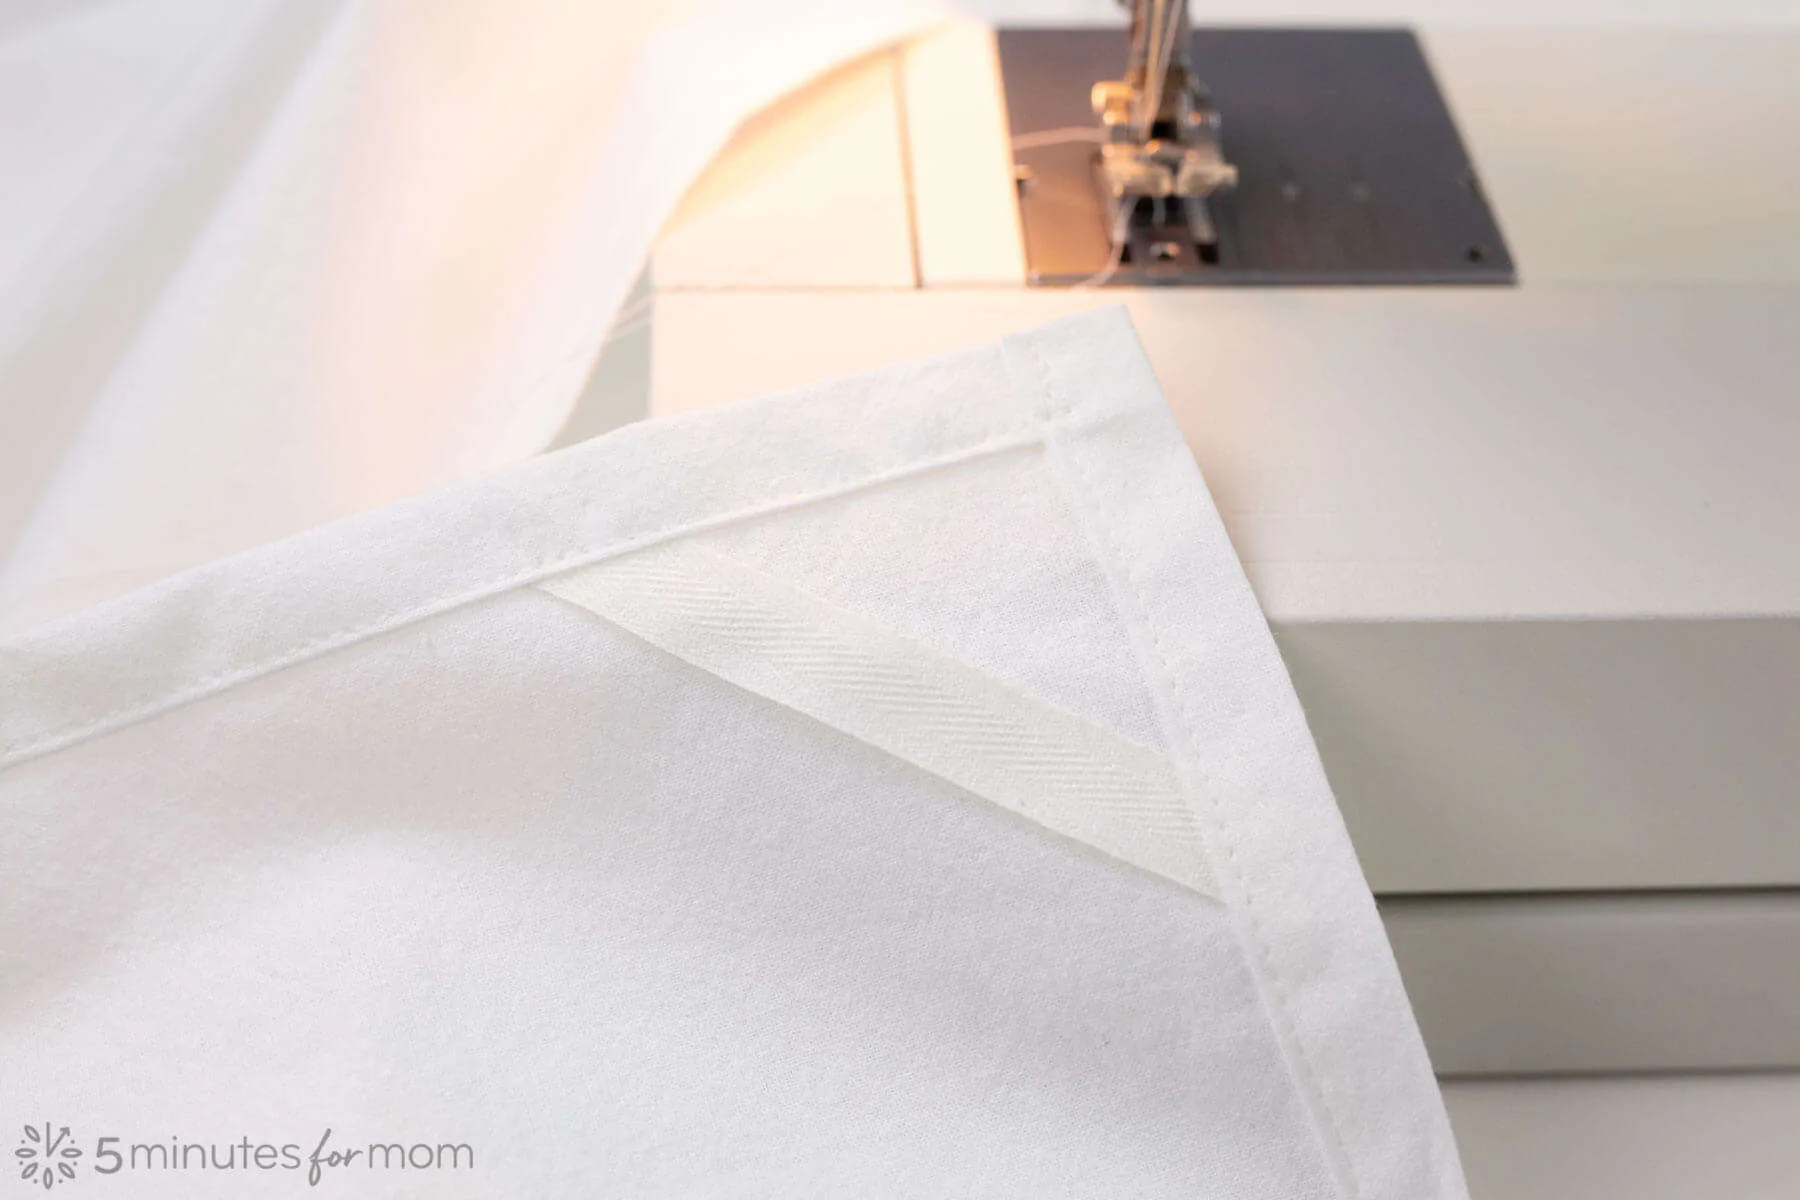
- Add Twill Tape for Hanging Towel (optional)
If you would like to easily hang up your towel, you can add a small piece of twill tape or grosgrain ribbon to one corner of your towel.
Simply tuck the ends of a 4 or 4 1/2″ inch piece of twill tape or ribbon under the hem of one corner, placed diagonally. Pin in place.
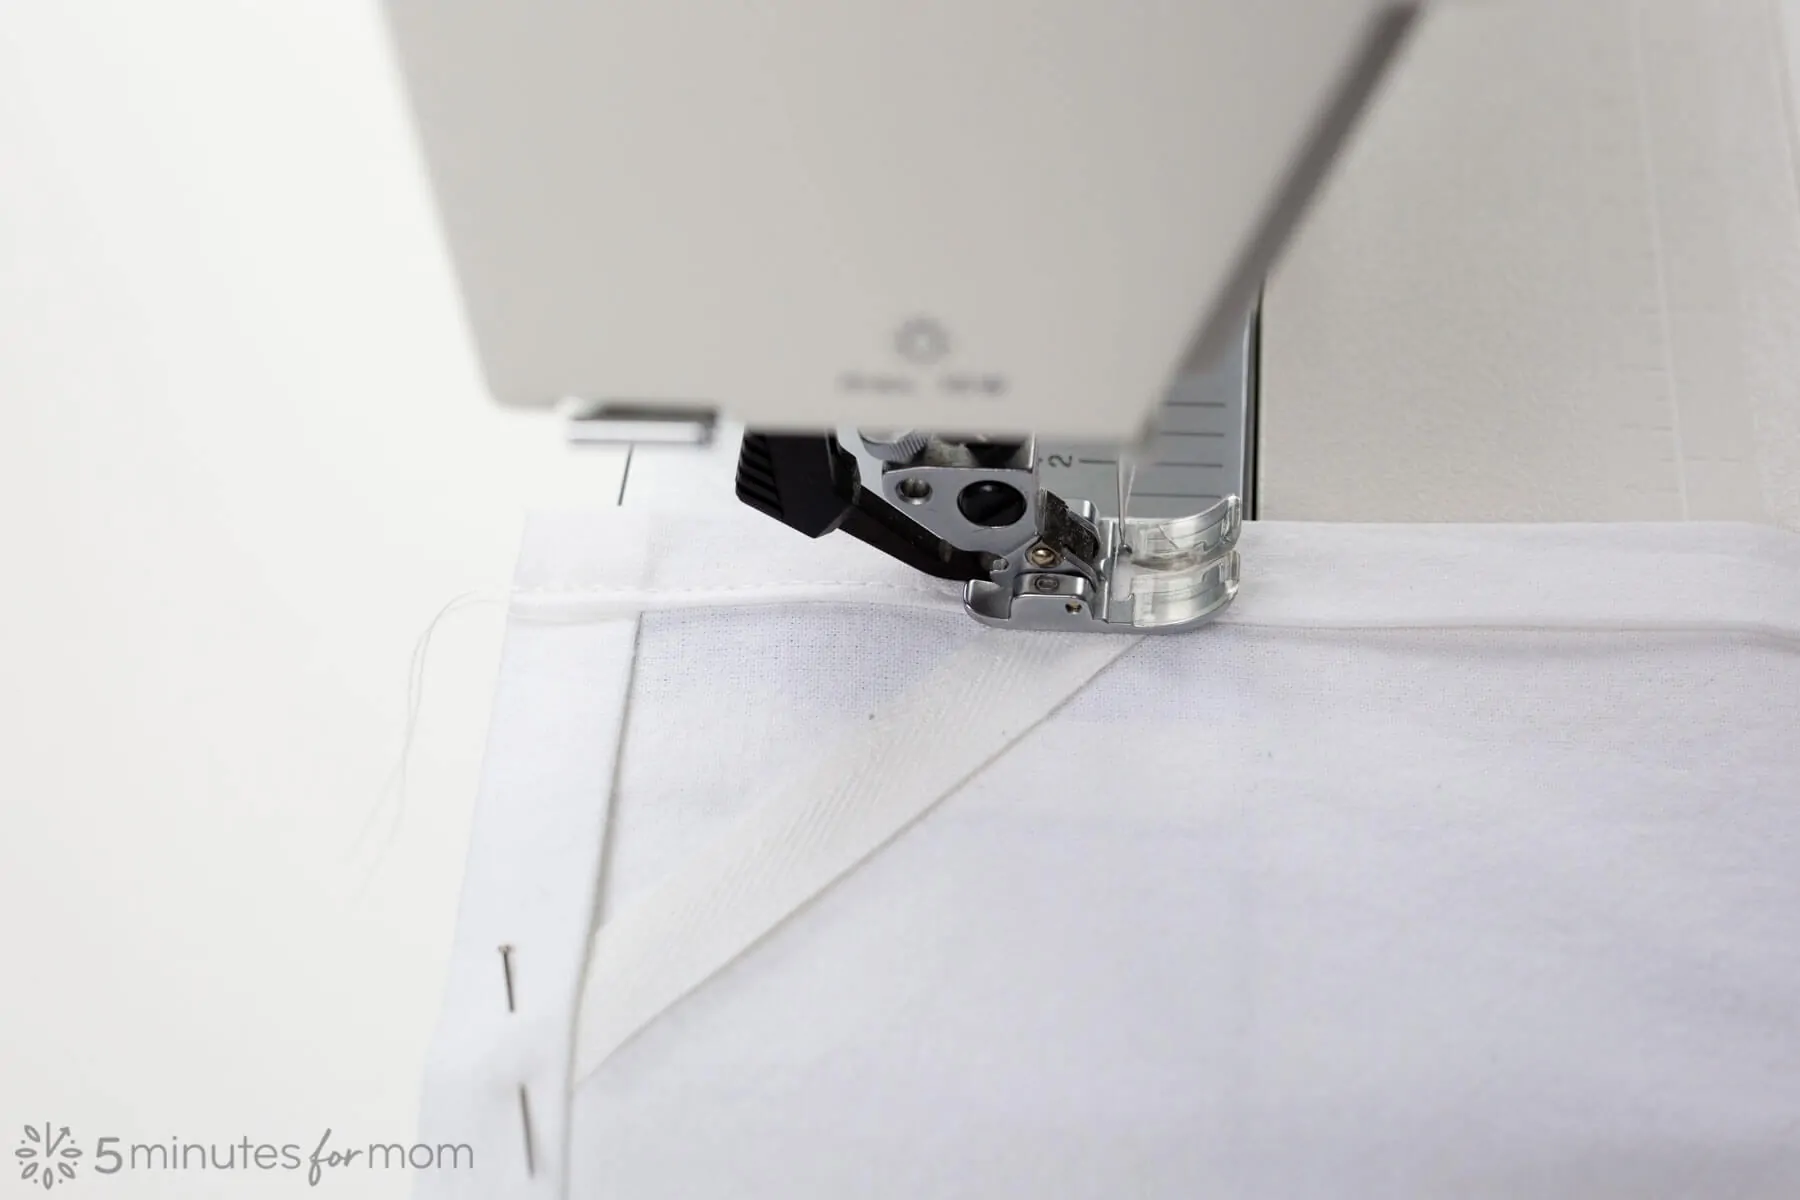
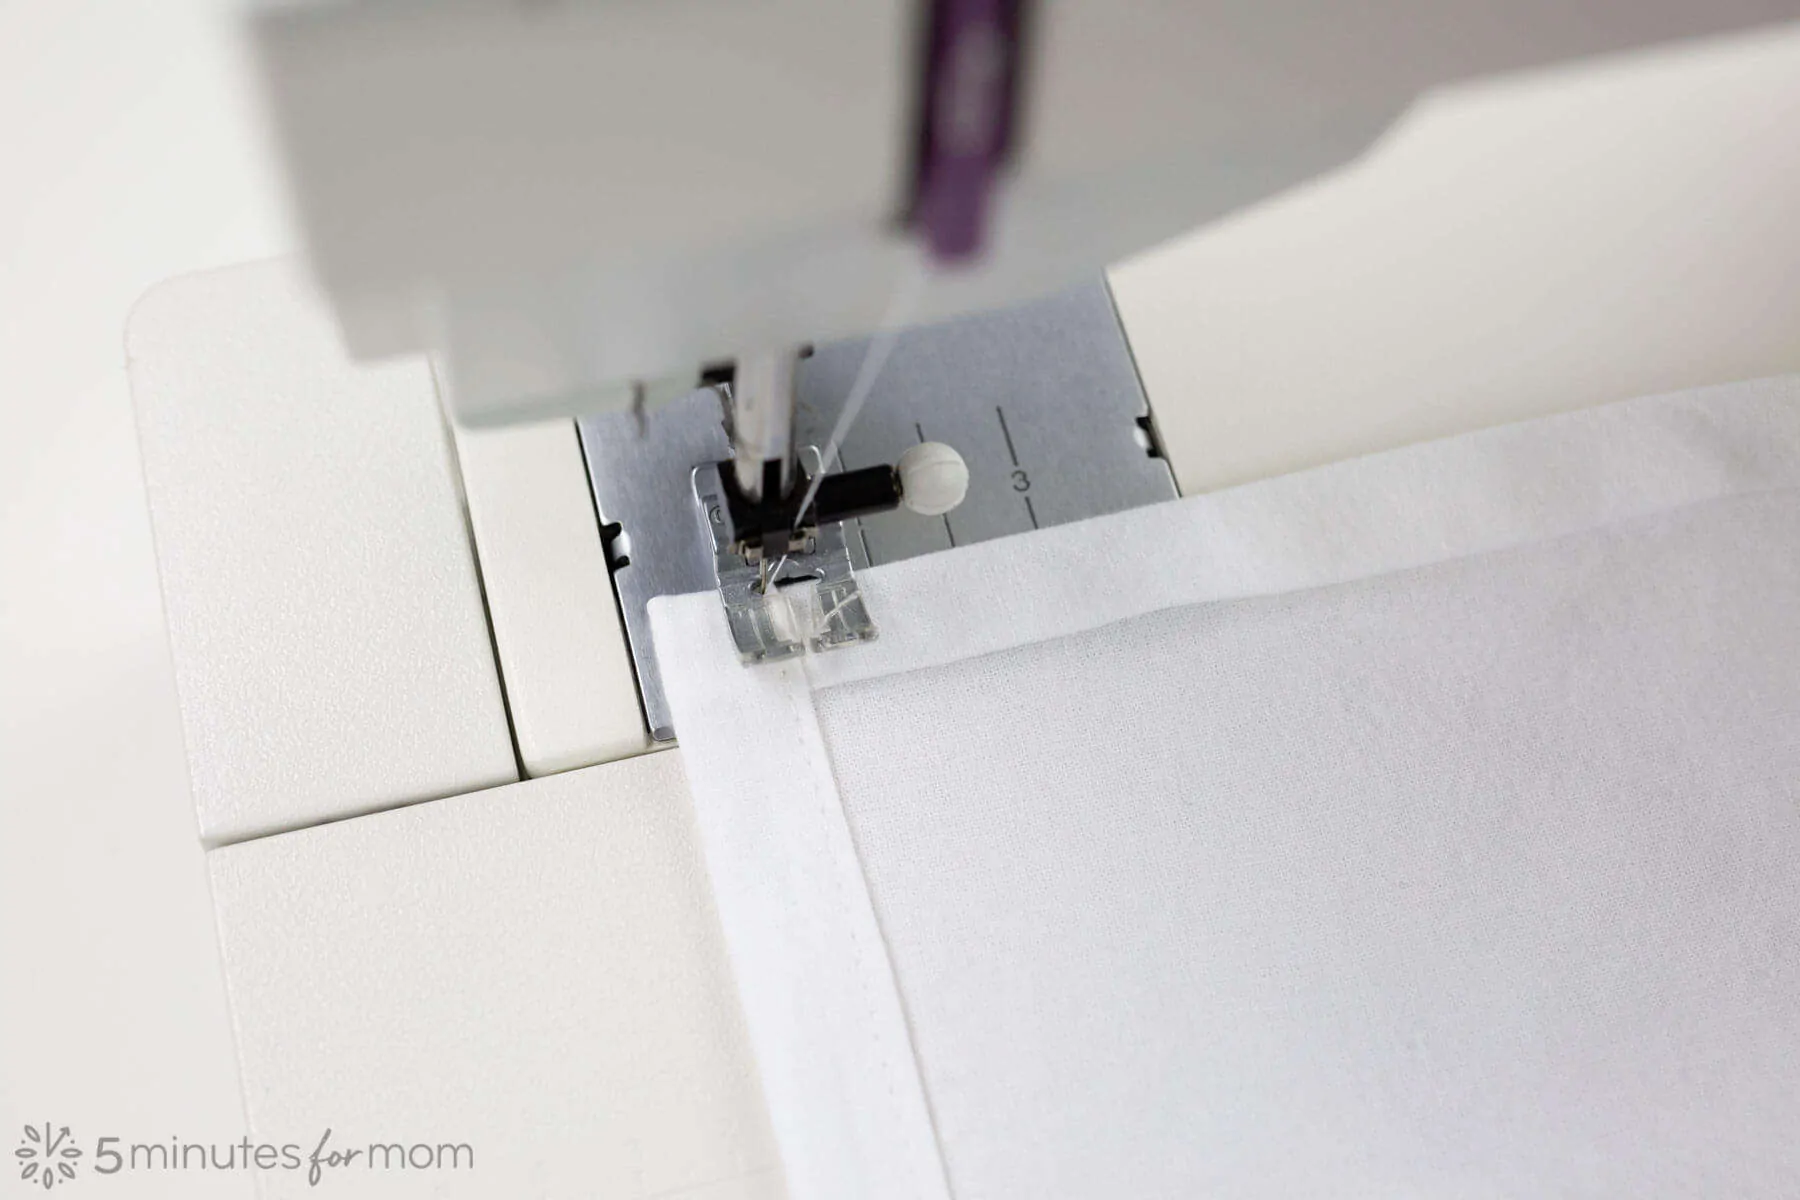
- Sew Hem
Sew a straight stitch around the entire towel, securing the hemmed edge.
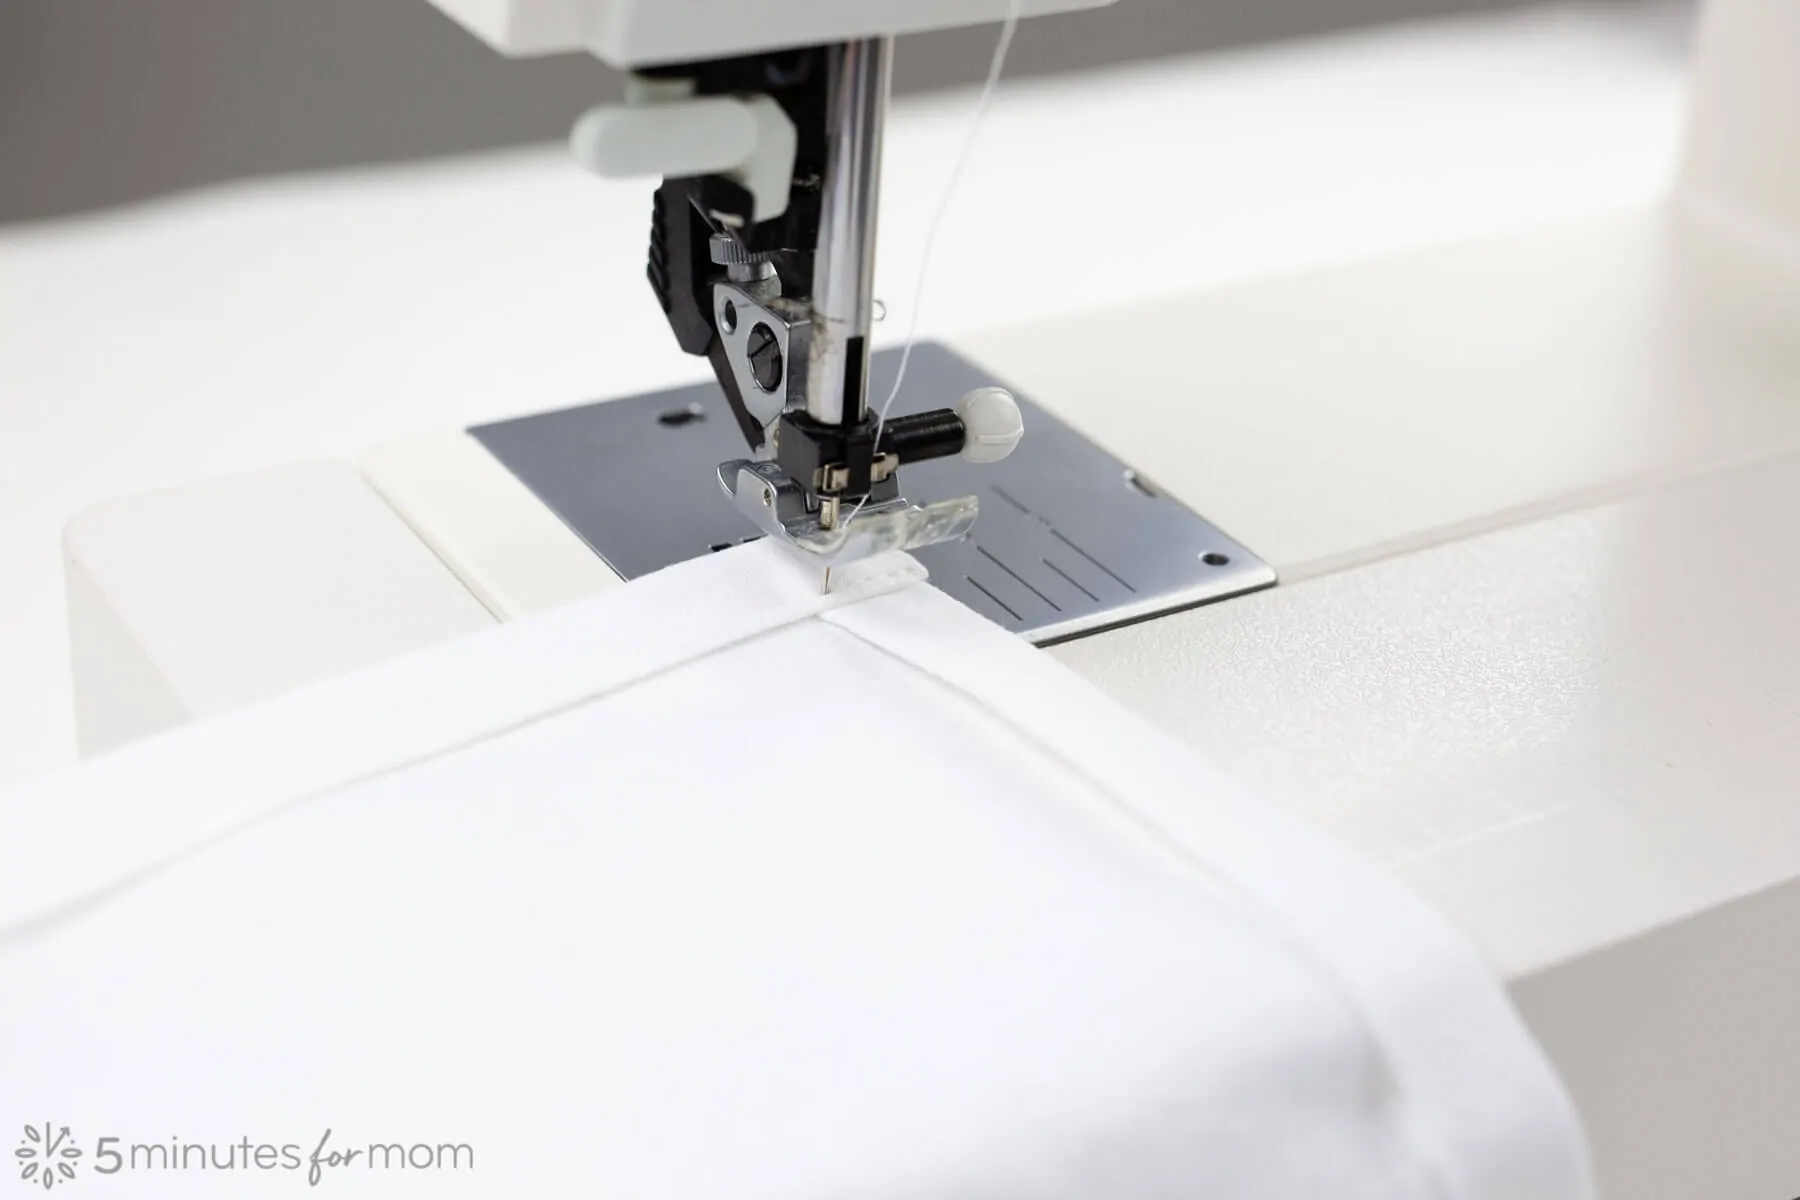
In the corners, extend your stitching to the edge to secure the hemmed corners.
To do so, stitch to the end, backstitch, and then with the needle positioned down into the fabric, lift presser foot, turn the fabric and lower presser foot to continue sewing down the next side of the towel.
After stitching all the way around the towel, press the finished towel.
Step Two Prepare your Artwork for Printing
After you and your family members have created their artwork, you need to prepare the artwork to print on a laser printer.
If the artwork is not already in a digital format, you will need to scan or photograph it to turn it into a digital file.
If you don’t have a scanner, you can use a photo scanner app such as Google’s PhotoScan.
With PhotoScan, you can take a photo of your artwork and PhotoScan will even remove any glare.
Once you have your artwork scanned, you can edit or make any necessary adjustments in photo editing software such as Photoshop or PicMonkey, if you don’t have Photoshop.
For easy sizing, layout your artwork in an 8.5″ x 11″ format so that you can gauge who big your piece will be. When your tea towel is folded, you will have a front panel that is about 7″ x 14″. So you will want to make sure your artwork fits within those dimensions.
Then you must FLIP THE IMAGE HORIZONTALLY so that when you print the image it is mirrored.
Once you complete the photo transfer process the image will then display correctly.
Step Three – Print Your Artwork on a Laser Printer
To use Rustoleum Photo Transfer, you need to print your artwork on a LASER PRINTER or standard printer paper.
The photo transfer will not work with an inkjet printer and it will not work with photo paper.
We do not have a color laser printer, so we use the self-service printer at the local Staples.
If you do not want to go to a Staples in person due to quarantine, you can order your laser prints online.
Since our Staples is next to our grocery store, I wore my mask and made my copies when I was out for my grocery run.
Step Four – Apply Photo Transfer
Once you have your laser prints and your tea towels, finalize the layout where you want to transfer your image to the tea towel.
For easy placement, fold your towel and press. You can use the pressed folding lines to help you position your artwork.
Before using the photo transfer product, protect your work area since the photo transfer product may soak through the fabric as you transfer the image. I put down some plastic packaging that I had from some poster paper to cover my desk.
The product cleans up easily with soap and water, but it is always best to make sure you are protecting your surfaces for easier cleanup.
With your tea towel set aside, place your artwork face up on your covered workspace.
Apply a GENEROUS amount of photo transfer to the PRINTED side of your artwork laser-printed paper.
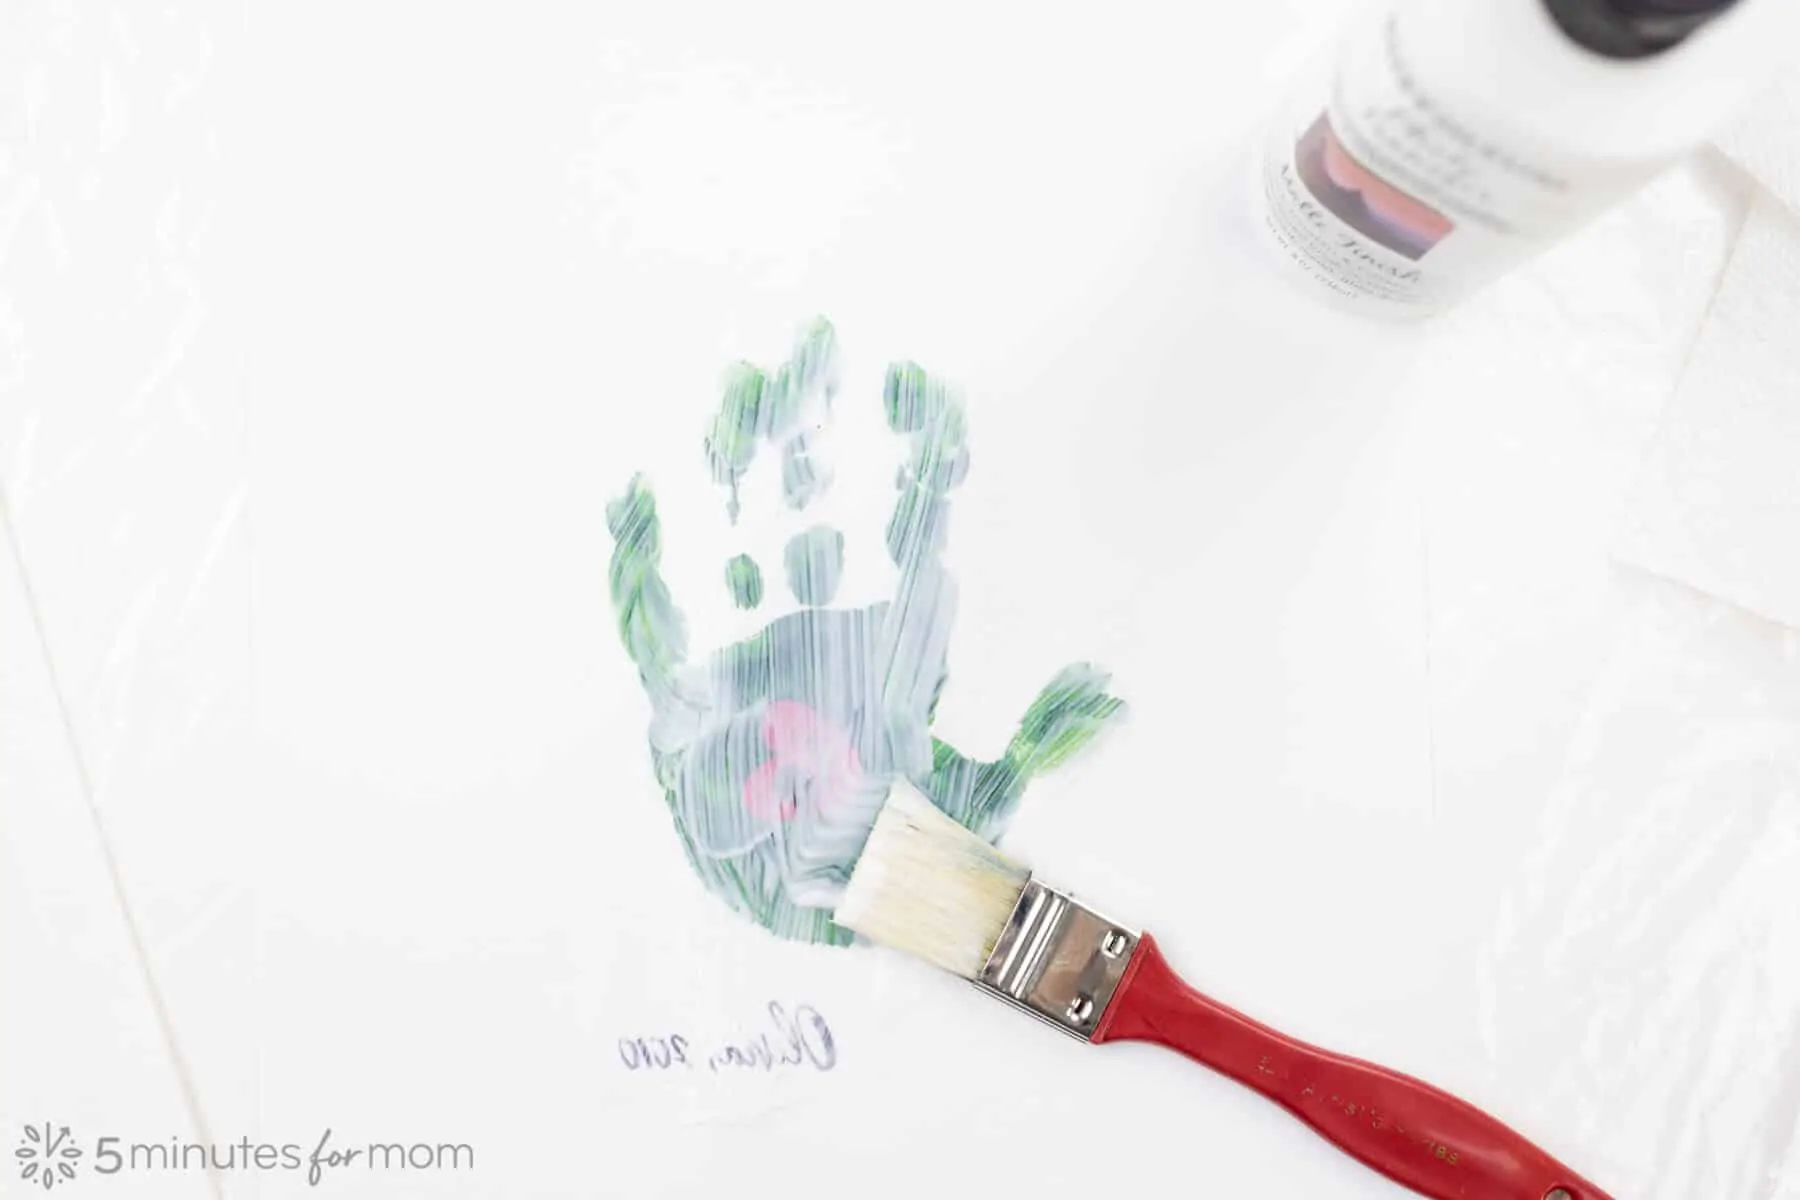
You can use a paintbrush or foam brush to apply the photo transfer product — ensuring that you have a thick coat of product covering your artwork.
Next, make sure that you have a clean area for your tea towel to lay out flat, with a protected surface underneath. The photo transfer will soak through the fabric and so you want to protect the area underneath. Do NOT have the towel folded because glue will soak through.
When the towel is laid out, place the printed side of the paper, with the photo transfer glue on it, face down onto the tea towel fabric.
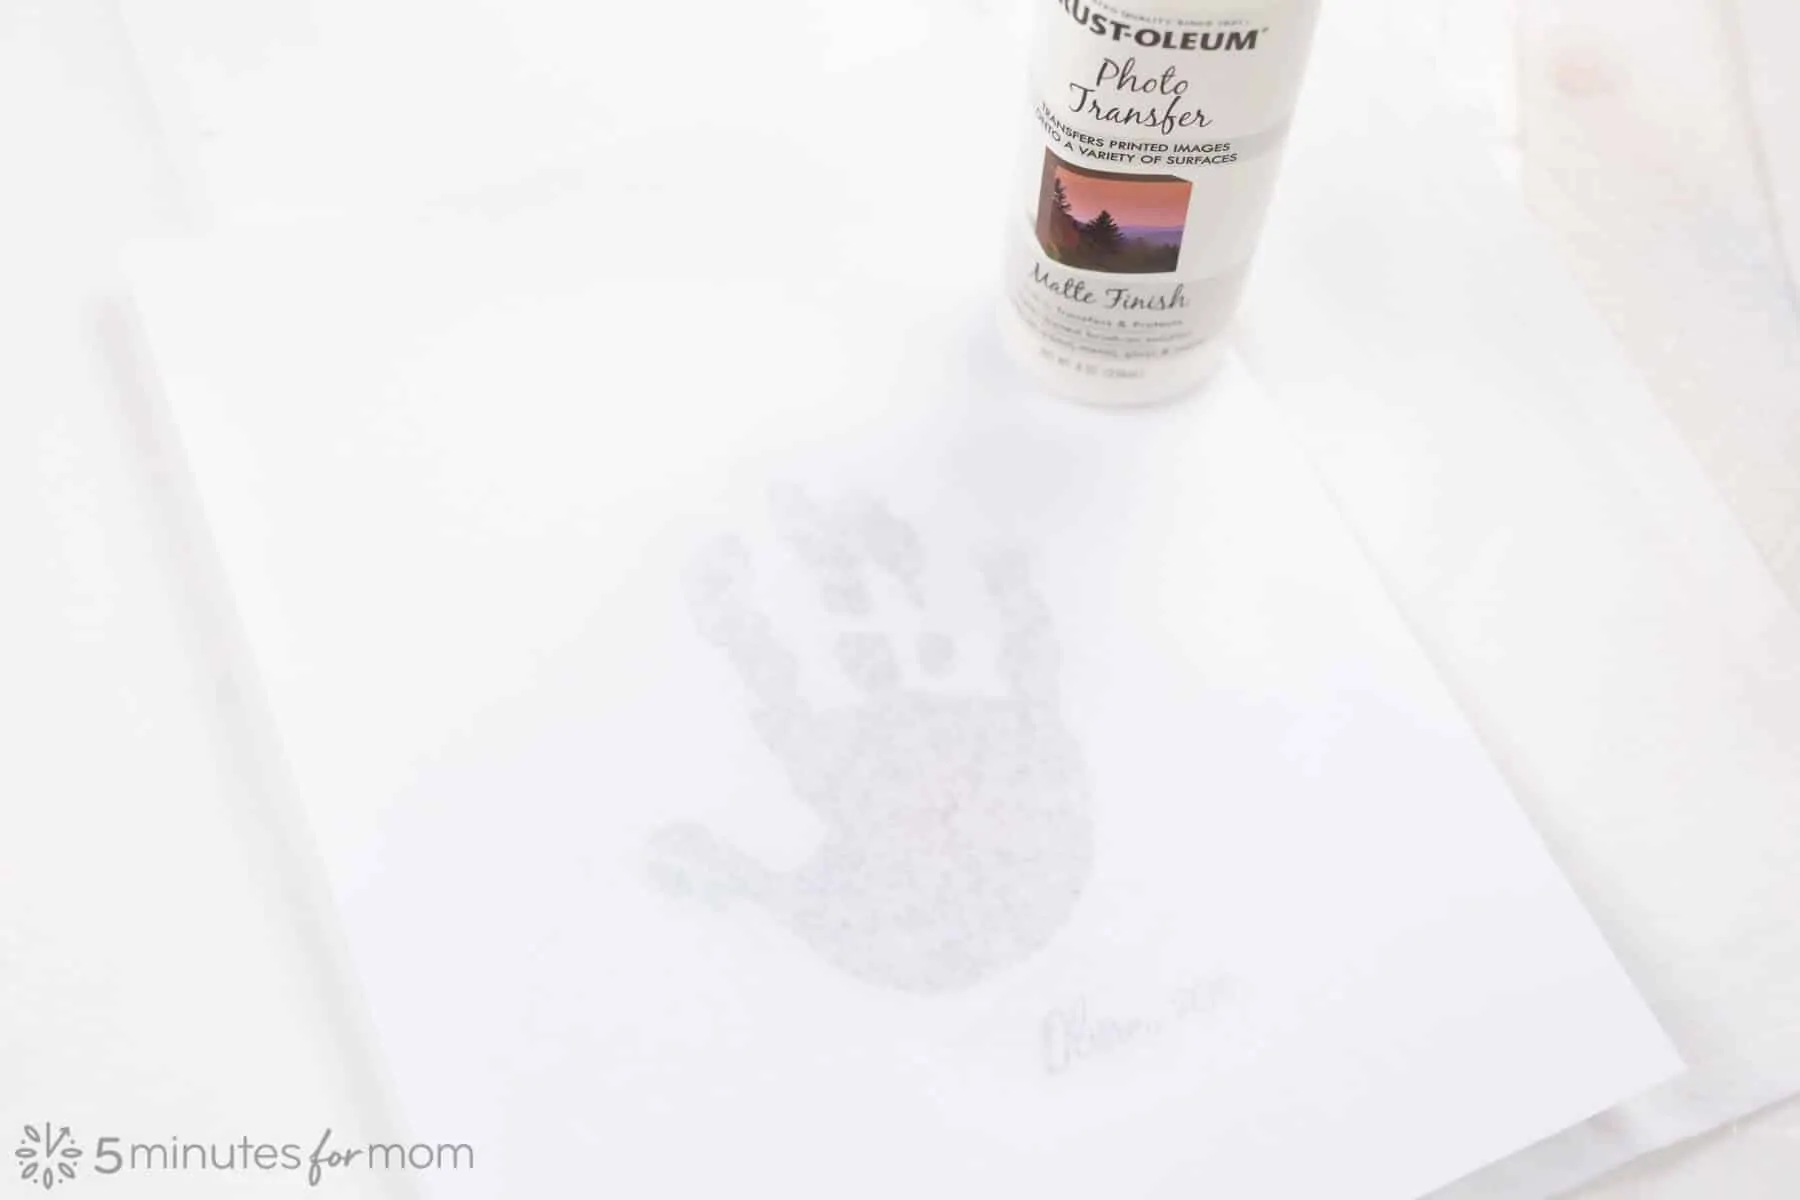
Press firmly, smoothing out any bubbles.
Allow to dry for 24 hours. If you are in a hurry or impatient, like I am, you can use a hairdryer to speed up the drying process.
Step Five – Remove Paper from Transfer
Once the photo transfer product, the paper, and the fabric are thoroughly dry, it is time to remove the paper backing and reveal your artwork!
Please note that the paper backing removal process can be delicate and you do not want to scrub too roughly or use too much water as you will remove some of the photo/artwork in addition to the paper backing.
With a damp cloth, gently moisten and rub off the paper, working in small areas until the entire image is exposed.
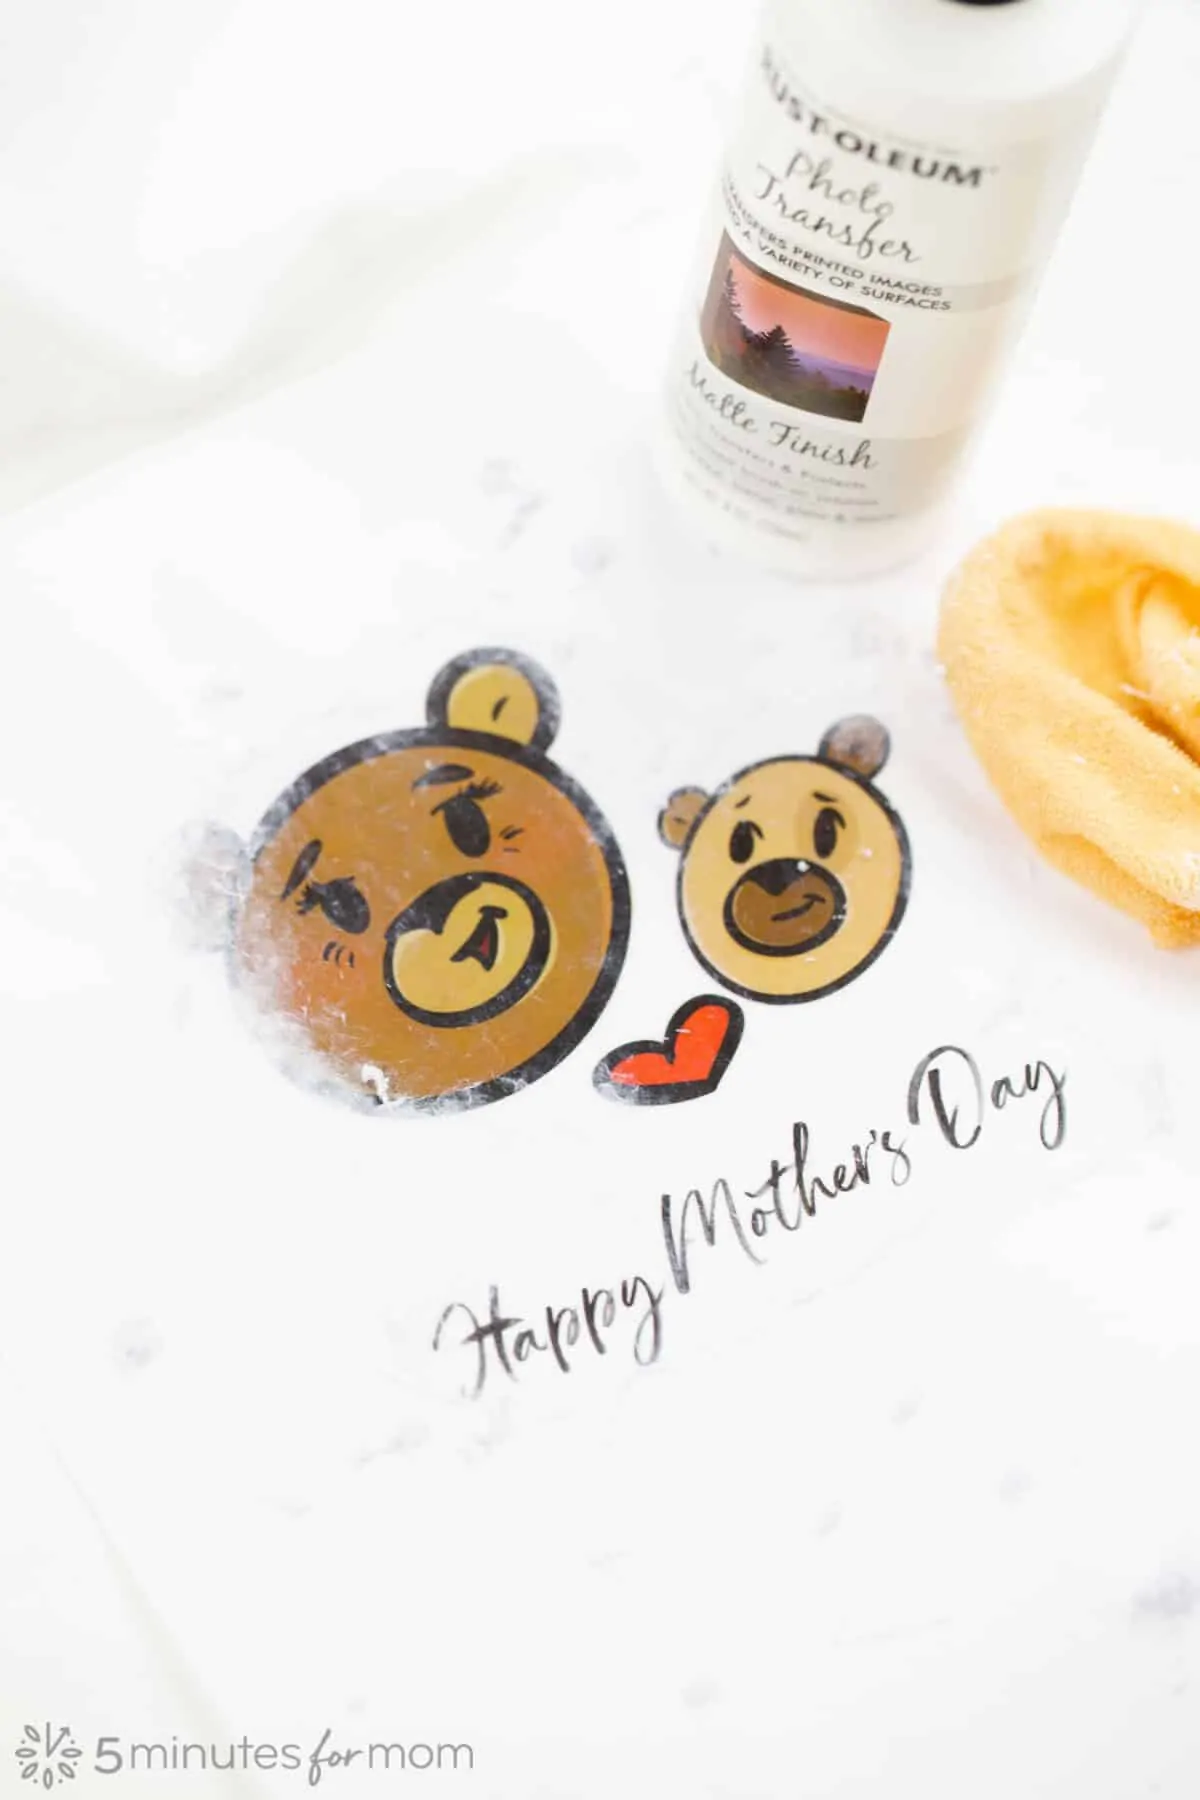
You will probably need to do this process two to three times to completely remove the paper residue from your artwork. But proceed carefully and do not apply too much moisture.
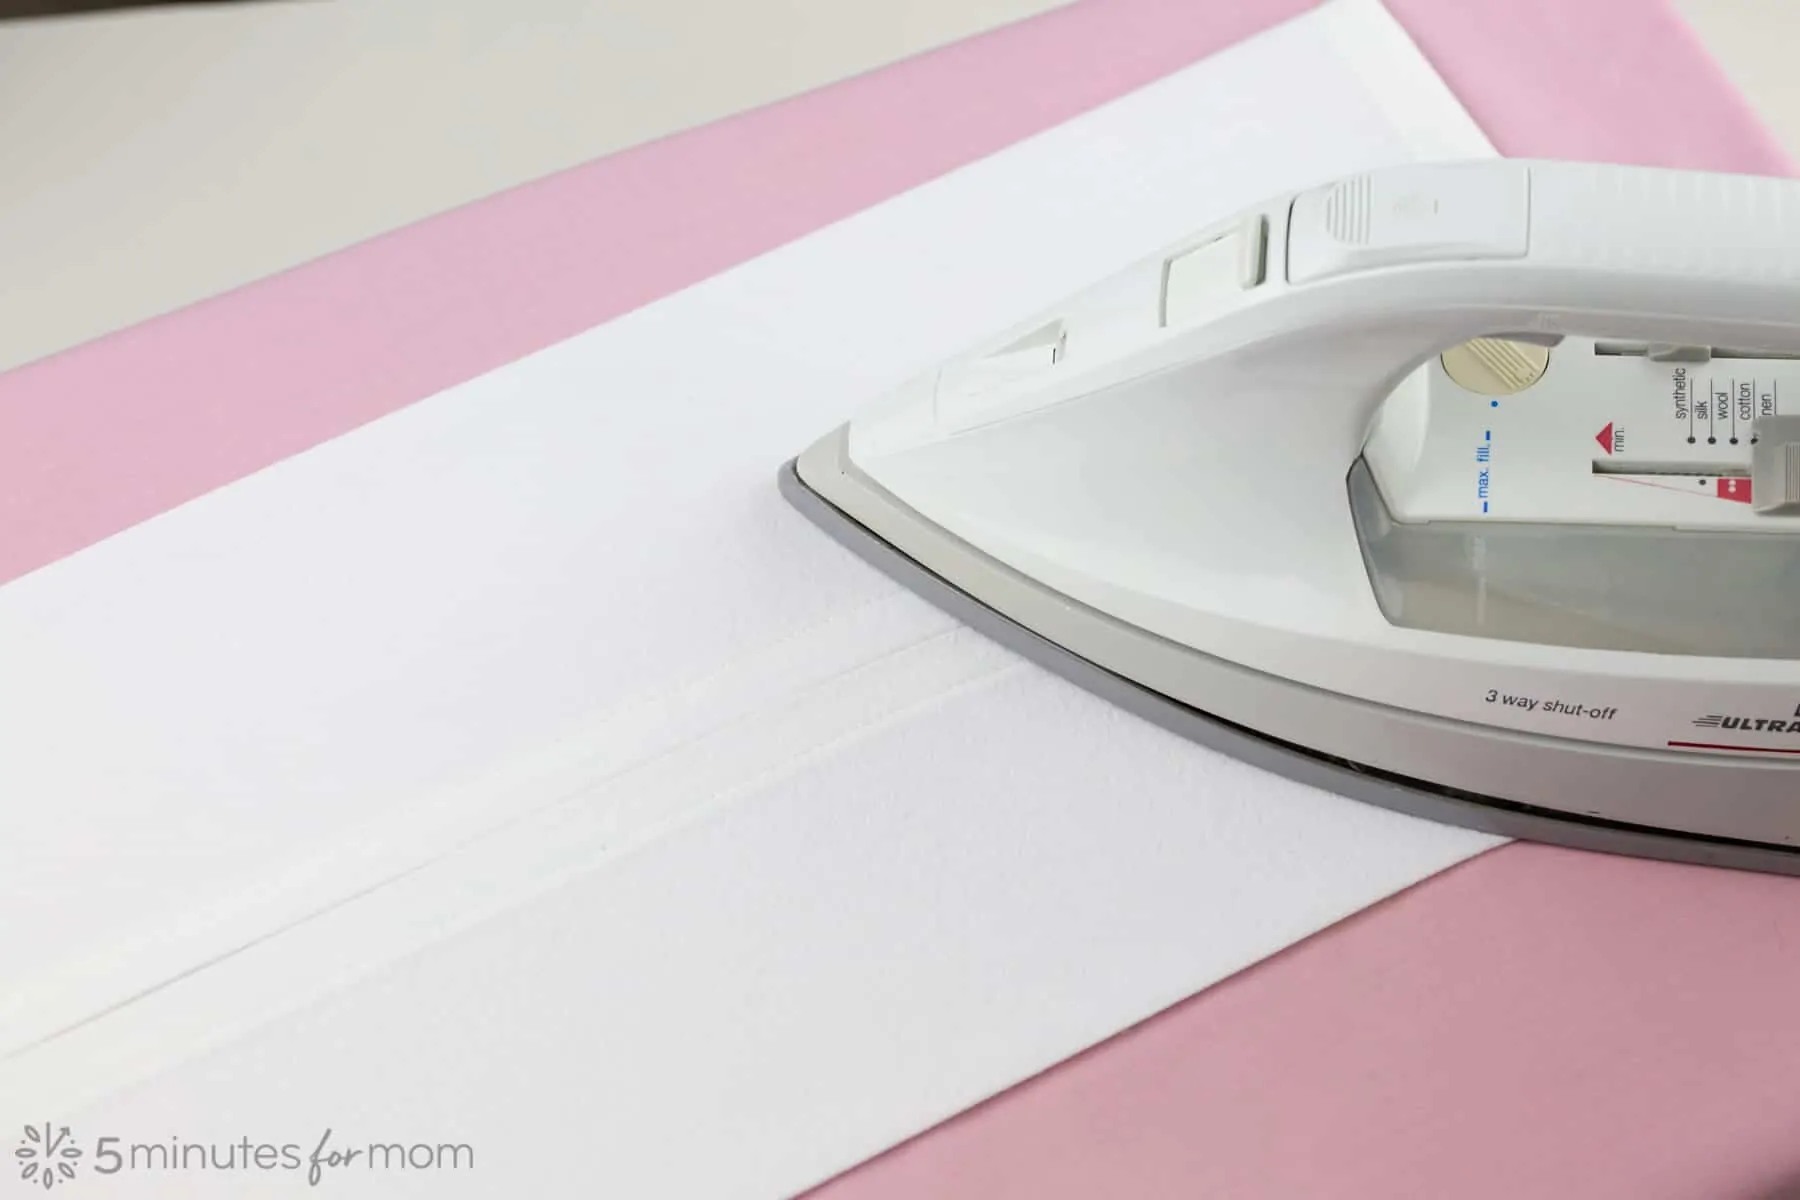
Step Six – Press with Iron to Heat Set
Once your artwork is paper-free, you can help preserve it by setting it with an iron set to medium heat.
Place your tea towel on ironing board with your transferred artwork facing up.
Cover with a pressing cloth – a piece of scrap fabric or old sheet/pillowcase – and gently iron for about 3-5 seconds. Remove the cloth and check that the artwork is okay and the iron was not too hot.
Do not touch towel/artwork – it may be hot and you do not want to burn yourself. Repeat two to three times, changing to clean areas on your pressing cloth each time in case some of the ink has transferred to the pressing cloth.
Congratulations! Your tea towel is complete.
Your photo transferred image will fade with washing and so you may want to keep your tea towels as decorative pieces. But you can wash them, so feel free to use them if you wish.
Have fun creating your tea towel memories. Happy Mother’s Day to you all!
Try These Fun, Family Crafts Too…
Take a look at some of our other Testors Crafternoon projects that your kids will love:
- DIY Glow in the Dark Bowling
- Painted Birdhouses
- DIY Flower Press
- Paint Rocks
- Photo Transfer Photo Ornaments
- Pallet Picture Frame
Disclosure: This post is sponsored, so extra thanks for reading and sharing.
Written and photographed by Janice Croze, co-founder of 5 Minutes for Mom
Pin with us at pinterest.com/5minutesformom
Pin it for Later
Don’t Miss This…
Be sure to check out our ideas for the best gifts for mom!


So creative, I really love what you’ve done here. The giveaway is also very exciting!
Recently posted: https://mominformed.com/why-do-newborns-sleep-with-their-mouths-open/
Hi! First time reading your log and I have to say you are so well detailed im gonna be reading this daily! Thank you for this giveaway
..crossing my fingers ..two kiddos are bored since school shut down we need activity!!
I love your creativity specially for kids craft. Being a mom i know how creative these are.
Recently posted… https://www.babyadvisor.org/best-toddler-utensils/