See how to paint an Easter egg using acrylic paint and enamel paint pens. Plus, learn how to blow out eggs to create hollow eggs and how to harden them so your painted Easter Eggs can last year after year! Easter Egg Painting is a fun alternative to dying Easter eggs that lets create unique and beautiful Easter decorations that you can reuse for years.
You and your kids (teenagers too!) will love this latest DIY in our ongoing sponsored partnership with Testors.com.
Looking for some creative ideas to craft with your kids this spring?
 We originally hosted this Testors Crafternoon activity in March of 2020, and it has been one of our most popular crafts ever since. So we’re sharing it again so you and your family can have some springtime fun painting Easter Eggs.
One of our favorite spring activities is decorating Easter Eggs. But did you know you can actually paint Easter eggs? Yes, you can change up your usual routine. Instead of dying Easter eggs with food coloring, you can hollow out eggs, paint them with acrylic paint, and then decorate the painted Easter eggs with Testors Enamel Paint Pens.
Easter egg painting is a fun switch from dying eggs. Since all of our kids love to paint and we are always looking for new ideas for painting crafts, this is the perfect Easter Egg DIY for our family.
Because we hollowed out our eggs, (read on to find out how to blow out an egg,) we can keep these painted Easter Eggs and reuse them year after year.
These same painted Easter eggs that we created while making this post in 2020 are STILL as cute as ever in 2026!
If you are concerned about the fragility of working with blown-out eggs, especially when children might be playing with them, we have a one-step fix to harden your hollow eggs as well.
Yes, these painted Easter Eggs really are a fabulous family craft that will have everyone in the family getting into the springtime fun.
Easter Egg Painting Supplies
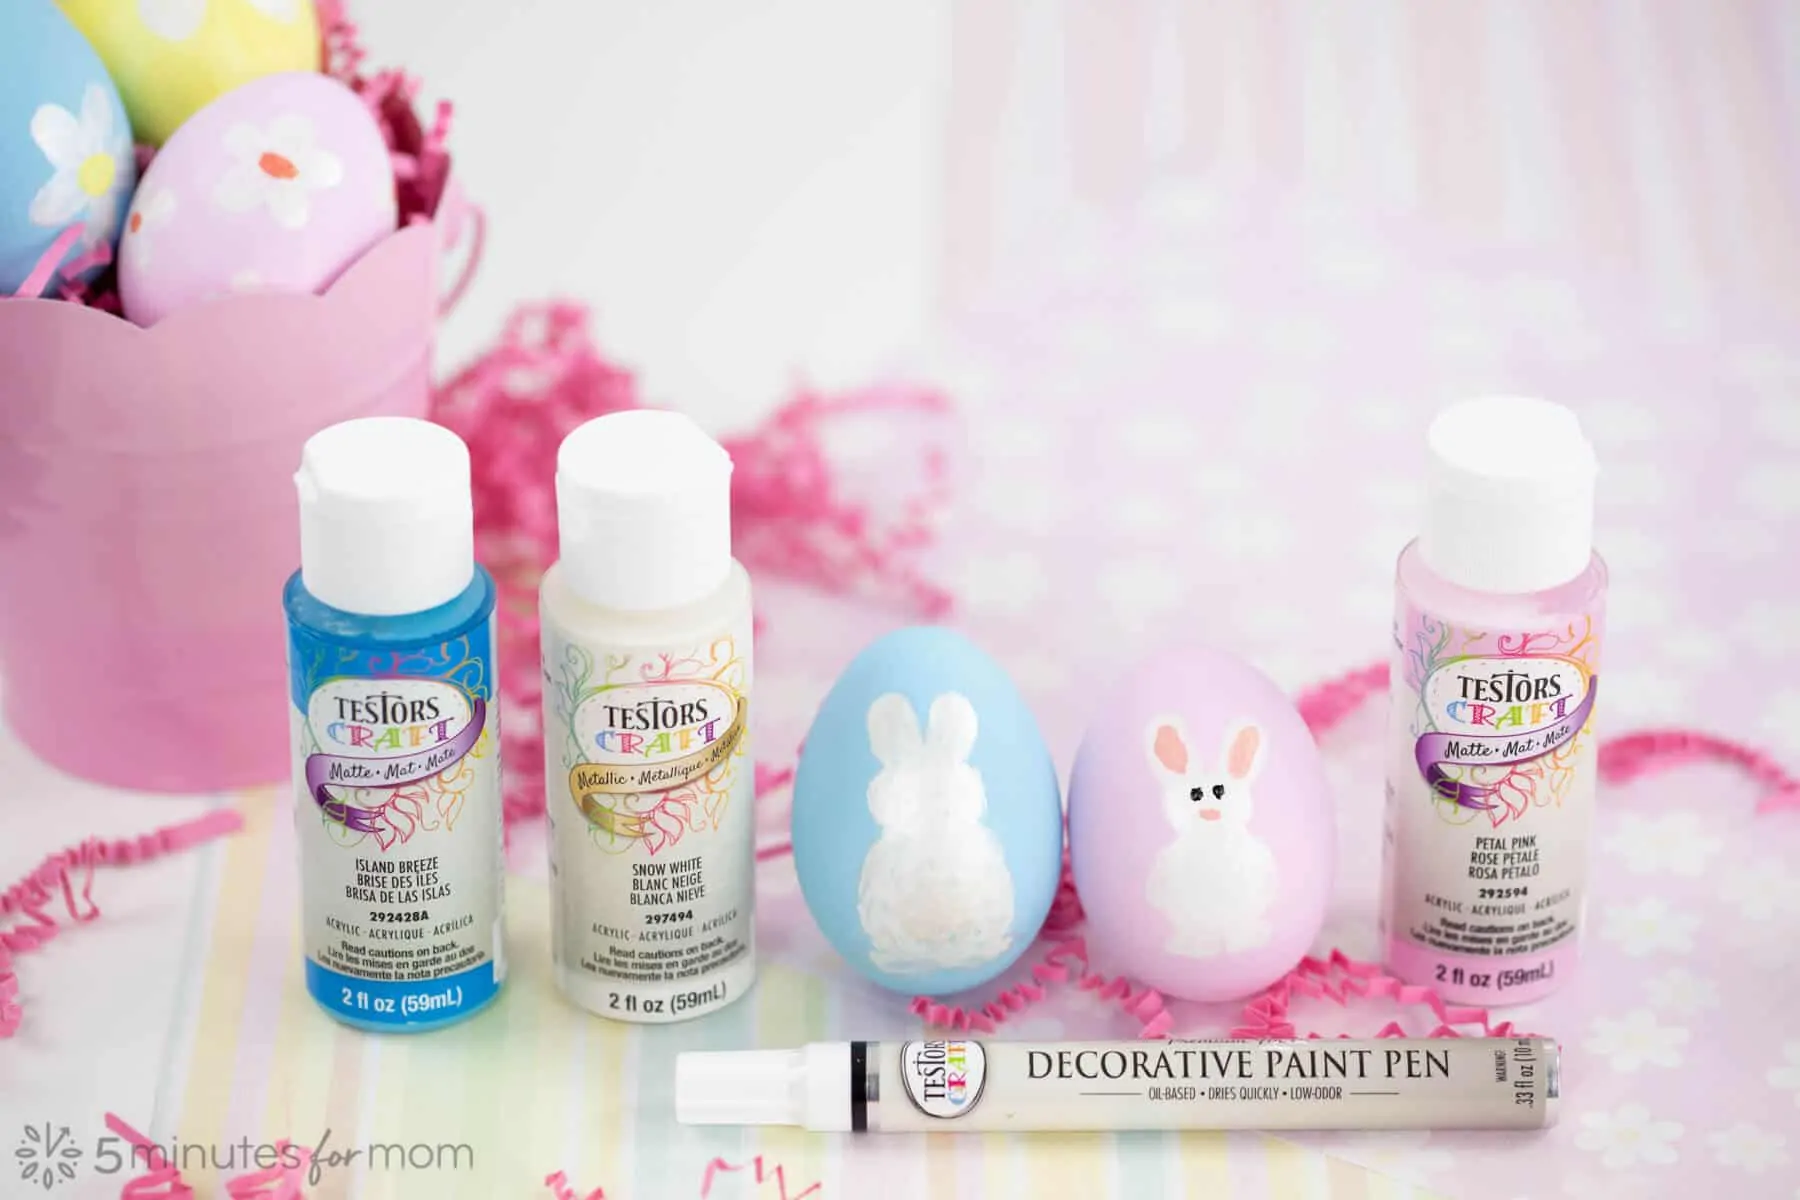
- Testors Crafts Metallic Acrylic Paints — Galaxy Blue, Gold, Snow White
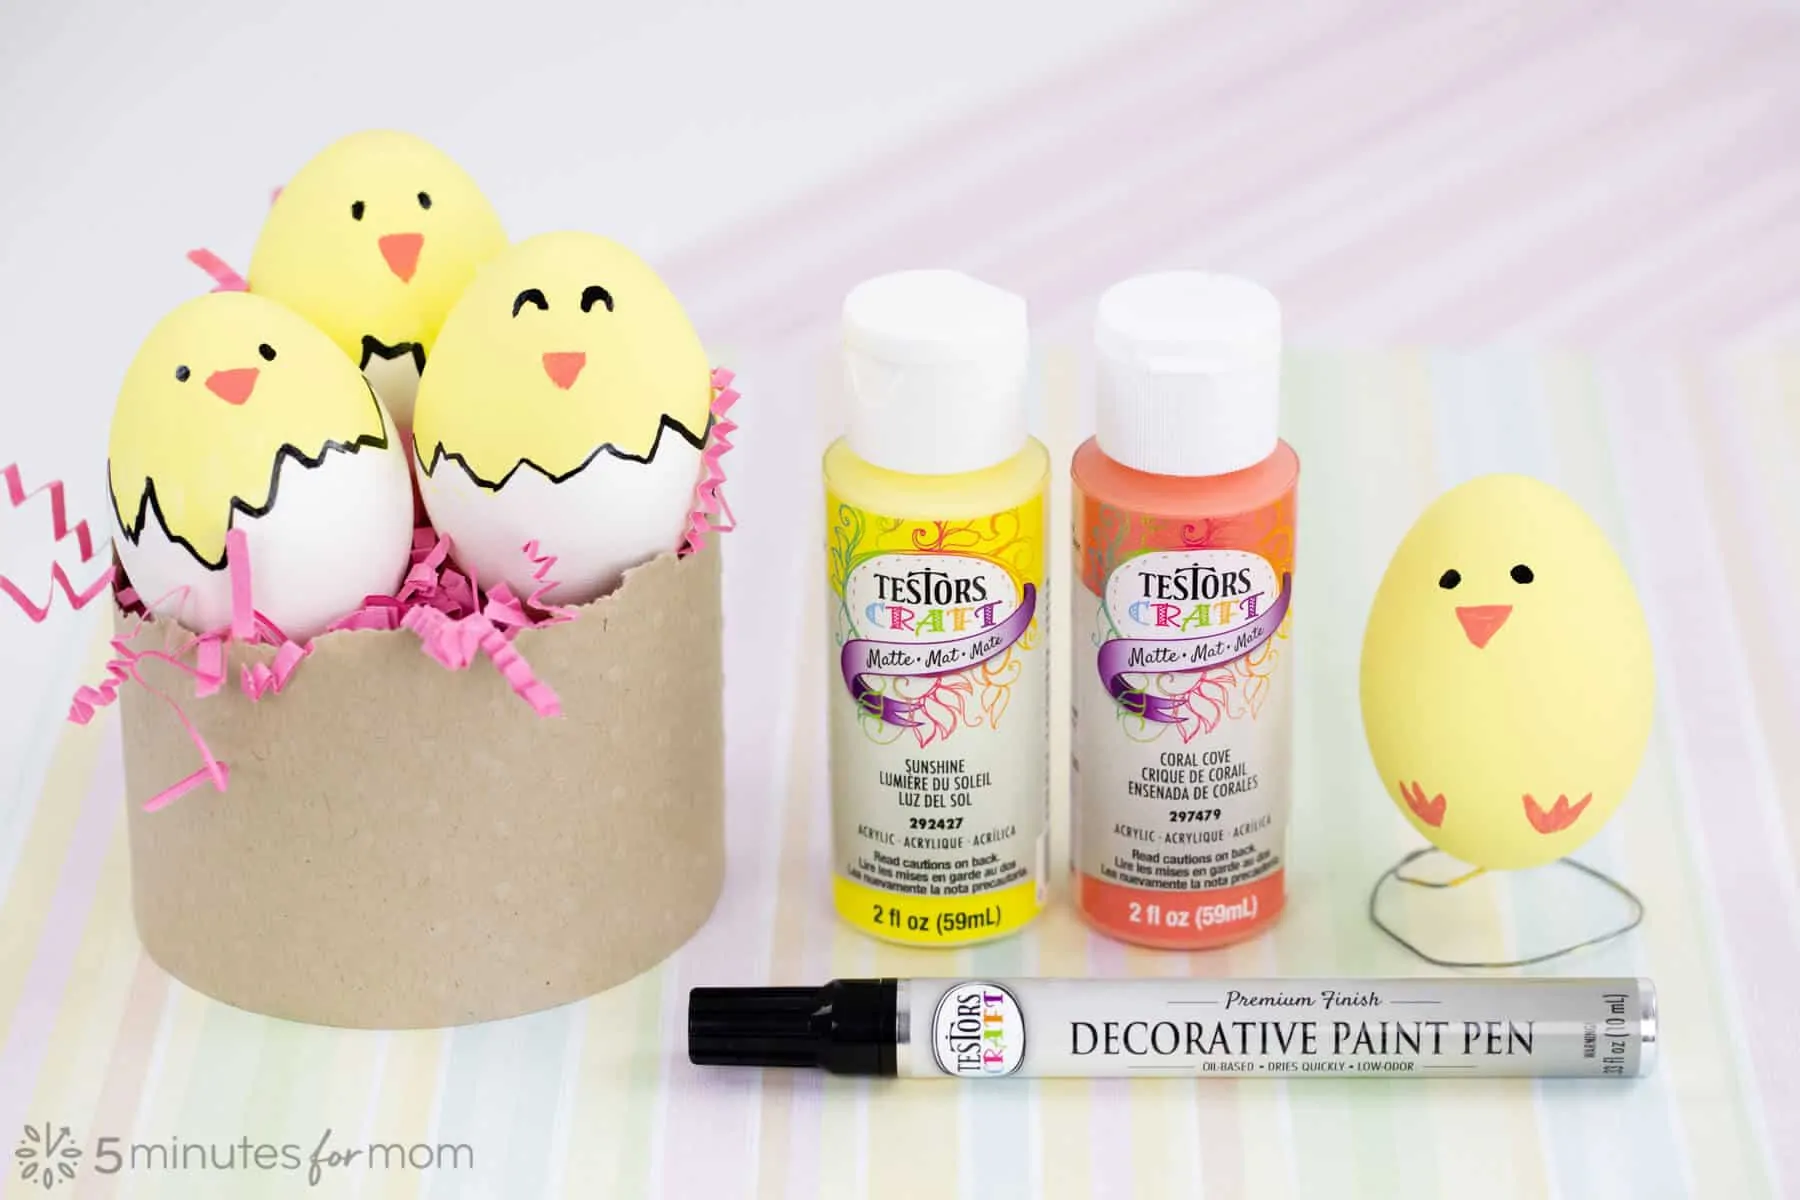
- Testors Crafts Acrylic Paints — Sunshine, Coral Cove, Petal Pink
- Testors Crafts Metallic Leafing Pen — Gold
- Testors Crafts Decorative Paint Pen — Satin White, Satin Black
- Craft Wire
- Needle/Seam Ripper/Thumbtack (a sharp tool to pierce eggshells)
- Paper clip
- Paintbrushes
- Eggs
Testors Craft Paint Pens are available on Amazon and at Michaels, Home Depot, Dick Blick and Ace Hardware stores. Testors Craft Acrylic Paints are available at Michaels, Home Depot, and specialty hobby shops.
How to Make Hollow Eggs to Decorate
Before you can begin painting your eggs, you need to make hollow eggs. No worries though — it is actually easy to blow out eggs.
Here are our simple step-by-step instructions for how to blow out eggs and prepare them for painting.
STEP 1: Wash Eggs
First up, let’s get your eggs as clean as possible.
Place eggs in a bowl of warm, soapy water and allow to soak for a few minutes while gently washing them. This process allows you to clean your eggs while also warming the eggs slightly, which will make removing the egg yolks a little easier.
Rinse eggs well and place them on a towel or paper towels to dry.
If you will be cooking and eating the eggs after you blow them out, you will also want to wash and clean the tools, (needle, seam ripper, paper clip, etc.) that you will be using to pierce the eggshells and break the yolks.
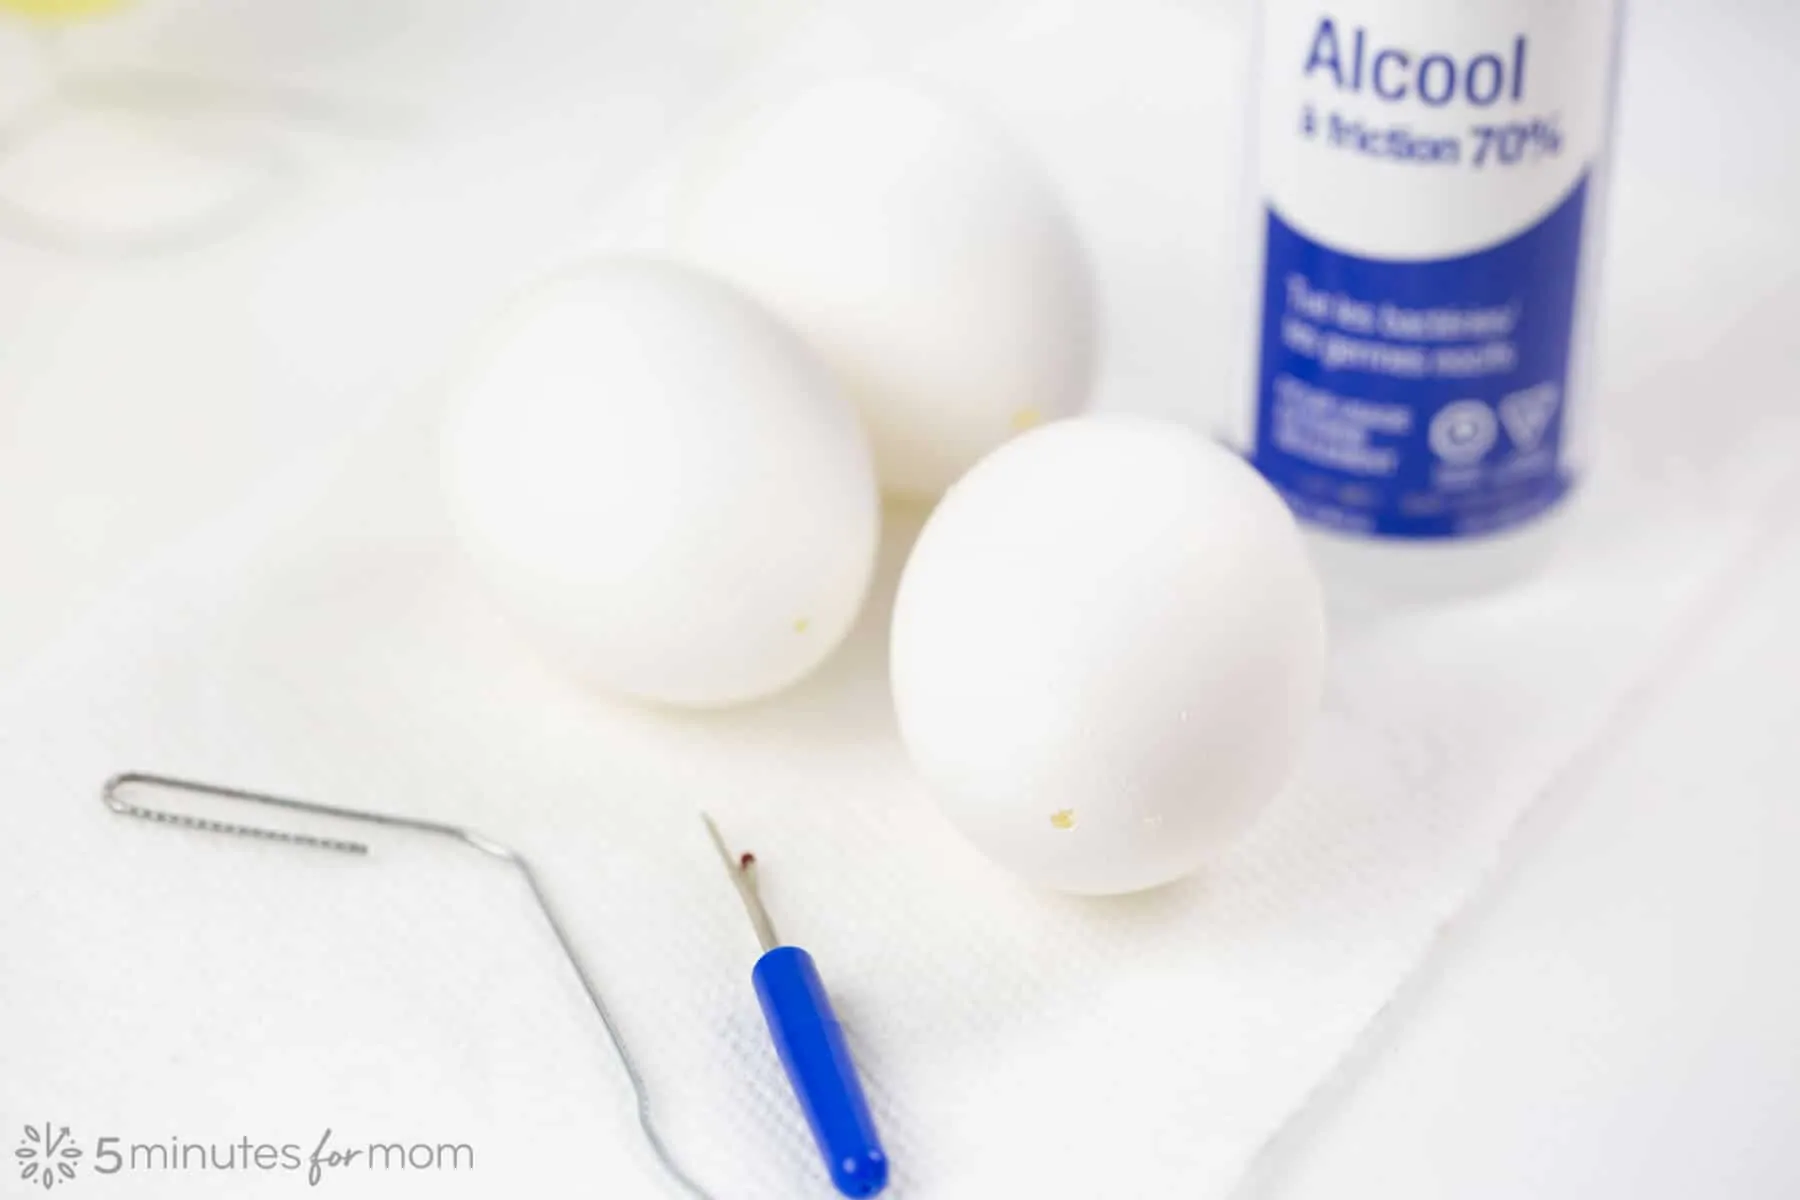
STEP 2: Pierce Holes in Bottom and Tops of Eggshell
Next, you will pierce holes in the bottom and the top of the eggshells.
You can use anything small and sharp to create the holes in the shells, such as a needle, pin, thumbtack, or nail.
I used a seam ripper to pierce my eggshells as it is comfortable to hold and easily created a nice sized hole.
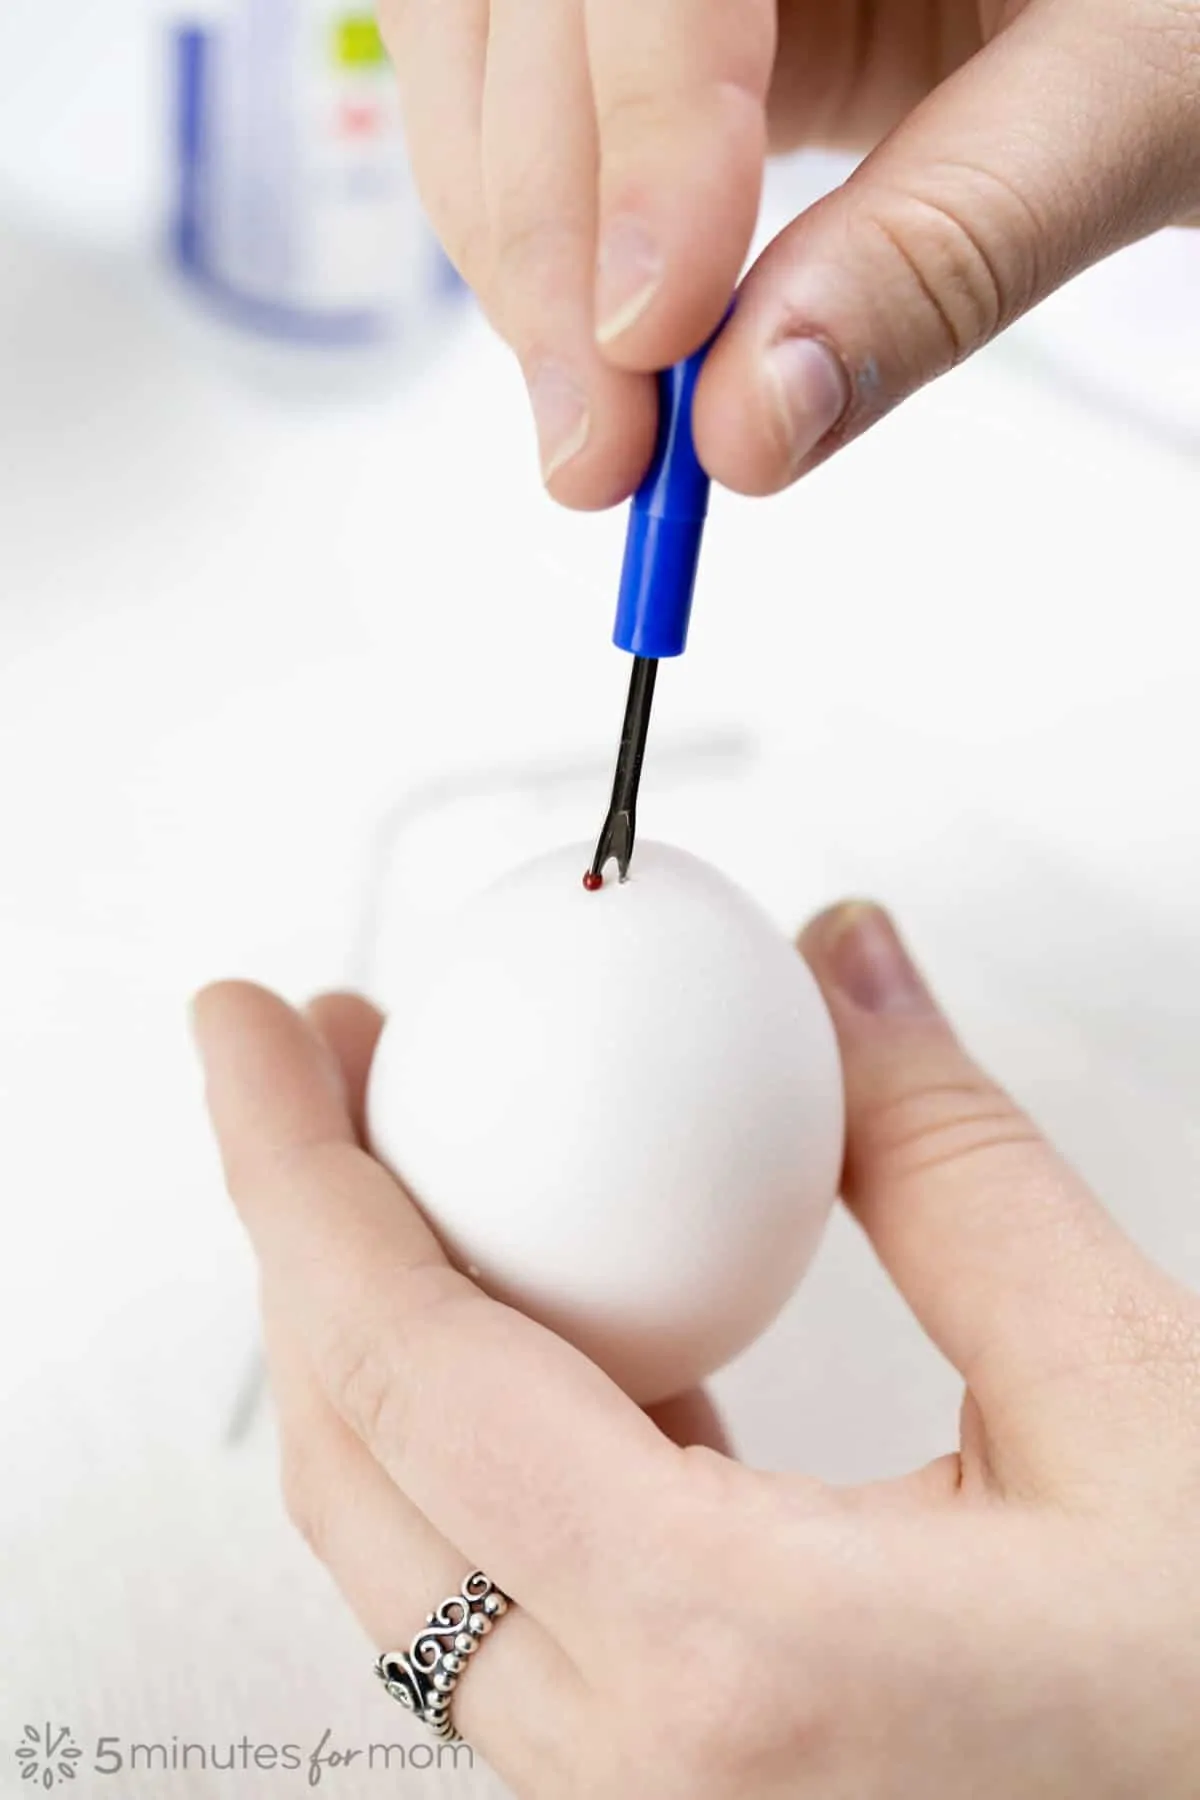
For the hole at the top of the shell, you want to create a small opening that is large enough to blow through but small enough so that it is not too noticeable for our finished Easter egg.
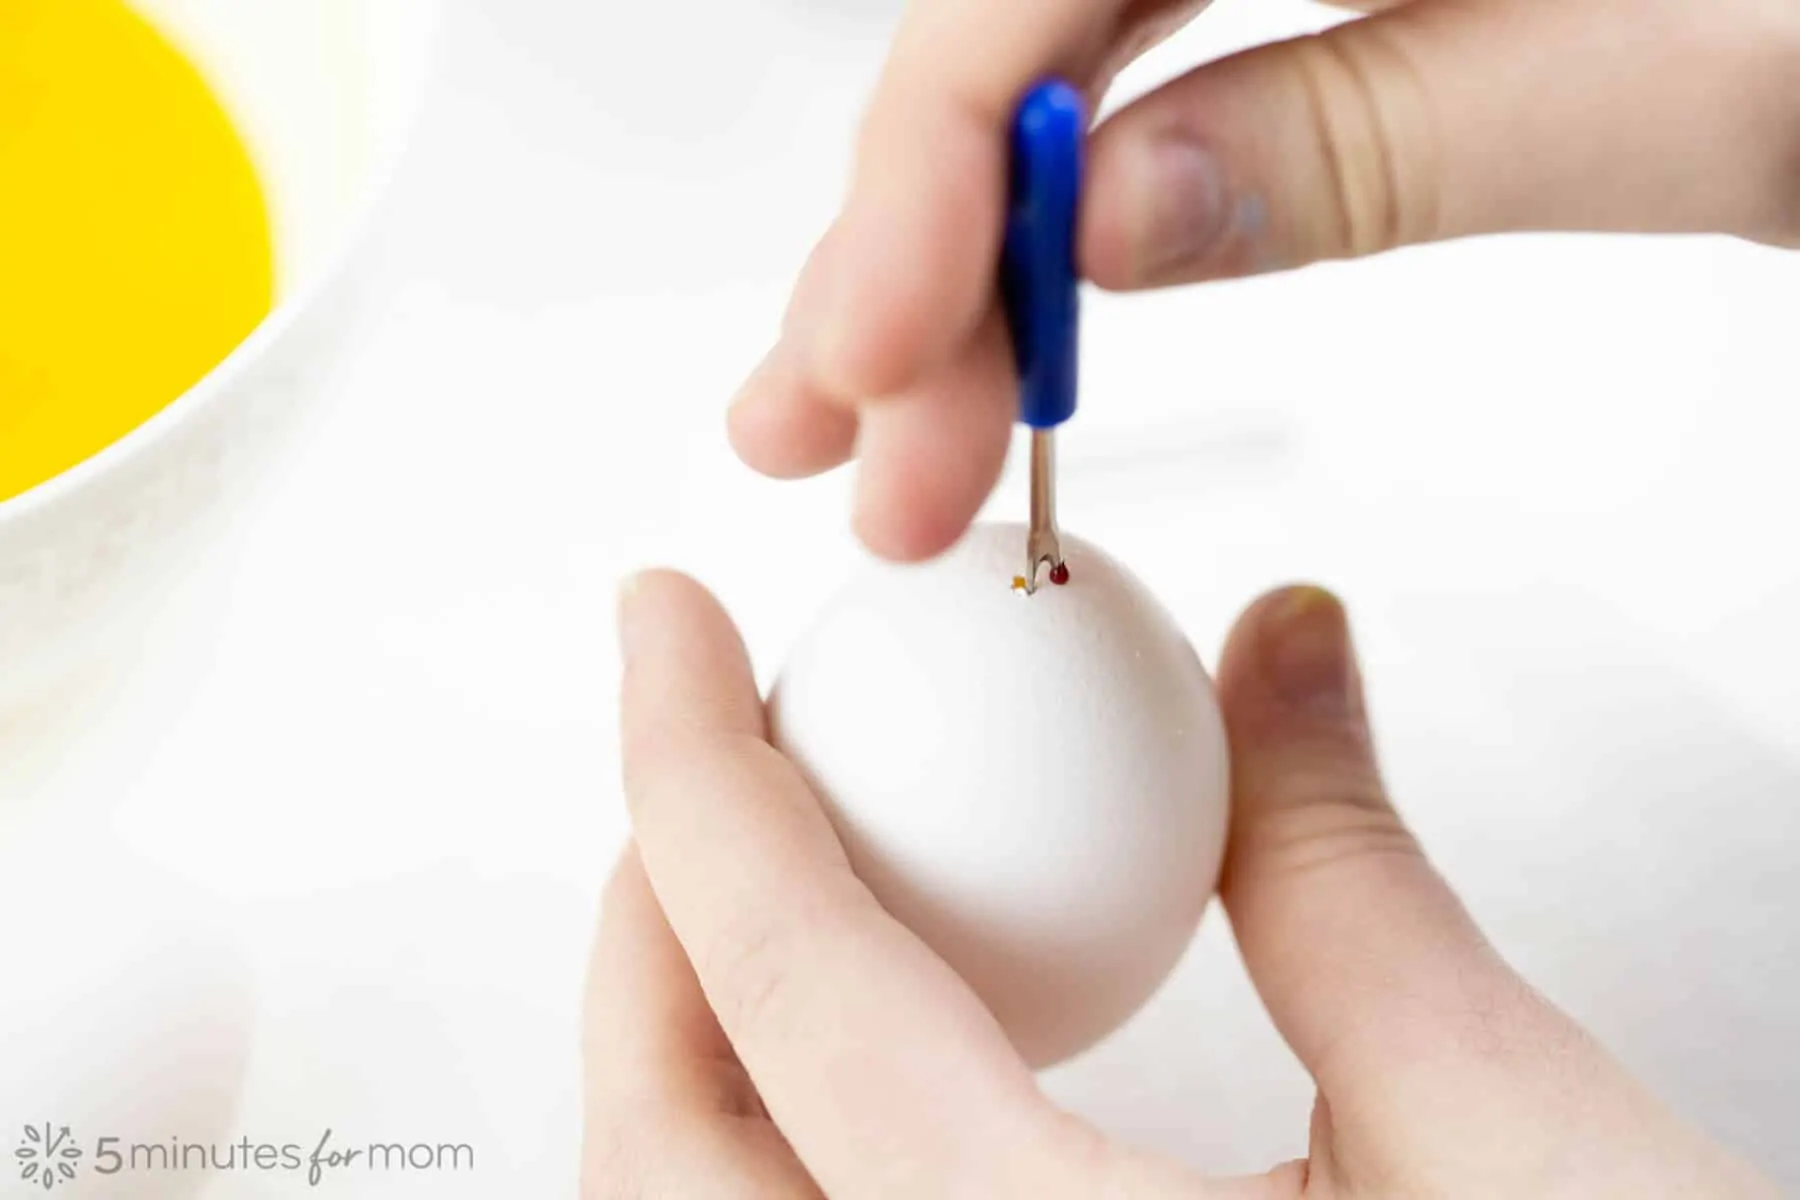
When creating the opening at the bottom of the egg, use your tool of choice to make the hole larger by twisting and turning inside the hole, carefully increasing the size of the opening.
Some people suggest placing a small piece of tape on the eggshell before piercing the holes in order to prevent the shells from cracking. But I find that step to be unnecessary and that it is easier to create the holes without tape.
STEP 3: Break Egg Yolk
To allow the egg yolk to flow easily out of the hole in the bottom of the egg, you should pierce and break up the egg yolk.
Insert a straightened paper clip, long needle, or nail, etc., into the holes in the eggs and carefully rotate around inside the egg to break up the yolk.
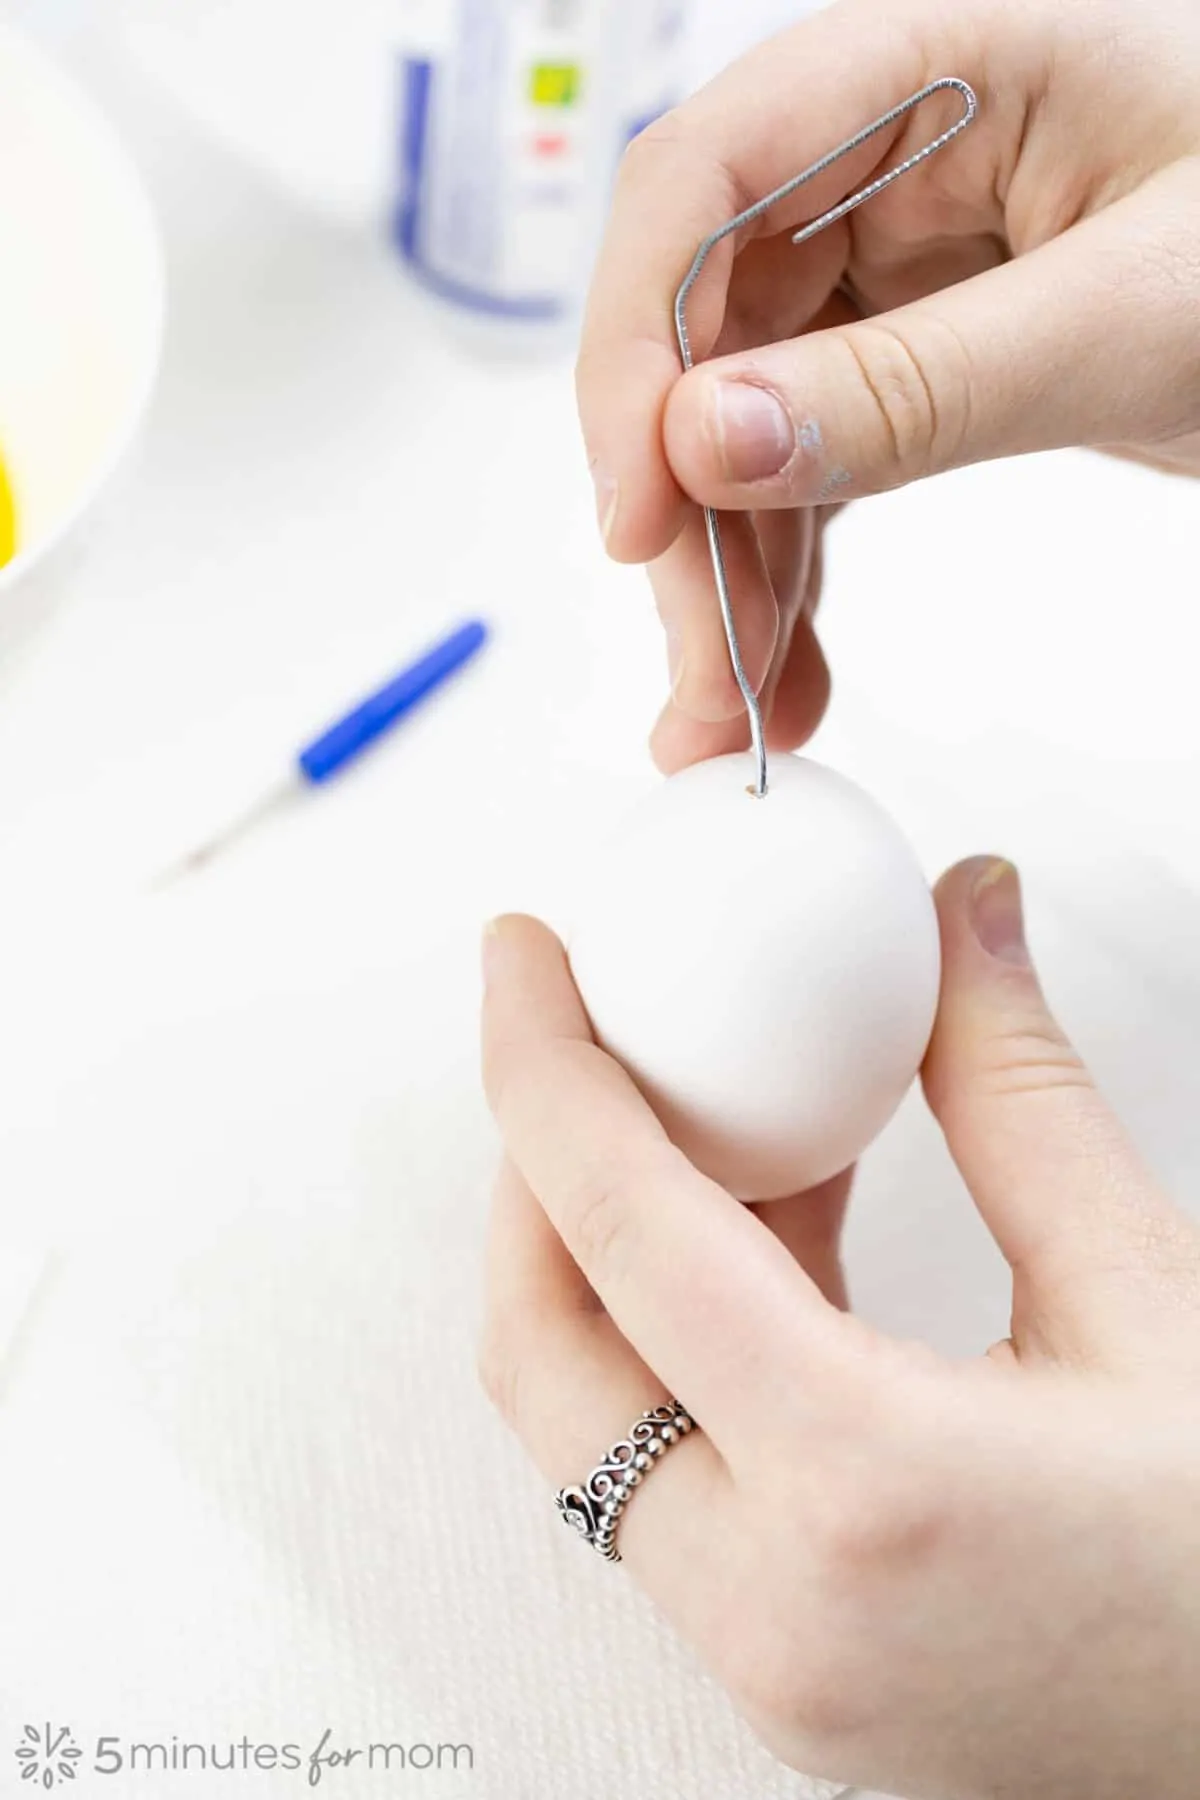
This is also an ideal time to make the hole in the bottom of the egg large enough for the yolk to escape.
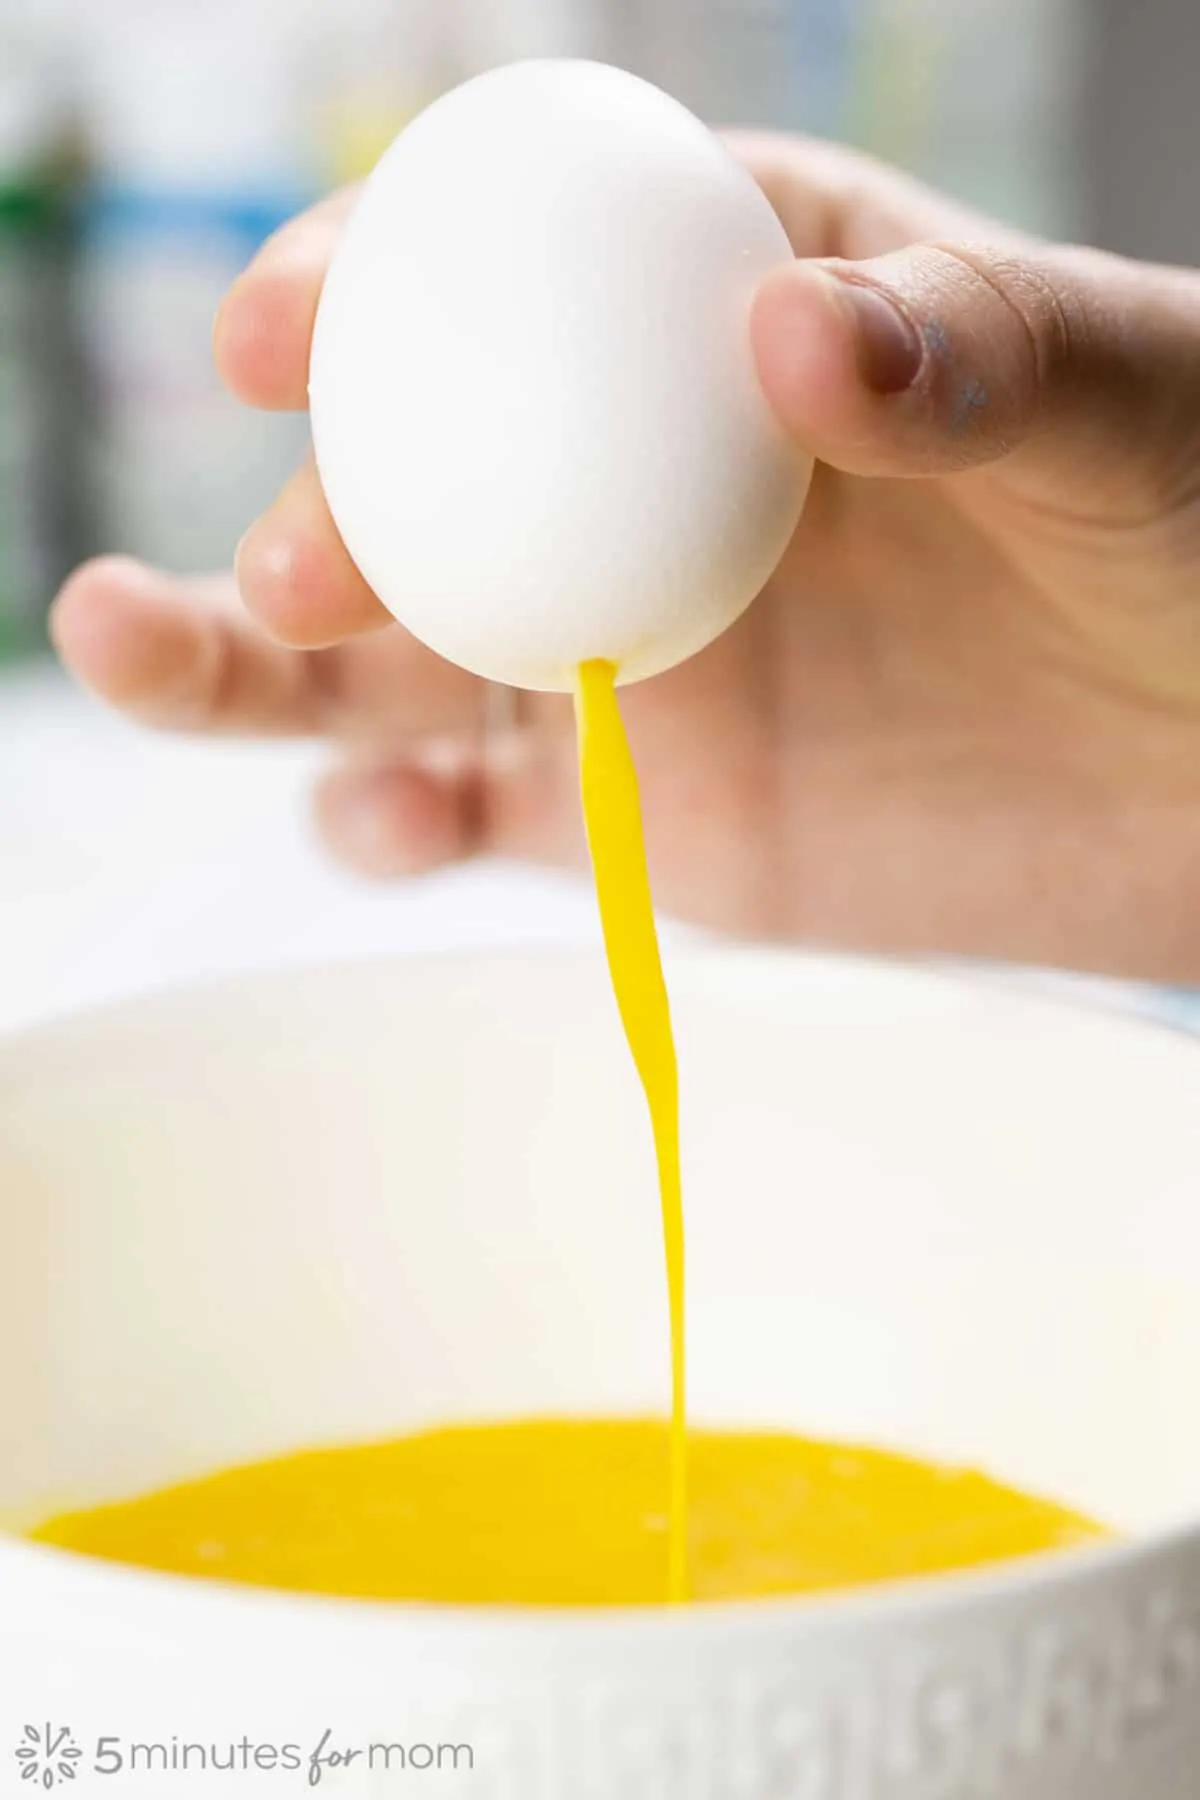
STEP 4: Clean Top of Egg Shell and Blow Insides Out
This next step for how to decorate Easter eggs is for those of you who are like me and are careful about germs and contamination.
After I finish creating the holes and breaking my yolk, I wipe down the top of my eggshell and clean it with some rubbing alcohol. Call me crazy, but it just made me feel a whole lot better before I put my mouth on the egg.
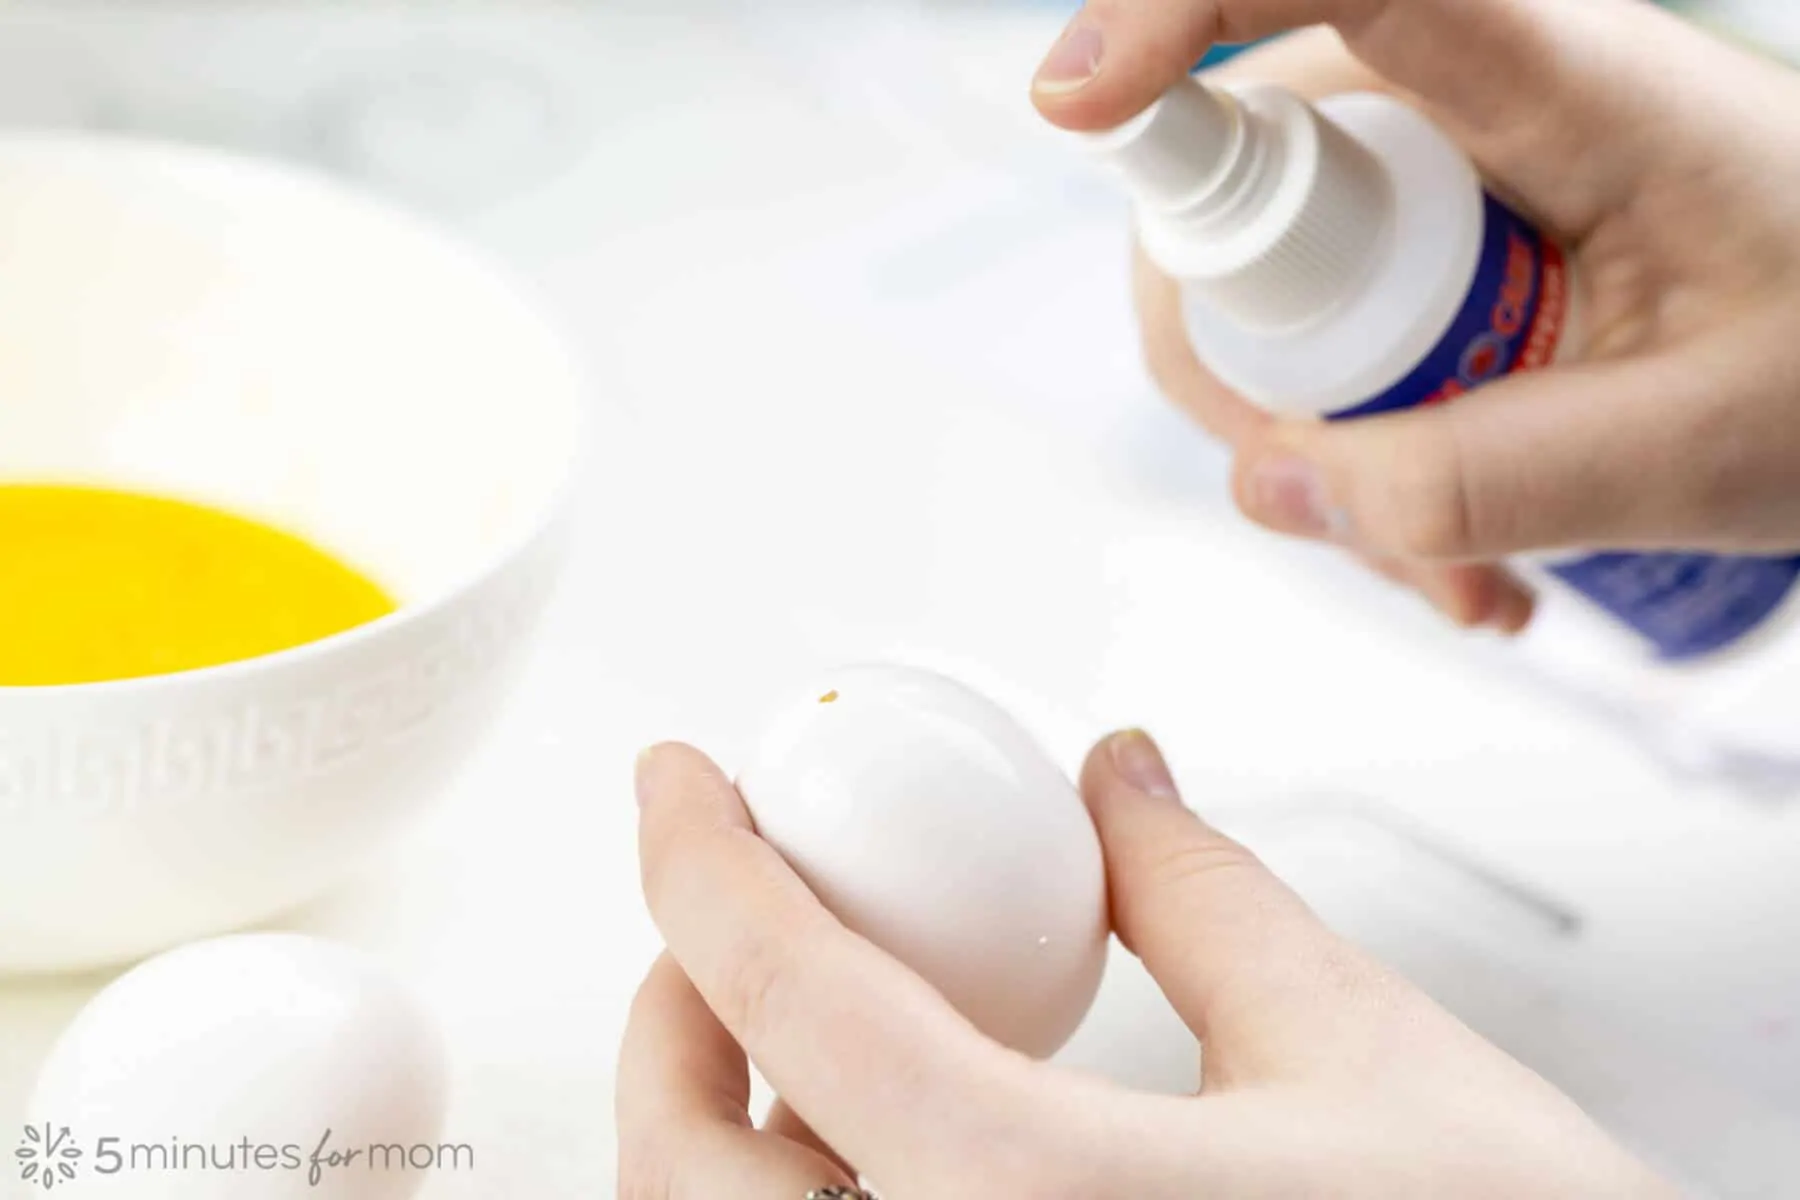
You could try to blow out your egg using a straw or some sort of barrier, but for us, it worked well to clean our eggshells with alcohol. Please note we are not medical professionals or scientists and you can do as you feel comfortable when blowing out your eggs.
When blowing out your egg, the ease of the process is determined by the size of the holes. If you want the process to be quick and painless, just make the holes slightly larger.
If the membrane gets stuck when you are trying to empty the egg, you can use a tissue or paper towel to grasp the end of it and pull it out manually.
Step 5: Wash Empty Eggshells and Bake in Oven
After your eggs are emptied, wash with soapy water or water and vinegar and then blow out the remaining water inside the eggs.
To quickly dry your eggs and to cook any egg material remaining inside the shells, place empty eggshells on a baking sheet and bake at 200*F for around 20 minutes.
How to Harden Hollow Eggs
Yes, eggshells are easily broken.
So working with hollowed-out eggs can be a delicate process and if you have children painting hollow eggs or playing with them after they are made, you will probably want to harden your eggshells.
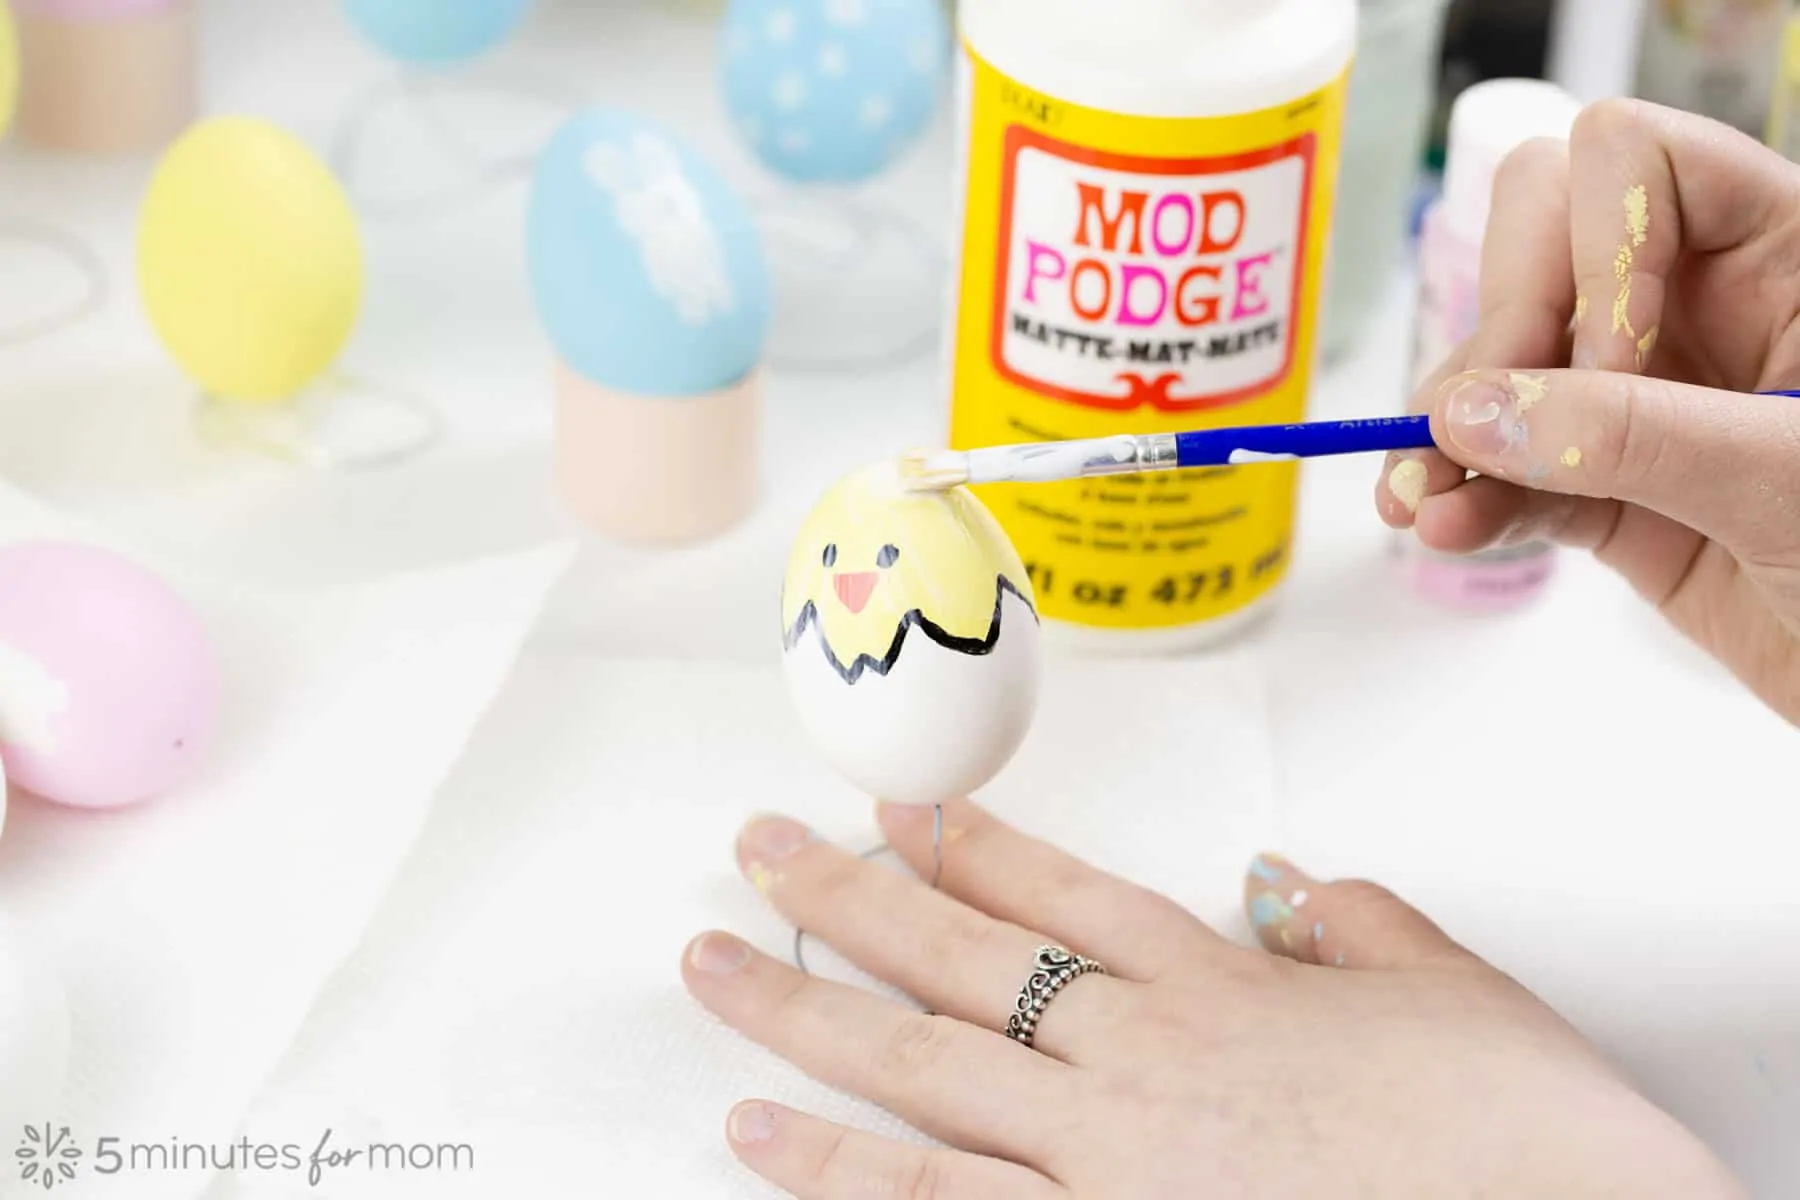
To keep your eggshells in one piece, simply brush on a layer of decoupage glue or Modge Podge and allow to dry. If you don’t have any decoupage glue or Modge Podge, thin down some white glue with a bit of water to use instead.
If you want to make your eggs extra sturdy, pour a small amount of thinned glue or Modge Podge inside the hole in the bottom of the egg and shake to cover the inside of the egg as well.
You can also use the glue to cover the top hole in the eggshell and reinforce the edges of the hole in the bottom of the egg. If you are using the wire eggshell holder as we are, you will need to keep a small hole in the bottom of the egg.
Please note that you can harden your eggs BEFORE painting or AFTER painting.
If you are applying the decoupage glue/Modge Podge before painting, (which I recommend if children are painting the eggs,) then you may have some ridges that may show up when you paint the eggs after.
So, for the smoothest painted egg, I recommend applying glue/Modge Podge after painting.
Also, after you harden the eggs, you will NOT be able to dye the eggs with food coloring since the dye will not be able to permeate the glue and reach the eggshell.
If you do not harden the eggs before you paint and you drop or crack your eggshell — no worries! — as long as the eggshell is still intact, you can seal up the crack by applying a coat of glue/Modge Podge.
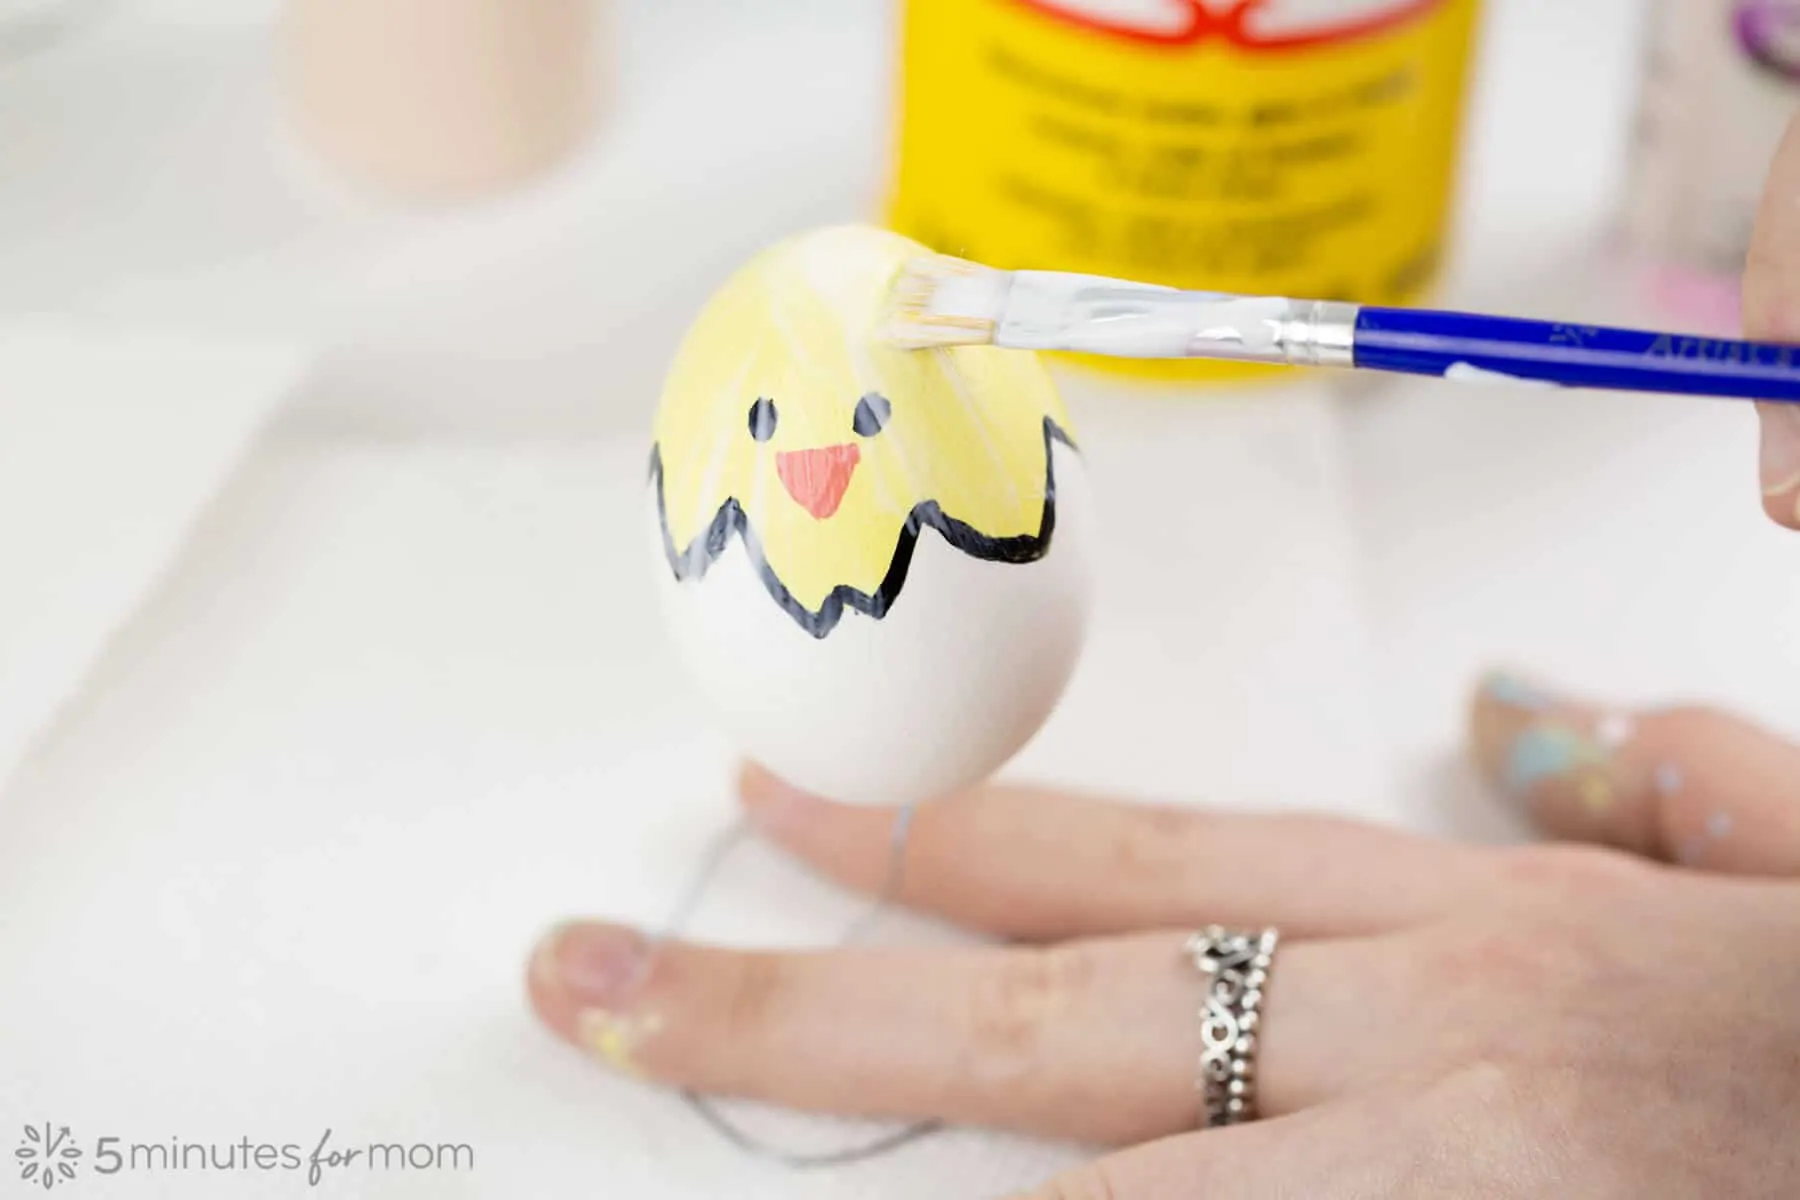
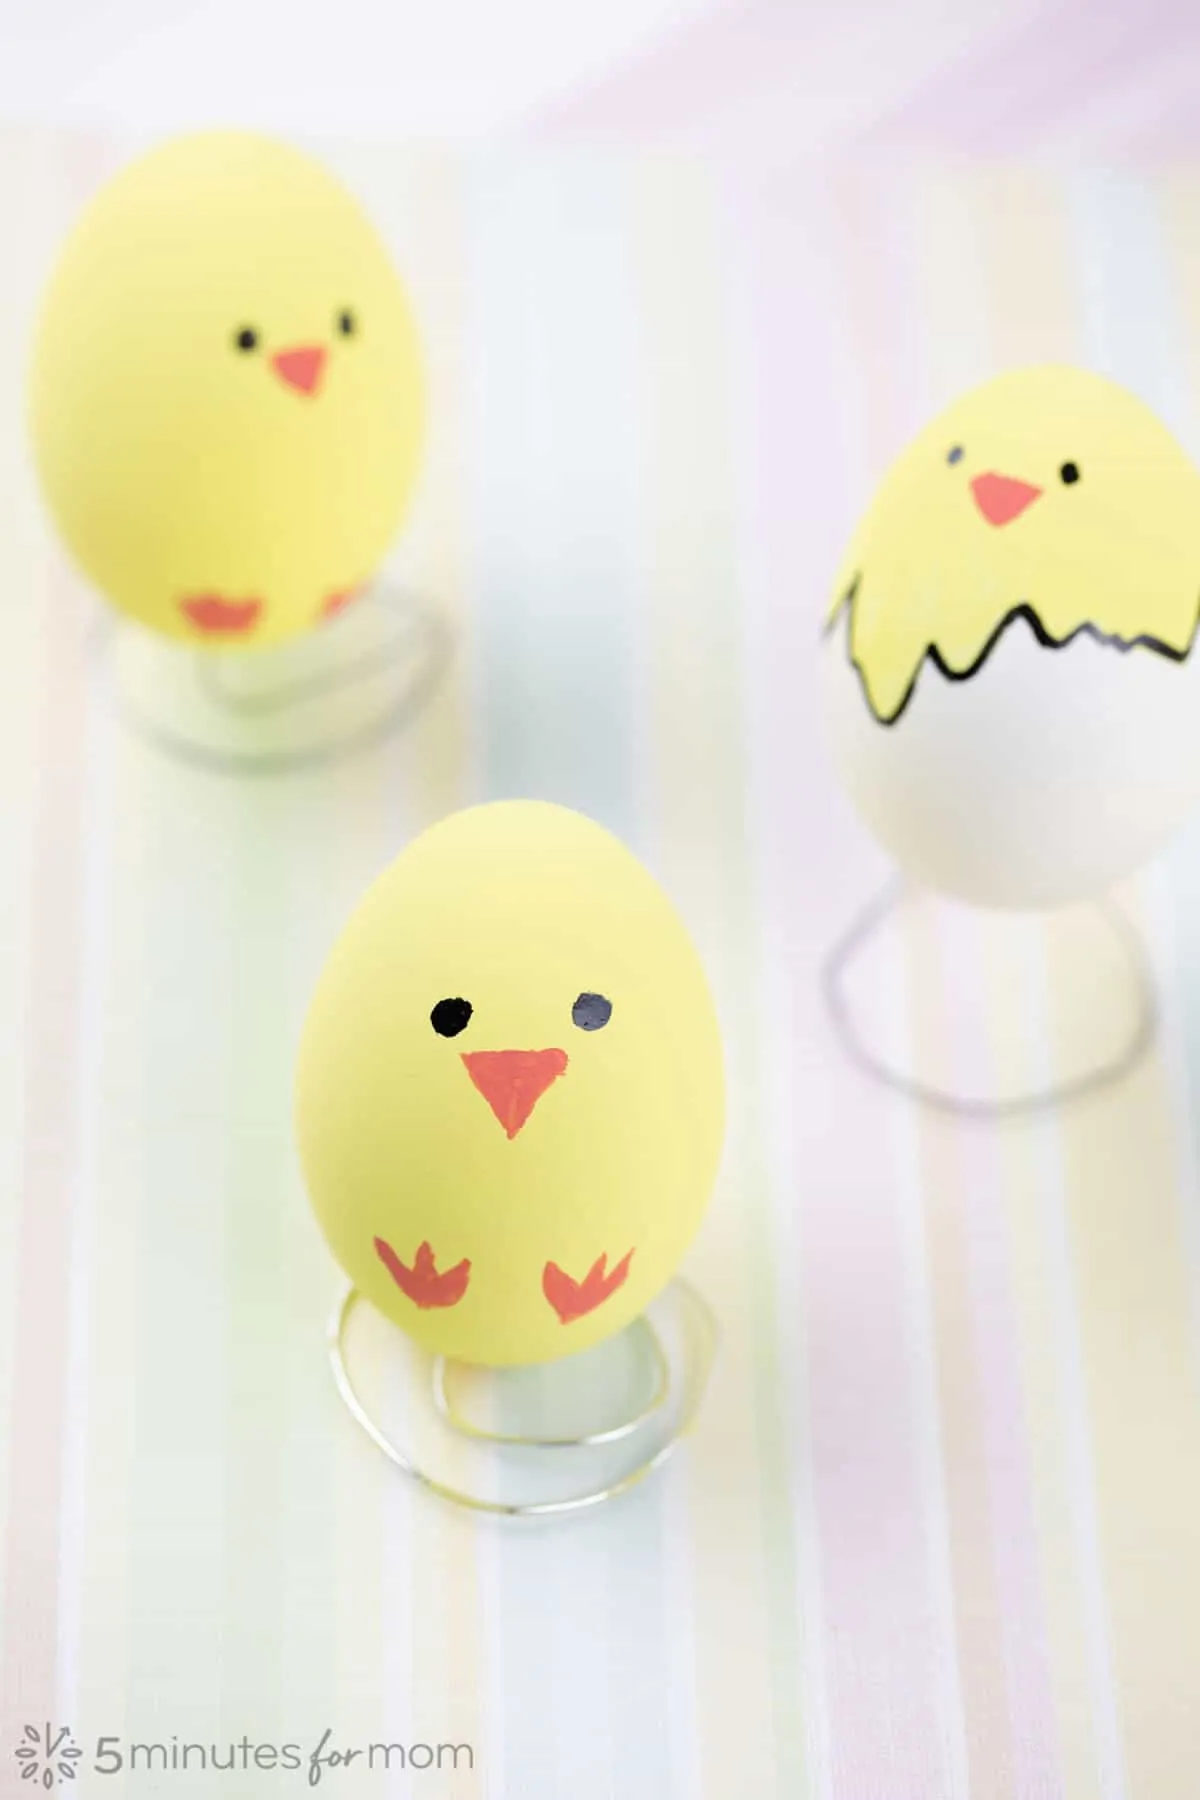
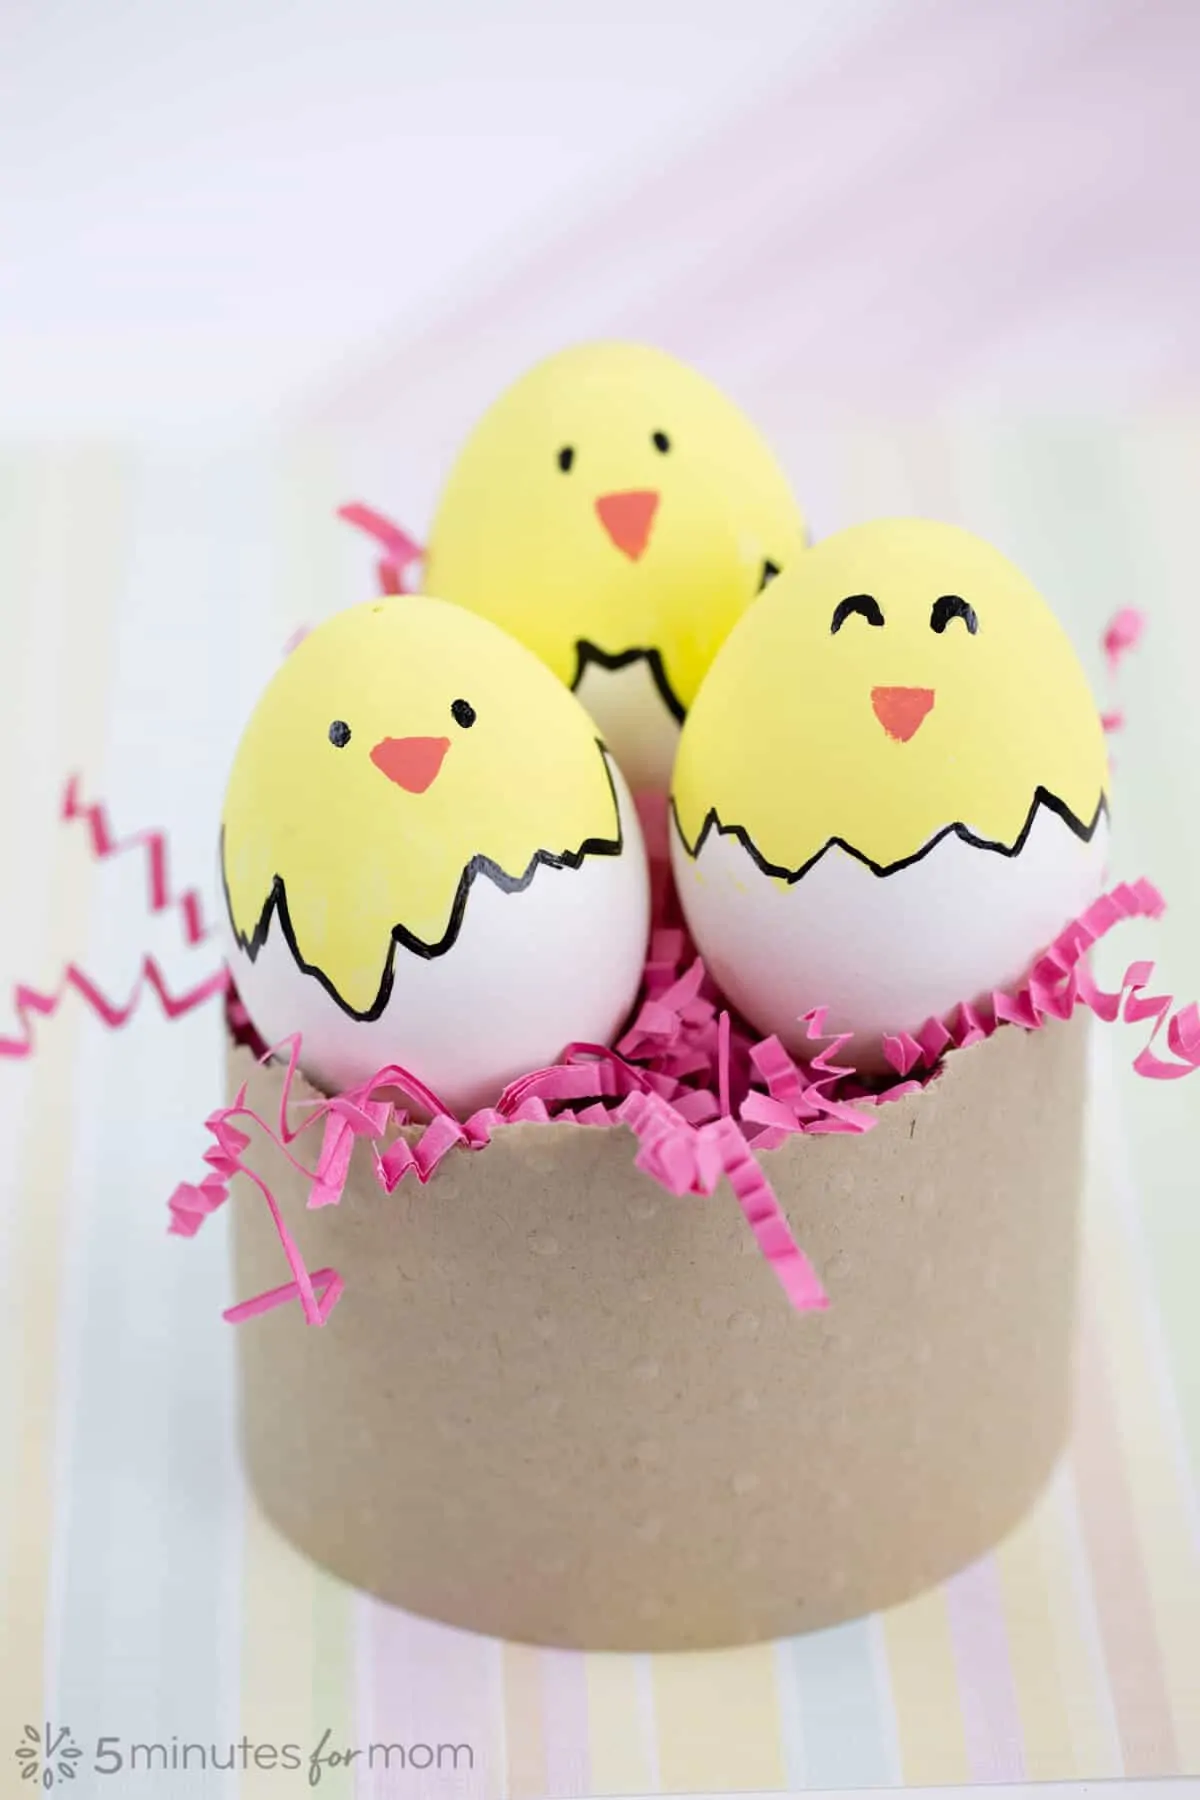
We dropped this little chick and rescued the situation with a layer of Modge Podge after he was painted.
How to Decorate Easter Eggs with Acrylic Paint and Enamel Paint Pens
Once you have your eggs hollowed, baked, and ready to go, you can get to the fun of painting them.
Please Note: If you have younger children painting eggs, you probably want to harden their eggshells before they paint them, as noted in the step above about how to harden blown-out eggs.
But you do not need to harden your eggs before painting. You can harden after painting or skip it entirely. It is totally optional.
Here are some helpful TIPS for how to decorate Easter Eggs and make painting them as easy as possible.
TIP 1: Make a DIY Egg Holder with Crafting Wire
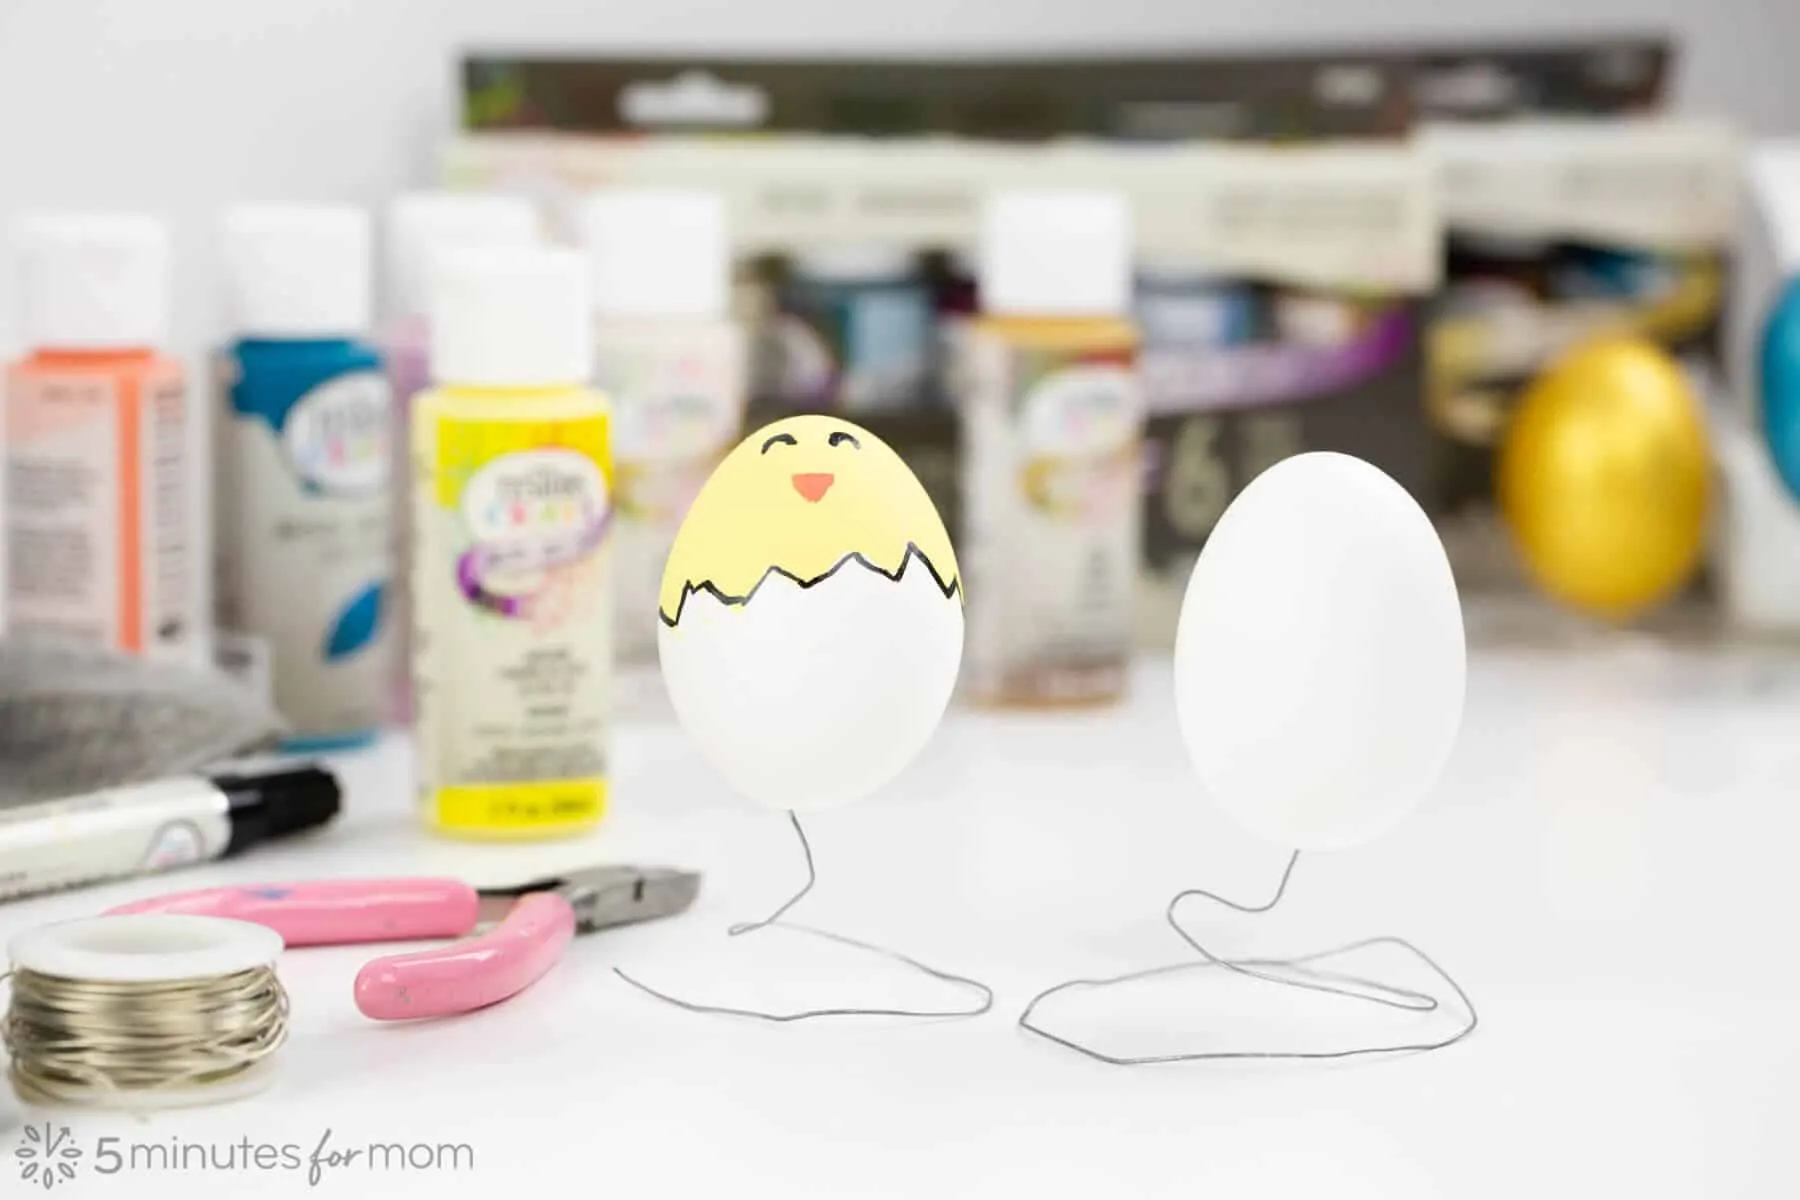
One of the trickier parts of painting eggs is how to hold on to eggs while painting and how to allow them to dry without ruining your painting job.
In order to paint and dry our hollow eggs without touching and wrecking our painting, I created wire egg holders.
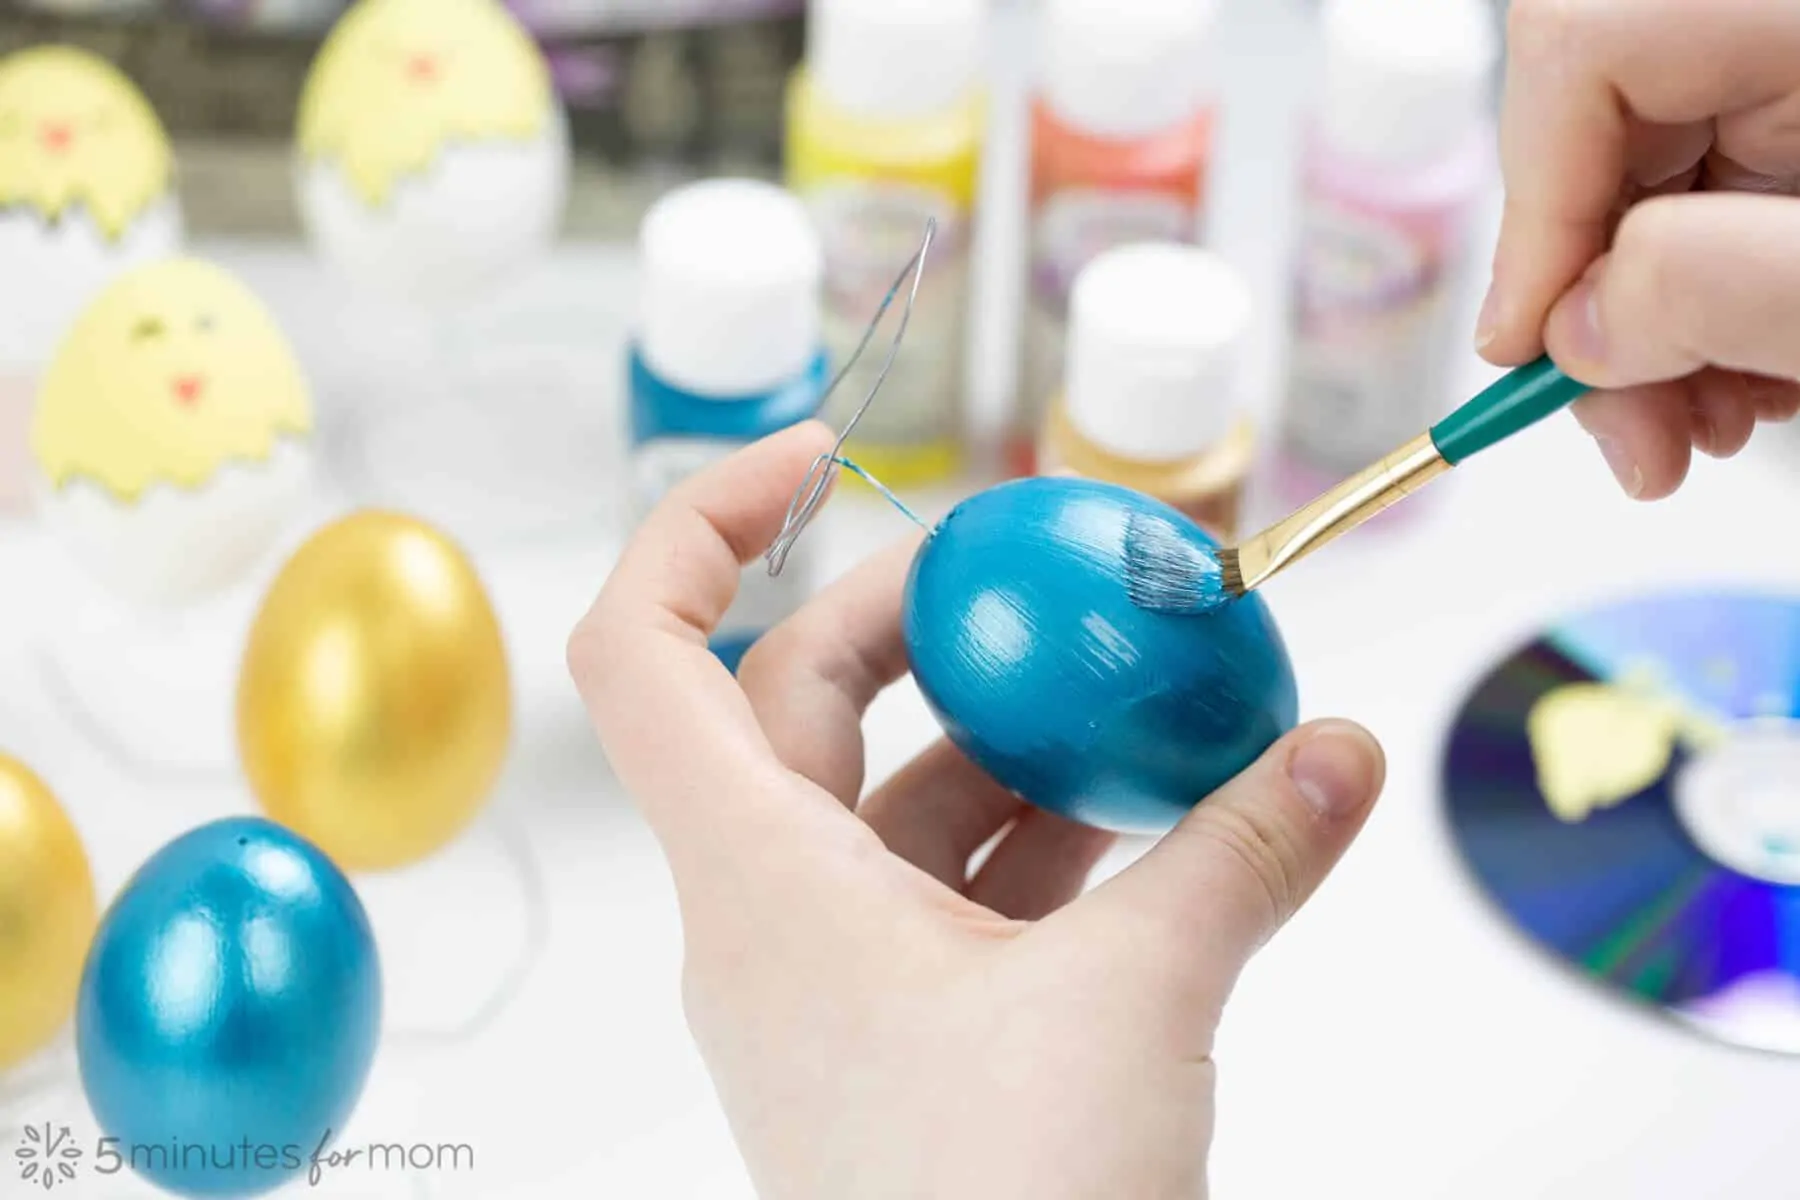
I simply cut and bent crafting wire to make a frame that we could insert in the bottom hole of the eggshells that would both hold the egg while we painted the areas that had been covered by our fingers that were holding the eggshells and hold the eggshell while it dried.
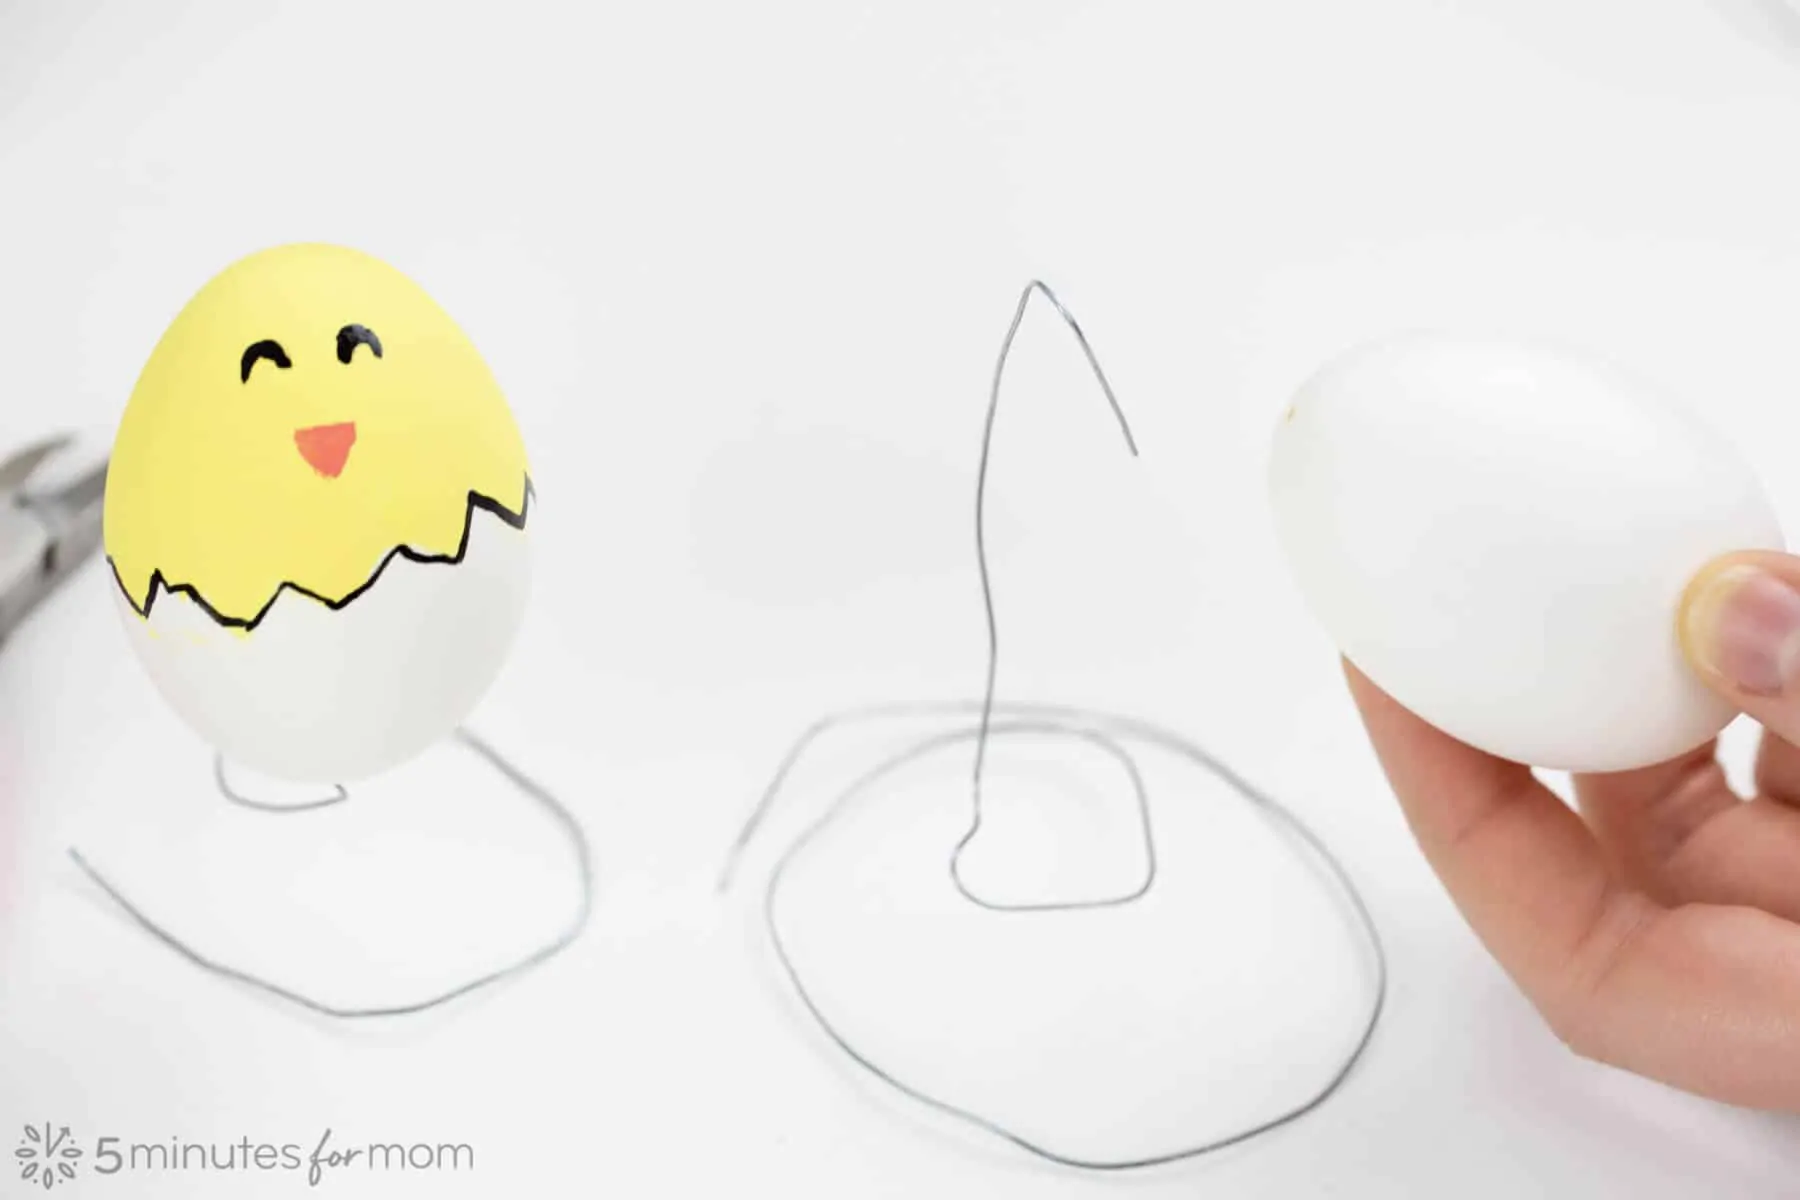
You will want to use a wire gauge that is stiff enough to hold up the egg, but soft enough so that you can easily bend it into shape.
TIP 2: Use a Hairdryer Between Paint Layers
To speed up the painting process between layers of paint, you can use a hairdryer to ensure each coat of paint is dry before you paint additional layers.
You will need to paint at least two coats of paint, sometimes more, to achieve a smooth, consistent base color and you will also need to wait until the base color is drying before painting additional designs or using a paint pen.
TIP 3: Make Egg Cups with Cardstock or Paper Rolls
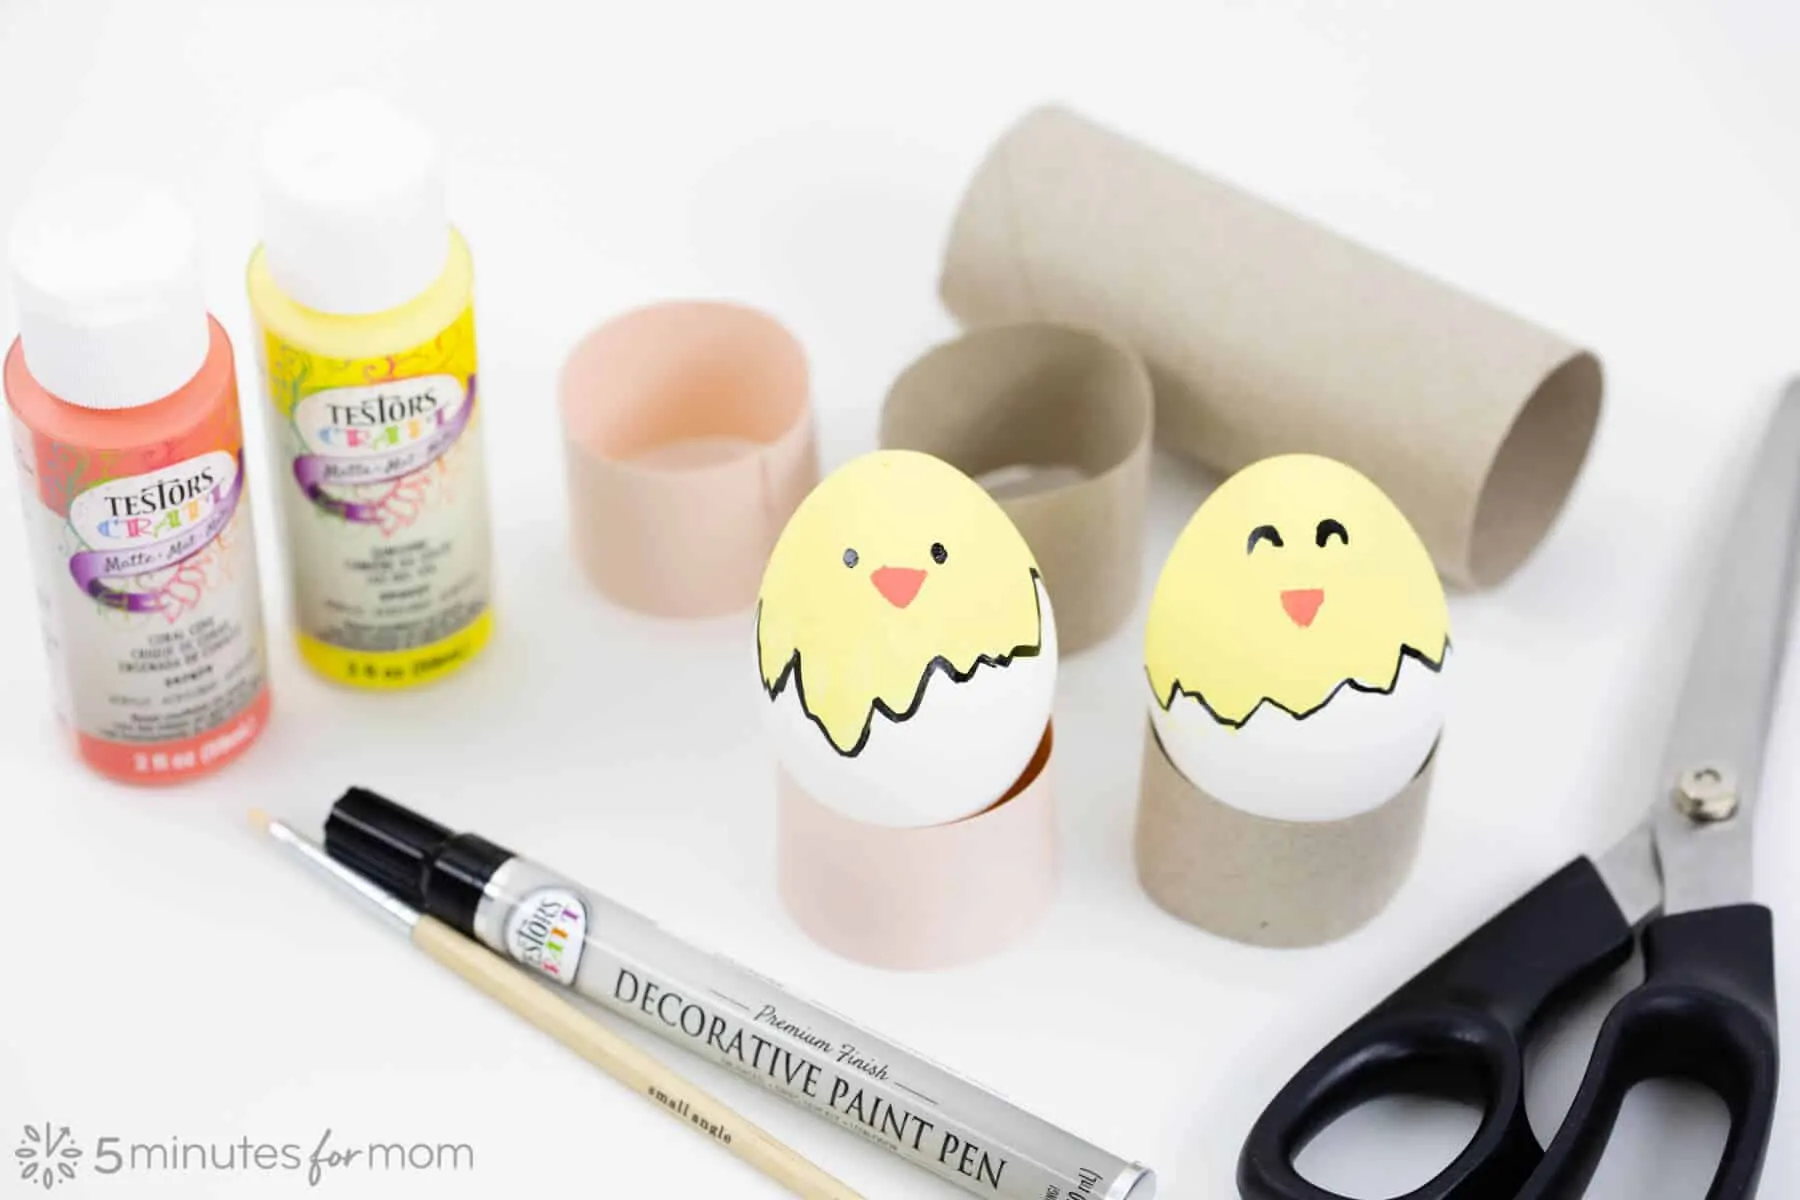
You can quickly create little egg holders by cutting up toilet paper rolls or gluing circles of cardstock.
These paper egg cups work well to both hold eggs while you paint them and display them when they are finished.
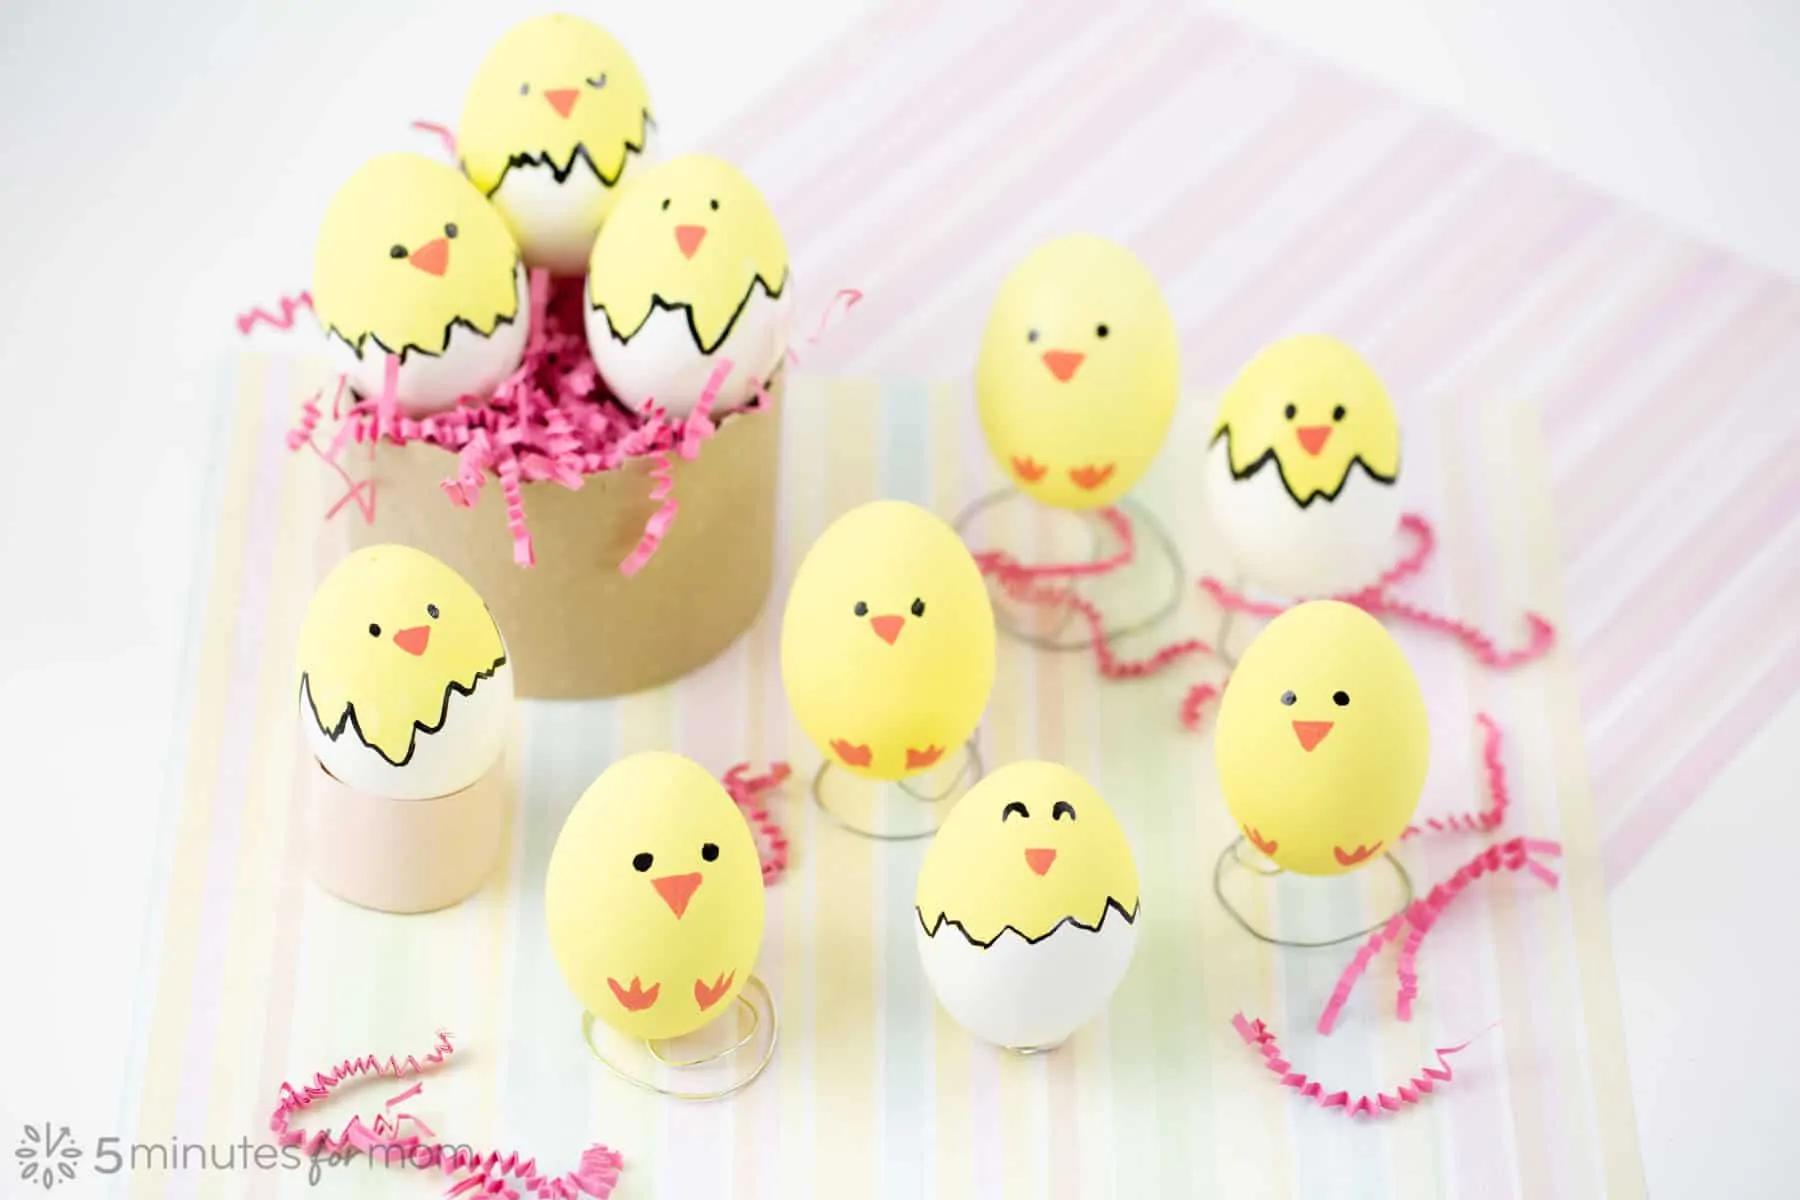
To make our larger nest, I simply rolled a piece of cardstock and taped it together at the back. (You can staple, glue, or tape the cardstock. I taped mine so I could remove the tape after we were done.)
TIP 4: You Can Fix Mistakes
Don’t despair if your paintbrush or paint pen slips. Use a damp corner of a paper towel to wipe off any mistakes and then touch up any smudges or imperfections with a bit more paint.
And as we mentioned above, we dropped a little chick and repaired the eggshell cracks with a layer of Modge Podge.
Problems solved.
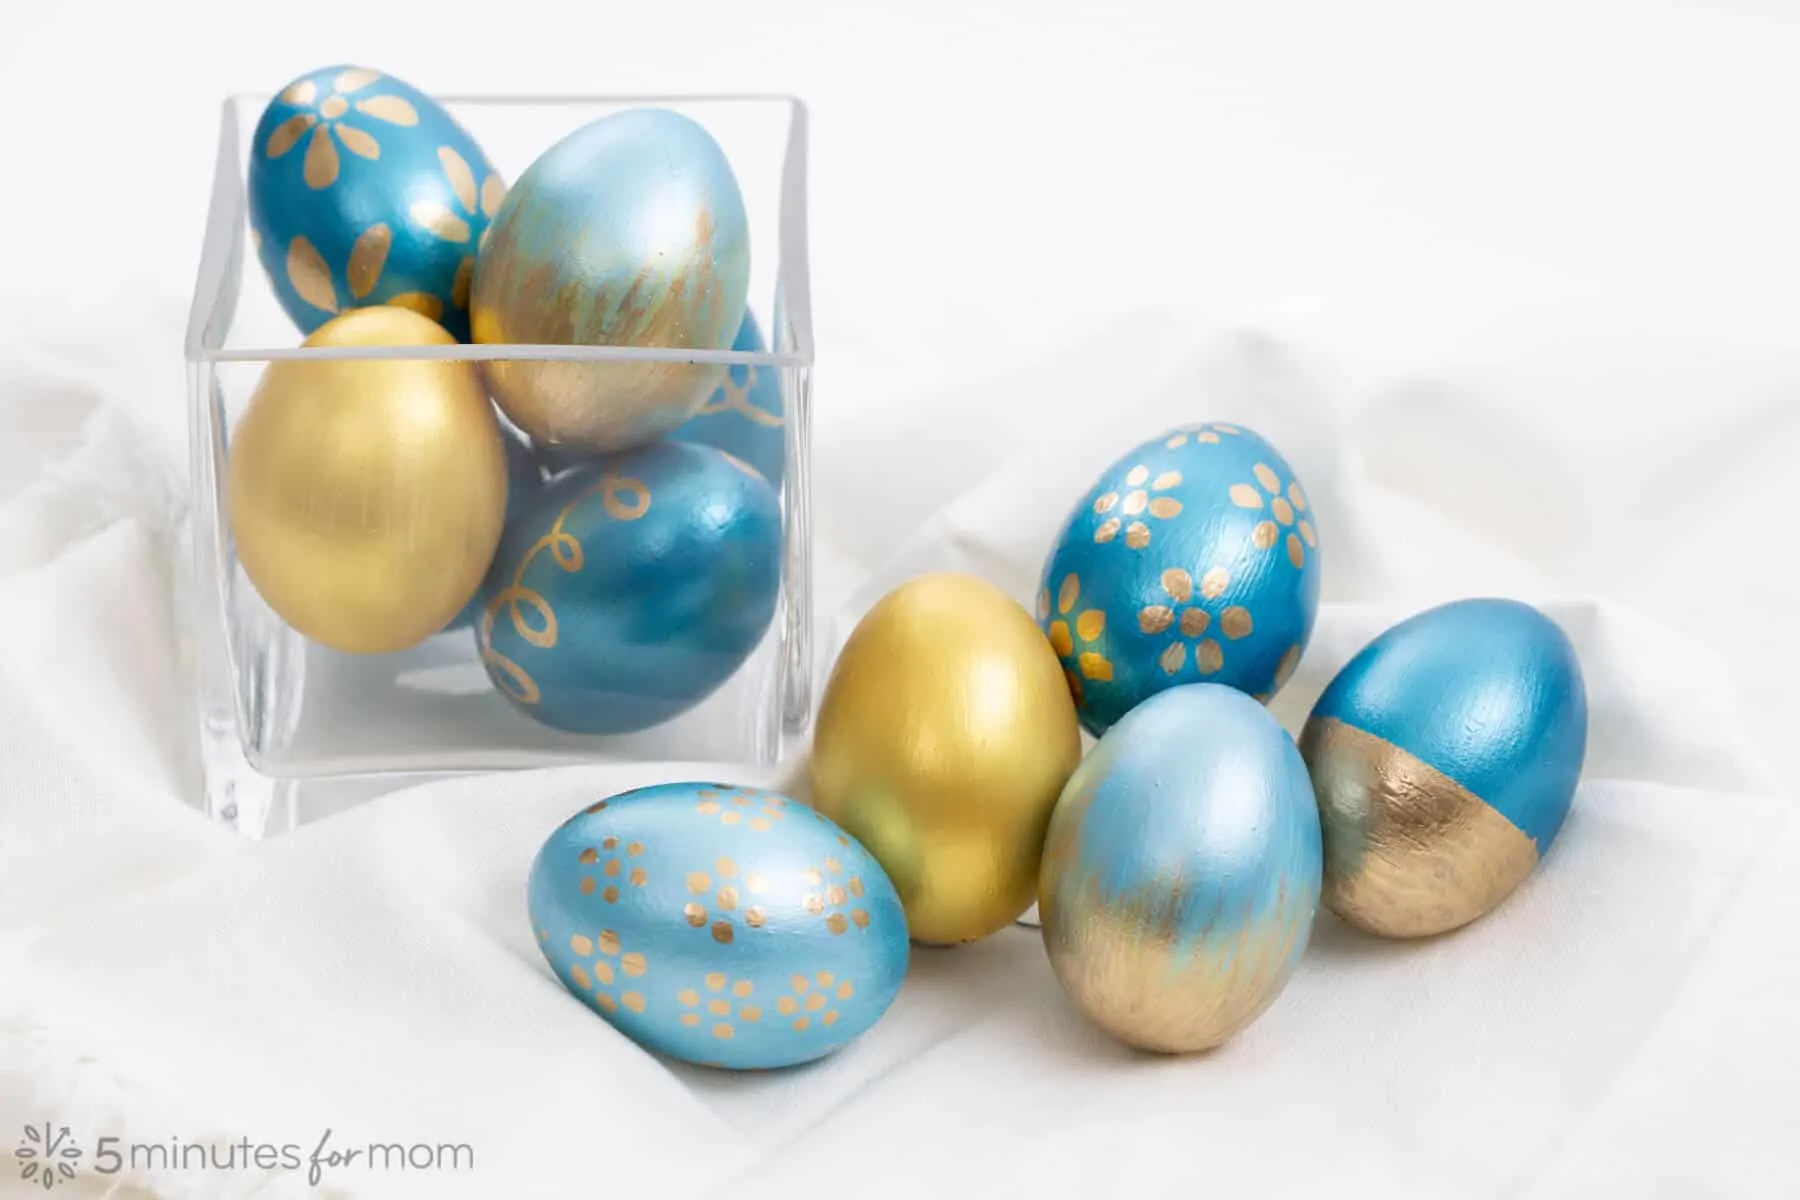
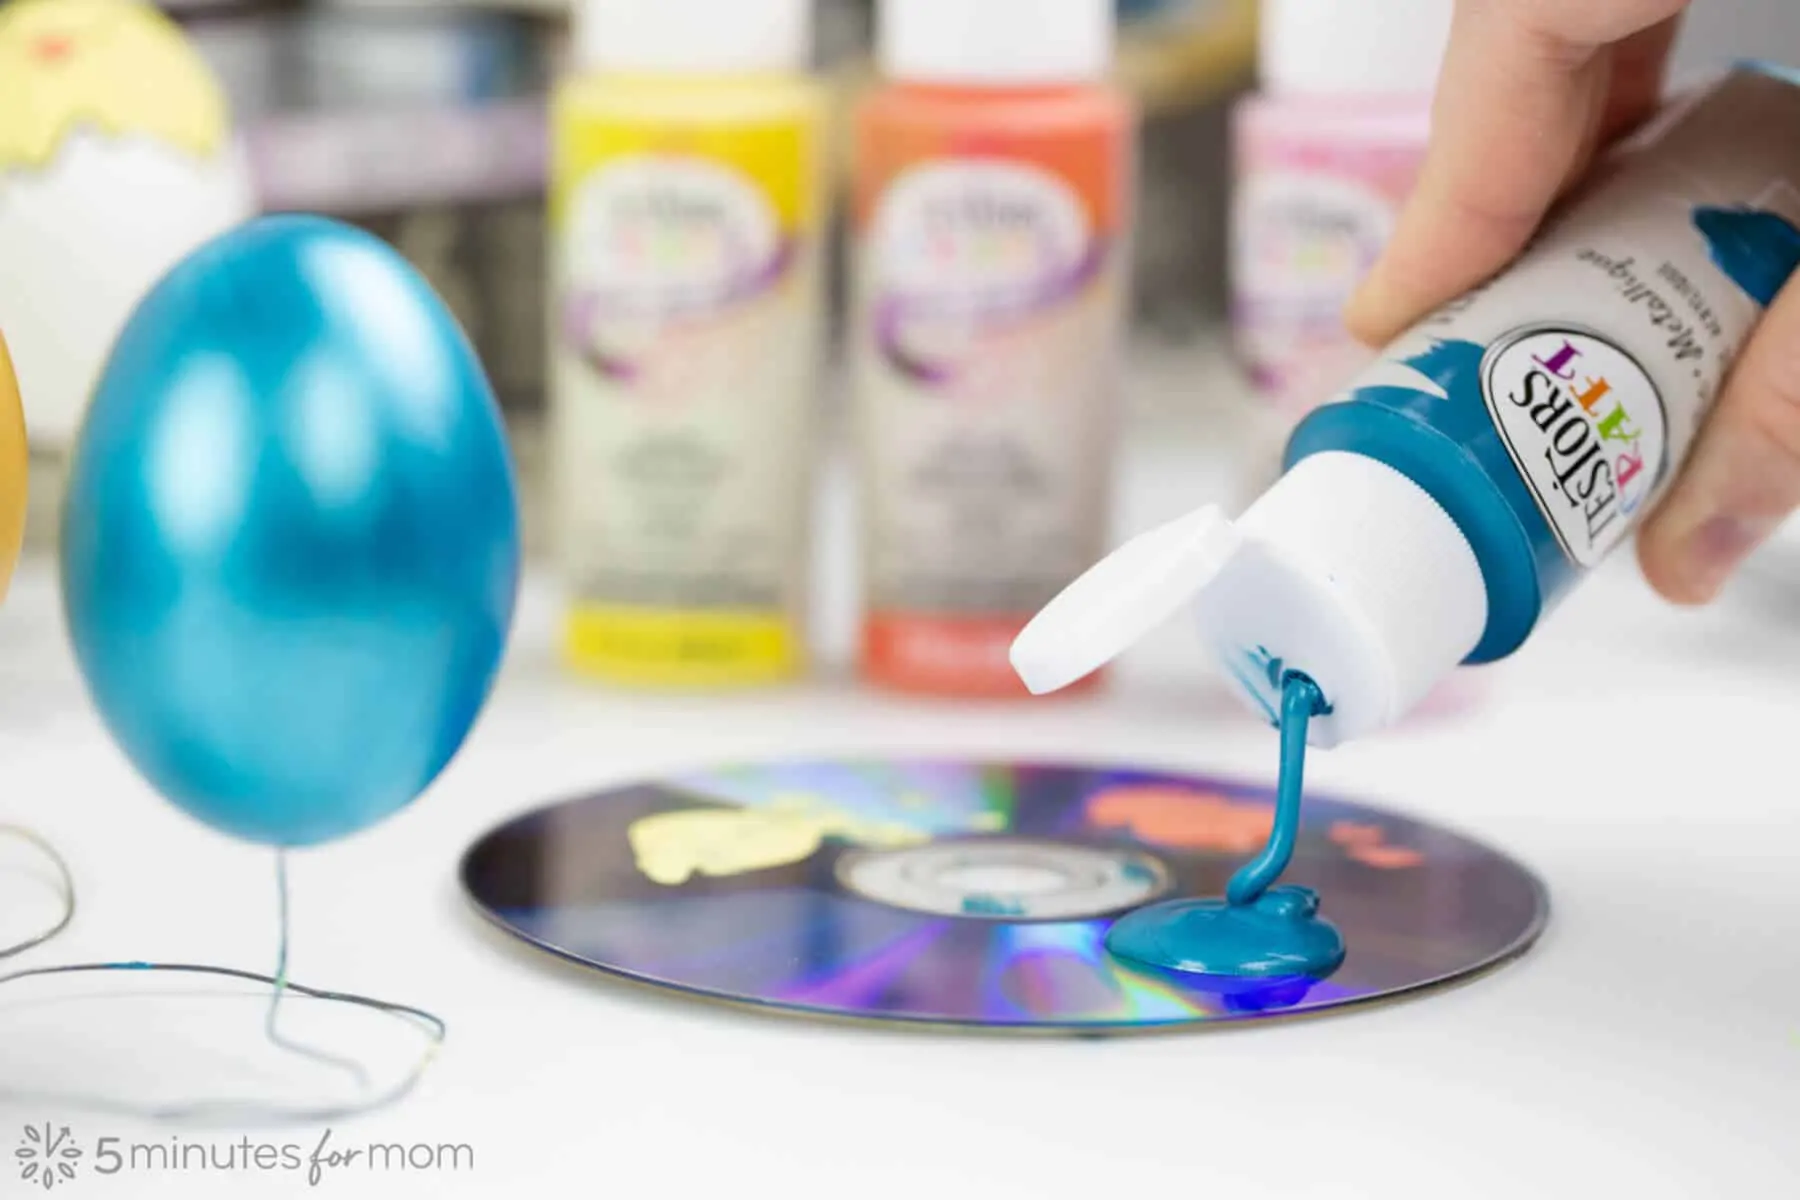
TIP 5: Use Testors Craft Metallic Paint to Create Metallic Easter Eggs
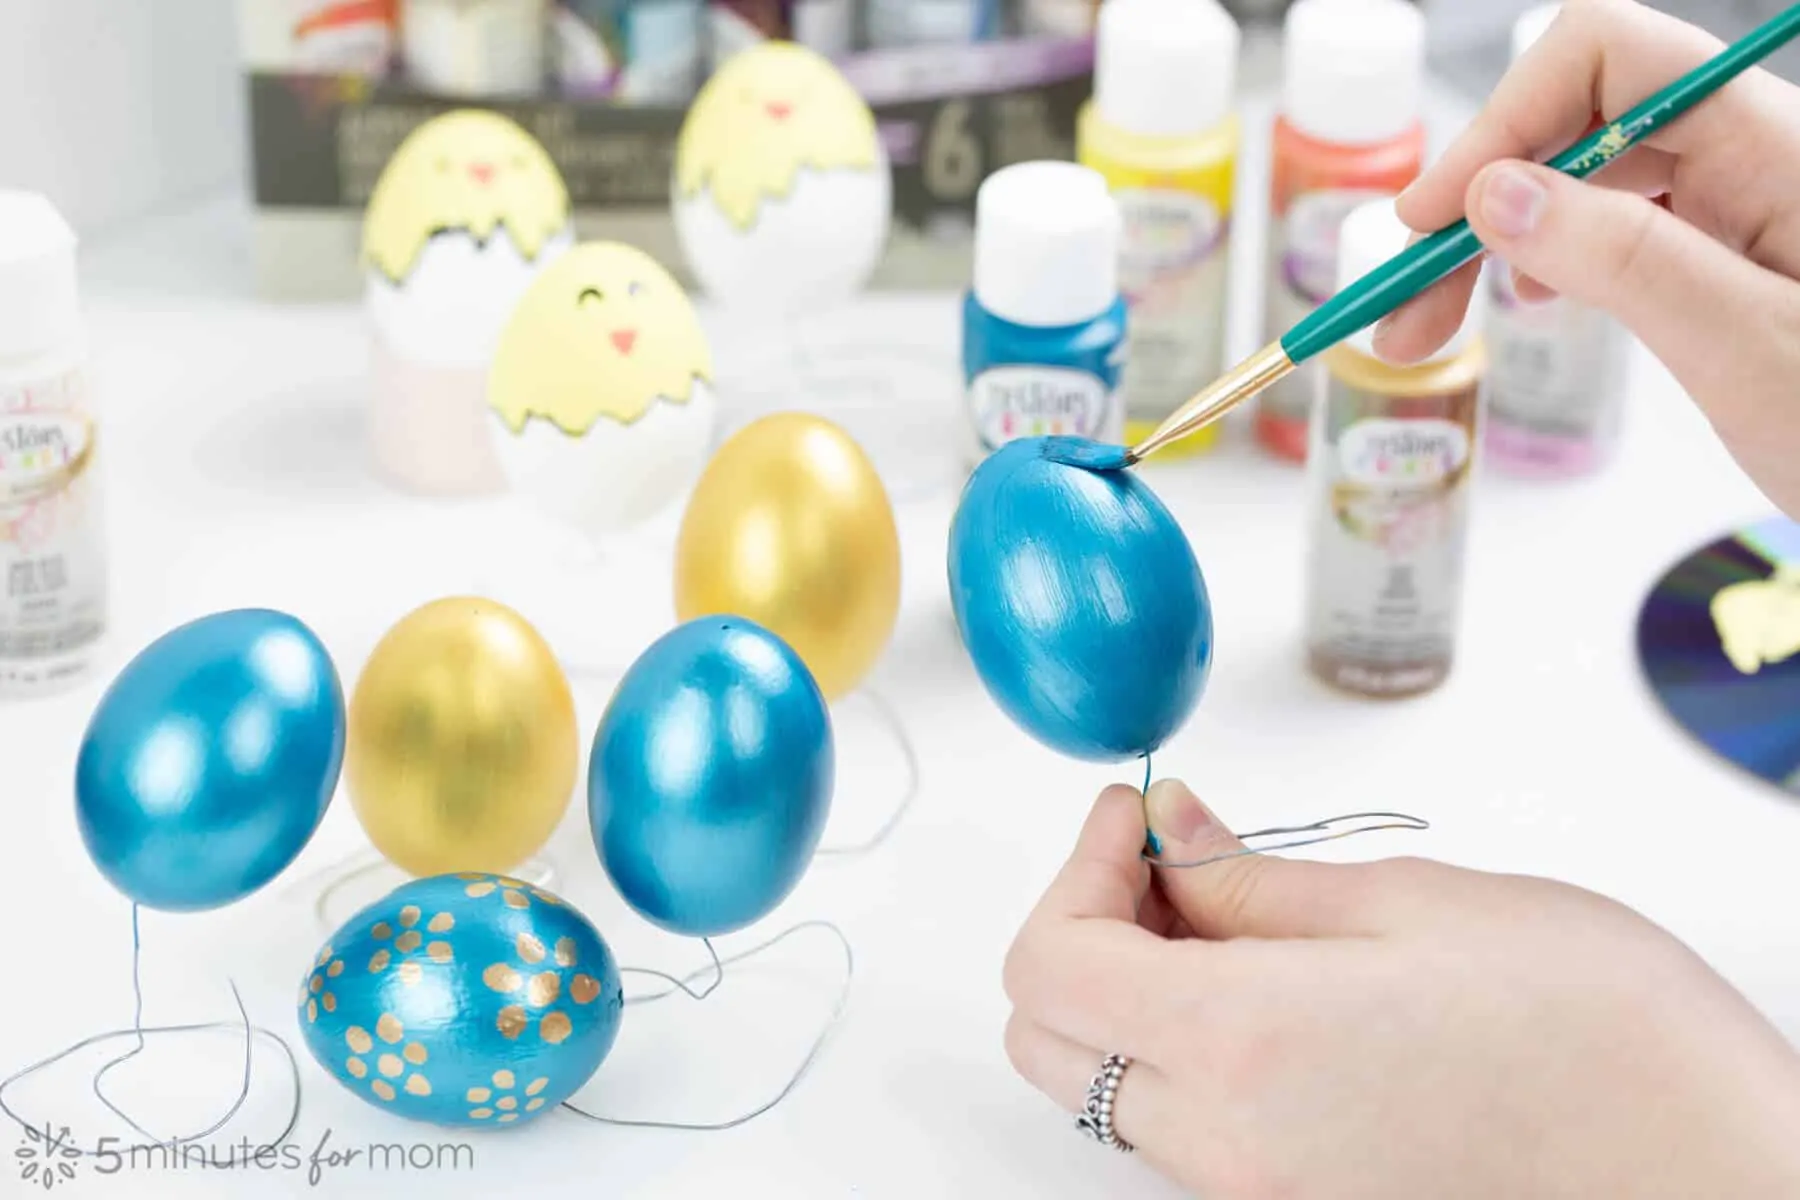
To make these shimmering metallic eggs, we used Testors Craft Acrylic Metallic Paint in Galaxy Blue, Gold, and Snow White.

We mixed Metallic Gold and Metallic Snow White to create a lighter blue color.
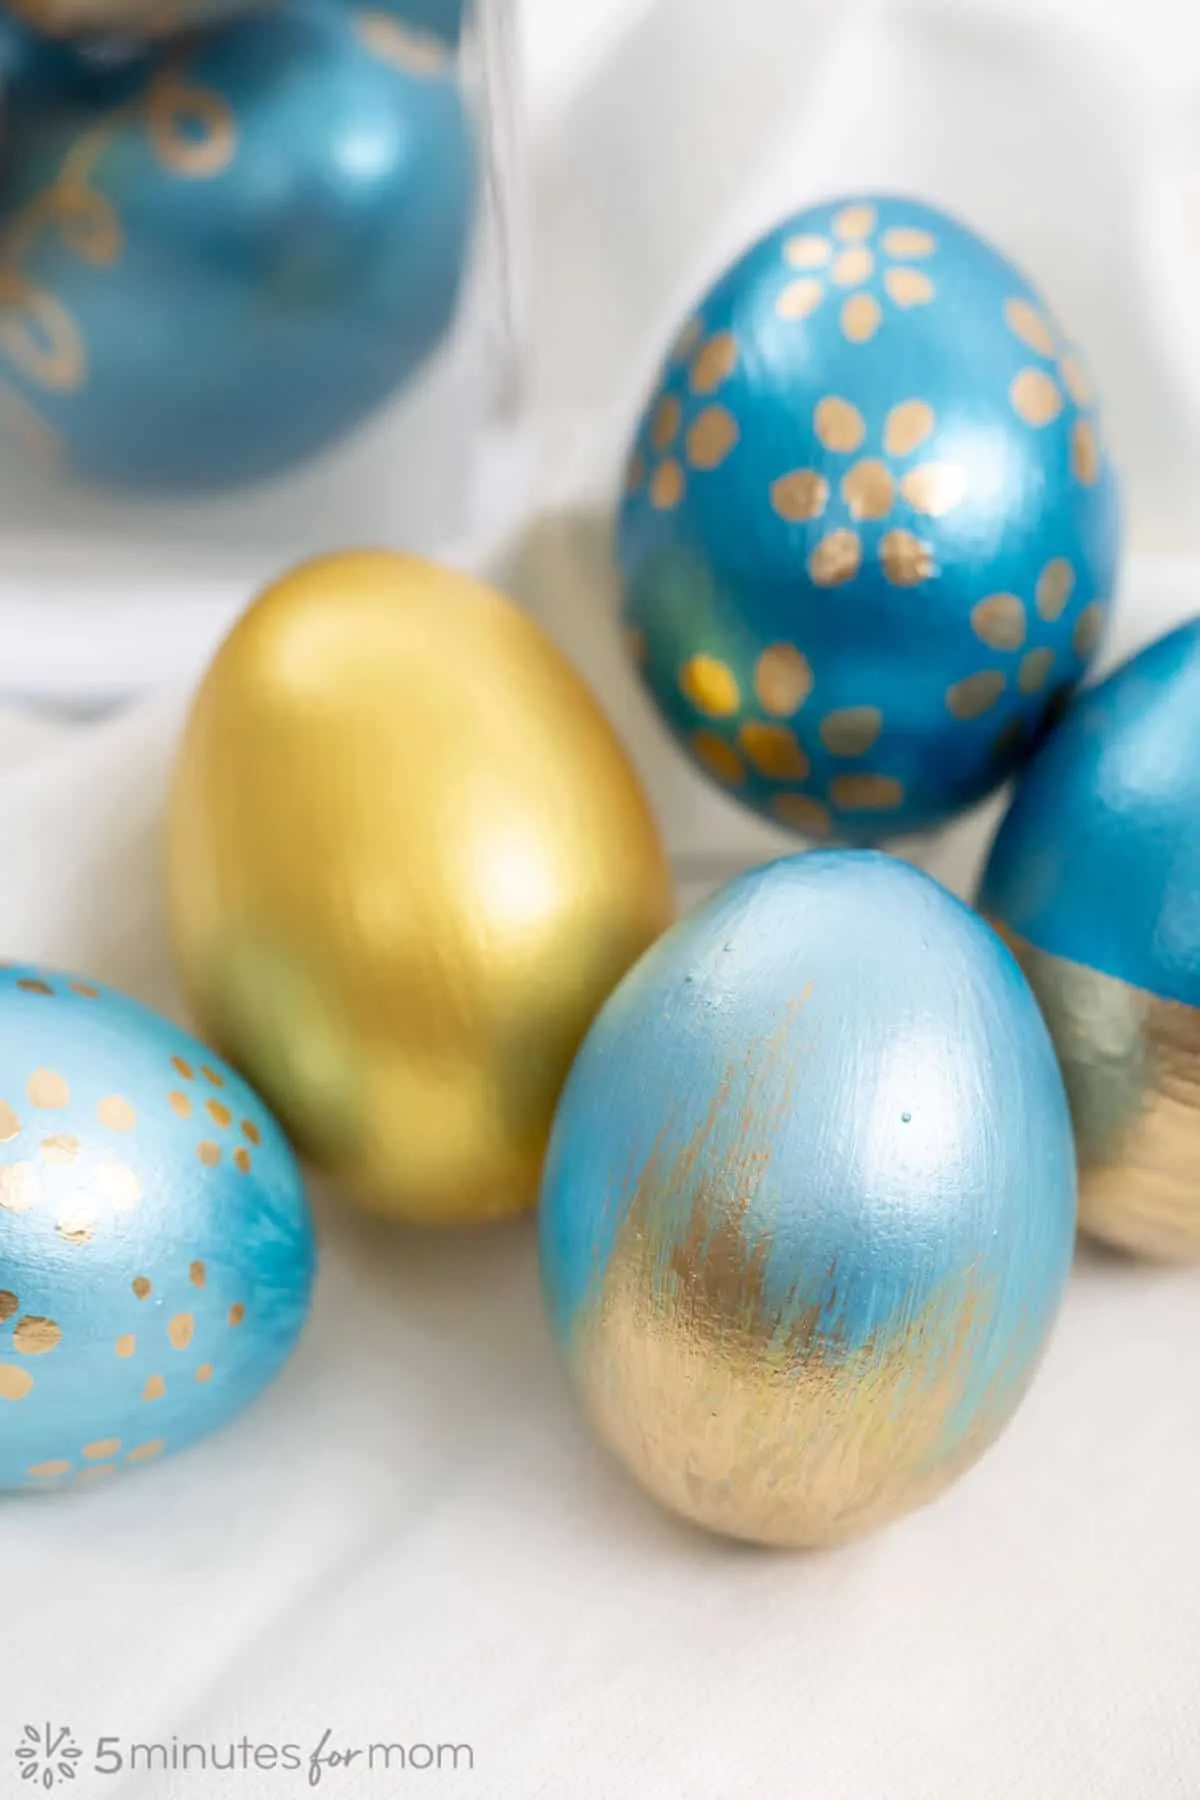
I love how beautifully these metallic eggs turned out!
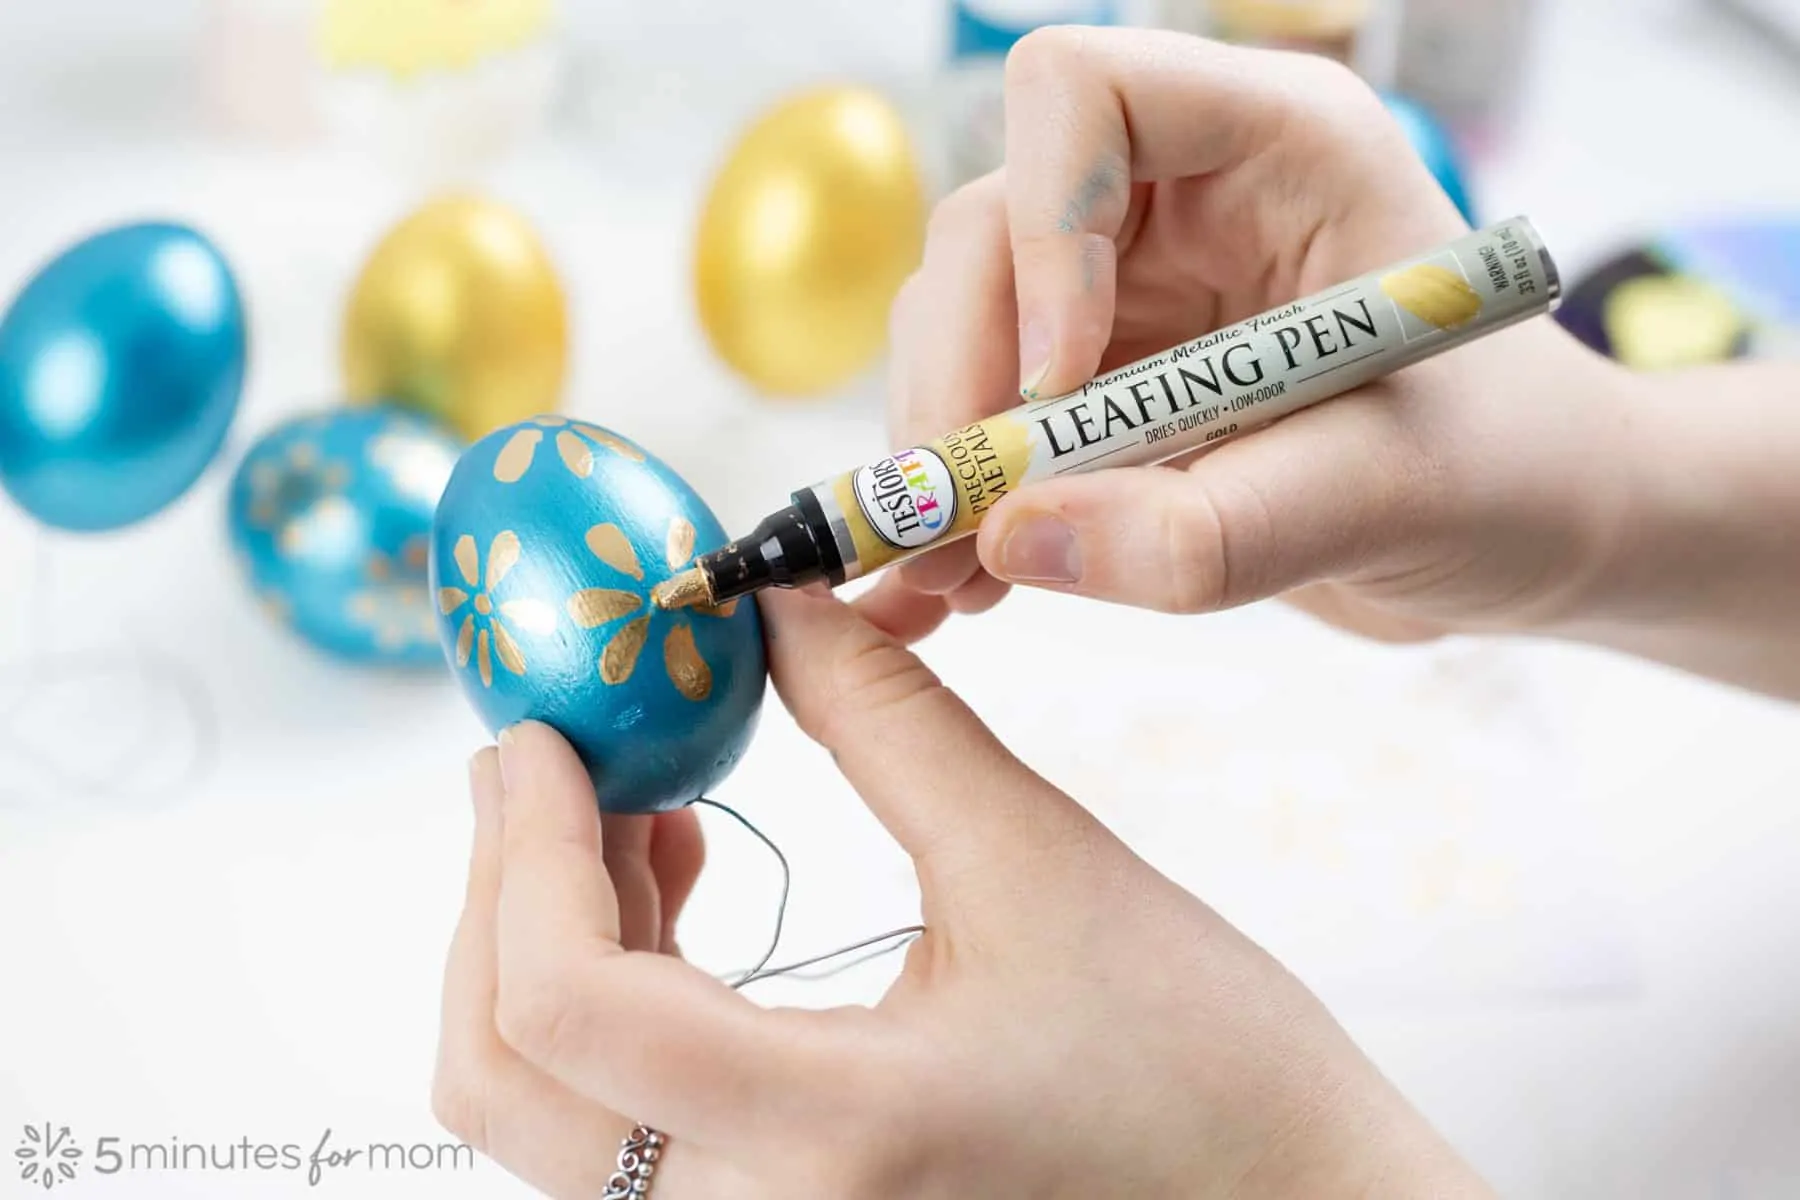
TIP 6: Use Testors Craft Enamel Paint Pens to Decorate Your Eggs
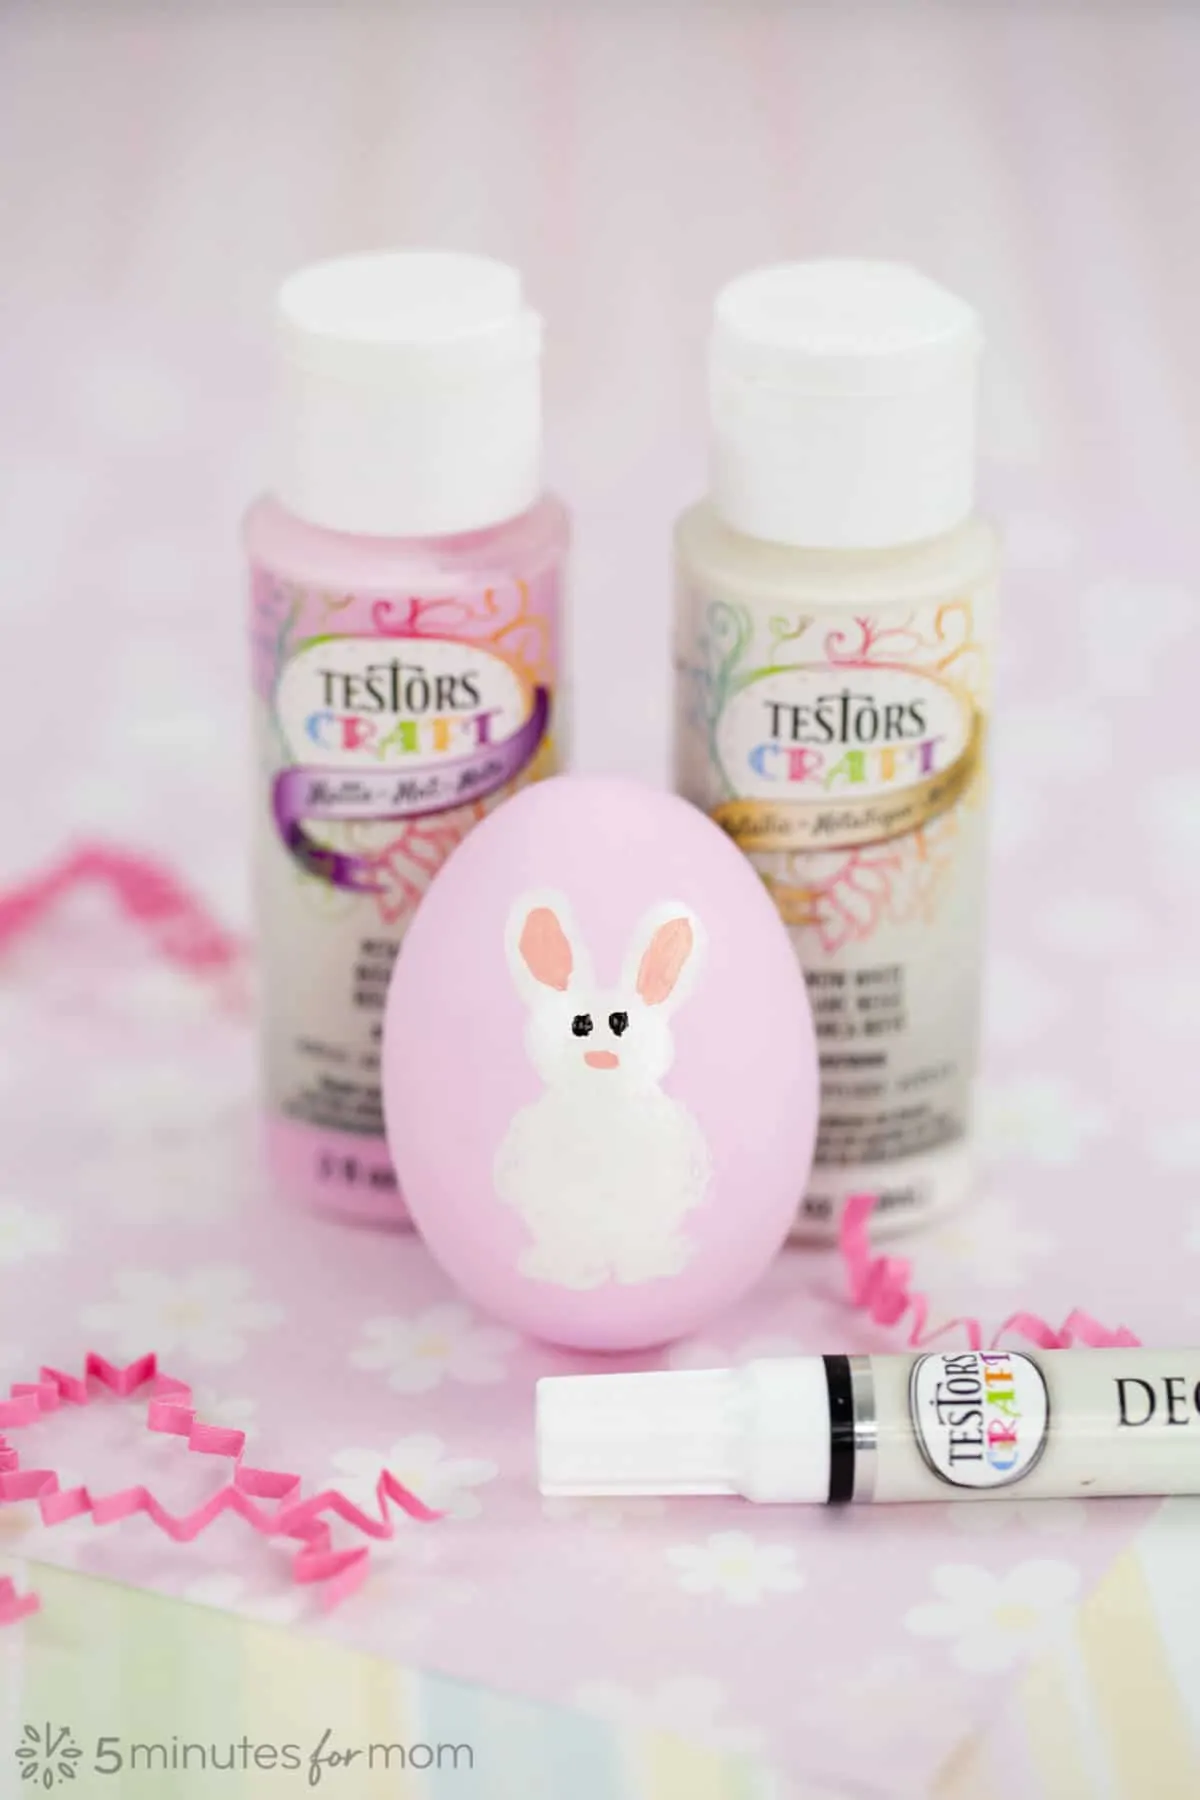
With Testors Craft Metallic Leafing Pens and Testors Craft Decorative Paint Pens and you can draw, paint, doodle, or write on your eggs to create stunning, one of a kind Easter Eggs.
After we painted our blue and gold eggs with Testors Craft Metallic Paints, we used the Testors Craft Metallic Leafing Pen in Gold to add gorgeous gold leafing accents.
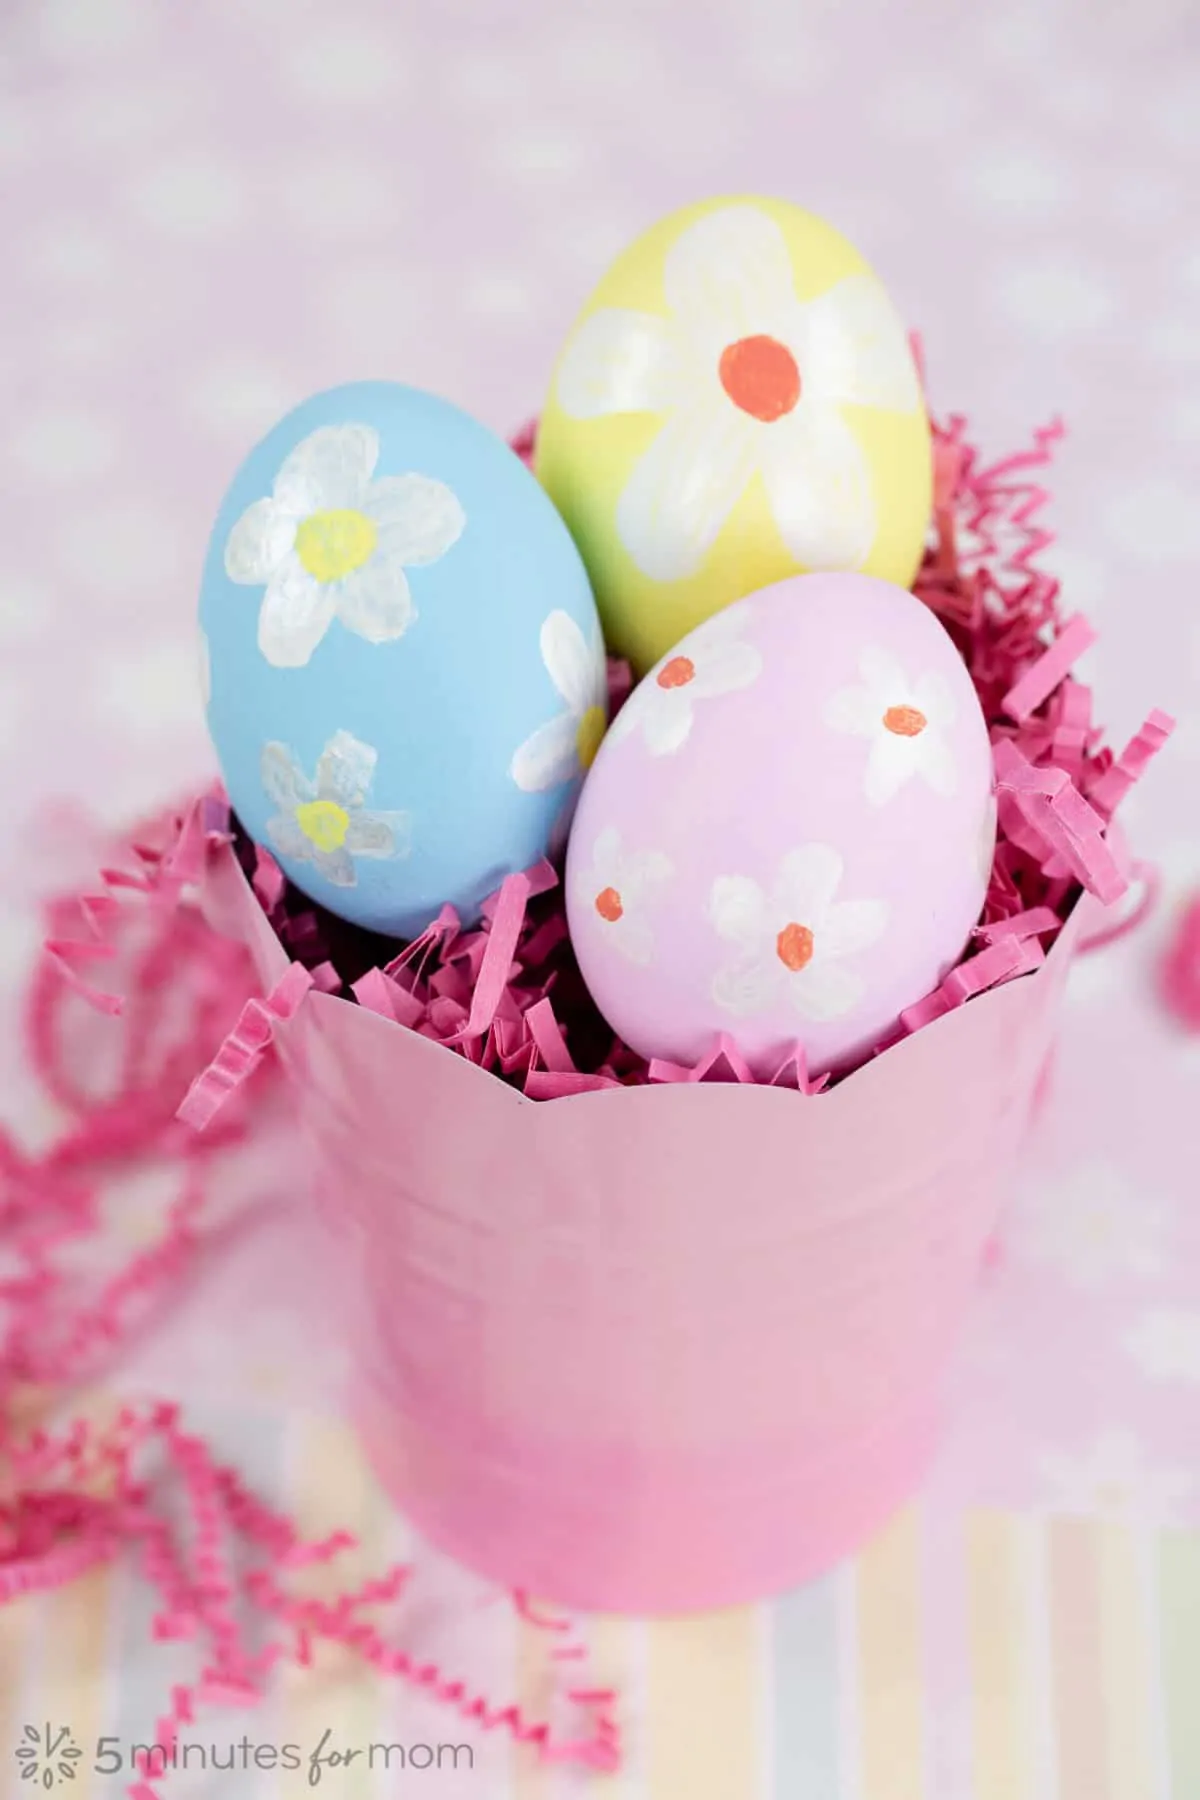
We used the Testors Craft Decorative Paint Pen in Black Satin Finish to create our “chick” eggs and we used Testors Craft Decorative Paint Pen in White Satin Finish to create our flower eggs and our bunny eggs.

To use the paint pens, first, hold the cap in place and shake for 30 seconds. To start the flow of paint, lightly depress the tip of the pen several times.
While using the pen, you may need to recap and shake periodically and you will need to reprime the pen as you work to keep the paint flowing.
Please Note: When you are using the paint pens on the eggshells, do not depress the tip of the pen on the eggshell to get the paint flowing.
Since the eggshells are delicate, you do not want to press down hard on the eggshell with the paint pen.
Keep a scrap piece of paper/cardstock next to you while you are working so that you can prime the pen on the scrap paper to keep the paint flowing.
Try These Fun Crafts Too…
Take a look at some of our other Testors Crafternoon projects that your kids will love:
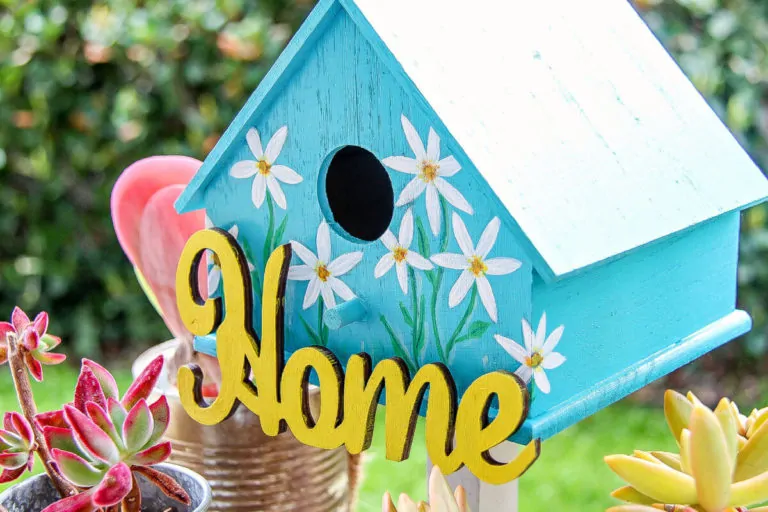
- Painted Birdhouses
- DIY Flower Press
- Coffee Filter Flowers
- Paint Rocks
- Pallet Picture Frame
- Glow in the Dark Bowling
- How to Make Tea Towels
Disclosure: This post is sponsored, so extra thanks for reading and sharing.
Written and photographed by Janice Croze, co-founder of 5 Minutes for Mom
Talk with me: @5minutesformom and Facebook.com/5minutesformom
Pin with me at pinterest.com/5minutesformom


I’m going to be making these eggs this year and love the tip on hardening the shell. Can I dye the eggs after the oven process and before the glue process? I was planning on dyeing them using natural food dyes (beetroot, purple cabbage and tumeric water)
Yes, you can do that. I hope you have fun!
We should decorate some this year
I love the use of those paint pens. I just discovered those recently and love using them for projects like this.
These look really awesome! Love this idea!
We’ve painted eggs before, but have always had a hard time covering our finger spots. Your wire egg holder idea is BRILLIANT!!!
wow! How cool are these eggs! I am sure that my kid will enjoy decorating them!
All of these decorated eggs turned out great. My favorite ones are the ones using metallic paint.
I have some wooden eggs that I need to try this technique on. These eggs are so pretty
These turned out so good. I love them all! I need to do some of them with my daughters. I really love those blue eggs. They’re very pretty.
These Easter eggs are so awesome! I’m hoping that we can decorate some this year.
I’m going to be making these eggs this year and love the tip on hardening the shell. Can I dye the eggs after the oven process and before the glue process? I was planning on dyeing them using natural food dyes (beetroot, purple cabbage and tumeric water)
Those are so cool! And with all this time on my hands I’ll be able to make these with my kids soon.
Those little chicks are so cute! I’m obsessed!
Paige
http://thehappyflammily.com