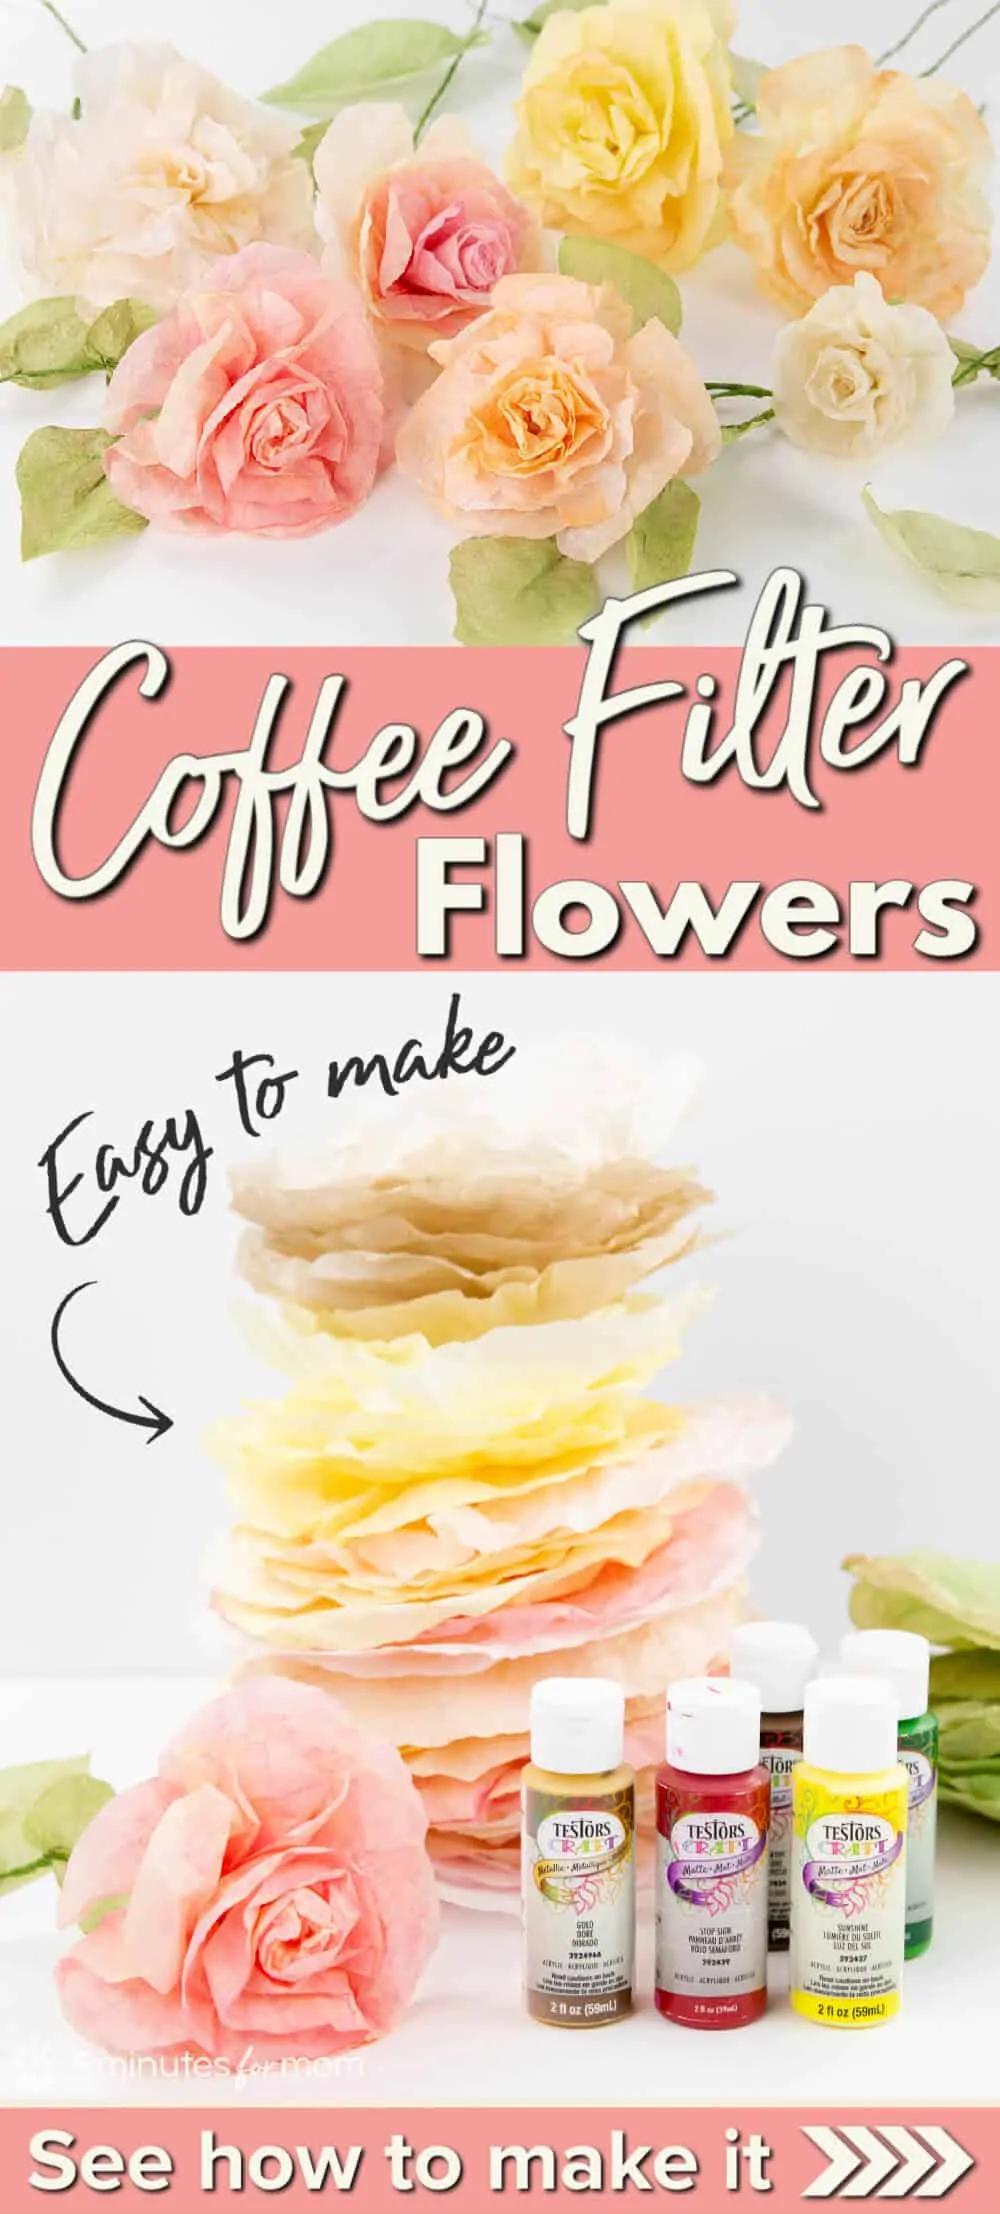
You can transform coffee filters into stunning paper flowers using acrylic craft paint and a bit of glue. These coffee filter flowers are a fun, easy, and inexpensive craft that works for all ages. Enjoy this craft step-by-step tutorial thanks to our sponsor Testors.com.
 We are thrilled to host another Testors Crafternoon to help you and your family have fun creating memories together.
Be sure to also check out a few of our other Crafternoons activities, including Flower Pot Painting Ideas and how to make a DIY Photo Display.
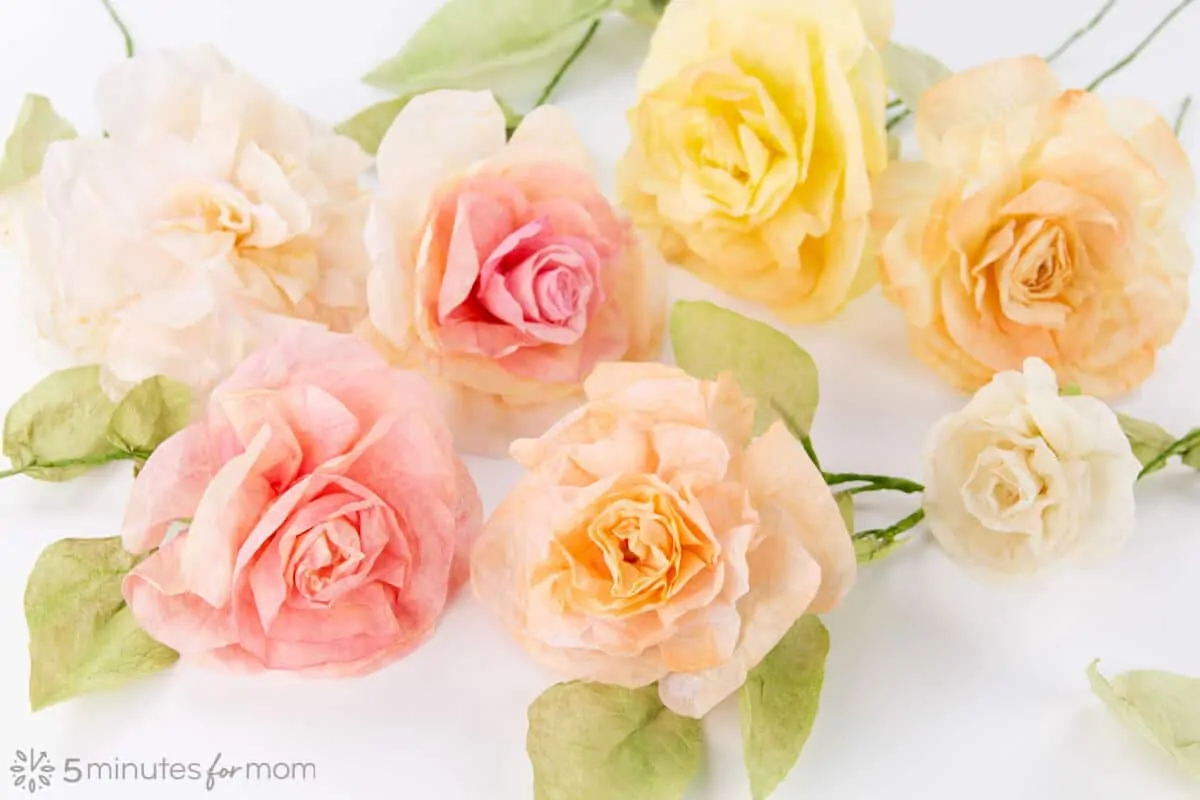
Coffee Filter Flowers
Did you know that you can make realistic paper flowers from coffee filters and regular craft acrylic paint?
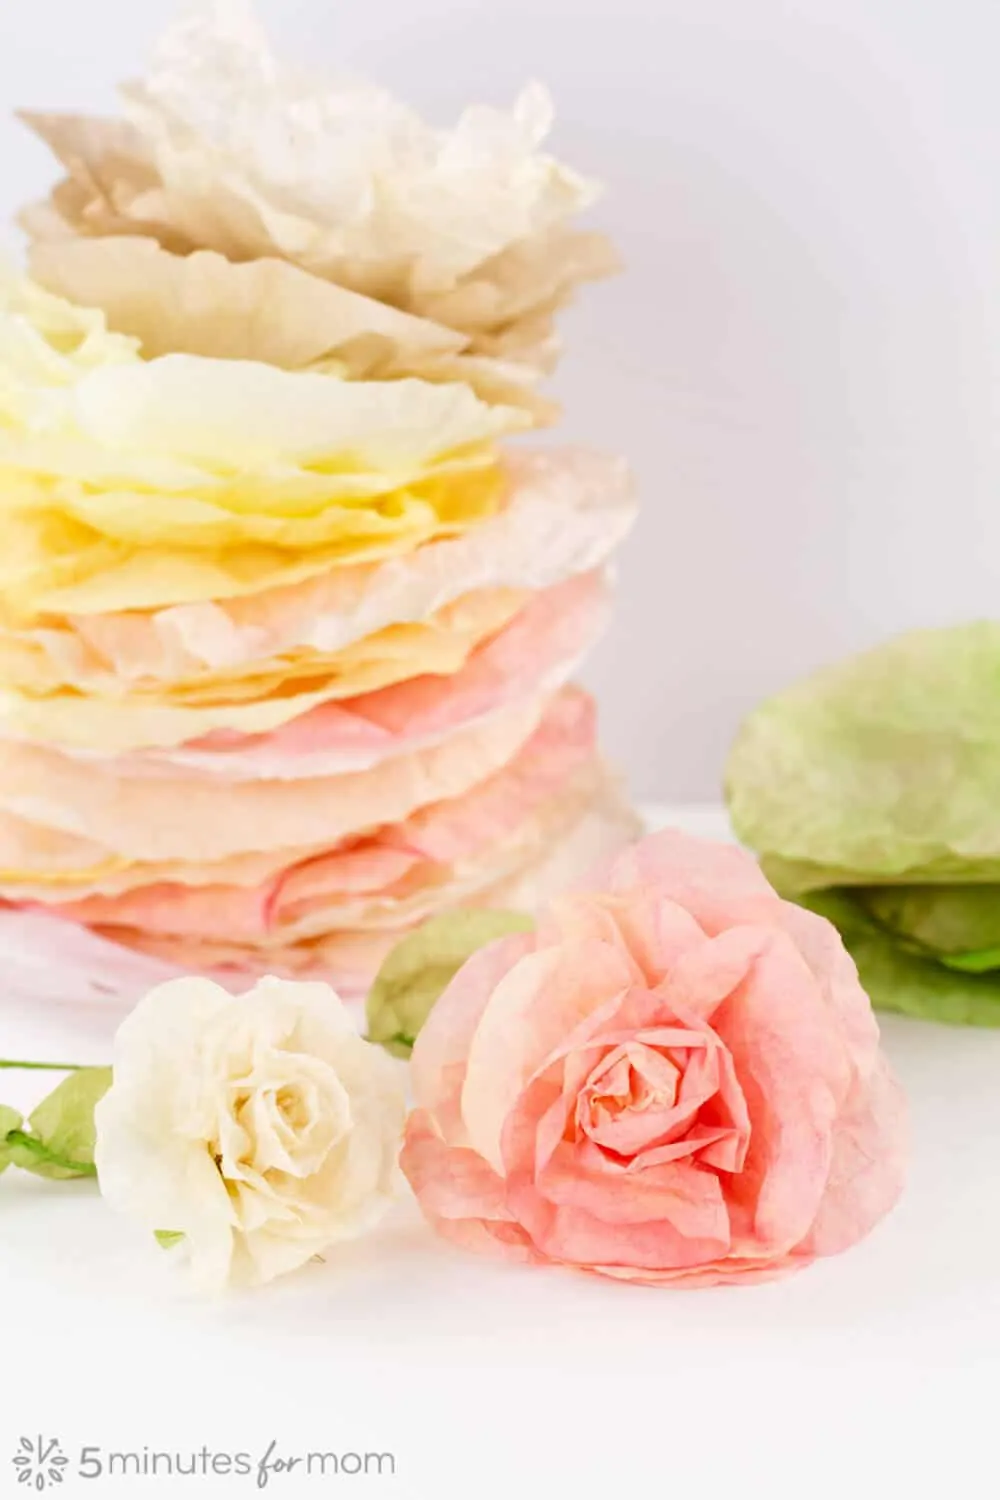
In all my years of crafting, I think these coffee filter flowers are some of the most gorgeous and yet inexpensive things I have ever made.
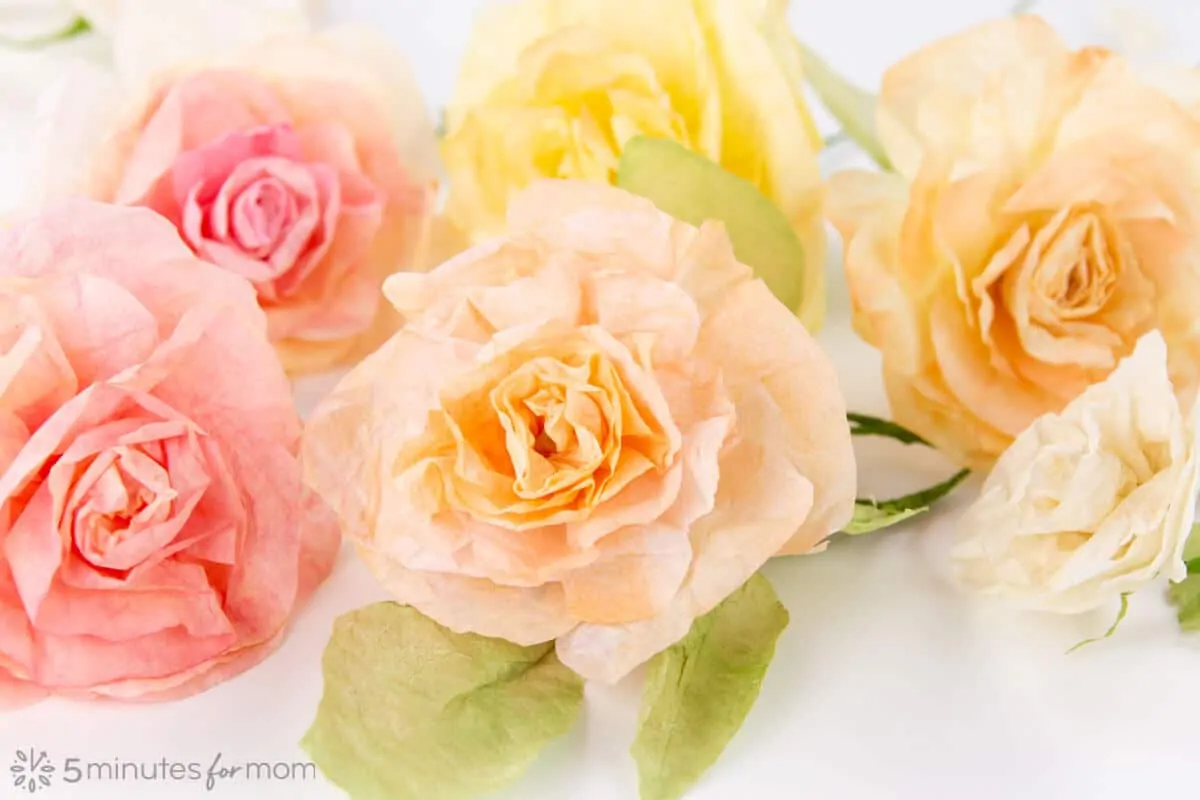
There are so many different flower variations you can make with coffee filters — roses, peonies, hydrangeas, tulips, and more. You can keep the style simple and easy or get more detailed and intricate with your creations.
Whatever methods or designs you choose, you will be amazed at what you can create with a coffee filter!
Supplies:
- Coffee filters – we used white, bowl-shaped filters in 4 cup and 8-12 cup sizes
- Testors Acrylic Craft Paints in assorted colors
- Glue gun or white glue
- Wire (18-20 gauge for stem and 24-28 for leaves)
OR pipe cleaners or drinking straws will work - Green floral tape or green masking tape
- Scissors
- Wire cutters (optional)
- Paintbrush (optional)
- Testors Amazing Air Airbrush Kit (optional)
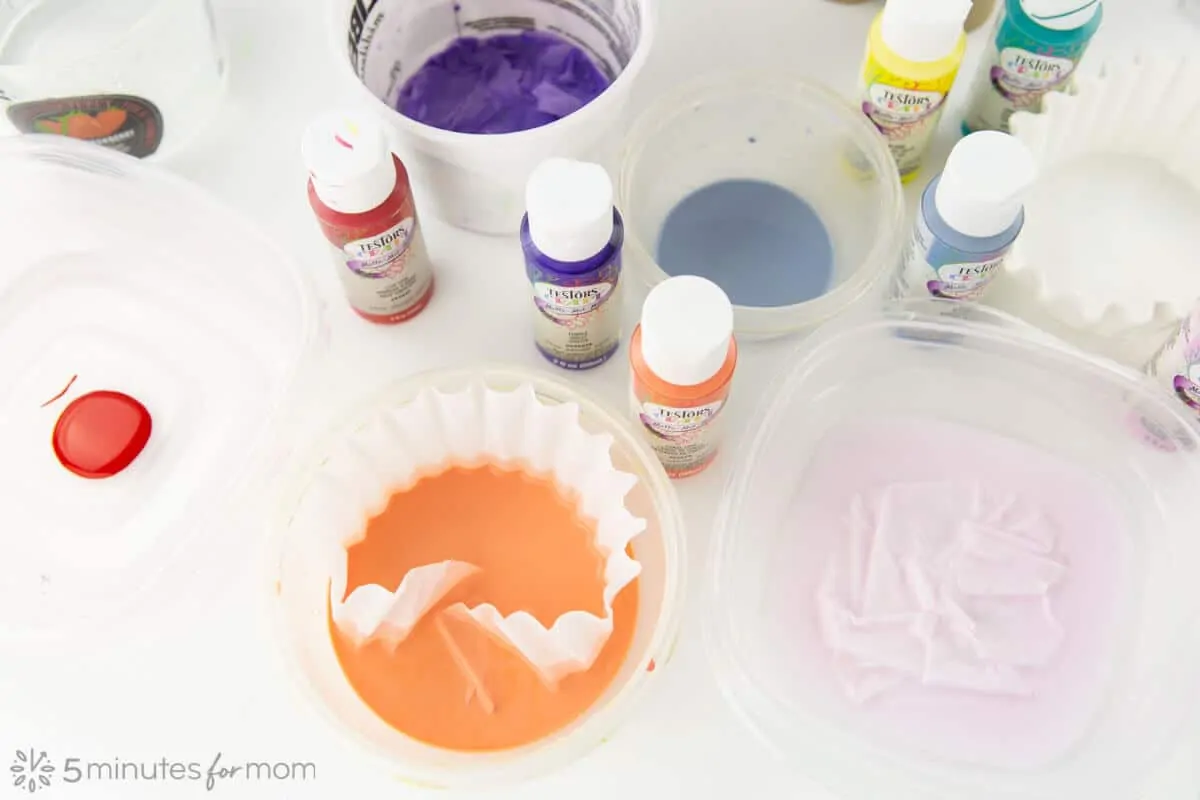
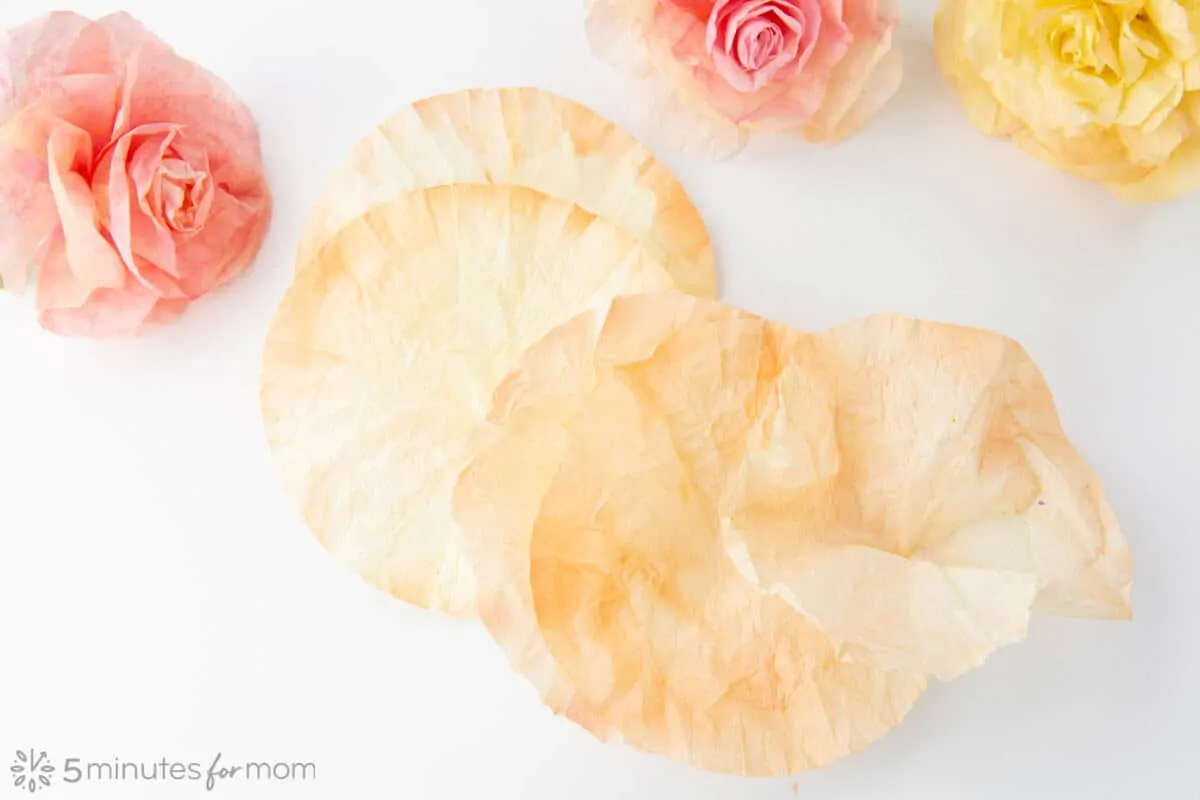
Step 1 – Dye Coffee Filters
There are a variety of ways you can dye coffee filters.
One popular method for dying coffee filters is to use food coloring. But personally, if it is possible, I avoid using food coloring when crafting. Food coloring can make such a mess and it does NOT wash up easily.
Especially if I have kids involved, I do not want to use food coloring to dye coffee filters. I don’t want to worry about food color stains on countertops, clothes, hands, etc.
Since we always have tons of acrylic craft paint, it is the perfect option to dye coffee filters. It is kid-friendly, inexpensive, easy to clean up, and creates beautiful colors.
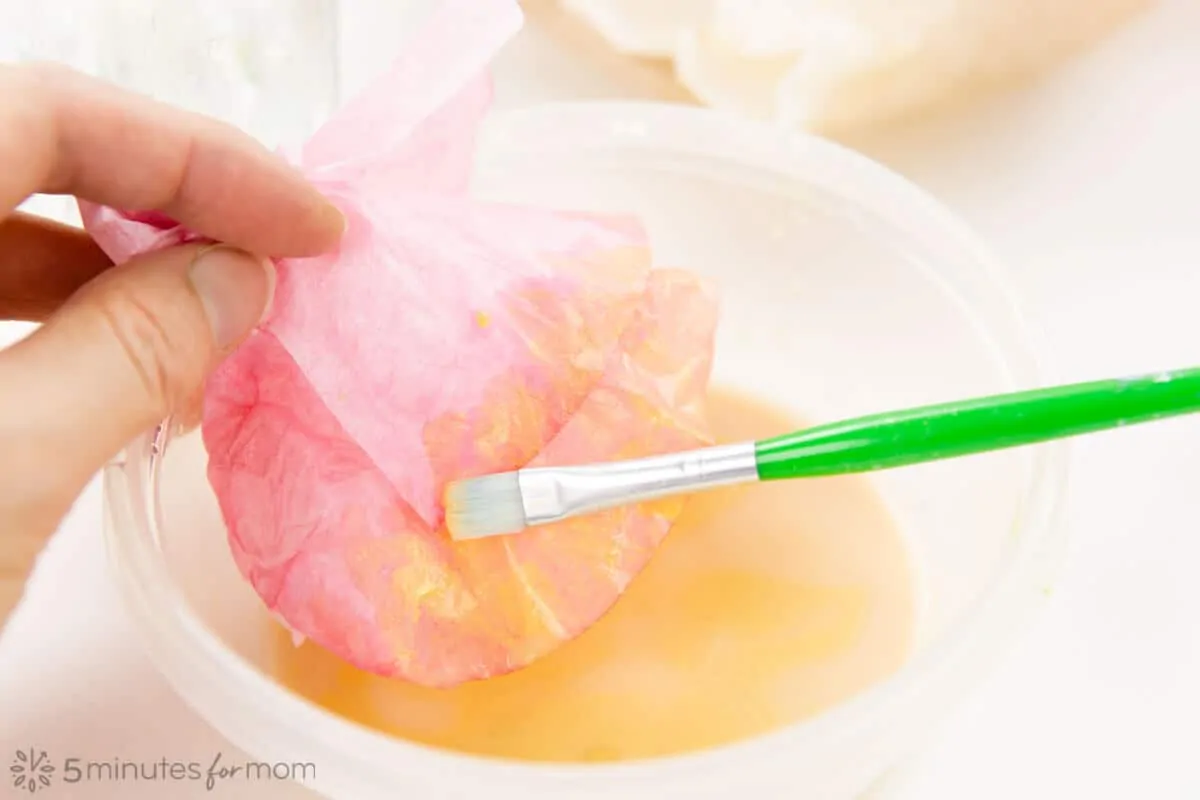
Simply add a small amount of paint to a bowl or container and mix with a small amount of water. The amount of water you add will depend on how intense you want the color and how many coffee filters you will be dying.
In general, I soak about 4-6 filters at a time in a bowl. Then after I squeeze out the dyed water back into the bowl, I add more filters and repeat.
So you actually don’t need a ton of paint and water. A small bowl or container, a couple of squirts of paint, and a half a cup of water will actually color quite a few coffee filters.
Once you squeeze out the water, gently open up the filter and hang or put somewhere to dry. I placed most of my coffee filters on empty toilet paper rolls and random bottles and containers all around my bathroom. They only take an hour or so to dry.
 You can keep things simple and use primary colors, mixing and blending to create a color palette for your flowers.
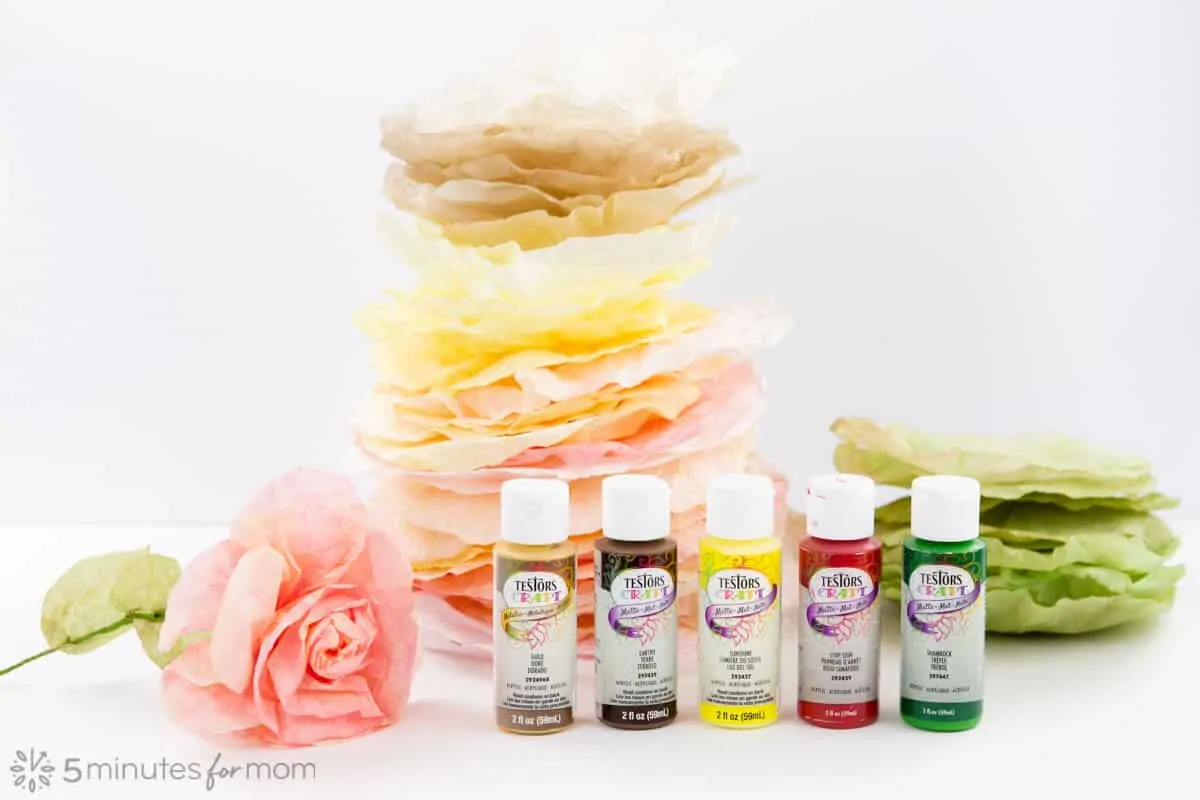
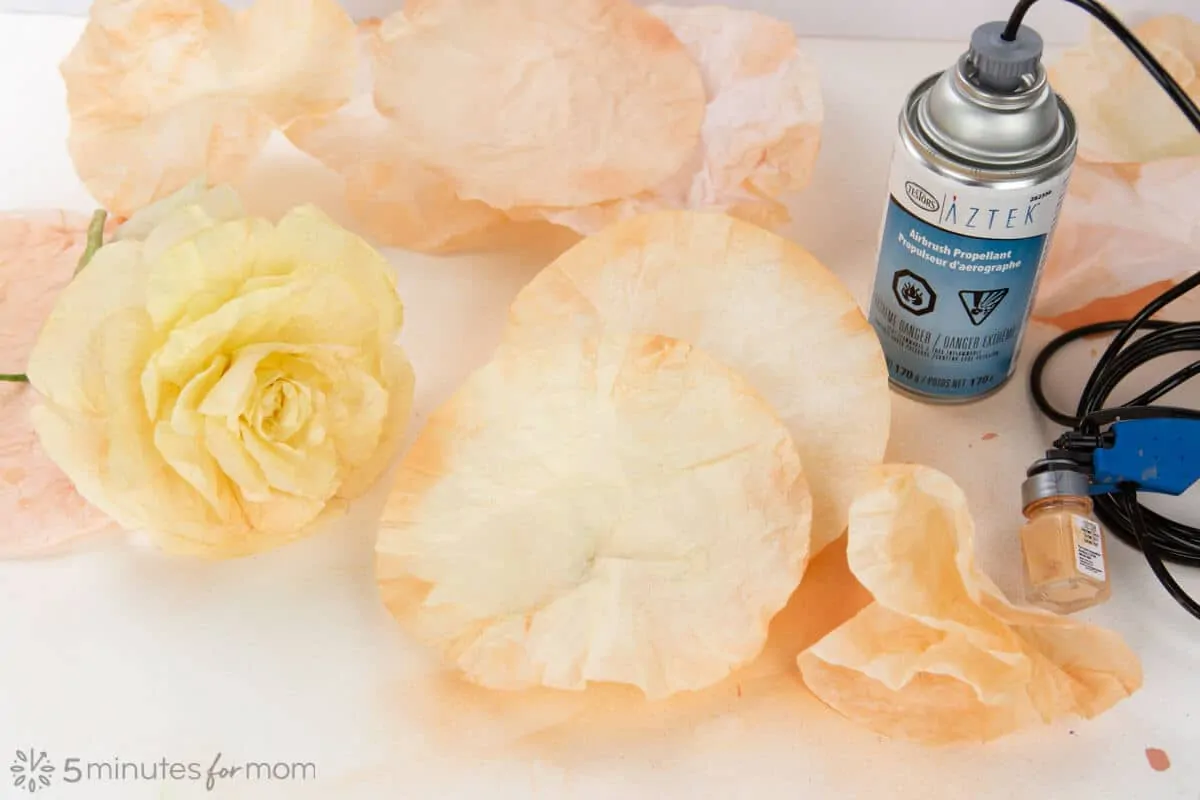
Or you can reach for some unique colors and metallic paints. I love all the incredible colors options of Testors Acrylic Craft Paints.
There are so many gorgeous colors. Testors Craft Acrylics can be purchased online at Menards, Do-It-Best, Amazon, Joann and Walmart.
I especially loved using Testors Acrylic Craft Paint in Gold Metallic to add a gold leafing effect to some of my flowers.
For most of my coffee filters, I dyed them in one color first and then after they dried, I added a second color.
I added additional colors in a variety of ways.
I painted the edges…
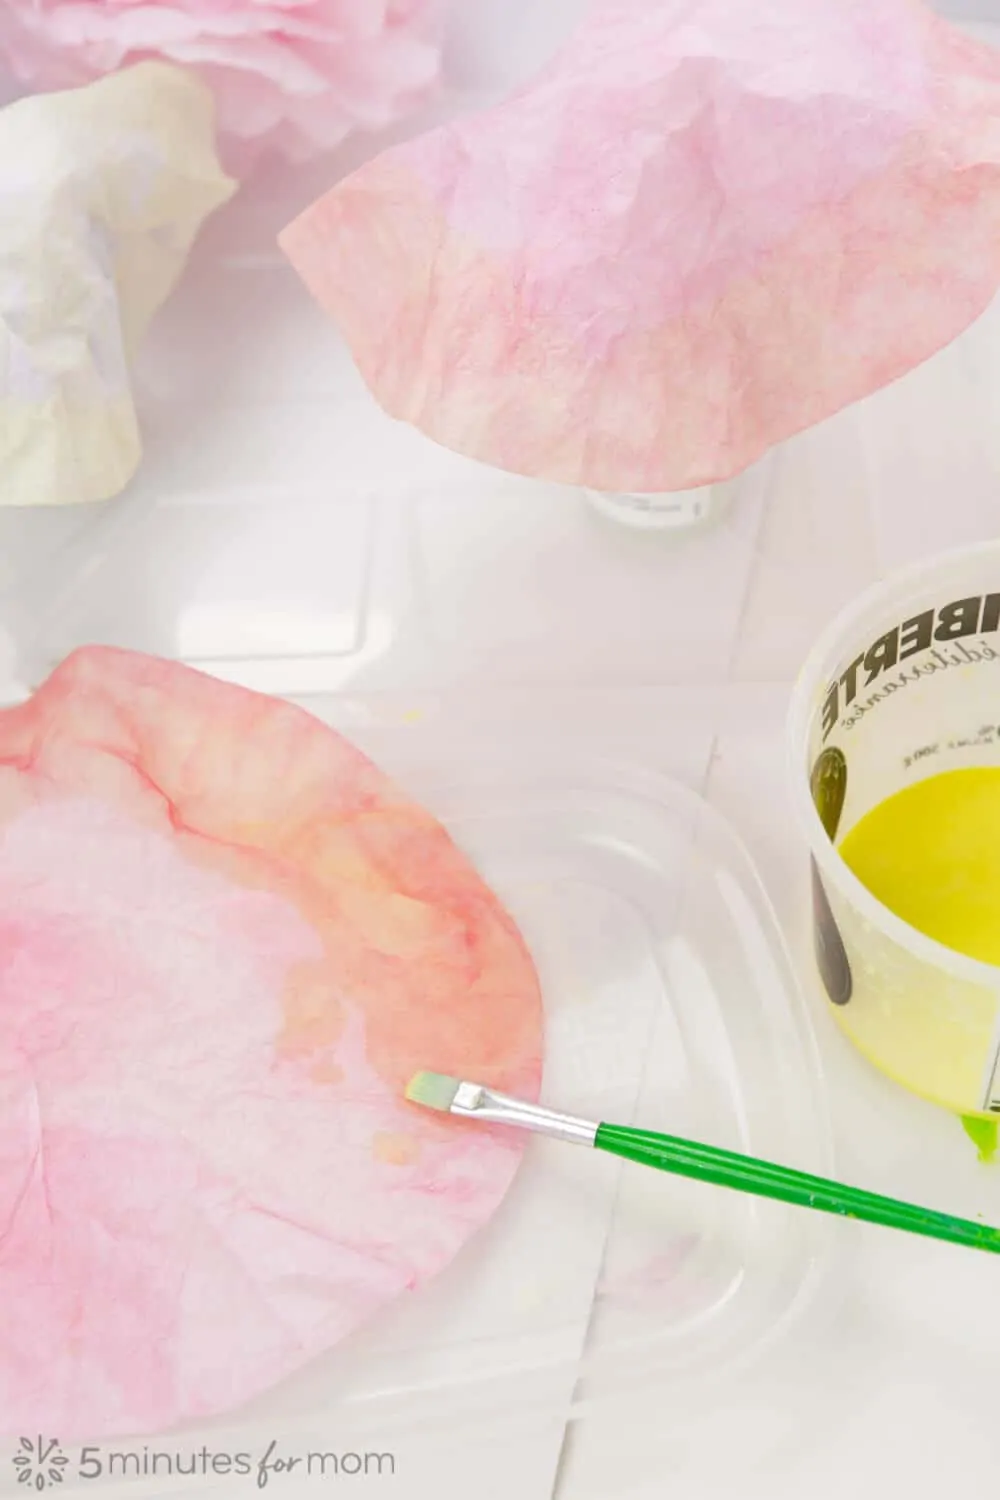
I dipped the edges…
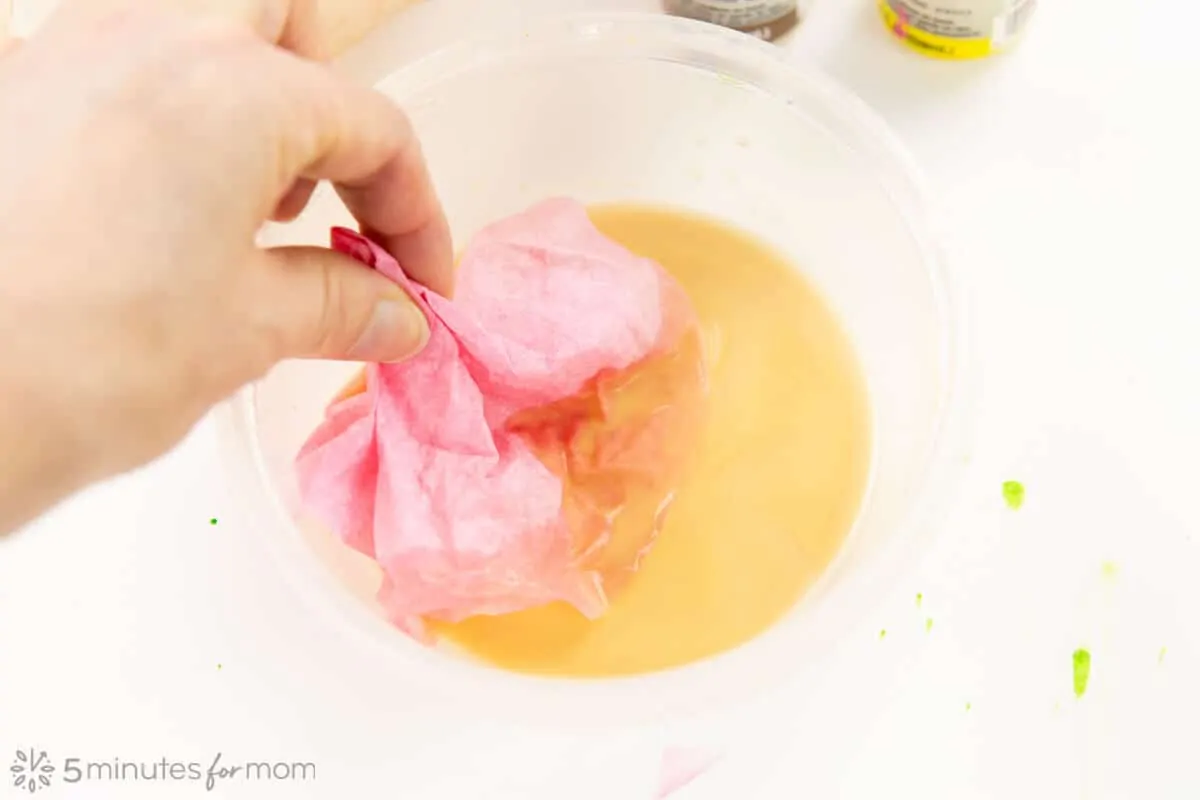
I also often submerged and dyed the entire coffee filter for a second time, in an additional color.
For my leaves, I wanted a more distressed, golden look. So after I had dyed some filters green, I re-dyed them in a gold and brown mixture.
For some flowers, I airbrushed the edges of the coffee filters or sometimes I airbrushed the completed flower.
I used Testors Amazing Air Airbrush Kit. This kit can be purchased online at Joann, Hobby Lobby, Michael’s and Amazon.
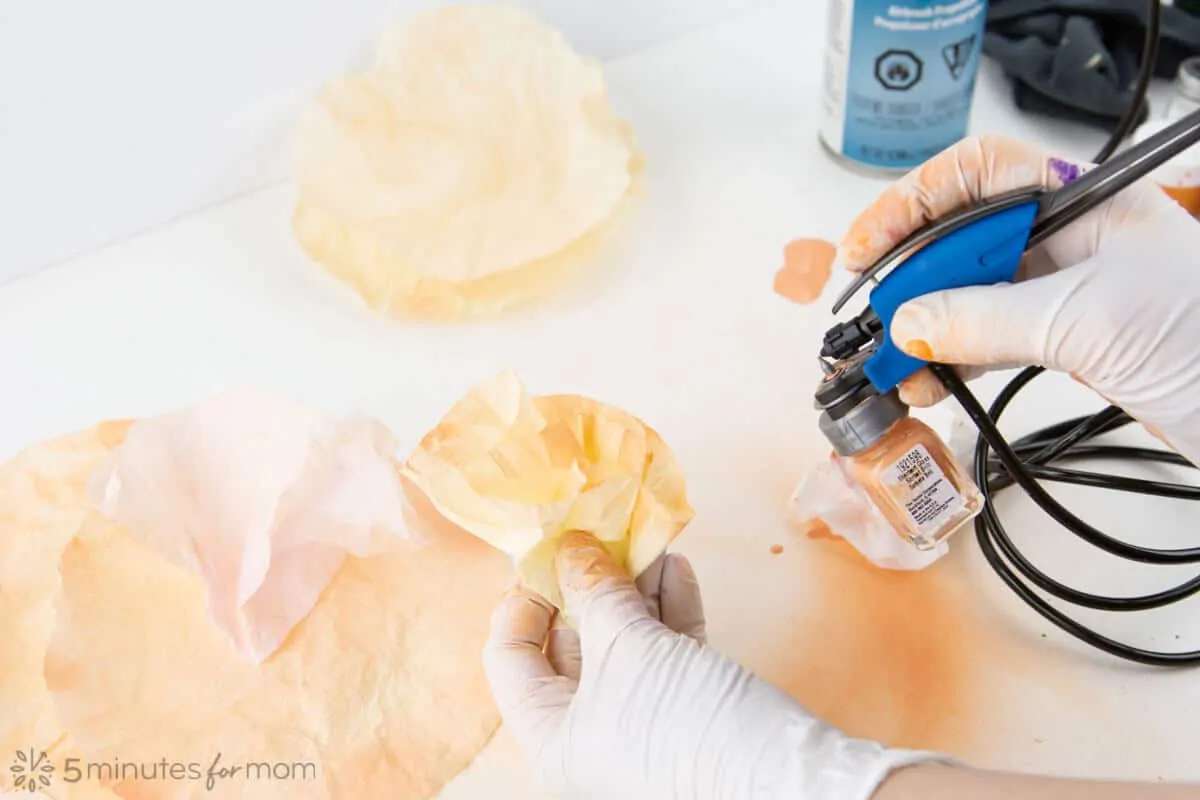
It was my first time using an airbrush and it was super fun! Using an airbrush is a great way to add subtle color to the petals and an exciting option for teenagers to get extra creative with their coffee filter flowers.
If you are using an airbrush and you think it is broken because paint is not coming out, do not give up!
In some of the bottles of my paint, the paint had settled and formed a small gunky blob inside. When you are spraying, that glob of paint can get stuck and stop paint from getting through.
So stir your paint thoroughly with the end of a paintbrush — something big enough to help you find any potential globs of paint that might block paint flow.
As well, you have to use the small wire provided to clean out the tip of the spray lid occasionally as you work, especially if you pause for a few moments and the paint dries.
If you want a color that didn’t come in your set, you can mix colors. I wanted to make a muted peach color. So I poured most of the paint from the orange bottle into a little container I had and then added some white paint and some magenta paint to the orange bottle.
Dying your coffee filters can be so much fun and a wonderful chance for you and your kids to experiment and come up with your own creative colors and designs.
And remember to dye some coffee filters green to create the leaves and greenery for your flowers.
Step 2 – Cut Petals and Assemble Flowers
Once your coffee filters are dyed and dried, you can create your flowers.
Again, your method depends on how much time you want to spend on your flowers, how detailed and intricate you want your flowers, and what kind of flowers you are creating.
If you want to keep things as simple as possible, you don’t even need to cut your coffee filters into any shapes at all. You can roll or bunch up your coffee filter around the end of your wire and pipe cleaner, glue and or tape it, and you are good to go.
The way you cut the tops of your petals will also determine what “kind” of flower you are making.
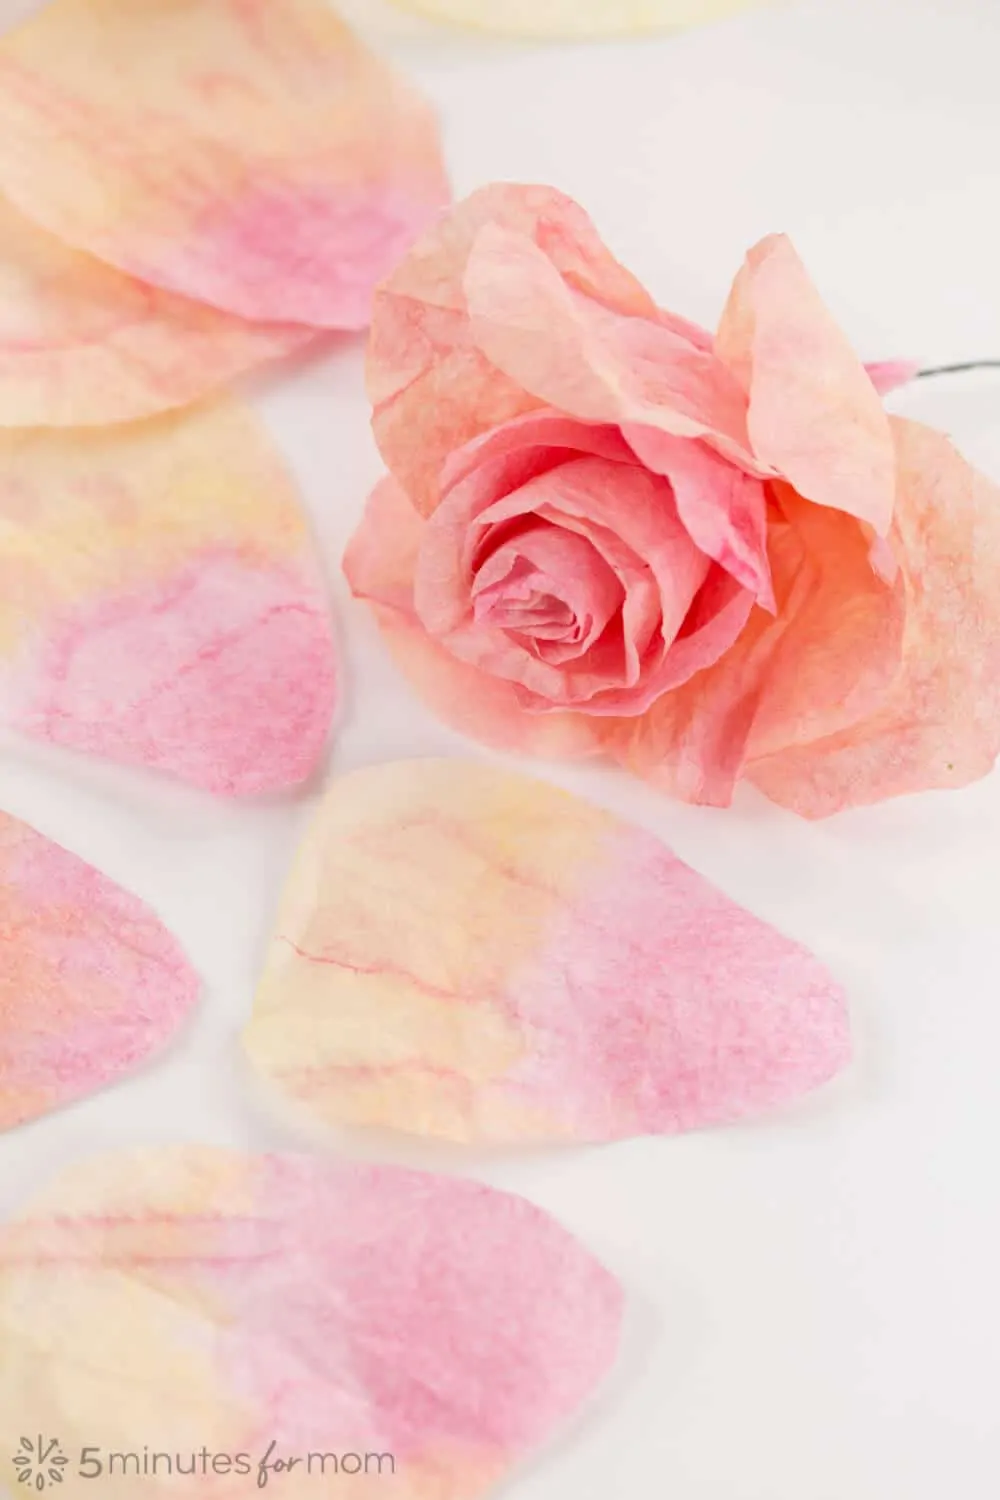
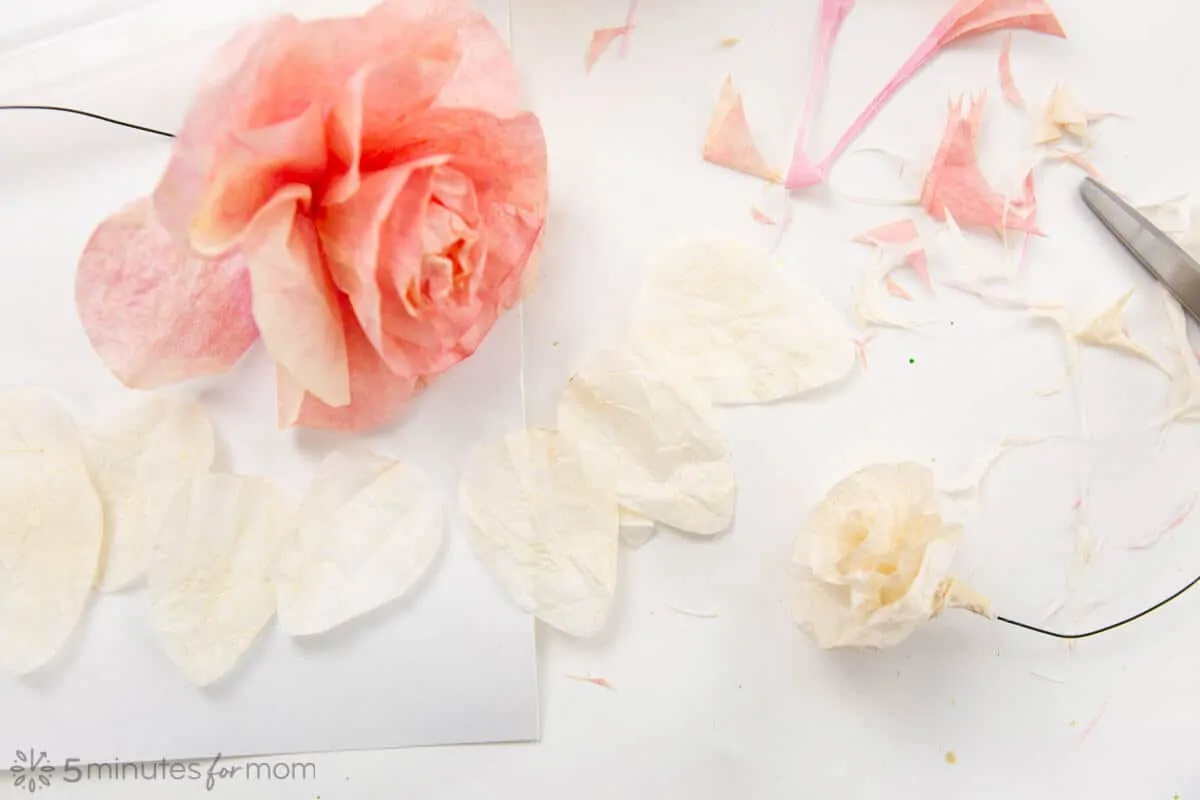
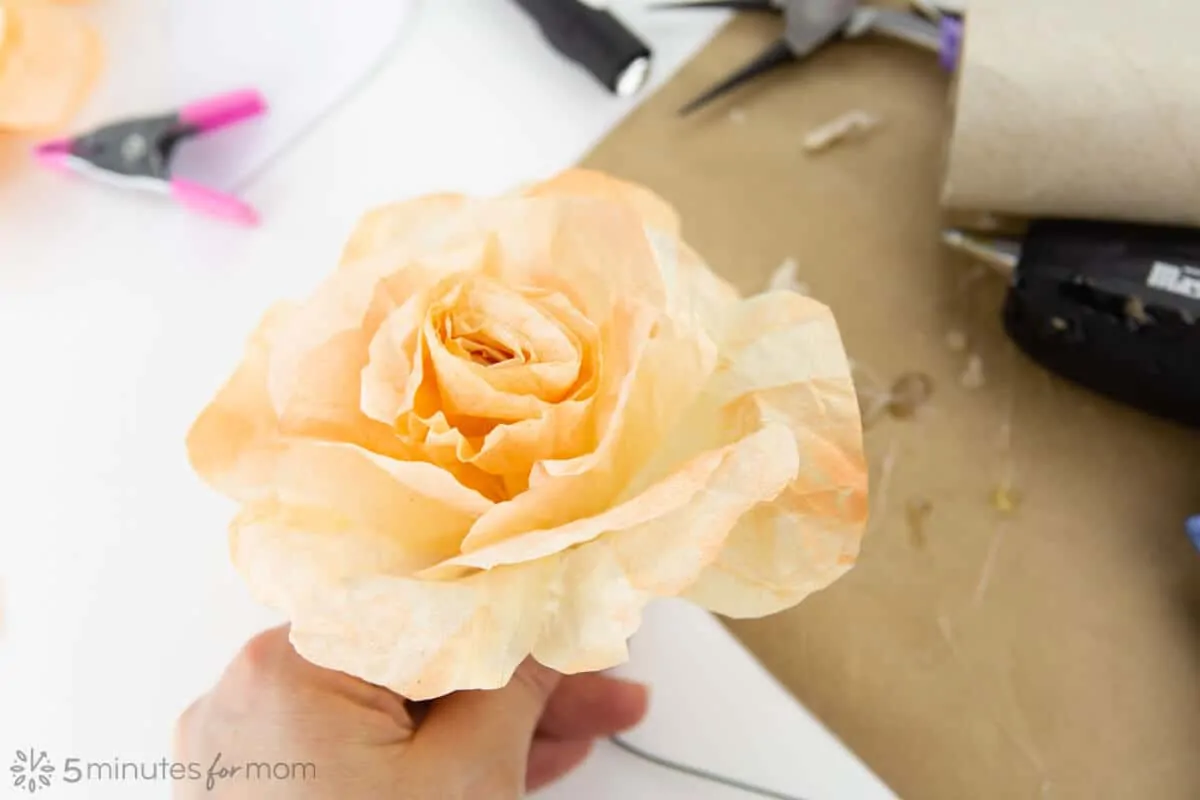
To make these coffee filter roses, I cut large rose petal shapes.
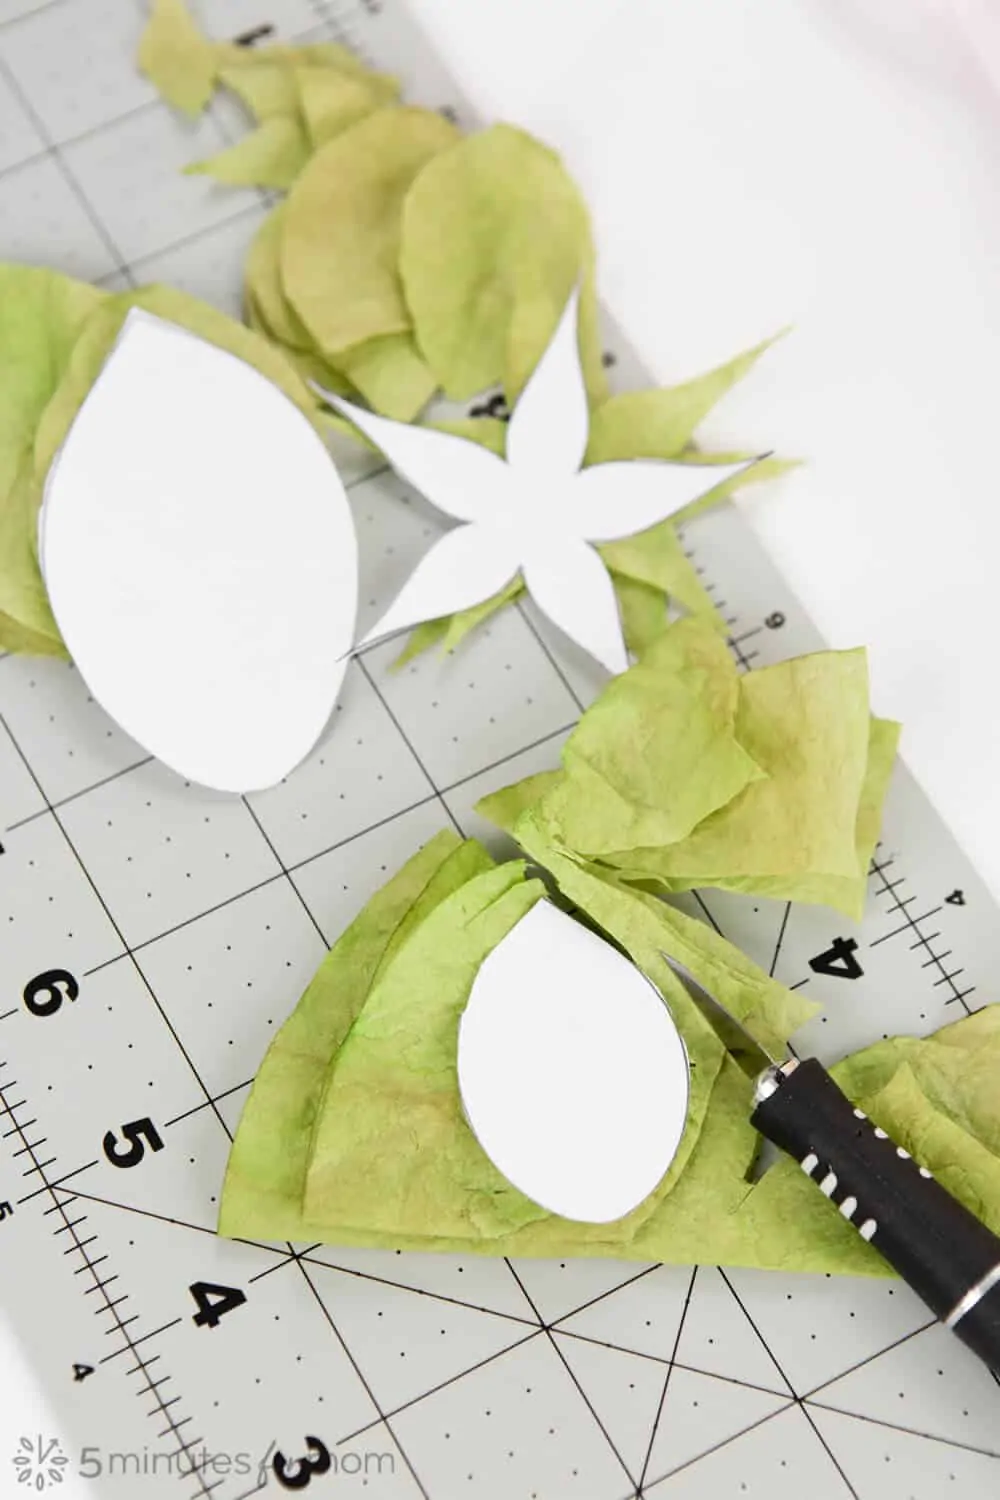
You can just eyeball and cut out petal shapes or you can download our Rose Petal Template PDF – 5 Minutes for Mom.
You can cut individual petals and attach one at a time.
Or, to save time, you can cut scalloped petal shapes just to the tops of the filter or cut petals but leave them connected at the sides.
Any method will work – it just depends on how you want to make your flowers.
To cut petals, fold a coffee filter in half and then in thirds.
Place the petal template on top of the folded filter and cut out petal shape. You will have six petals for each coffee filter.
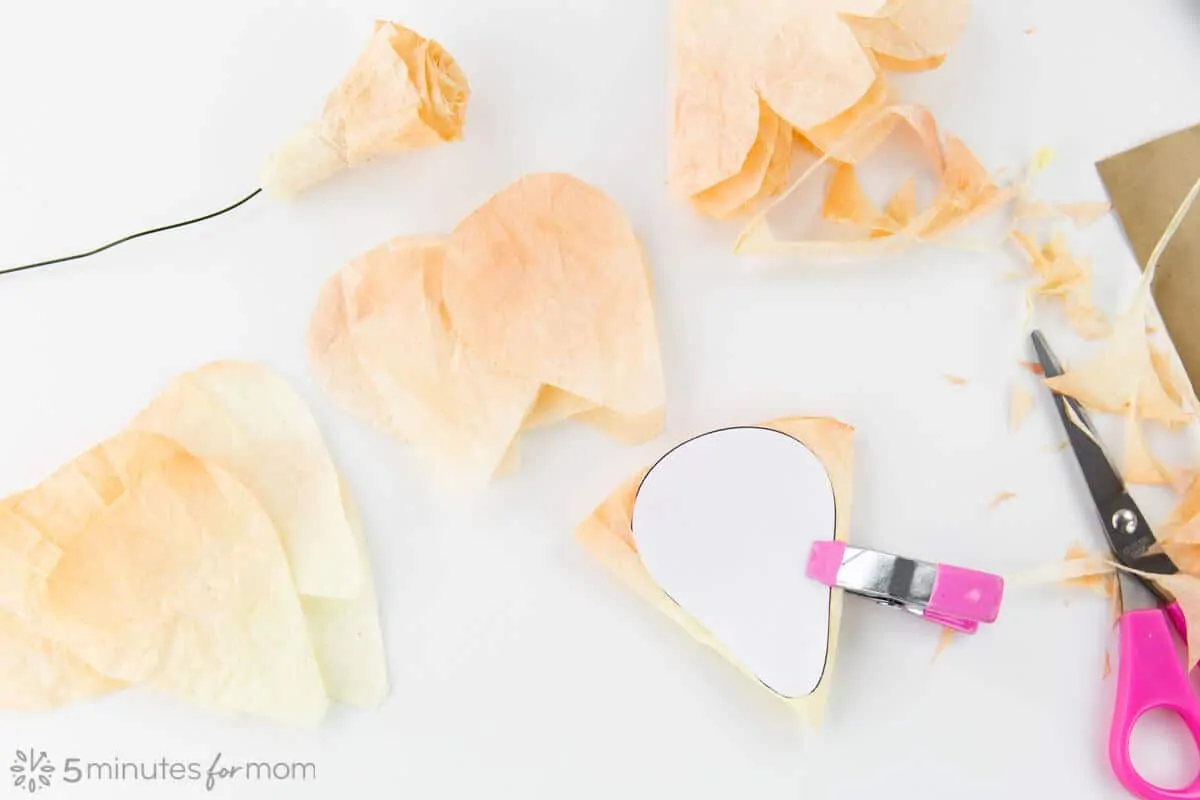
If you want to keep the petals connected, just cut the shape at the top and the bottom, leaving the sides uncut.
How to Assemble The Flowers
- Choose 3-6 dyed coffee filters for your flower. You may want to vary the colors, having darker in the center and lighter for outer layers.

- Fold the darkest coffee filter in quarters or thirds and cut off the bottom point. Open up the filter and cut a slice through the “doughnut” shape you just created. This first layer doesn’t need to have petal shapes cut into the top, but you can scallop the top if you wish.
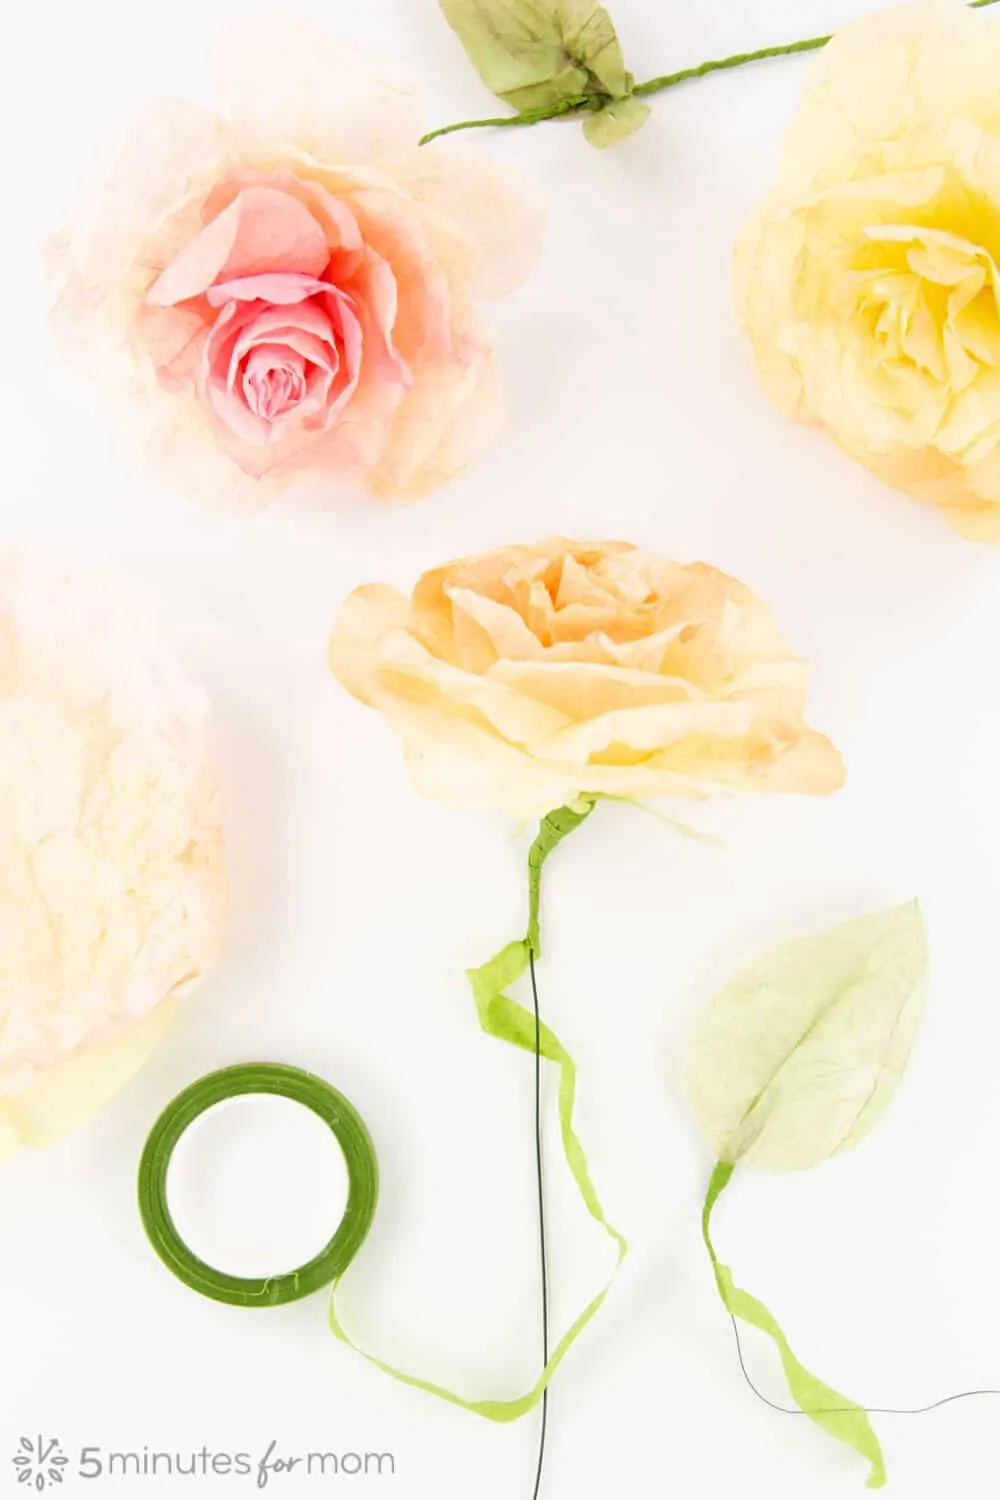
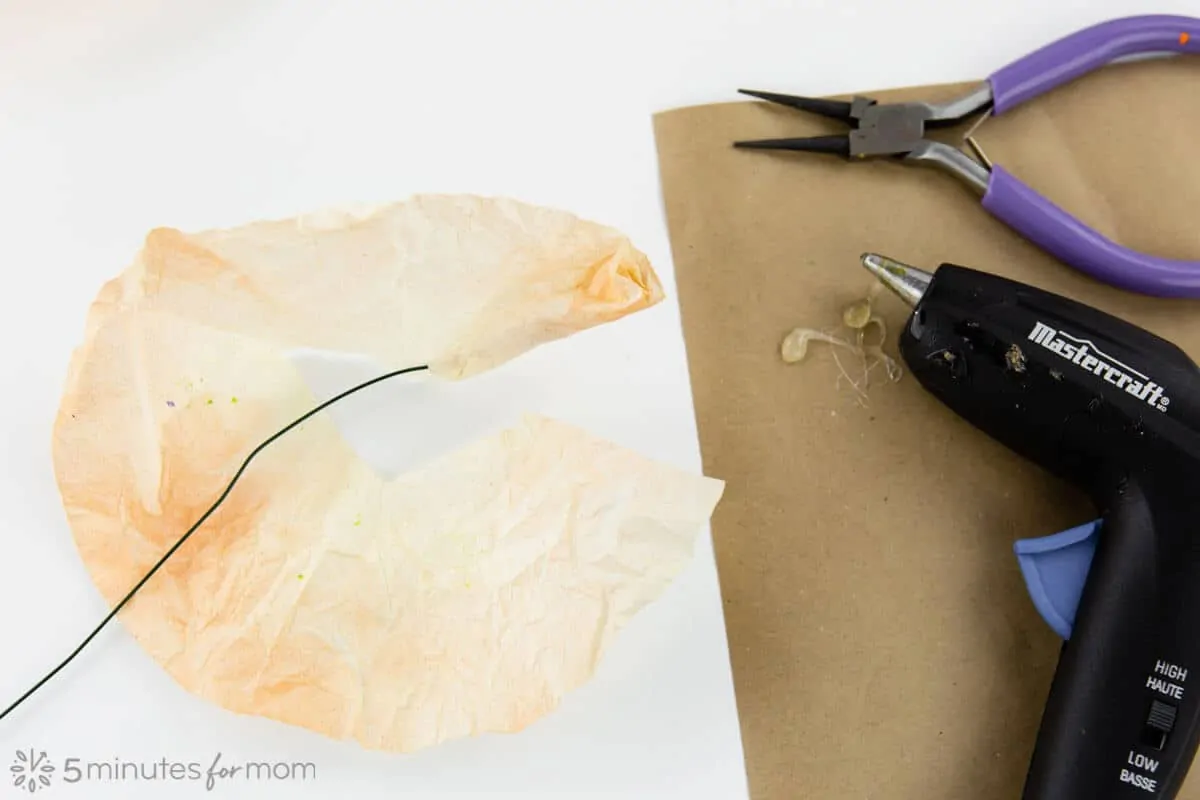
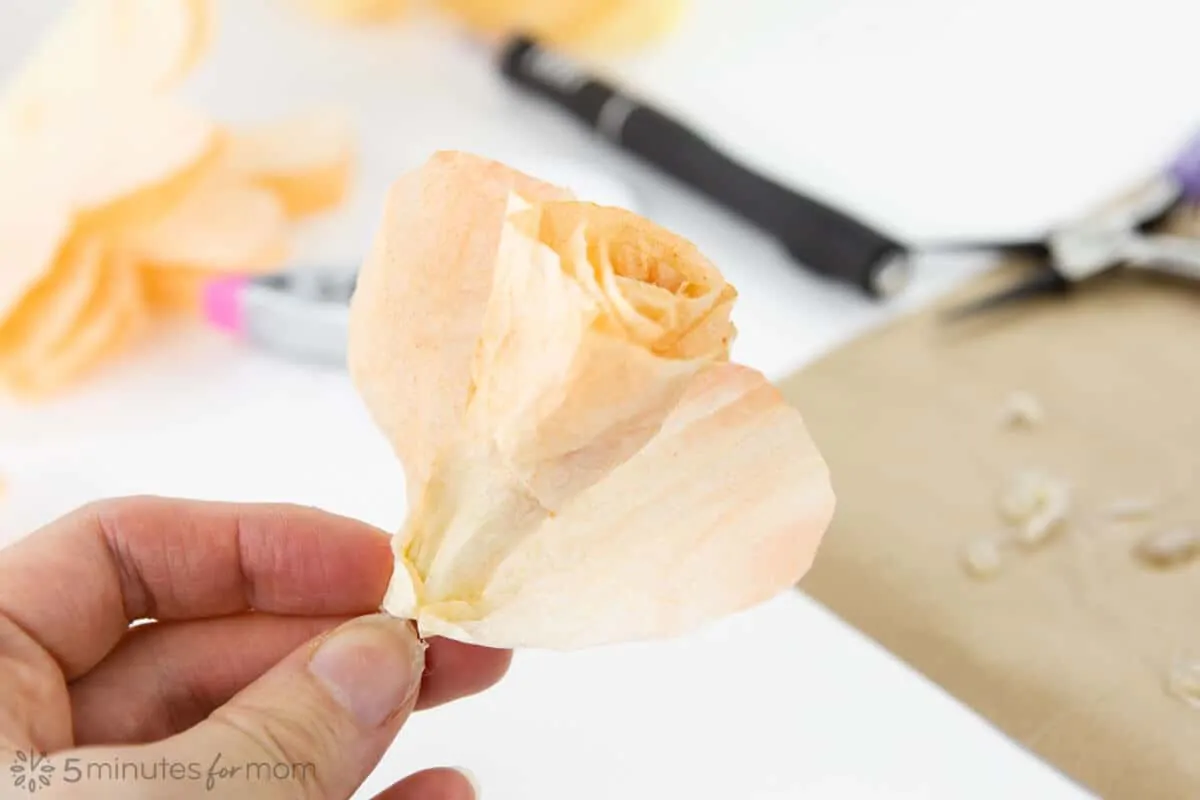
- Glue one end of stiff floral wire (or pipe cleaner or straw) to the cut end of your coffee filter doughnut. Roll the coffee filter around the wire, gluing at a few points, creating the center of your rose.
- Add your second layer of petals. You can add individual petals OR for a bigger, fuller flower, you can make the second layer the same way you made your first layer, but with scalloped “petal” edges this time. Roll the second layer the same way that you made the first layer, but keep it a little looser. Once you have glued in place, you can fold/roll the tops of the petals back to create depth and shape to your rose. For this rose, I went directly to adding individual petals.
- Continue adding layers of petals – either individual petals or connected petals if you wish. If adding individual petals, add one petal at a time, overlapping as you go. You can add as many layers of petals as you wish, depending on the size rose you want to create.

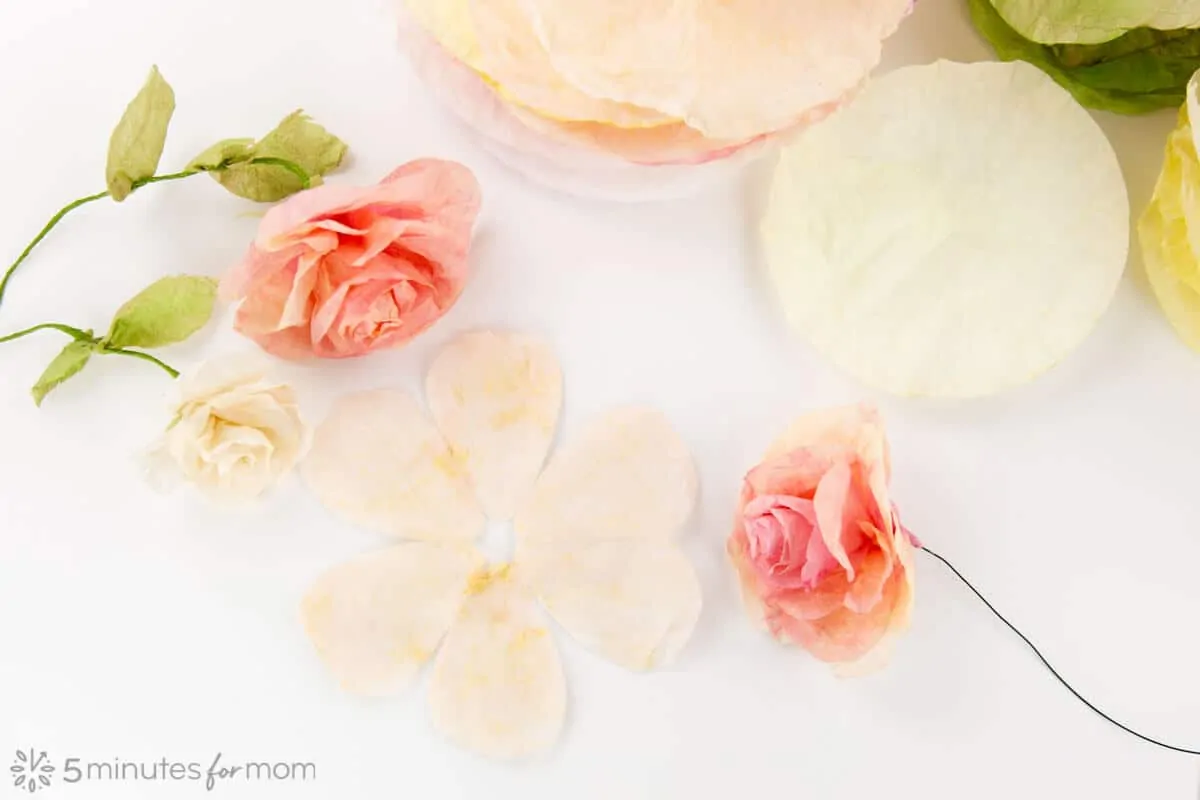
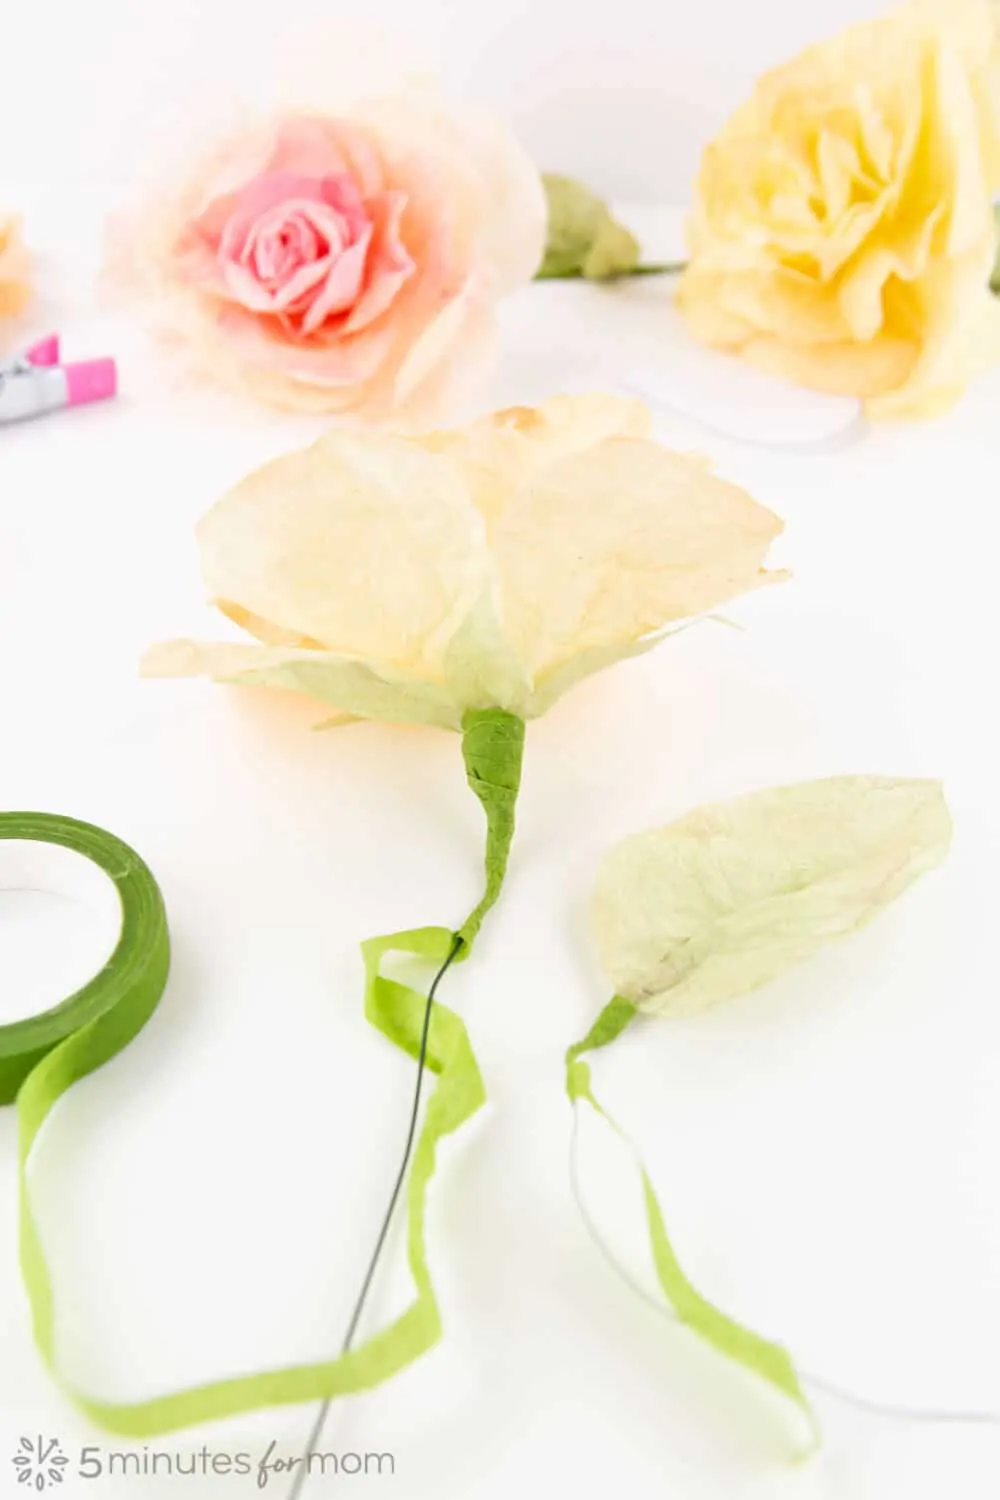
Step 3 – Cut Leaves and Build Branches
Now that you have some flowers made, you will want to add some greenery!
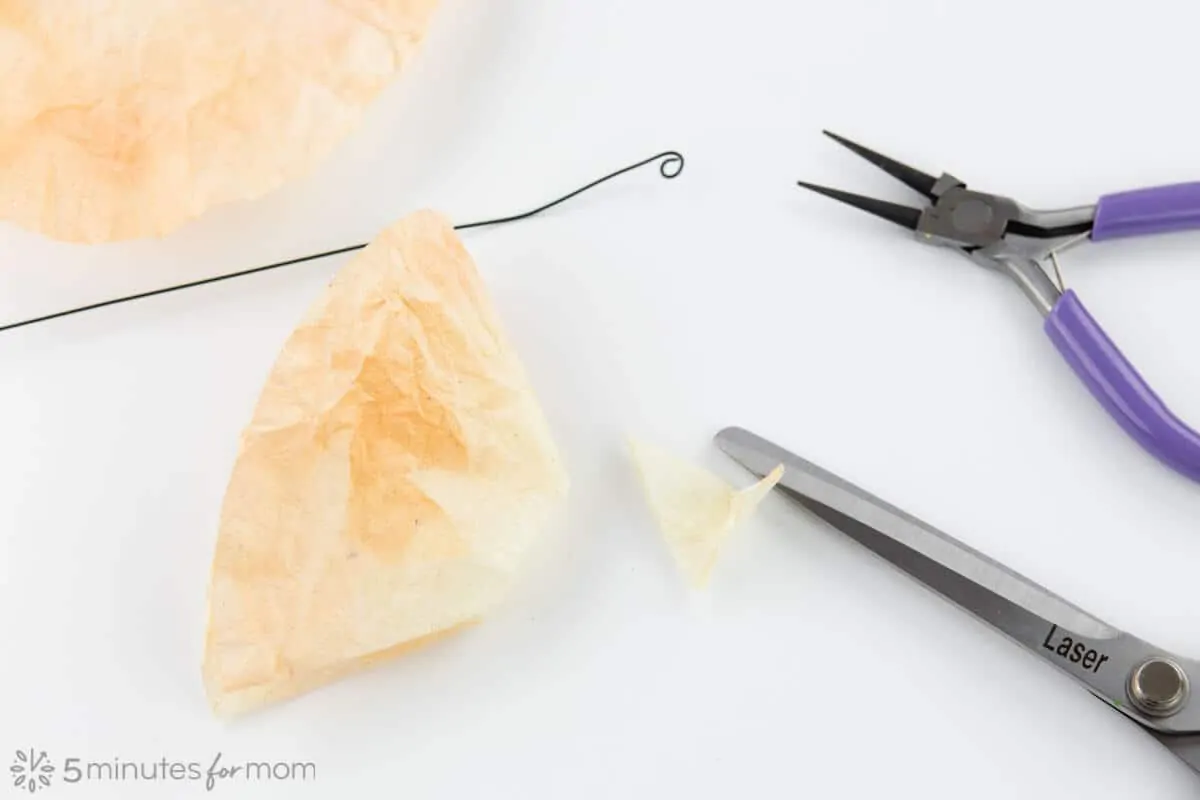
For roses, you may want to add a sepal.
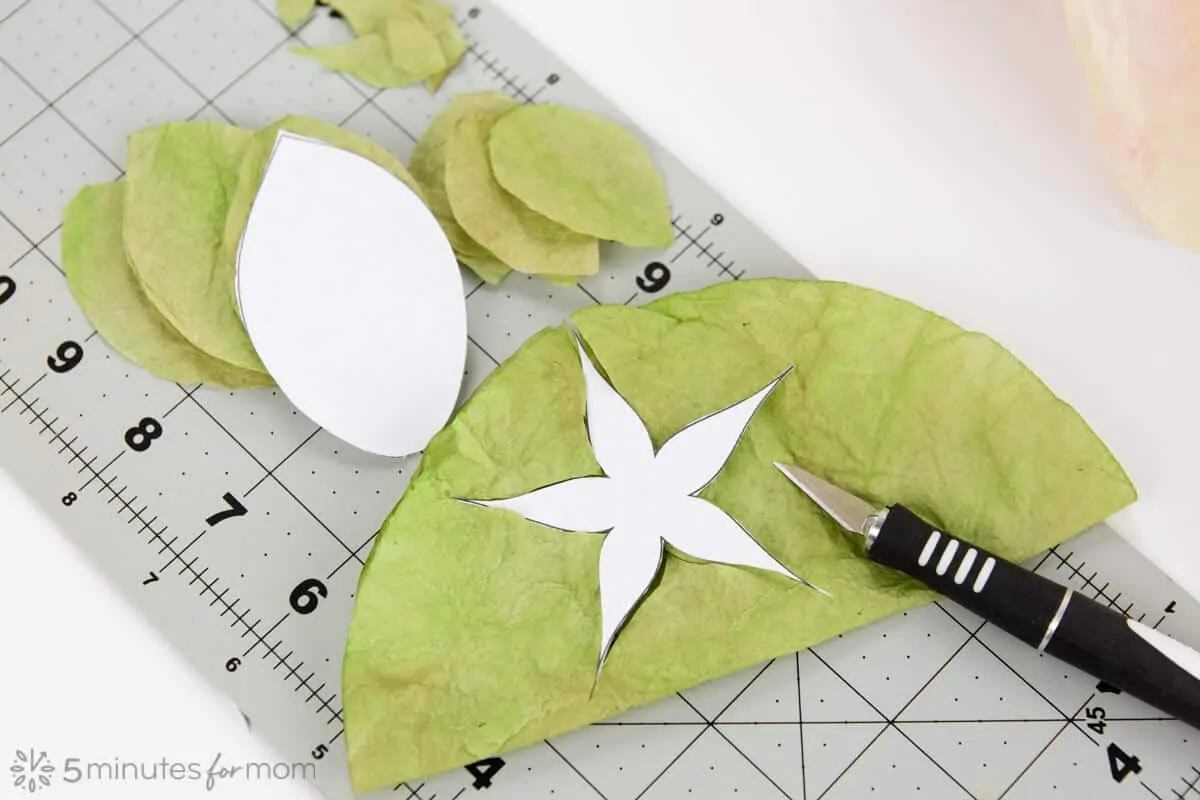
Download our Rose Sepal Template PDF- 5 Minutes for Mom that has various sizes for your roses and cut out from green-dyed coffee filters.
Cut two slits in the center or sepal and glue onto the bottom of the rose.
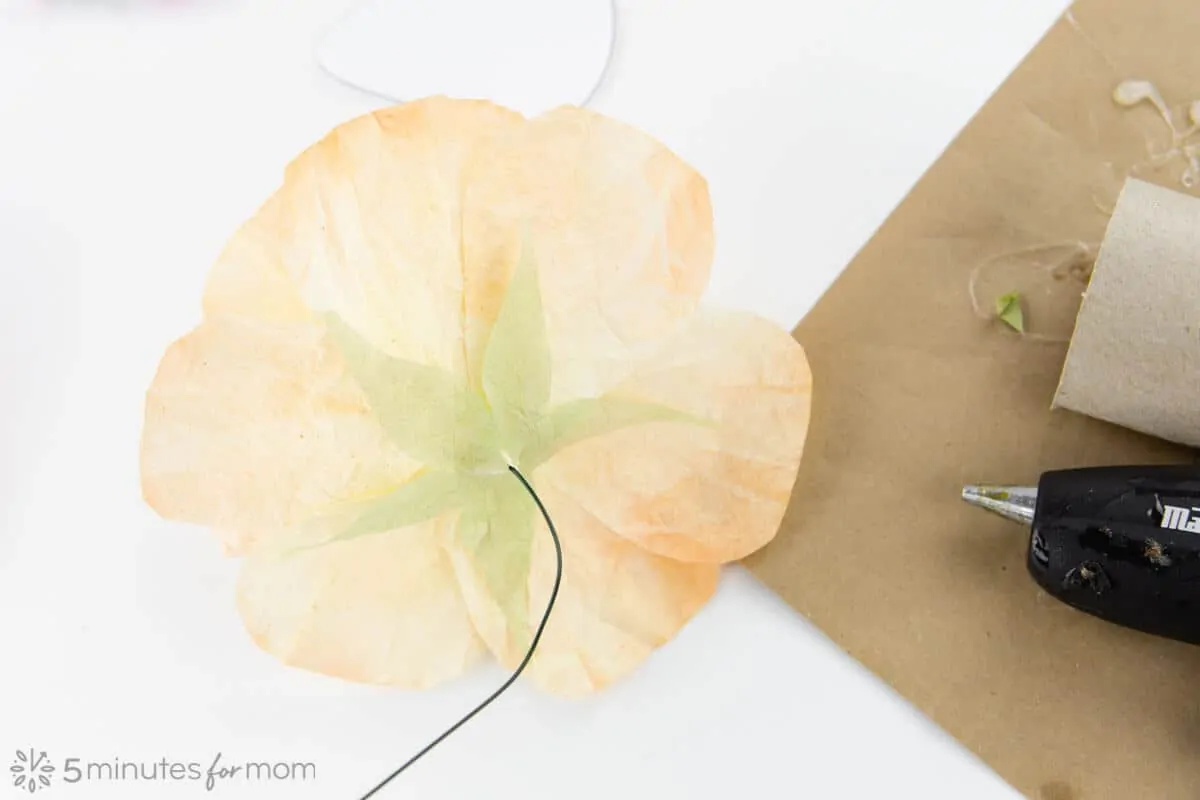
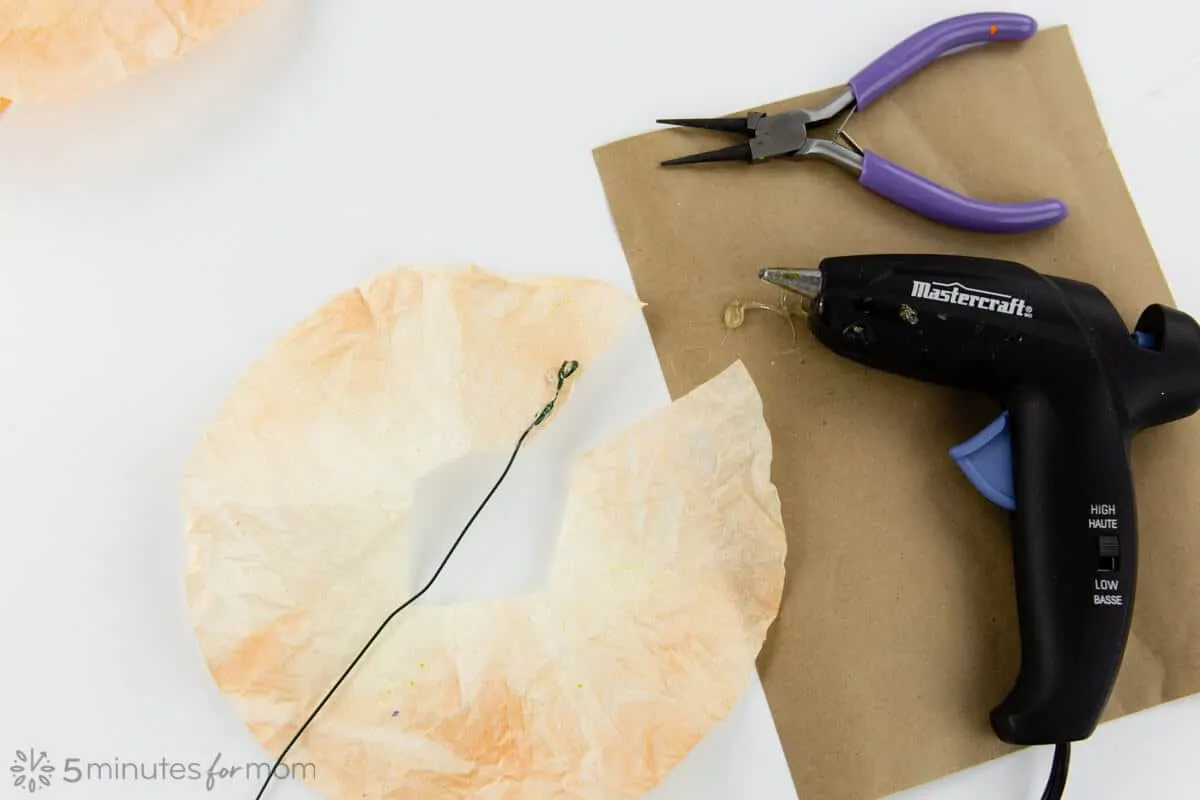
Add floral tape around the base of the rose. To add more shape, you can wrap a few inches of pipe cleaners if desired.
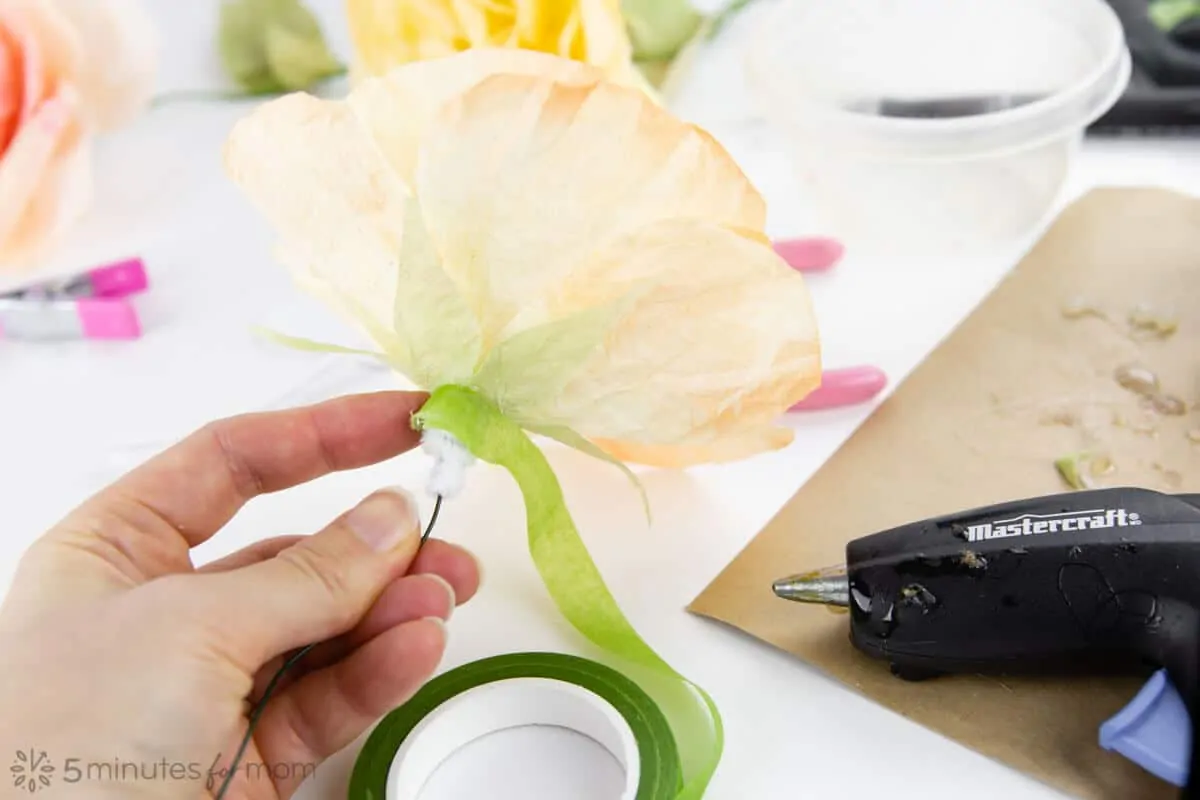
You may wish to stabilize the floral tape and the pipe cleaner with some hot glue or white glue. (I prefer working with hot glue when making my flowers because it dries faster.)
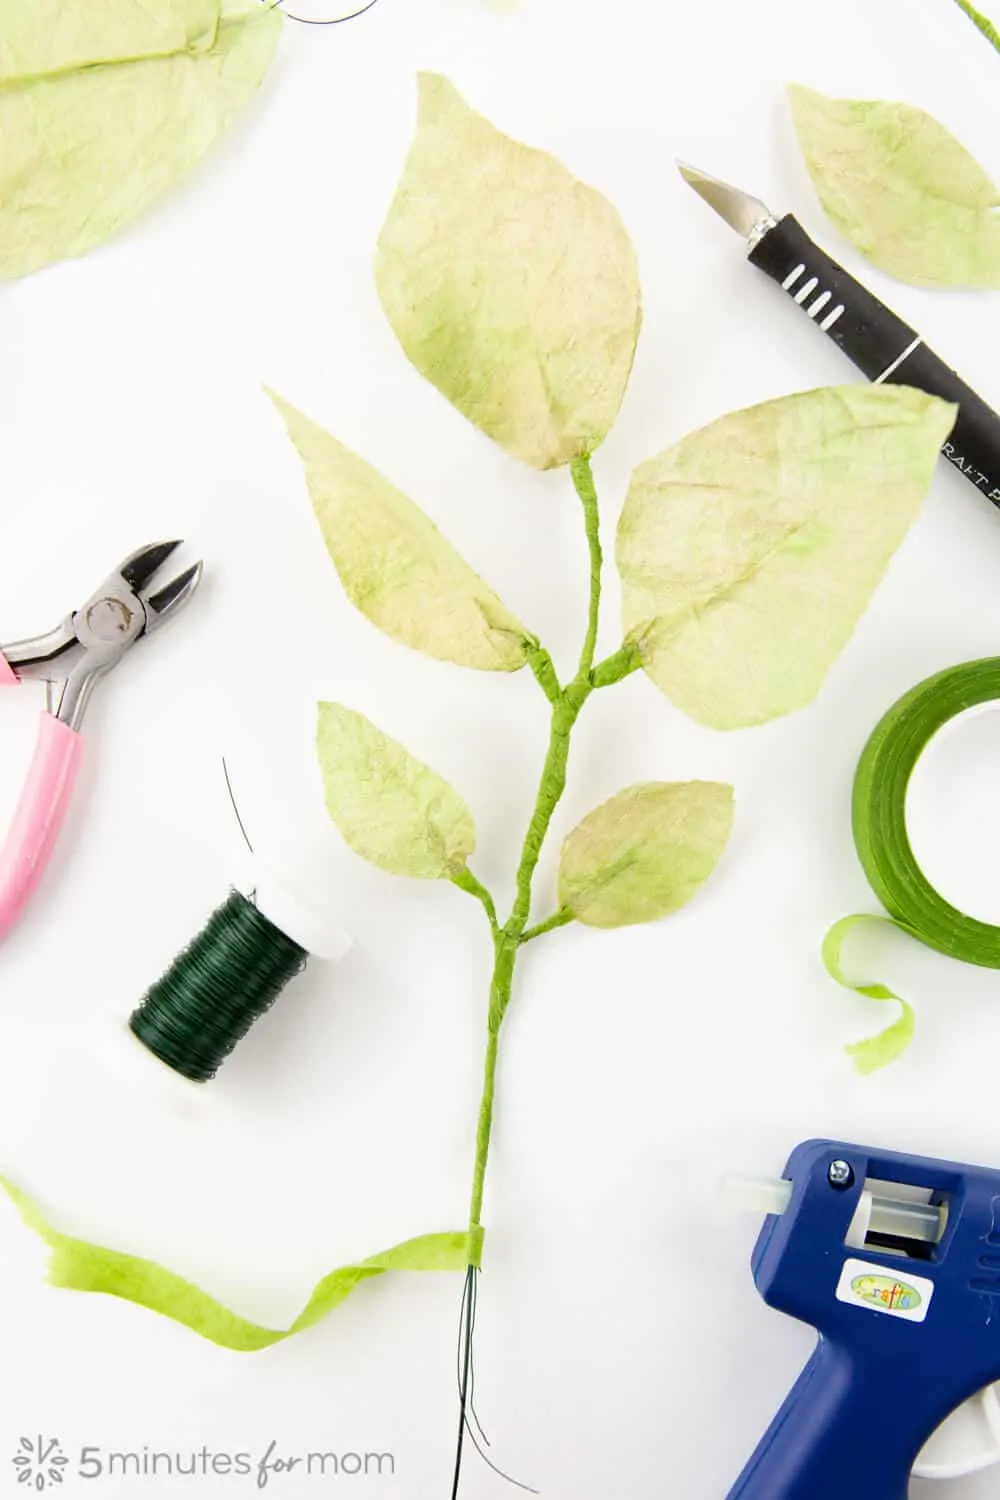
Wrap floral tape down the wire stem, stretching it as you go to reveal the “stickiness” of the floral tape.
If you want a thicker stem, you can wrap additional wire or place a pipe cleaner next to the stem wire and then add the floral tape over it.
To make leaves, cut out leaf shapes from green coffee filters. You can just eyeball the leaf shapes or use our Rose Leaves Template PDF – 5 Minutes for Mom.
To add veins to the leaves, place the leaf on a somewhat soft surface. The back of a mouse pad works well or if you have foam core, tear off the top layer of paper to reveal the foam core inside. That foam works perfectly.
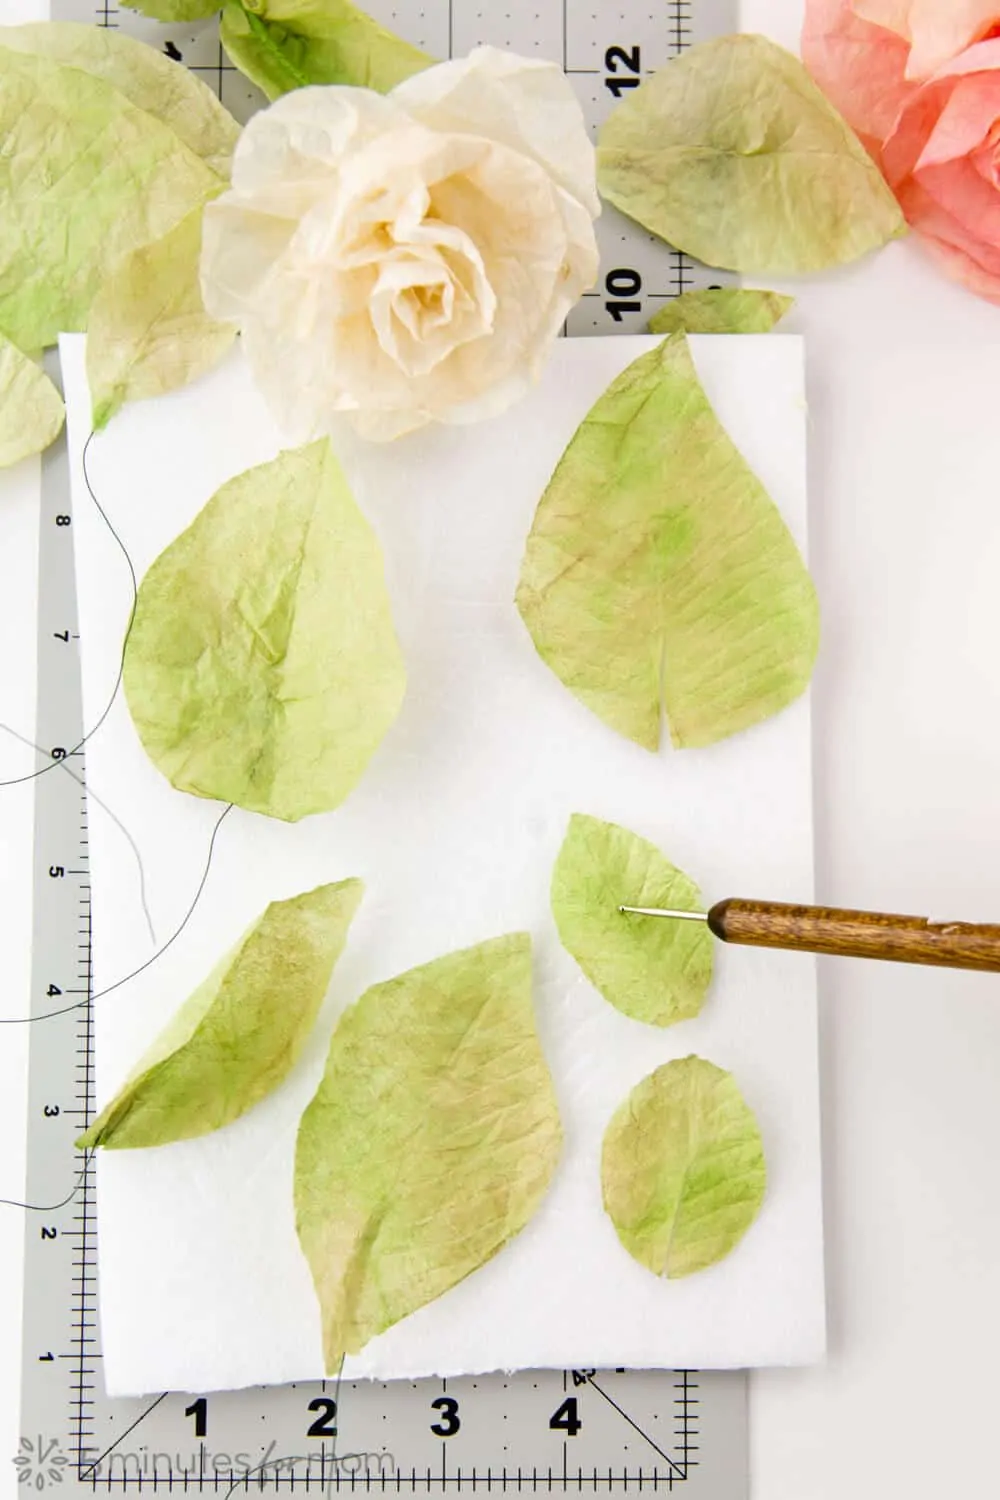
Using an embossing stylus/tool or something with a rounded tip like a pen cap, “draw” veins to create more realistic leaves.
Cut a slit at the bottom of each leaf and hot glue a piece of wire (about 24-28 gauge or whatever you have that works) to one side of the slit. Place the other side of the slit on top of the wire.
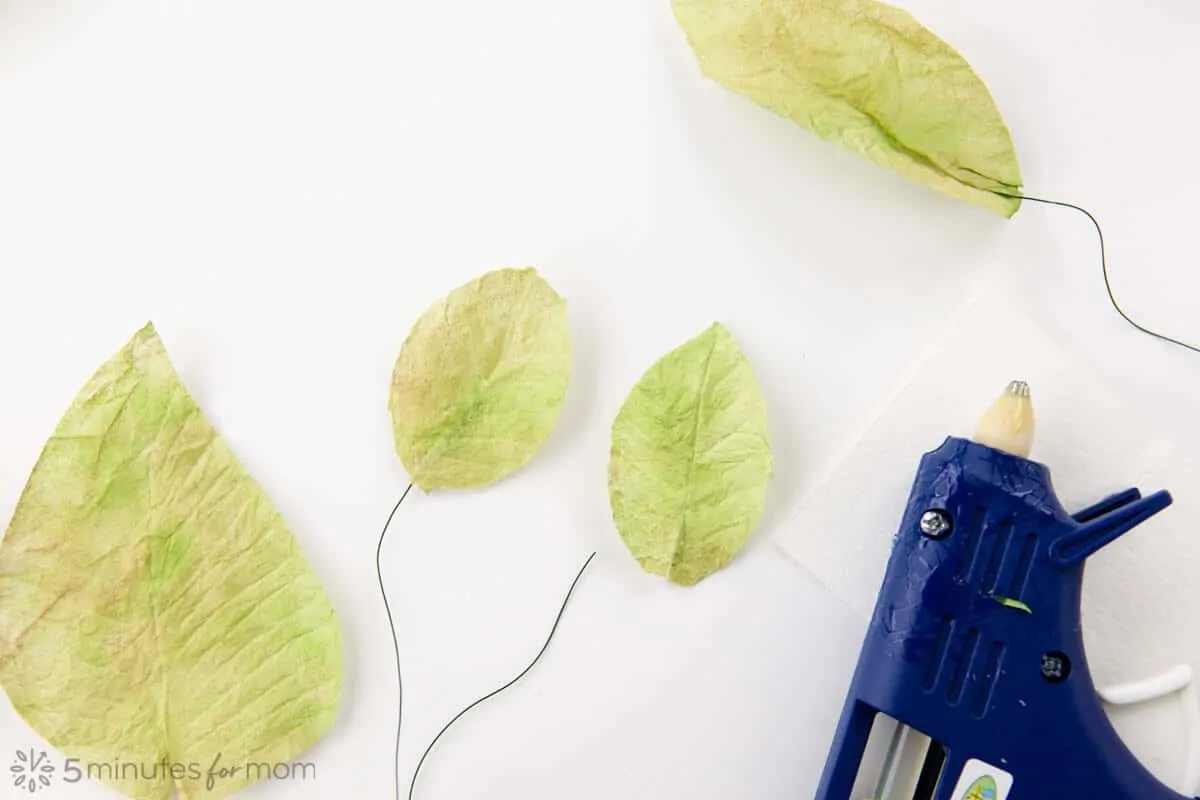
Wrap the exposed wire with floral tape and attach the leaf to your flower stem or branch.
And enjoy your flowers forever…
Try These Fun, Family Crafts Too…
Take a look at some of our other Testors Crafternoon projects that your kids will love:
Pin it for Later
Disclosure: This post is sponsored, so extra thanks for reading and sharing.
We first published this craft activity on June 30, 2020 and we have updated it for you.
Written by Janice Croze, co-founder of 5 Minutes for Mom
Talk with me: @5minutesformom and Facebook.com/5minutesformom
Pin with me at pinterest.com/5minutesformom


Thanks SO much! Great tutorial – we have been using watercolors but acrylic paint has so many more color possibilities and we had not done the veining technique. Can’t wait to try this!
SOOOOO, beautiful. What an amazing mom your children have! This is exactly what I was looking for! God Bless!
This is such a GREAT tutorial!! Thank you so much for sharing!
Thanks Sandra! We’re so happy that you like it.
This was great
Loved the website. Thanks for posting. You’ve found a new fan.
The craft roses are so pretty! Thank you for the detailed tutorial!
great stuff