• Skip to primary navigation
  • Skip to header navigation
  • Skip to footer navigation
  • Skip to content
  • Skip to primary sidebar
  • Skip to footer
Display Search Bar
  • About
  • Contact
  • Subscribe
Follow 5 Minutes For Mom on Facebook Follow 5 Minutes For Mom on Twitter Follow 5 Minutes For Mom on Pinterest Follow 5 Minutes For Mom on Instagram Follow 5 Minutes For Mom on YouTube Follow 5 Minutes For Mom via RSS

5 Minutes for Mom

Main navigation

  • Home
  • Recipes
    • Course
      • Breakfast and Brunch
      • Snack
      • Lunch
      • Appetizer
      • Dinner
      • Dessert
    • Ingredient
      • Apple
      • Beef
      • Blueberry
      • Chicken
      • Chocolate
      • Cranberry
      • Peach
      • Pumpkin
      • Squash
      • Strawberry
      • Tomato
      • Vegetables
      • Zucchini
    • Method
      • Air Fryer
      • Baking
      • Grilling
      • Instant Pot
      • No Bake
      • One Dish
      • Slow Cooker
    • Type
      • Breads and Rolls
      • Cakes and Muffins
      • Condiments
      • Cookies and Bars
      • Drinks
      • Food for Kids
      • Gluten-Free
      • Main Dish
      • Pies and Crisps
      • Salads
      • Sandwiches and Wraps
      • Side Dishes
      • Smoothies
      • Soup
  • Crafts & DIY
    • Crafts
    • DIY
    • Kids Crafts
    • Printables
    • Scrapbooking
    • Sewing
  • Family Life
    • Giveaways
    • Lifestyle
    • Marriage
    • Motherhood
    • Parenting
    • Pet Care
    • Special Needs
    • Time Management
    • Travel
  • Holidays
    • New Year’s
    • Valentine’s Day
    • St. Patrick’s Day
    • Easter
    • Mother’s Day
    • Fourth of July
    • Halloween
    • Thanksgiving
    • Christmas

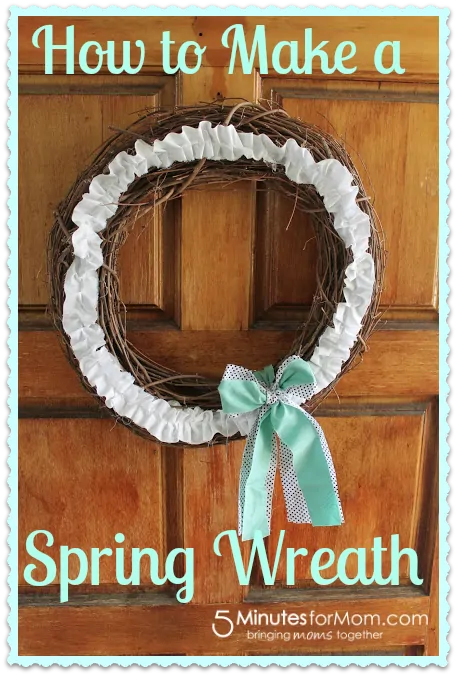
How to Make a Spring Wreath

March 18, 2013 by Jenny Nanninga

This post may contain affiliate links. Read my disclosure policy here.

ShareTweetPinPocketMail

Wreaths are one of the most welcoming decors on the market. I love decorating my door every year. Not only are wreaths warm and welcoming, but they are also a fun way to be festive and celebrate different holidays throughout the year.

However, it isn’t necessarily cost effective to have a different wreath for each holiday, so I set out to make one simple wreath that could be altered to match any season.


The materials you will need are:

  • 1 Wreath (I used a grapevine wreath, but many types would work fine).
  • fabric (1/4 a yard would be plenty)
  • hot glue gun
  • sewing machine/thread
  • Accessories: scrap fabric, buttons, etc.

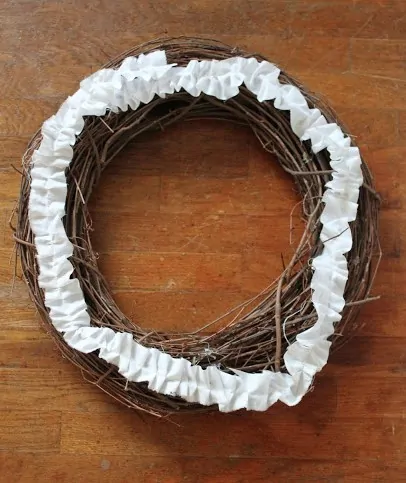
I bought two grapevine wreaths on sale with a coupon at Michael’s a few years ago.  I began with one of those wreaths as a base.  I added a fabric ruffle, because ruffles are a fun, yet simple way to decorate.

How to make the ruffle

To make the ruffle, cut a strip of fabric that is approximately twice the circumference of your wreath.

Then, using a sewing machine, sew a line straight down the middle.  While sewing, bunch up the fabric as it reaches the foot.  This is what creates the ruffle.  The closer together you push the fabric, the rufflier it will be.

Once you are finished sewing, place the ruffle on your wreath to see if you need to cut off any excess fabric length. Using a hot glue gun, glue the ruffle to the wreath at various points.  I didn’t glue the entire length of fabric in case I want to remove the ruffle someday.  Instead, I merely glued at enough points to keep a circular shape going.

Your wreath is now ready to be accessorized however you desire. For me,  I decided to add a shabby bow.  I cut two strips of fabric the same length, but different widths and tied them in a bow onto the wreath.  I did not glue, so that I could easily change the wreath by using different fabric or something other than a bow. If you did not want to use a bow, you could use buttons, fabric flowers, or anything that you liked.

How to add a touch of Easter or Spring to your Wreath

To add a touch of Easter and Spring, you could add a rabbit silhouette.

Find a silhouette you like on google images. Right click to save to your computer. Open up a word document and insert the image. Size the image as you like.  Print (cardstock works best to keep the silhouette firm). Cut out with scissors or an etching knife. Tape or glue to the wreath. I used tape in order to be able to easily remove the silhouette.

There you have it.  A simple, inexpensive, and versatile wreath for Spring.  Change it up for each holiday of the next few months or leave it neutral.  The possibilities are endless!
Jenny blogs at www.livingthesweetstuff.com where she writes about her life as a wife, mama to one baby girl, and an avid crafter.  She enjoys living on the central coast of California and soaking up as much sunshine as she possible can.  

ShareTweetPinPocketMail
Super-Duper Cupcakes {Review and Giveaway}
How to Decorate Your Bathroom on a Budget

About Jenny Nanninga

Jenny contributed often at 5 Minutes for Mom. She also used to blog on her own site about her home, family (husband and sweet baby girl), being a mom, crafting, cooking, her faith in God, and more. She loves the outdoors, living in a small town on the Central Coast and being a mom!

Reader Interactions


Leave a Comment Cancel reply

Recipe Rating


This site uses Akismet to reduce spam. Learn how your comment data is processed.

2 Comments

  1. canlı sohbet says

    March 19, 2013 at 1:32 pm

    make us the most beautiful conversations super administrator

    Reply
  2. Lauren says

    March 18, 2013 at 9:58 am

    Very cute — great tutorial. I love the idea of buying just one wreath and updating it each season. I could maybe even get a wreath from the dollar store to really save money!

    Reply

Primary Sidebar

Bringing Moms Together

We are Janice and Susan, twin bloggers and work-at-home moms. We're here to inspire, encourage & empower you.

Meet Us…

Work With Us…

Subscribe via Email

to be first to read new posts

Trending Now

“You Color My World” Free Printable Valentines

“You Color My World” Free Printable Valentines

Oven Roasted Potatoes and Peppers Recipe

Oven Roasted Potatoes and Peppers Recipe

How To Use A Moka Pot – Discover The Secret To Making Amazing Coffee At Home

How To Use A Moka Pot – Discover The Secret To Making Amazing Coffee At Home

Get Outside and Play with Spray Chalk

Get Outside and Play with Spray Chalk

browse around

  • Posts by Susan
  • Posts by Janice
  • Favorite Recipes
  • Favorite Crafts
  • Giveaways
  • All Posts

Footer

Recipes

St. Patrick’s Day Sugar Cookies with a Clever Decorating Trick

St. Patrick’s Day Sugar Cookies with a Clever Decorating Trick

Traditional Irish Soda Bread Recipe and History

Traditional Irish Soda Bread Recipe and History

Easy Valentine Sugar Cookies

Easy Valentine Sugar Cookies

Crafts/DIY

Summer Word Search Puzzles For Kids

Summer Word Search Puzzles For Kids

“You Color My World” Free Printable Valentines

“You Color My World” Free Printable Valentines

Buddy the Elf Hat Pattern – How to Make an Elf Hat out of Felt

Buddy the Elf Hat Pattern – How to Make an Elf Hat out of Felt

Giveaways

Holiday Gift Guides and Christmas Giveaway 2024

Holiday Gift Guides and Christmas Giveaway 2024

Valentine’s Day Gifts For Women

Valentine’s Day Gifts For Women

REDEEMING LOVE Set to Strike Gold on the Big Screen #RedeemingLoveMovie

REDEEMING LOVE Set to Strike Gold on the Big Screen #RedeemingLoveMovie

Follow 5 Minutes For Mom on Facebook Follow 5 Minutes For Mom on Twitter Follow 5 Minutes For Mom on Pinterest Follow 5 Minutes For Mom on Instagram Follow 5 Minutes For Mom on YouTube Follow 5 Minutes For Mom via RSS
  • About
  • Contact
  • Work with Us
  • Privacy Policy
Copyright © 2025 5 Minutes for MomTheme by Melissa Rose Design and Once Coupled