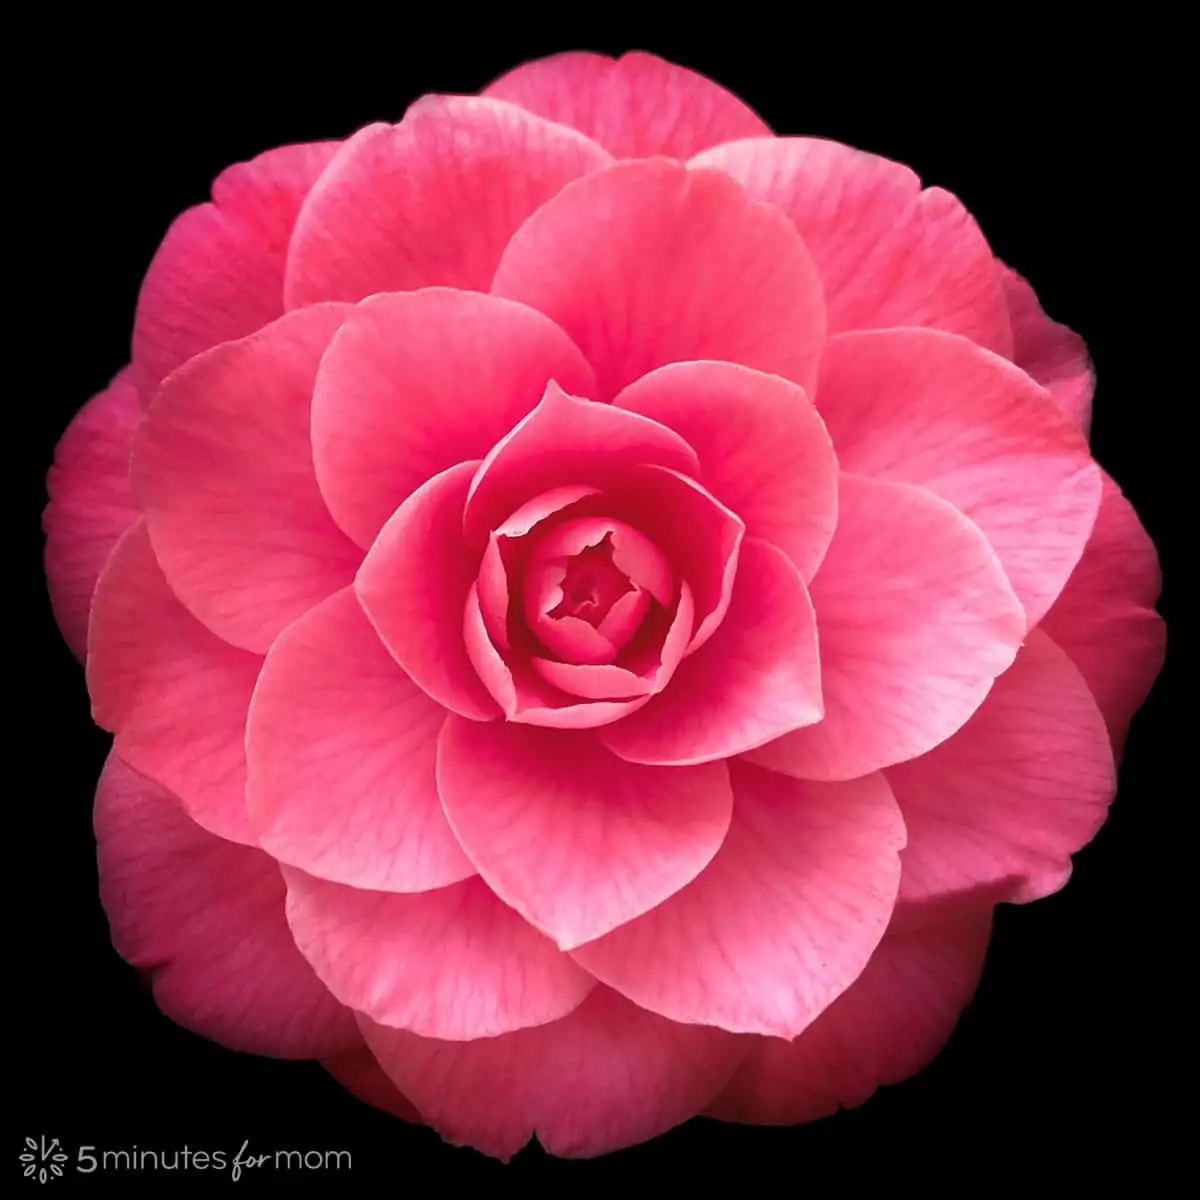
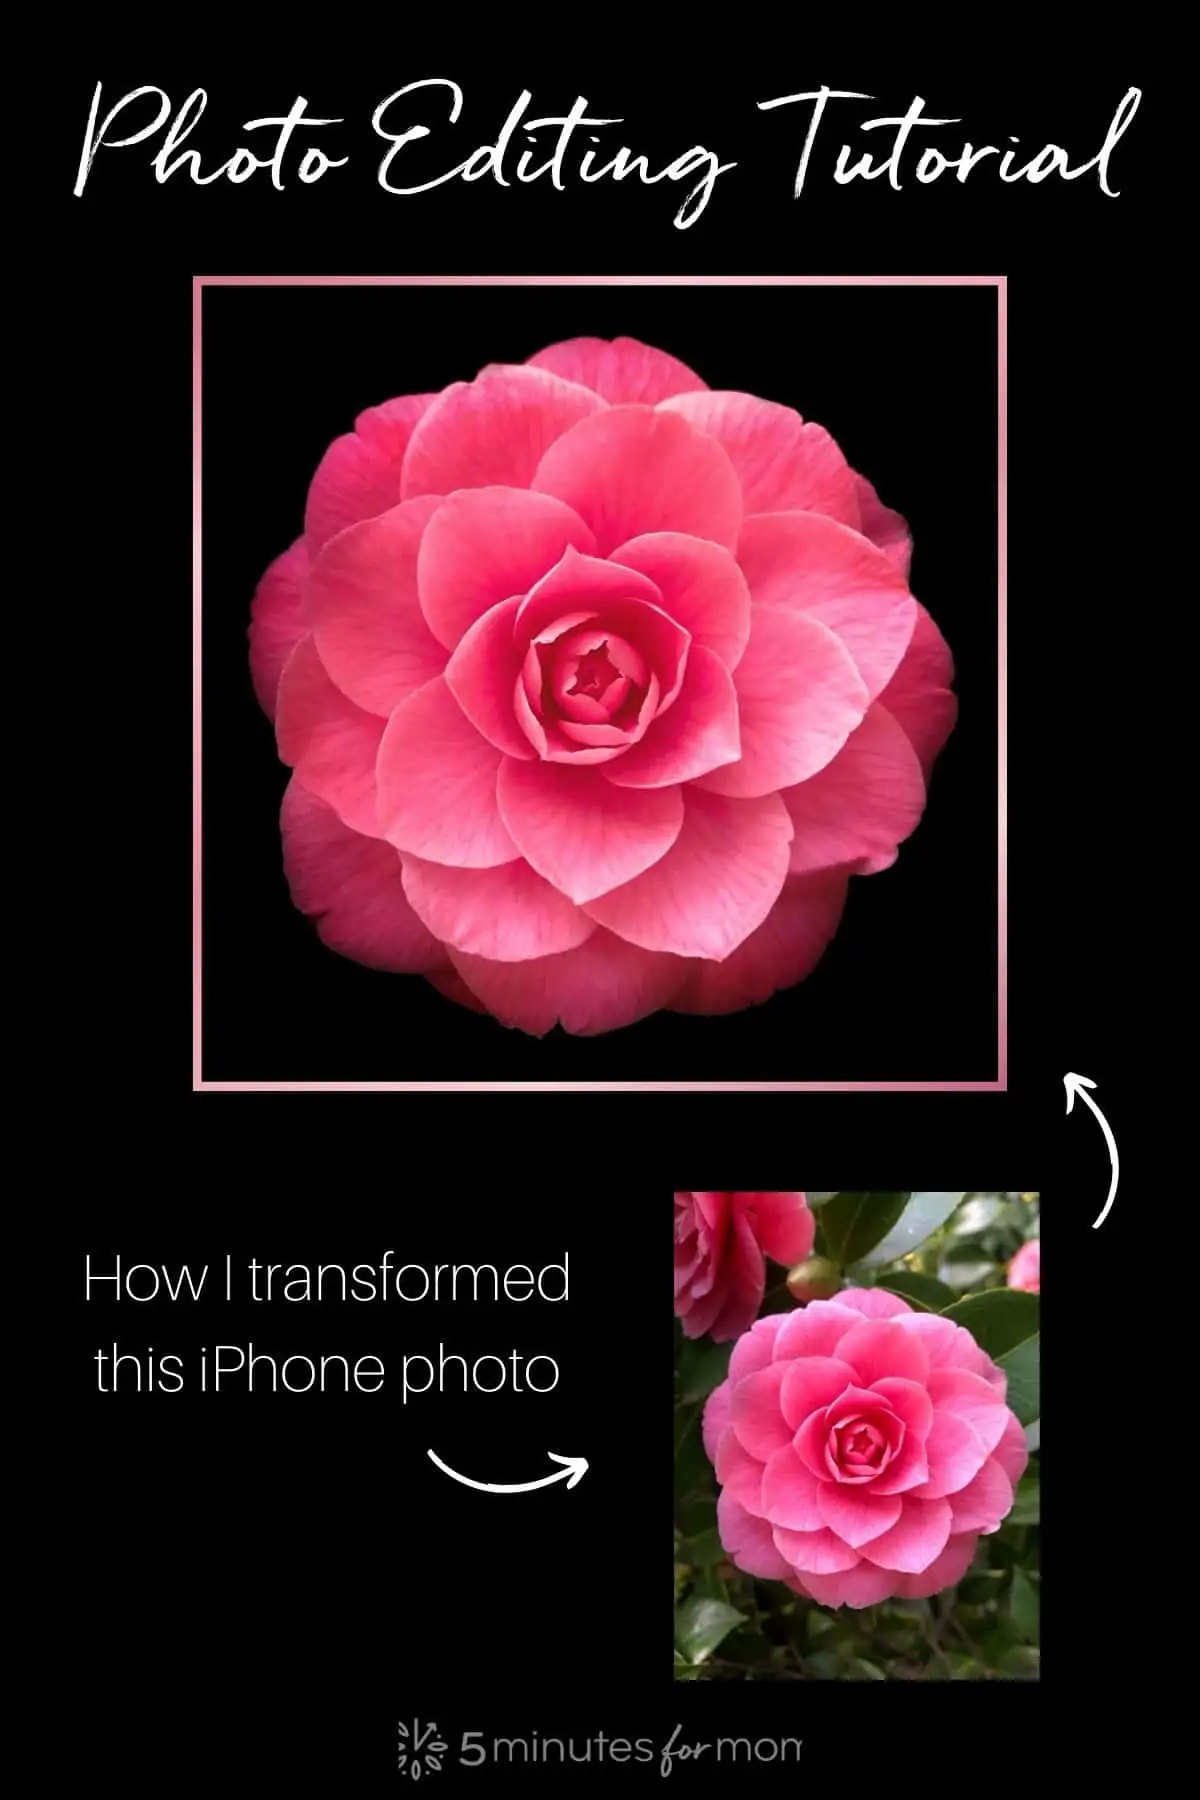
Find out how I created this striking image of a Camellia flower with an iPhone photo and a quick photo editing trick with the Vignette Tool in Snapseed, a free photo editing app for iPhone and Android.
This spring, I have been challenging myself to use my iPhone camera more and not rely on my DSLR for all of my photos.
It has been fun to see what I can do with just my iPhone 8 Plus. (Yes – it is 2021 and I am still using my old iPhone 8. My kids both have newer iPhones than I do! But, my phone works and it is paid off. So I keep using it.)
Check out my recent photos on Instagram and let us know if you would like us to follow you too!
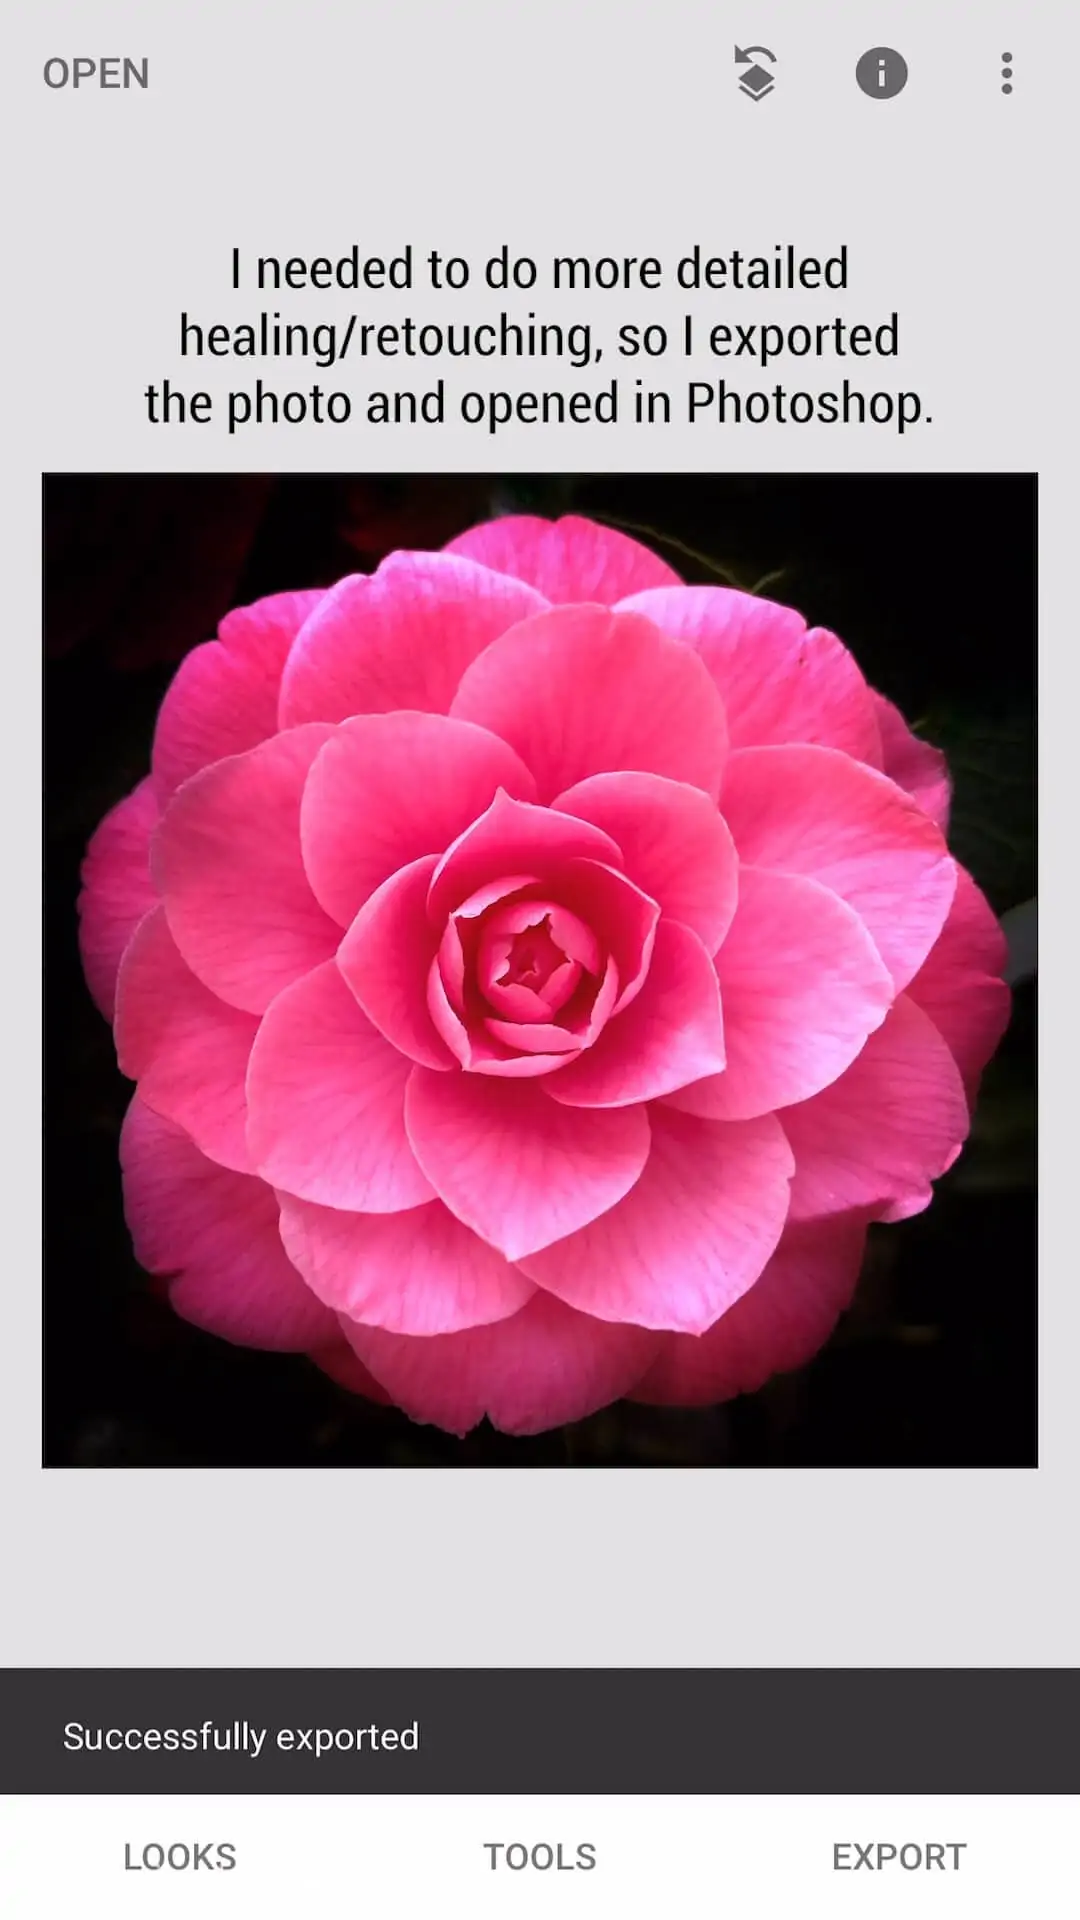
I took this stunning image of a Camellia blossom in my backyard. I wanted to show off the flower without the distracting background.
Instead of selecting the flower and removing the background in Photoshop, I used the Vignette Tool in the mobile photo editing app Snapseed to replace the leaves and trees in the original photo with a black background.
It was a quick edit trick that saved me from making a detailed selection in Photoshop, while also evenly darkening the outer petals of the flower to create a more dazzling final image.
How I shot the photo:
When photographing flowers, it usually works best to avoid shooting in direct, harsh sunlight. So, photographing on a cloudy day can work beautifully.
If the sun is bright, it is best to diffuse the light with some form of diffuser or try to shoot in open shade.
For this photograph, I shot it on a cloudy day and in the open shade of our neighbor’s house.
I knew that I wanted to photograph the flower straight on and with enough room around the edges of the flower to crop it symmetrically in a square.
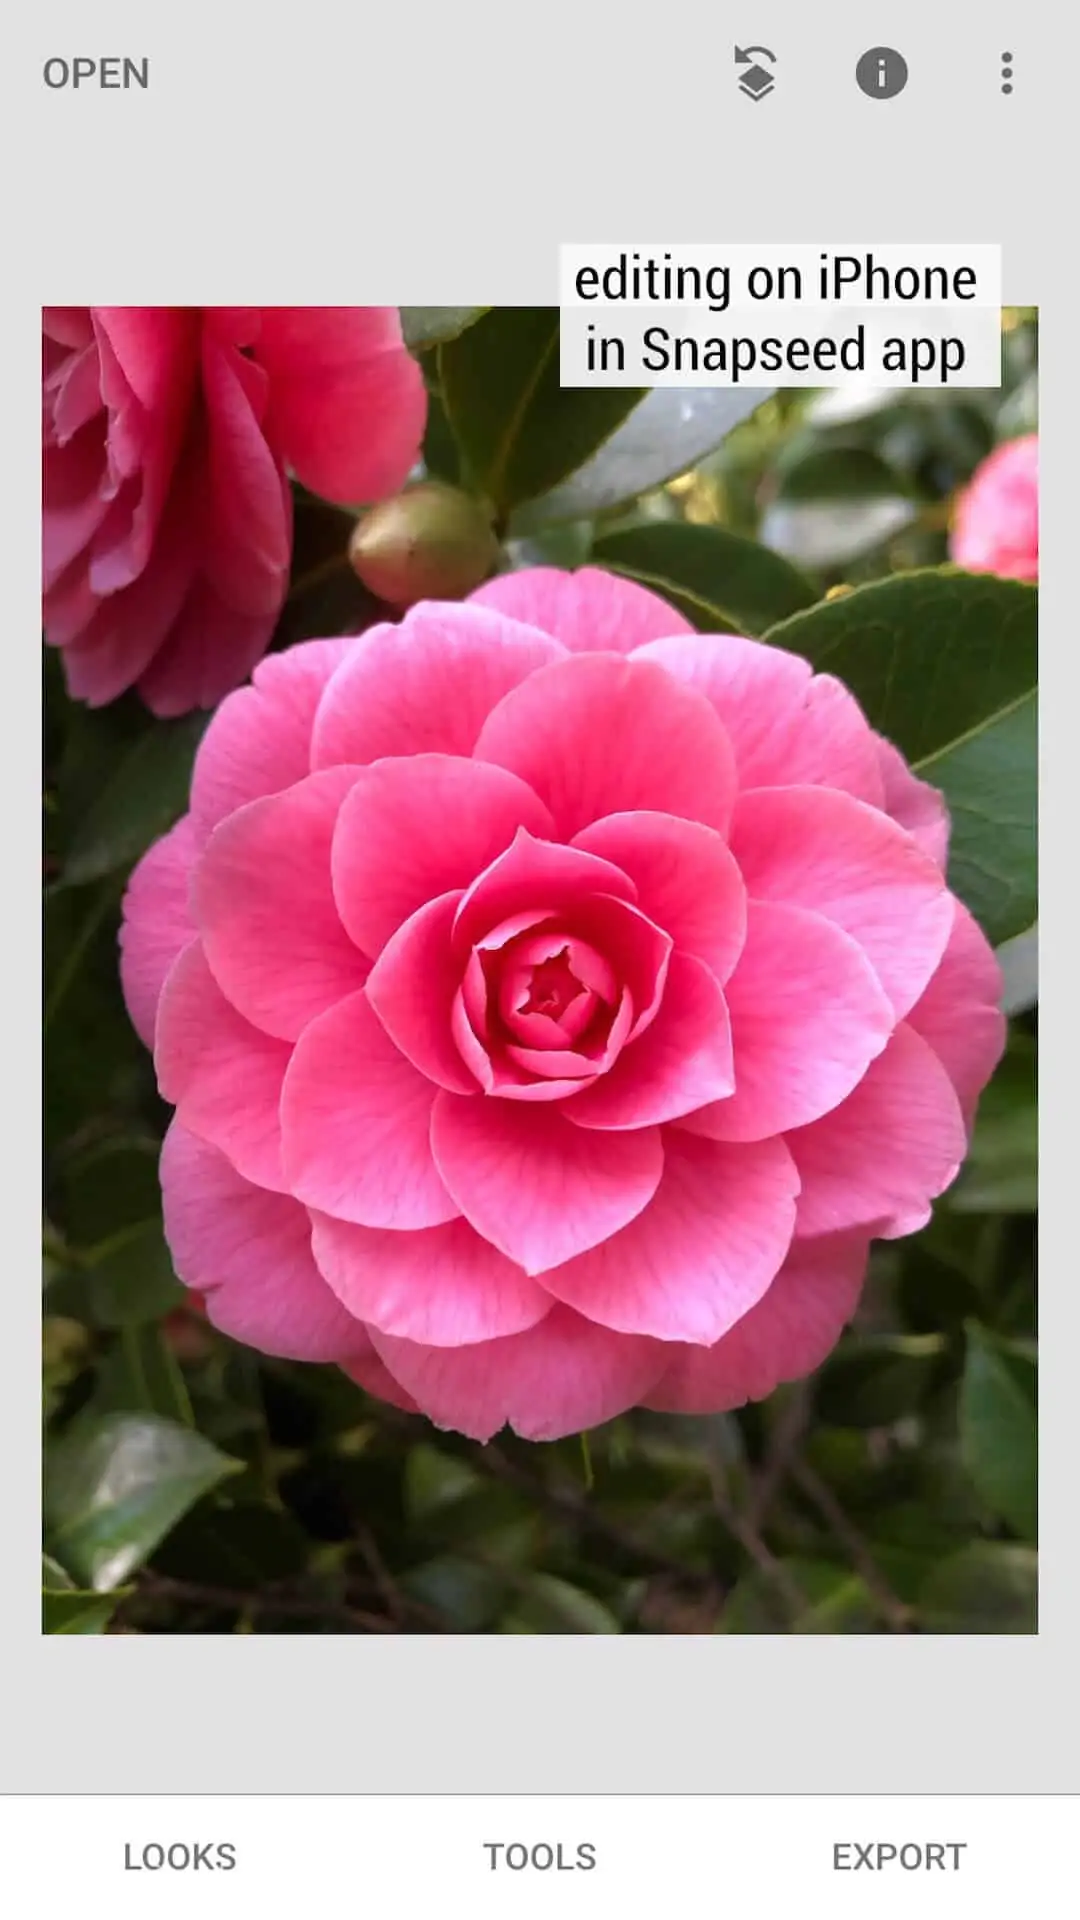
I got in close and used the regular camera on my iPhone. I focused on the center of the flower and adjusted the exposure slightly.
How I edited the photo:
Since I photographed the flower on my iPhone, I wanted to edit it on my phone as well. So I used the Snapseed photo editing app for mobile phones to edit the shot.
Snapseed is a fantastic, robust photo editing app for iPhones and Android – and it is free!
Snapseed is user-friendly with an intuitive interface and an extensive offering of editing tools, including presets and filters.
If you haven’t used Snapseed before, I highly recommend downloading it.
Curves Tool
I opened my photo in Snapseed and then went into the TOOLS section and selected CURVES.
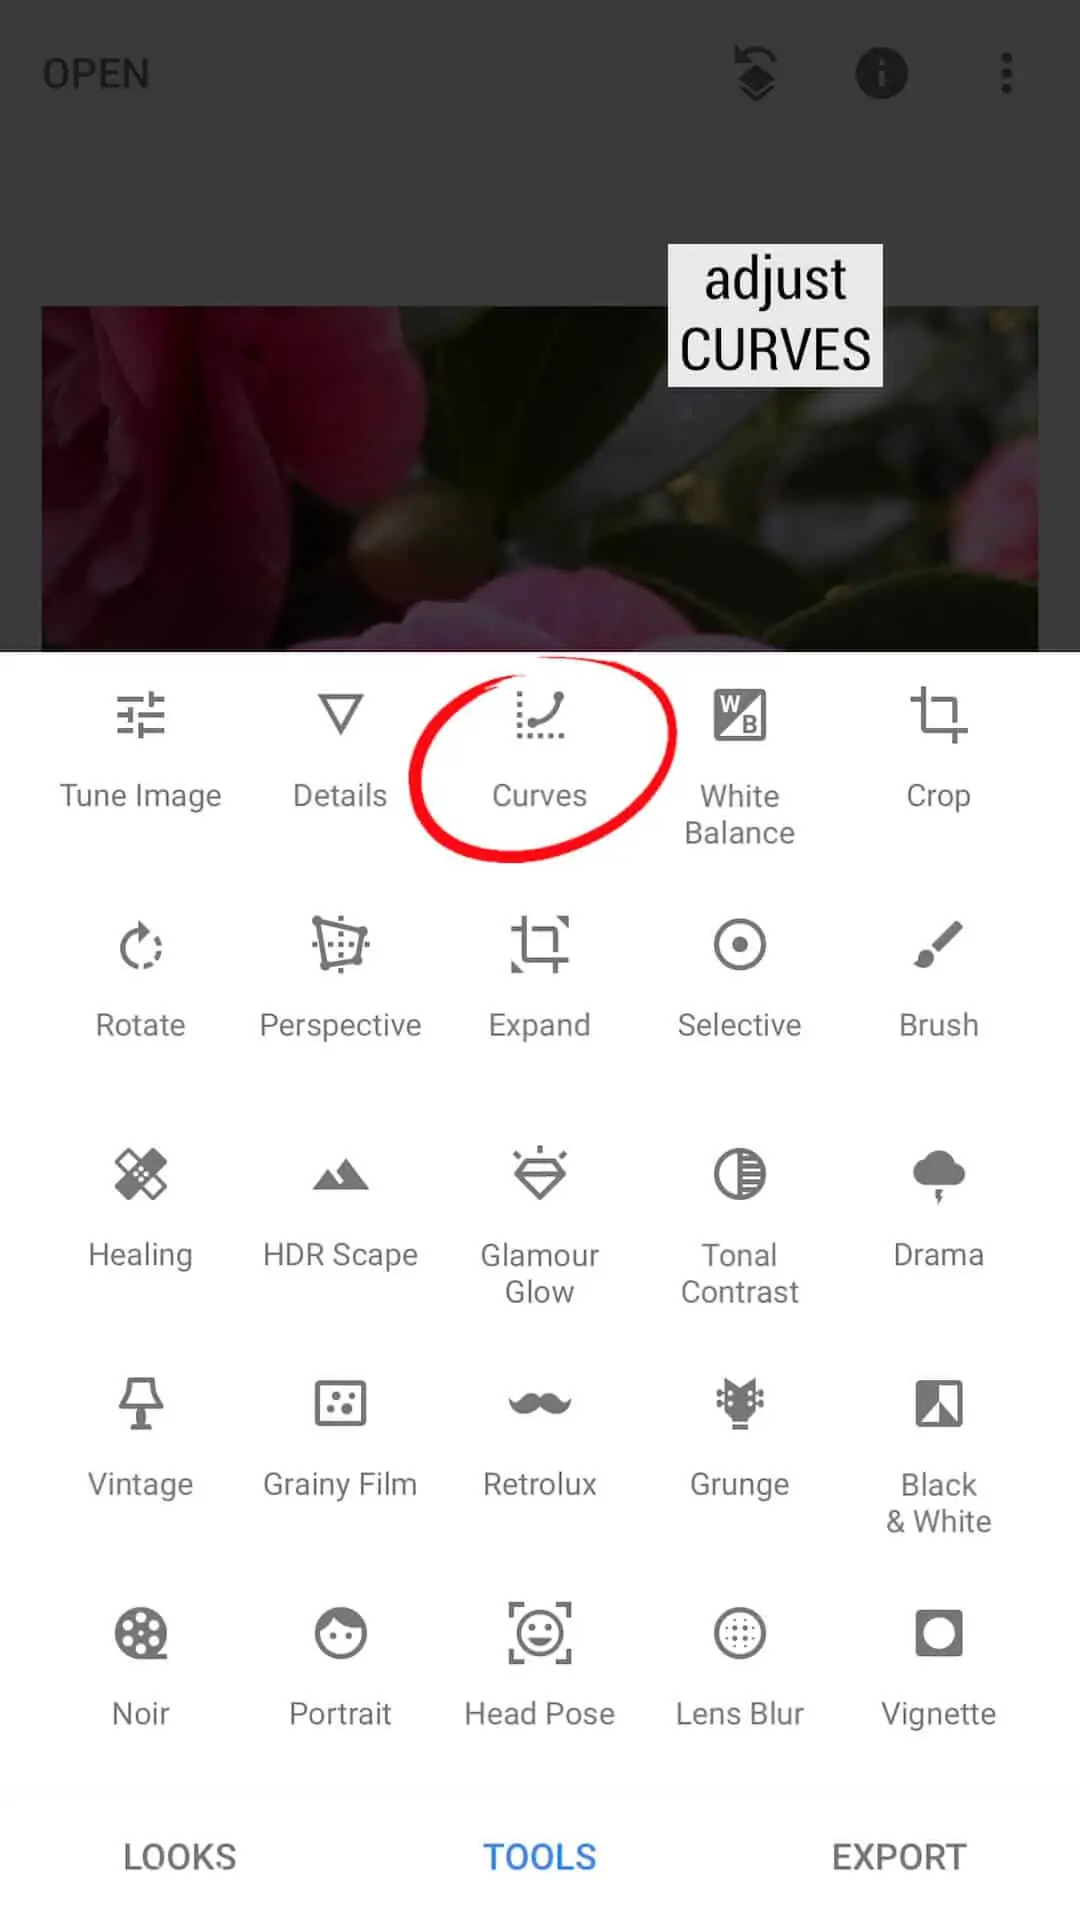
Because the shadows were a little too dark in the center of the flower, I wanted to bring up the mid-tones and the shadows. So I pulled up the middle of the curve and the shadows and blacks.
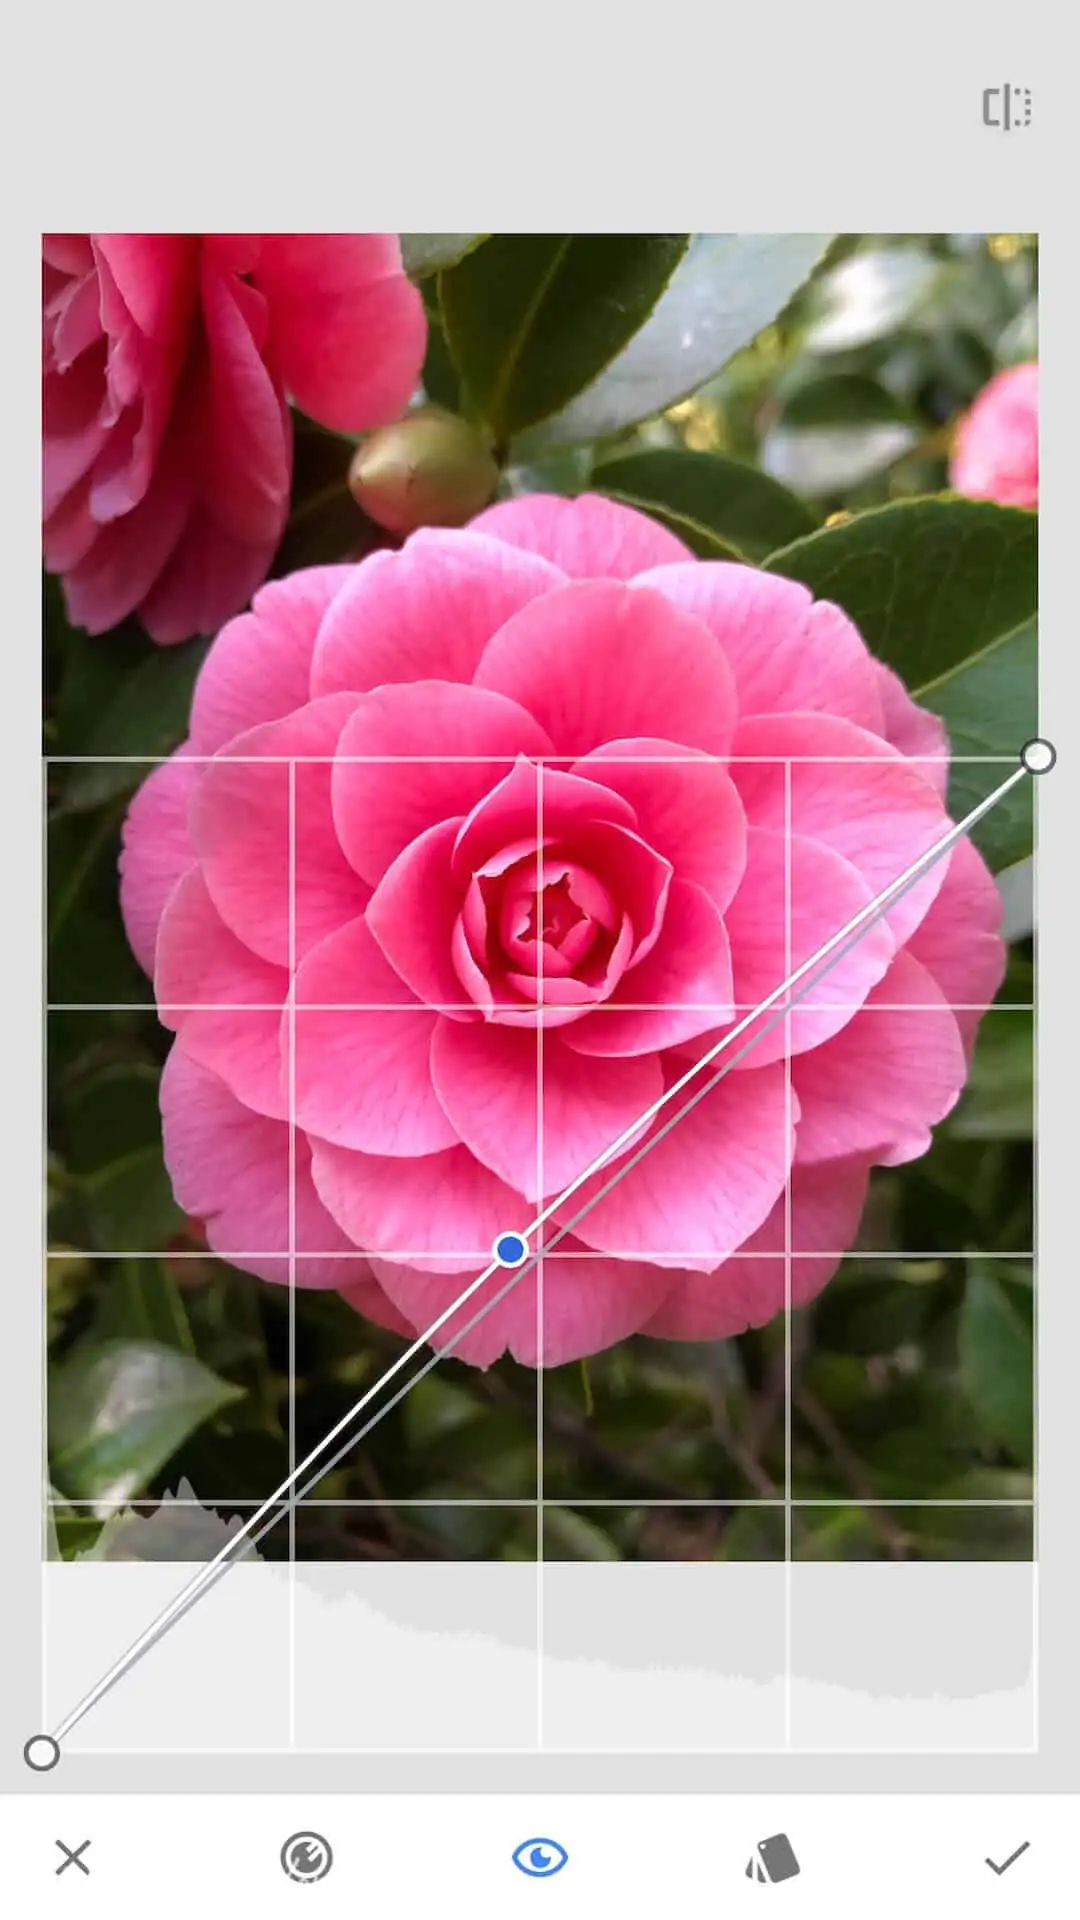
But then I decided instead to go with one of Snapseed’s curve presets that brought up the darks and shadows and also muted the greens a bit.
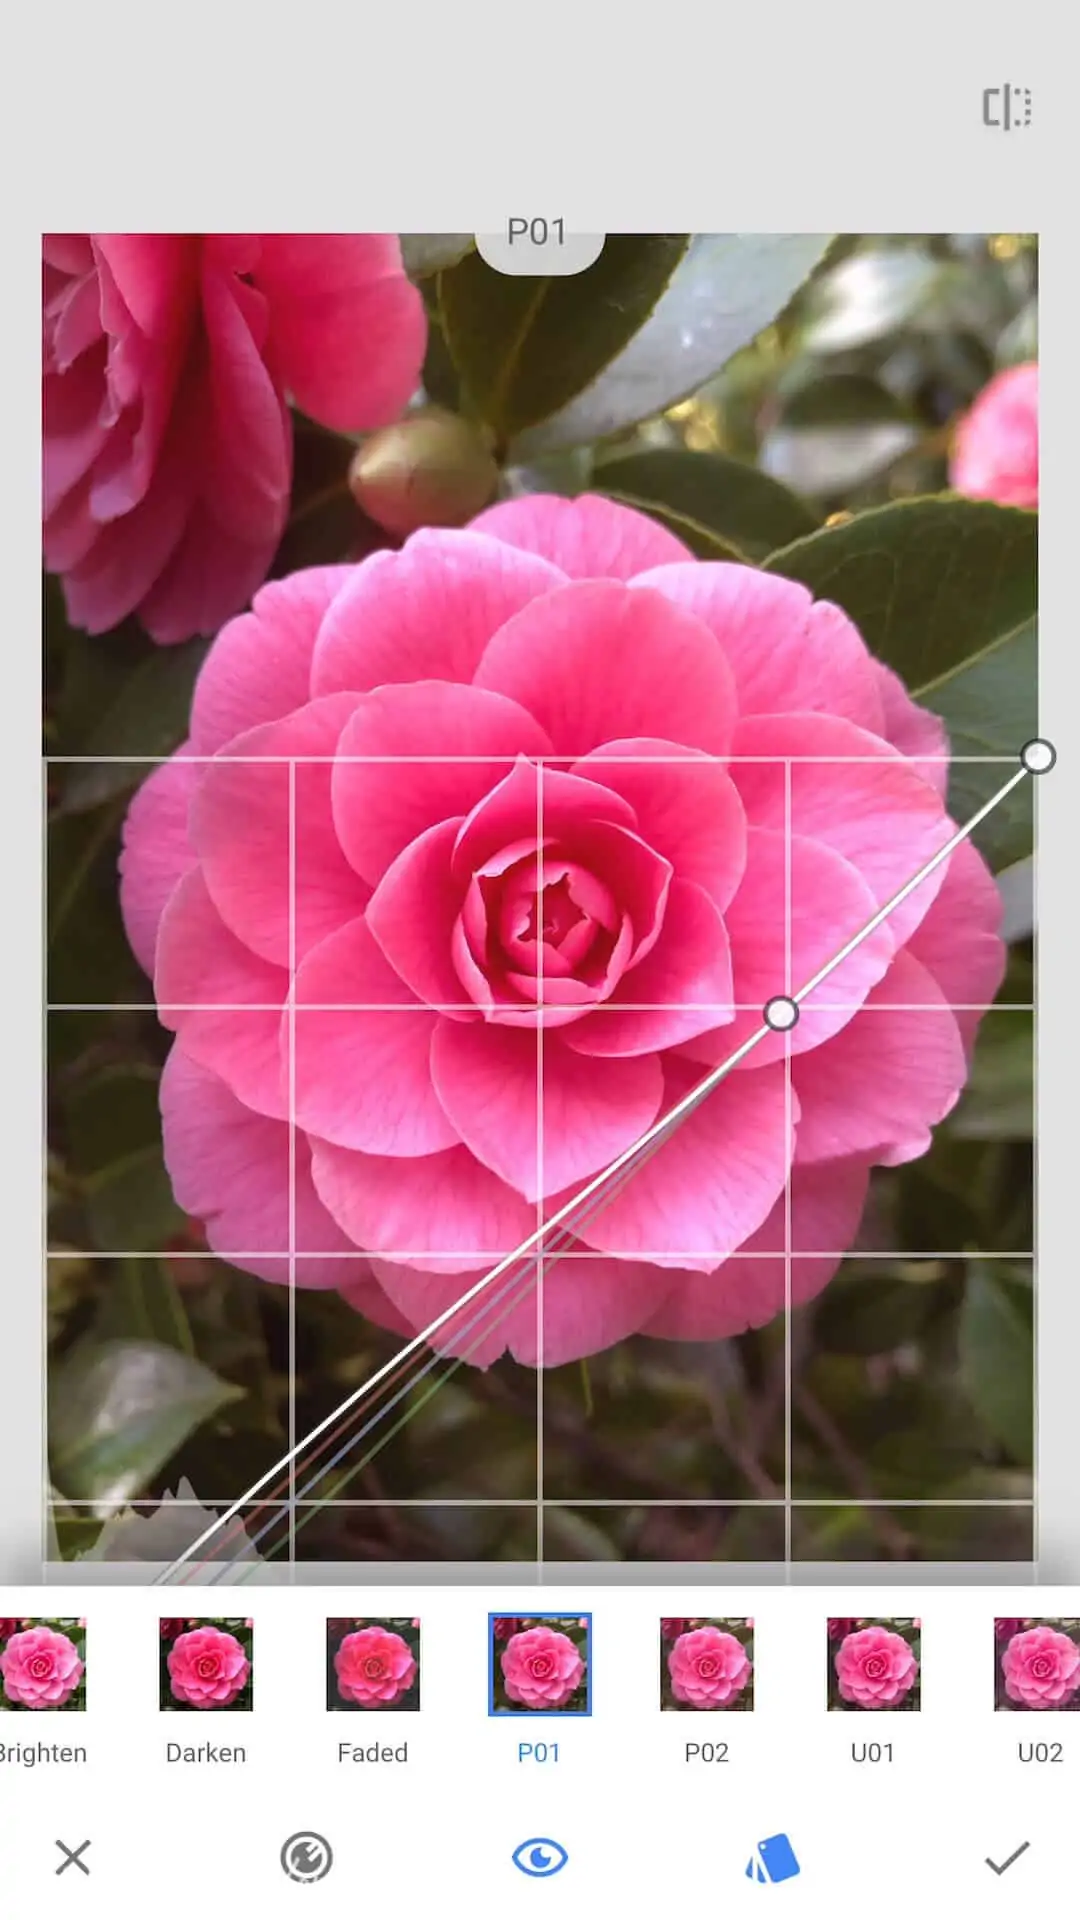
Either of those choices would have worked fine for my final photo since I eventually removed all of the green leaves anyway.
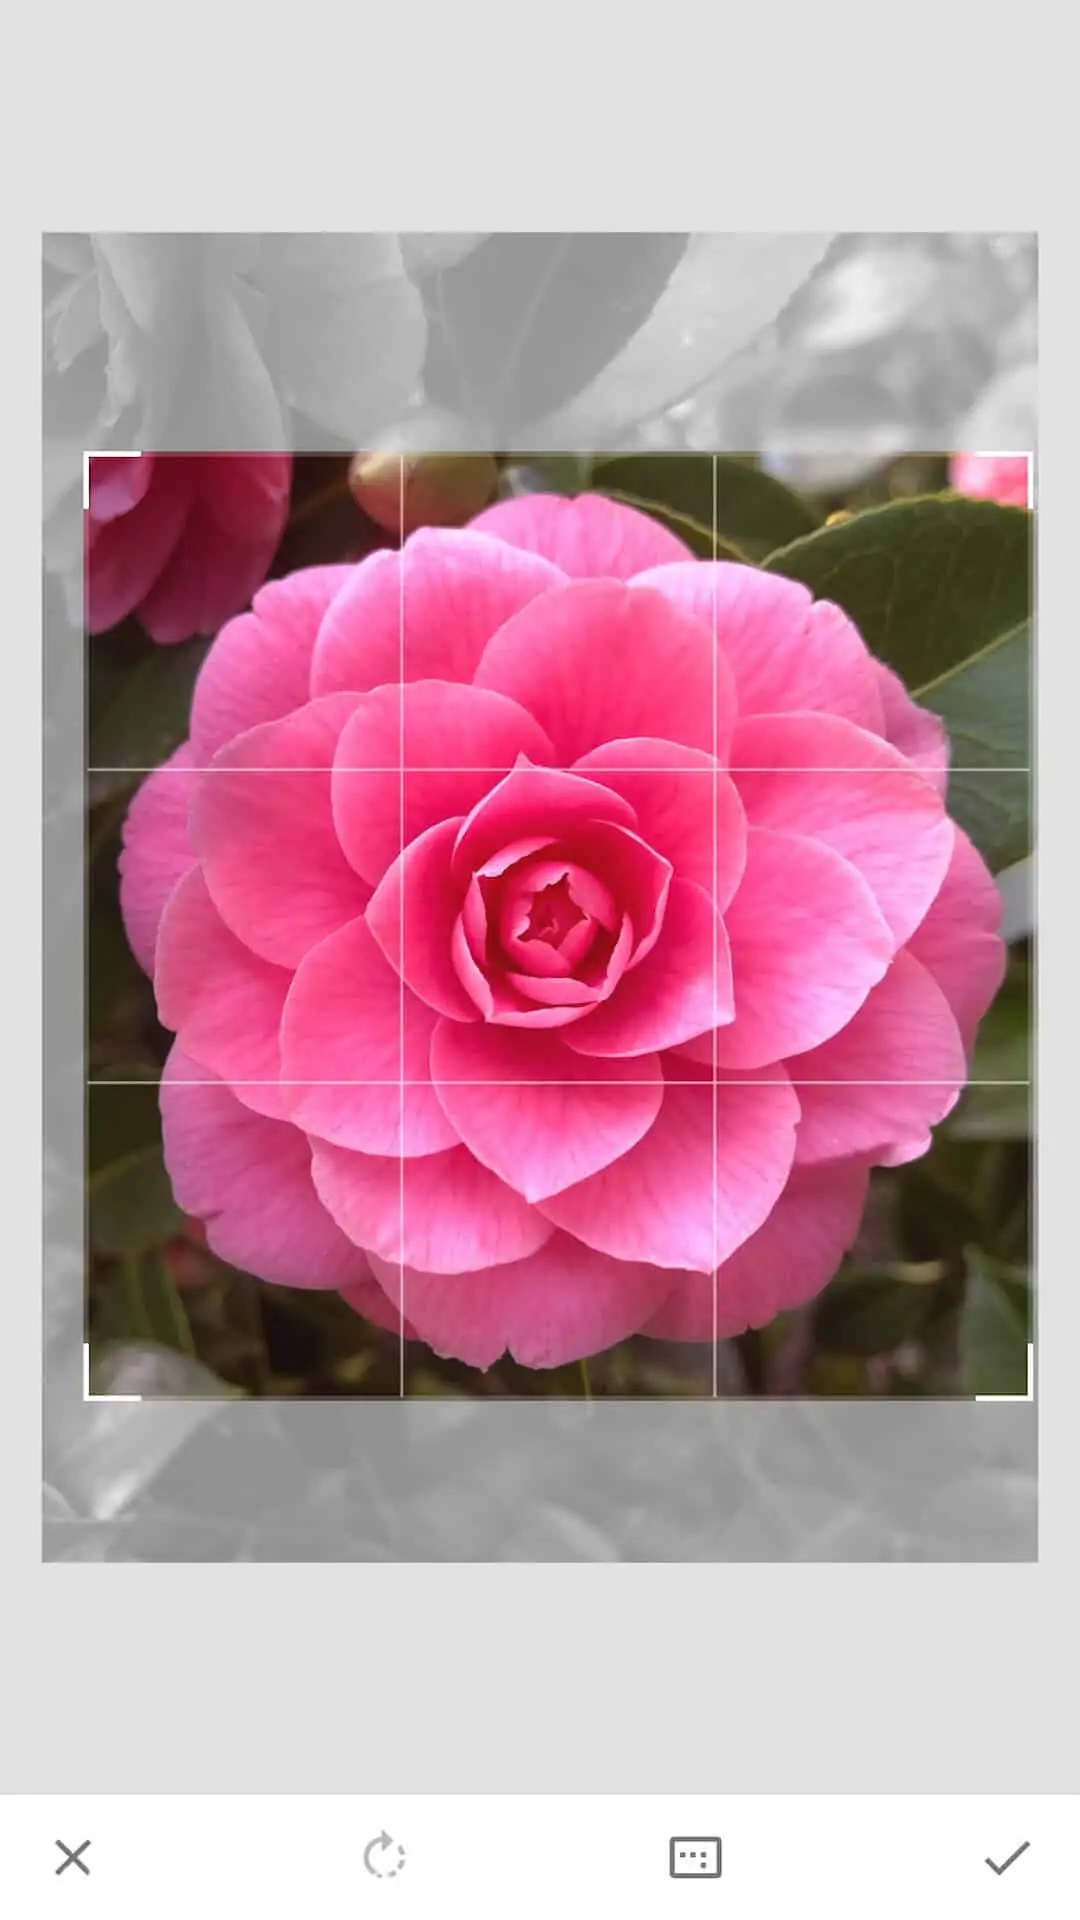
Crop Tool
Next, I selected the Crop Tool.
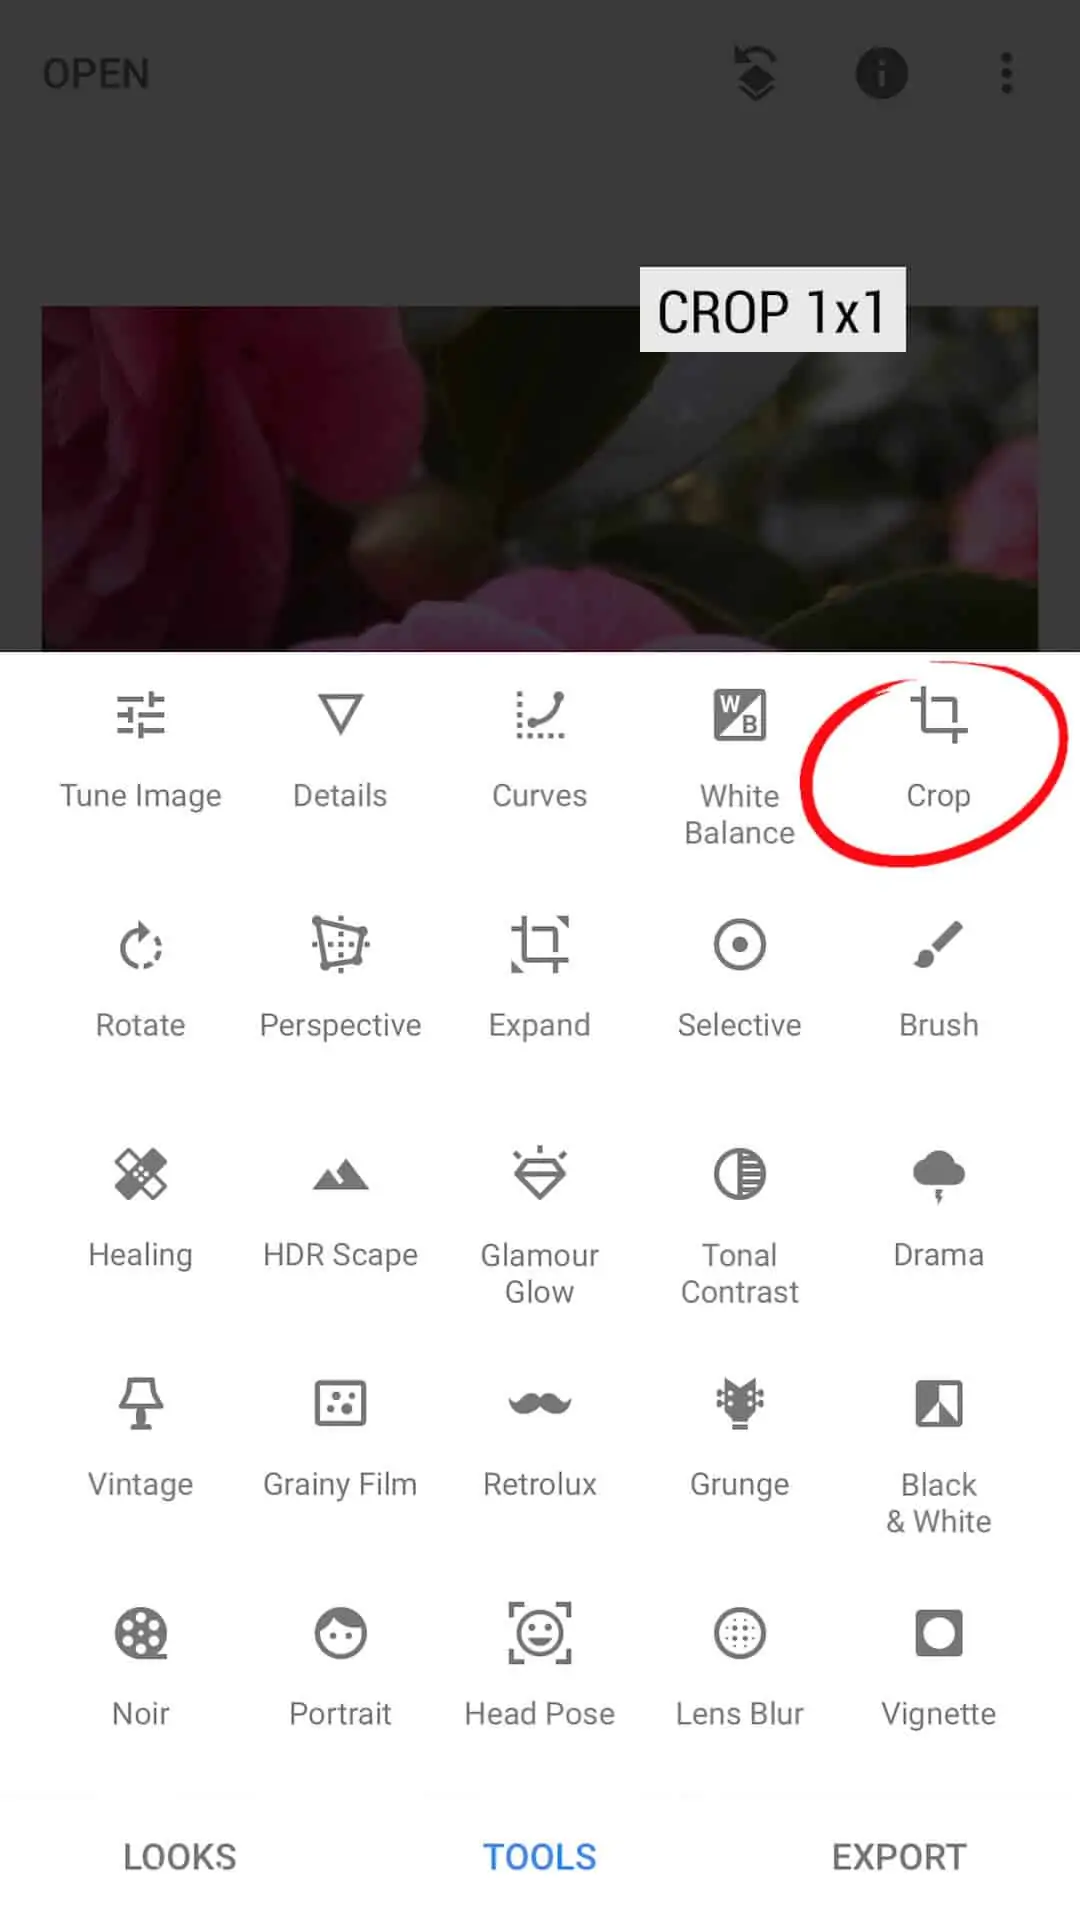
I cropped the image to 1×1, centering the flower evenly in the crop.
Vignette Tool
Then, I selected the Vignette Tool.
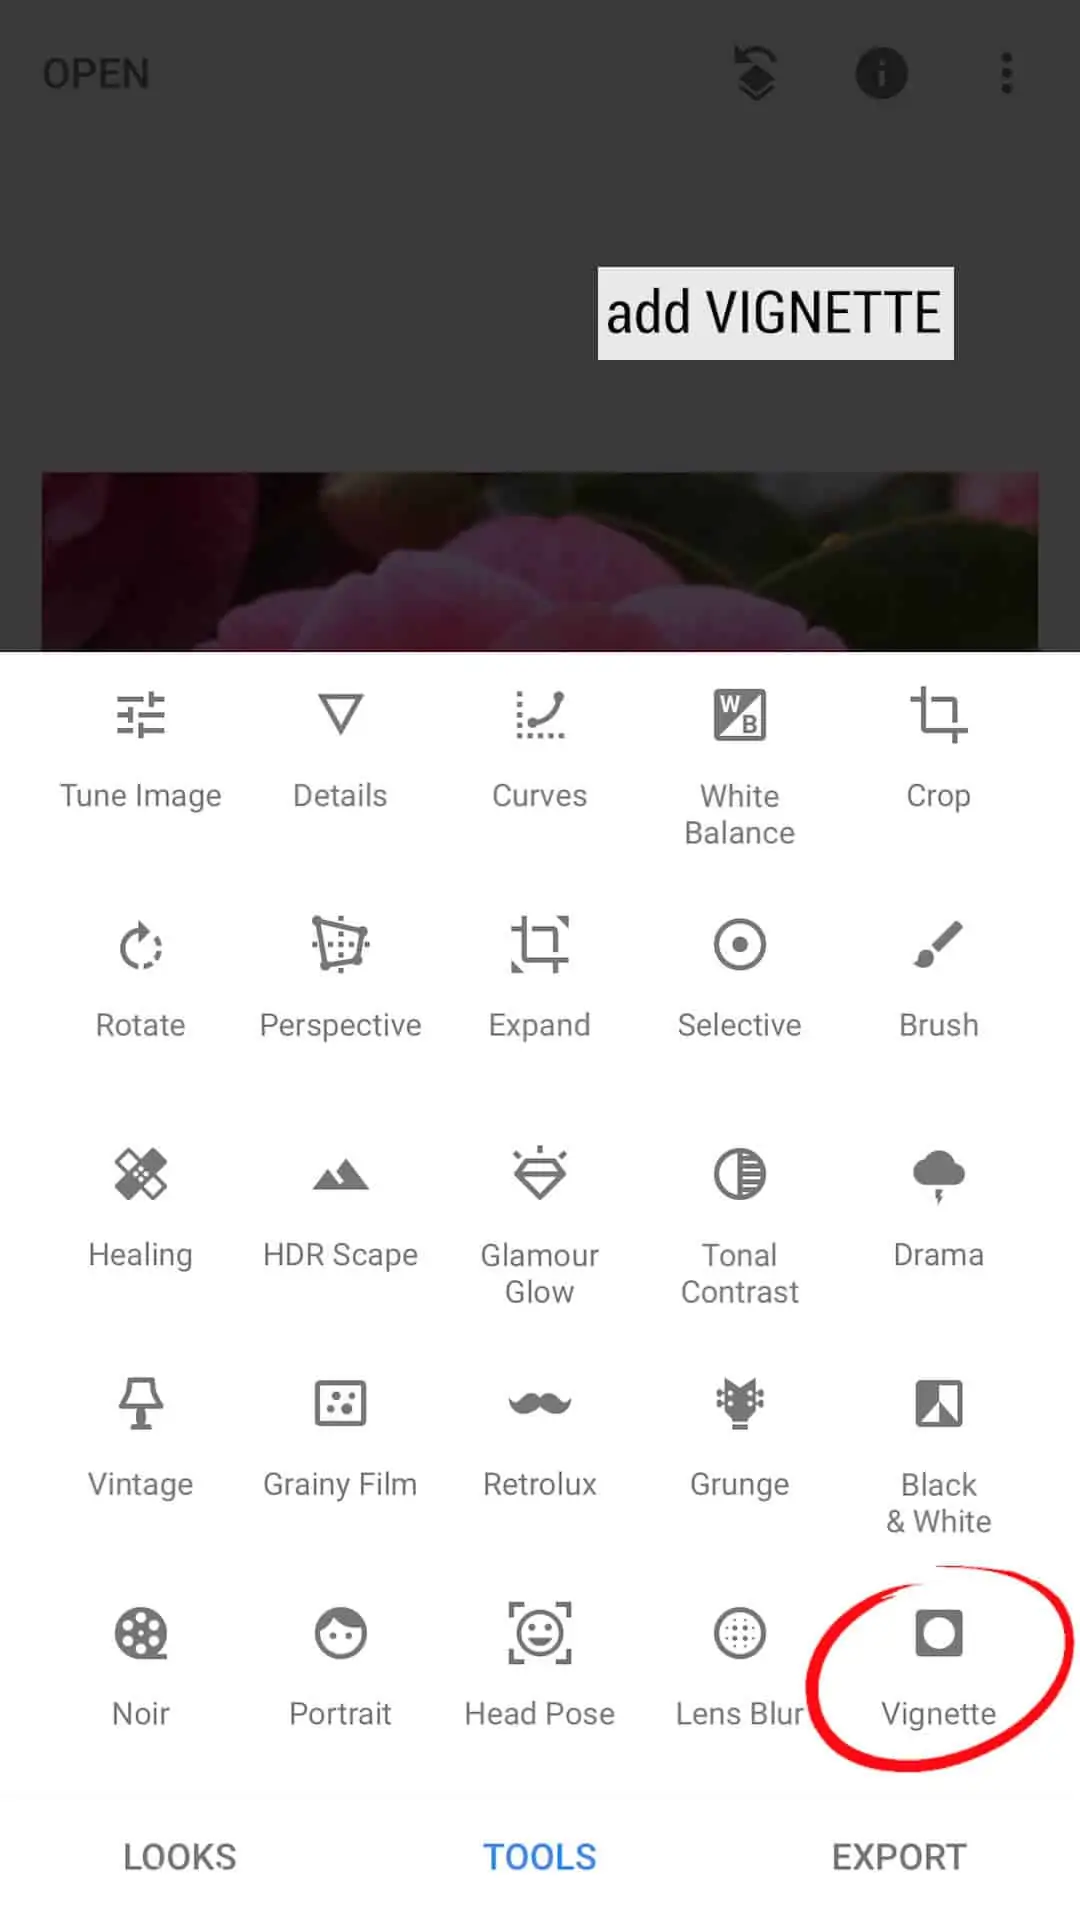
After I added a vignette, I brought the outer brightness down to -100% so it would be completely black around the edges.
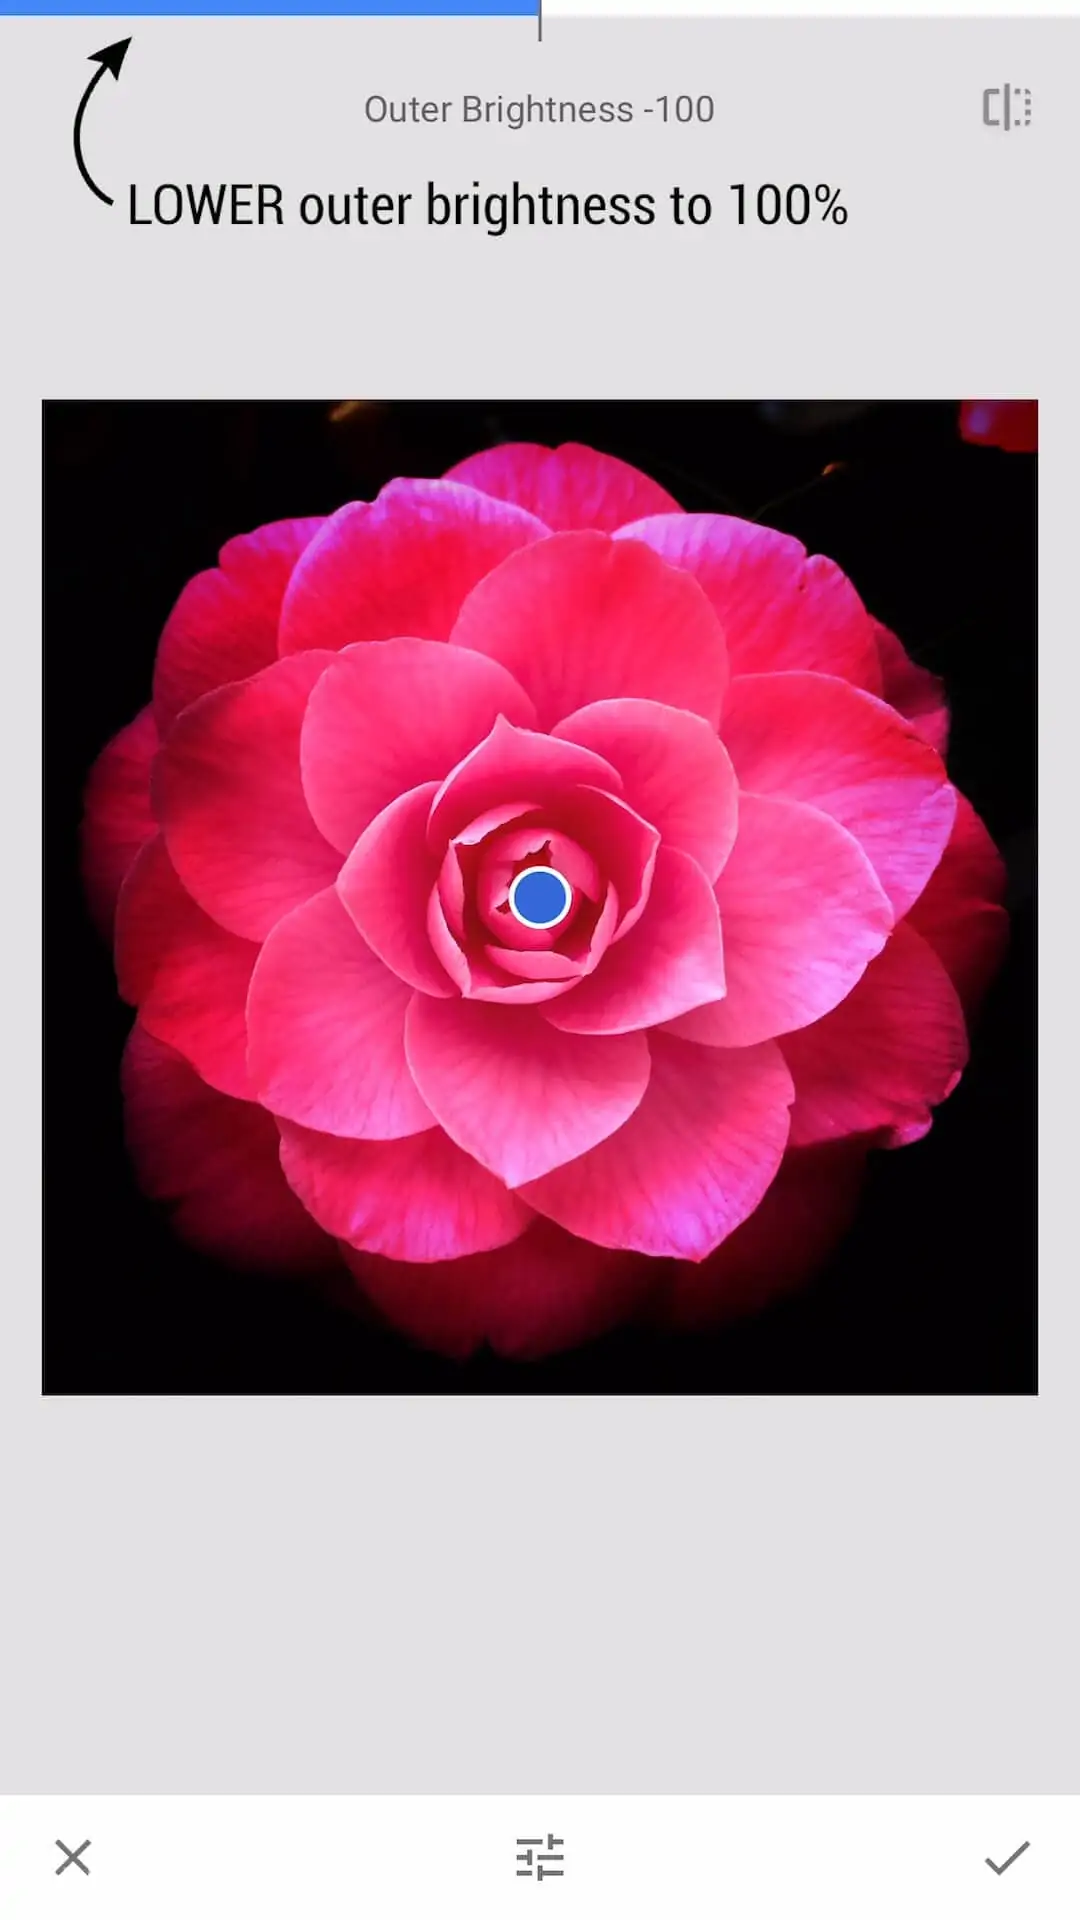
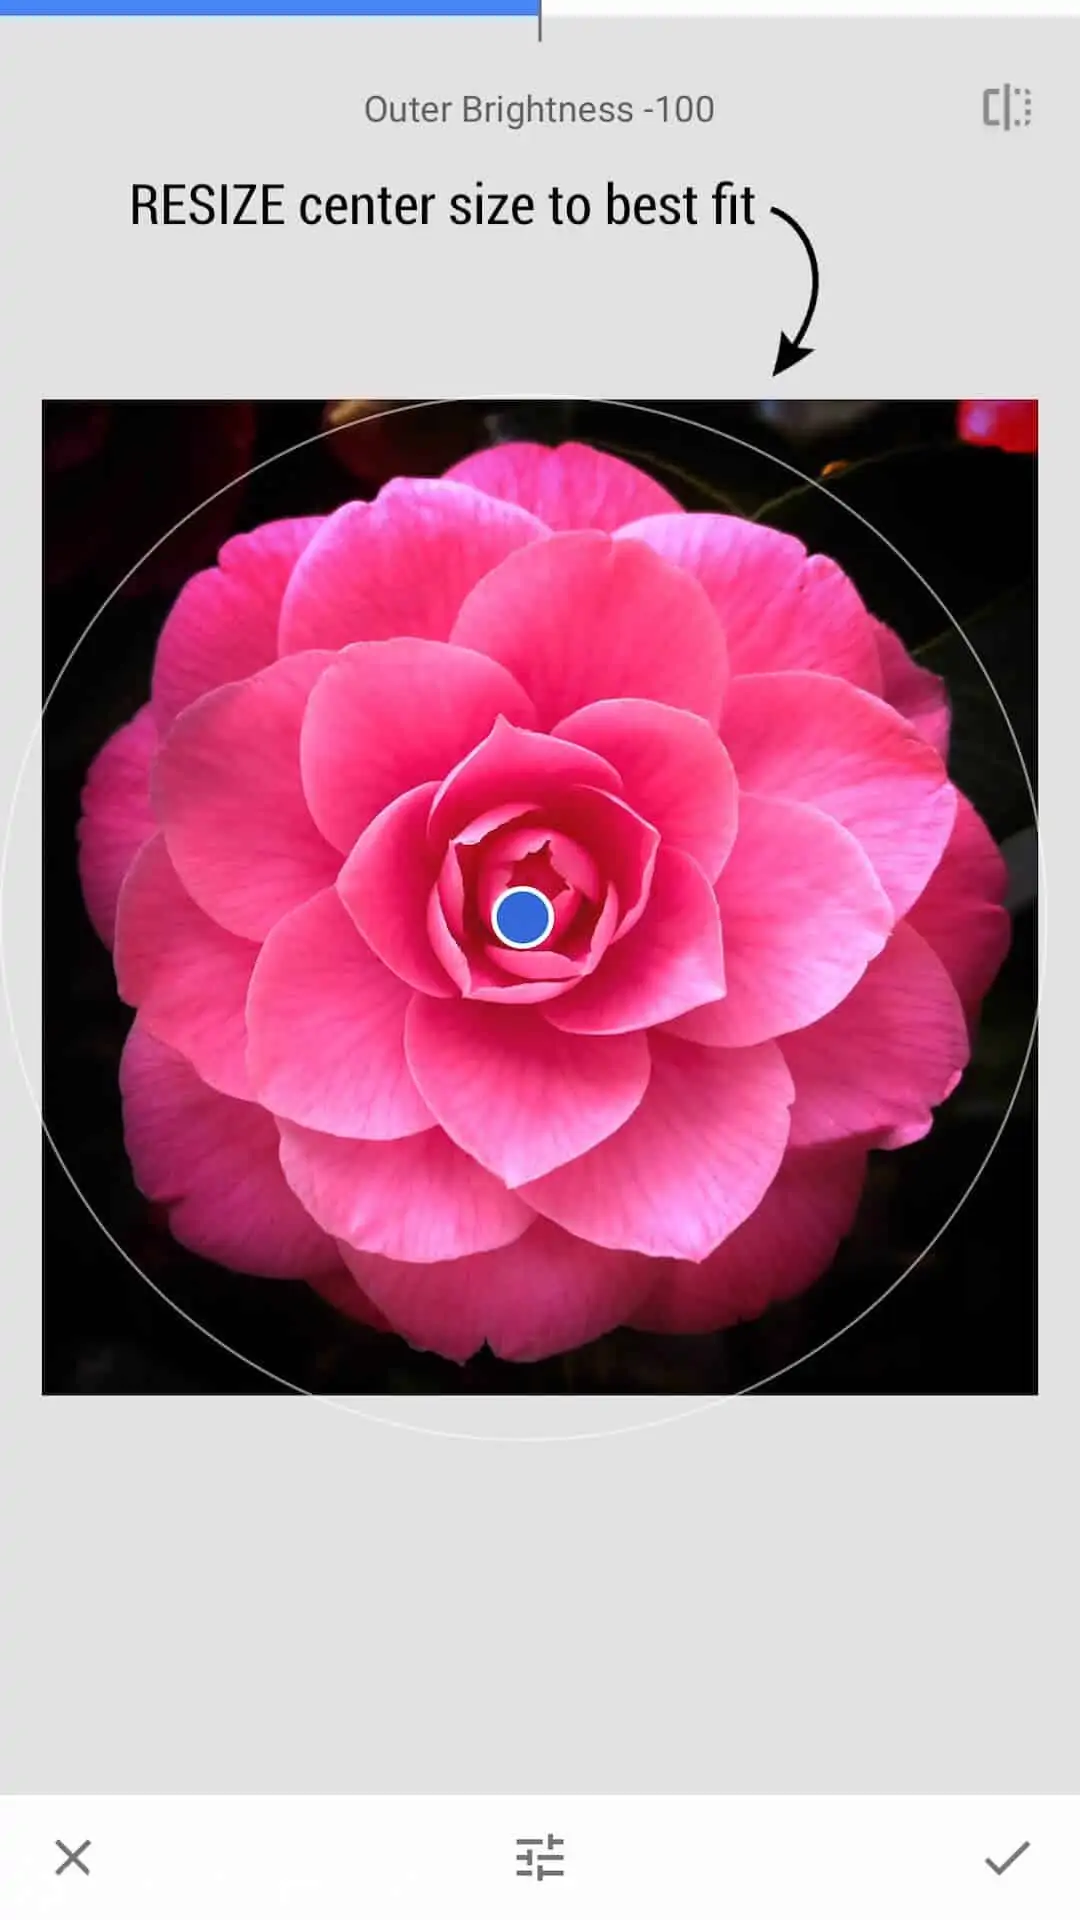
This dark vignette reached too far into the center, making the flower too dark as well, so I adjusted the size of the center circle of the vignette. To resize the center, pinch two fingers and slide apart or together.
You can also move the center of the circle so that it is in the best place for your photo.
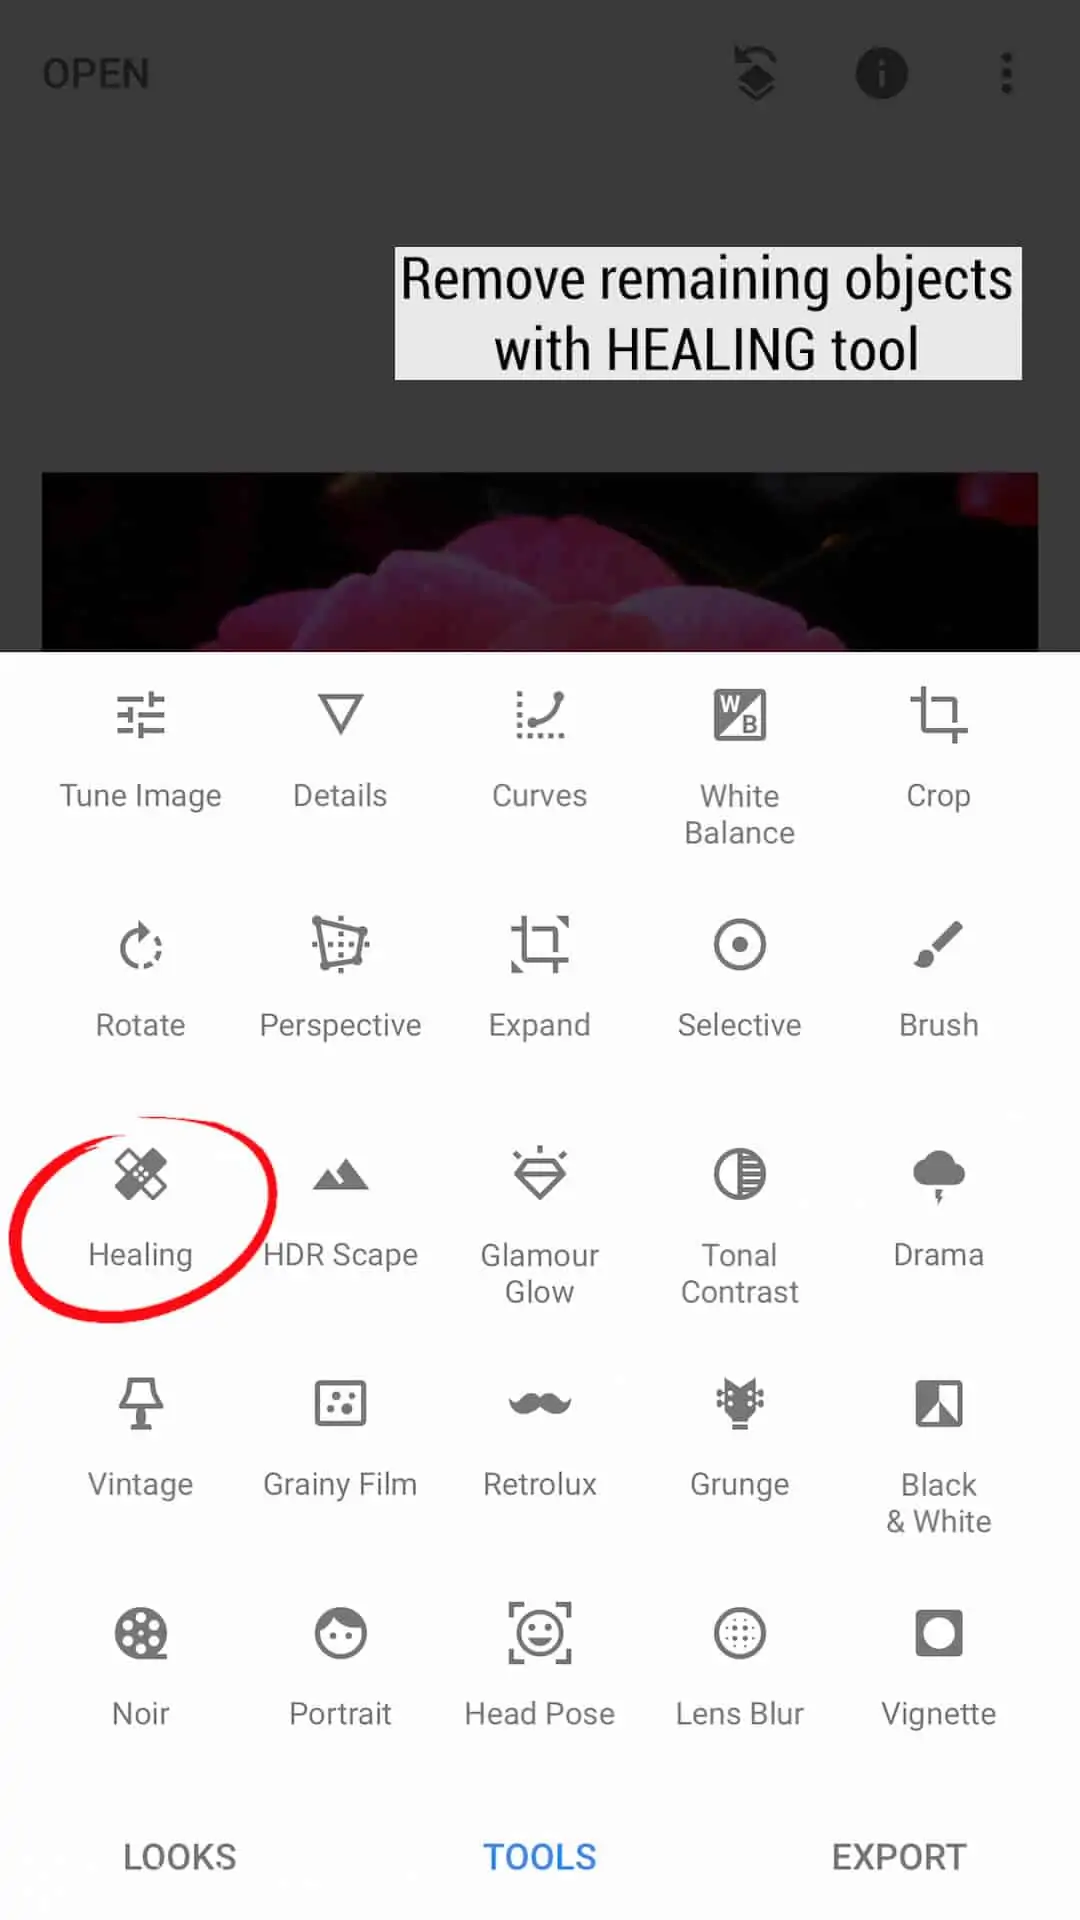
Making this adjustment brought back some of the light reflecting off the leaves and buds. But I didn’t mind because I knew I could remove those problems with the Healing Tool.
Healing Tool
So to remove those marks, I selected the HEALING tool and began to remove the unwanted spots.
Snapseed’s Healing Tool is incredibly easy to use. Just move your finger over the areas you want to remove.
Unlike the healing tool in the Lightroom Photo Editor mobile app, you do not select the area from which the app is cloning.
This makes Snapseed’s healing tool faster and easier to use than the Lightroom app’s healing tool, but it can be a hit or miss situation. So, you may need to UNDO attempts to try and achieve the best result.
(Note: I love the Adobe Lightroom Photo Editor App for mobile phones. I use Adobe Creative Cloud programs on my desktop, including Lightroom, Photoshop, Illustrator, InDesign, and Premiere Pro. I am so glad that Adobe has created a powerful mobile photo editing option as well. If you haven’t used the Lightroom app yet, I also highly recommend downloading it. I will publish some tutorials using the Lightroom app as well.)
For this image, I needed to remove some small marks that were touching the petals.
Because I was working on my phone, it was awkward to fine-tune my edits enough.
So I decided to finish editing the image in Photoshop.
But, if you want to finish your edit in Snapseed, zoom in and try your best to make small enough adjustments to perfect your image.
If you still have some details that you can’t adjust on your phone and you don’t have Photoshop, you can use the free photo editing website PicMonkey to finish your retouching.
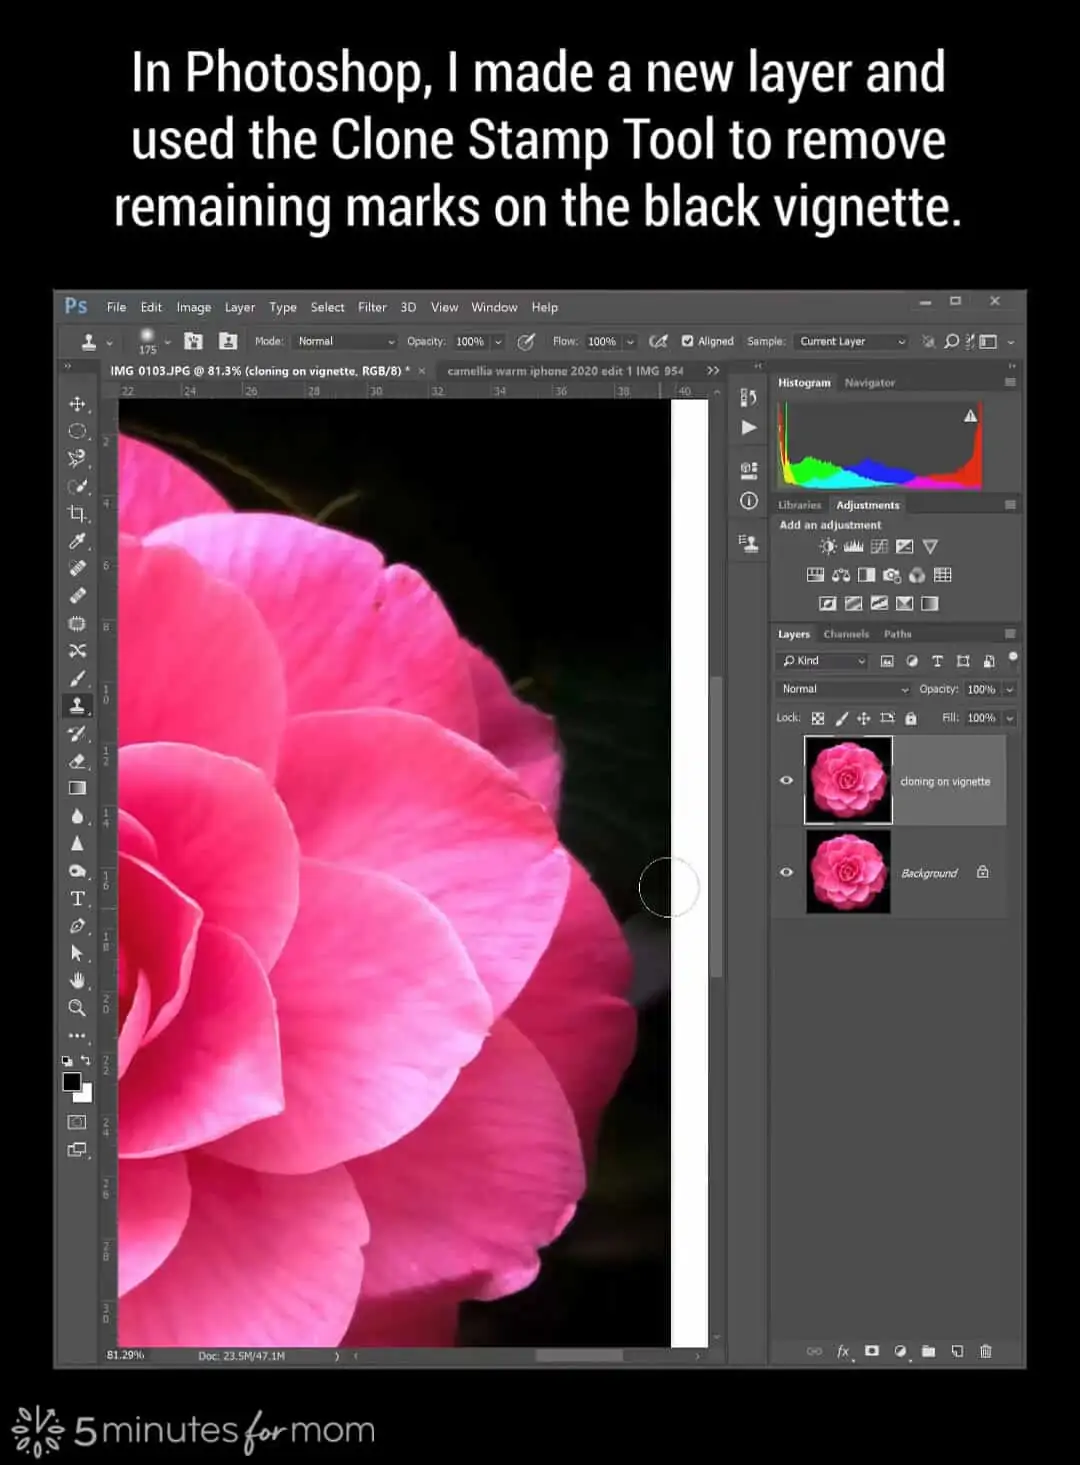
Photoshop Clone Stamp Tool and Spot Healing Brush Tool
In Photoshop, I created a new layer and used the Clone Stamp Tool and also the Brush tool set to black to clean up the black vignette. You could also use the Spot Healing Brush tool if you prefer – whatever tools work best for you and your photo.
Then I made another layer and retouched some of the petals using the Spot Healing Brush Tool and the Clone Stamp Tool.

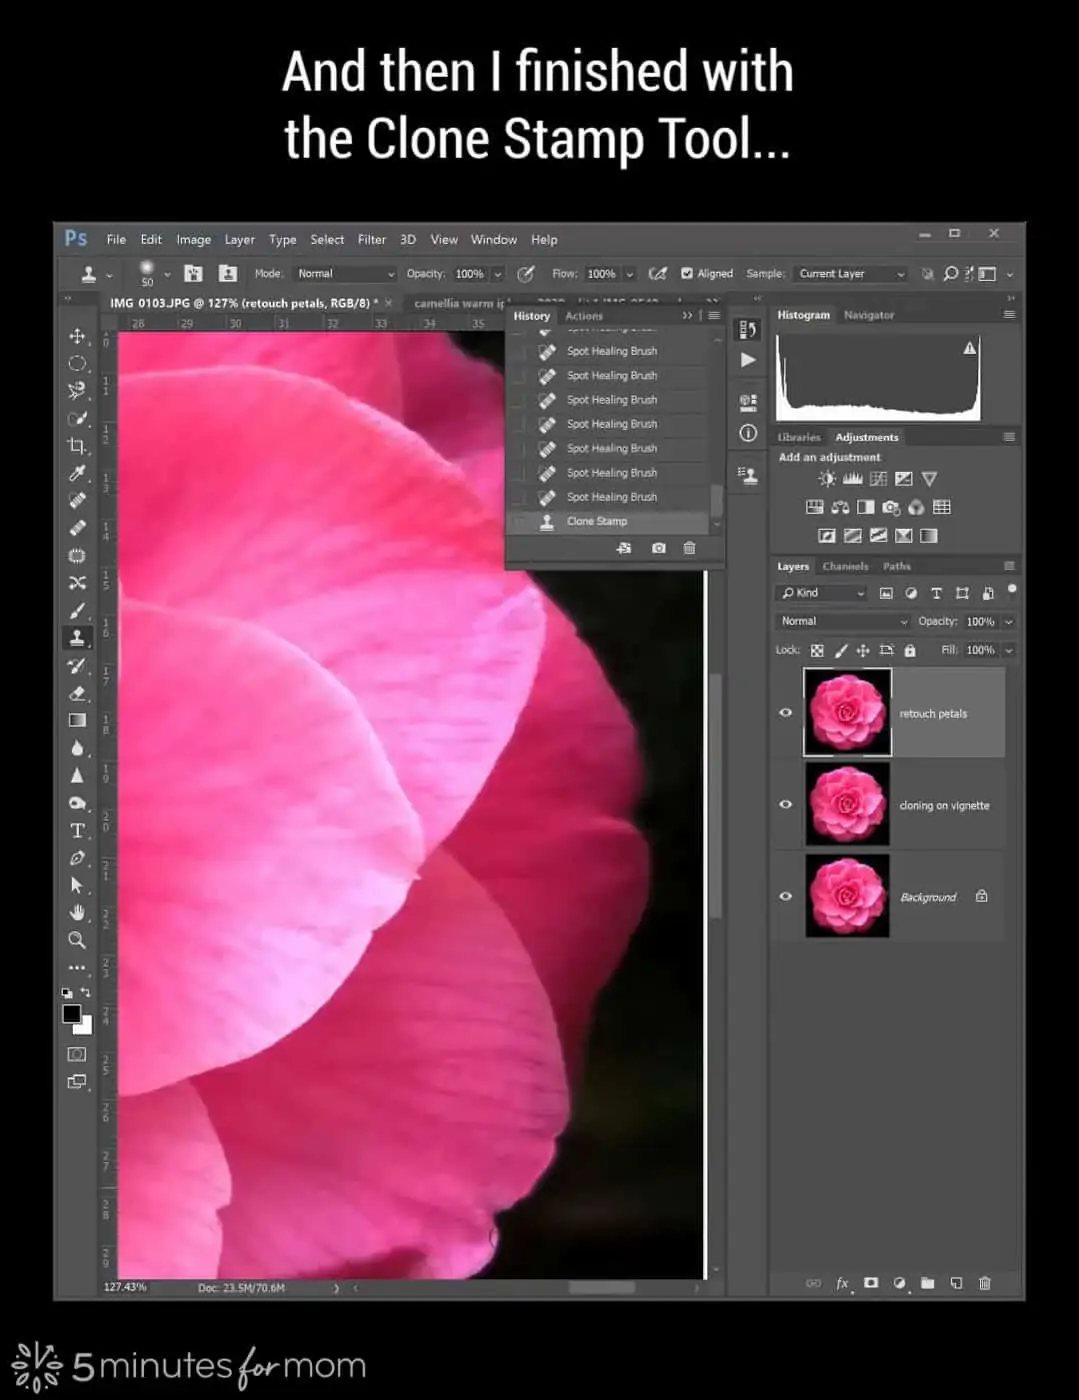
These edits were not critical, but since I was editing the vignette, I figured I might as well clean up the petals a bit too.
When working in Photoshop, it is best practice to work on individual layers so that you can easily adjust or remove certain edits/changes.
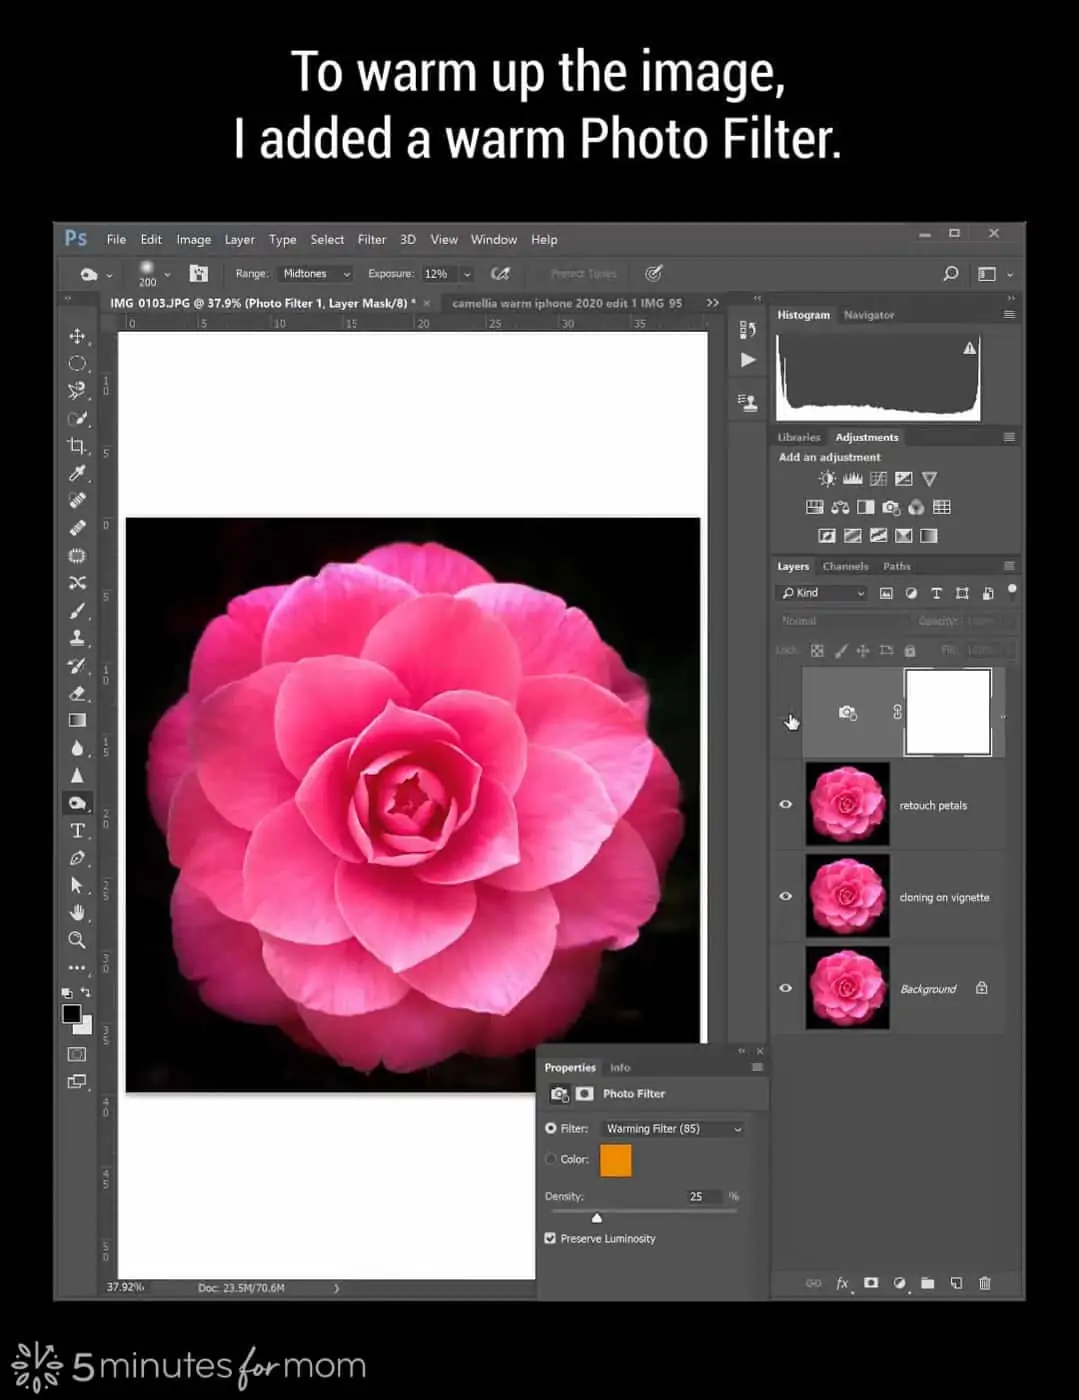
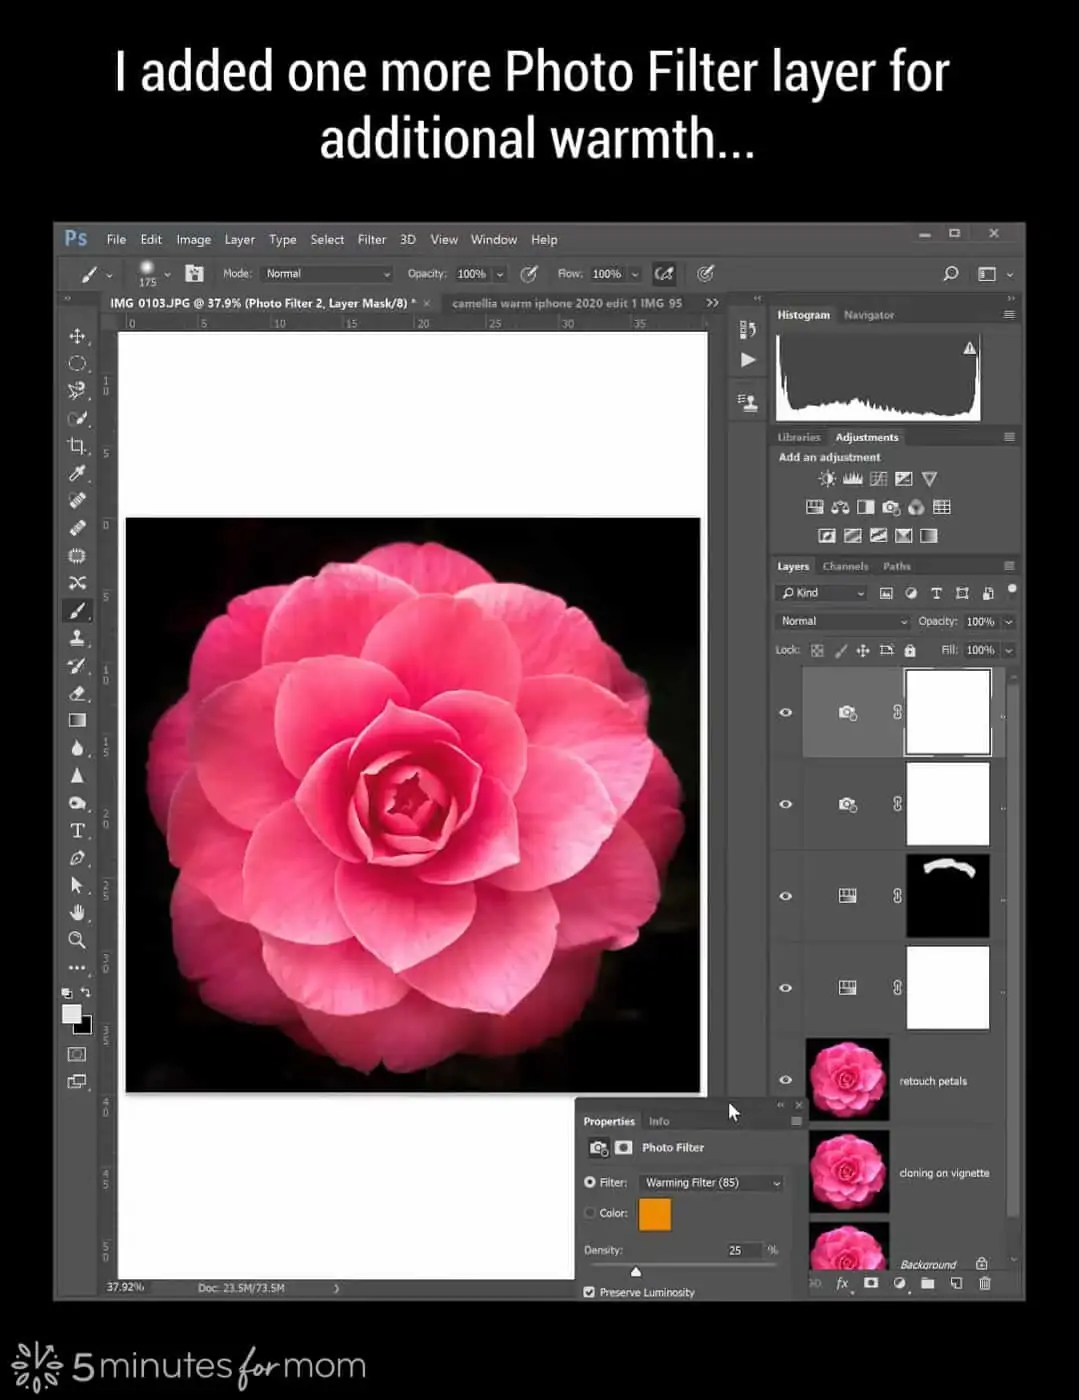
Photoshop Warm Photo Filter
I also added a warm Photo Filter to warm up the photo. (Note: in the screenshot below, you may notice that my mouse has deselected the layer so I could view the image without the layer to see the before and after.)
Photoshop Hue/Saturation Adjustment Layer
These next edits were also not critical for the final image, but I just like to play around and be a bit of a perfectionist.
I decided to change the hue of my flower just a bit.
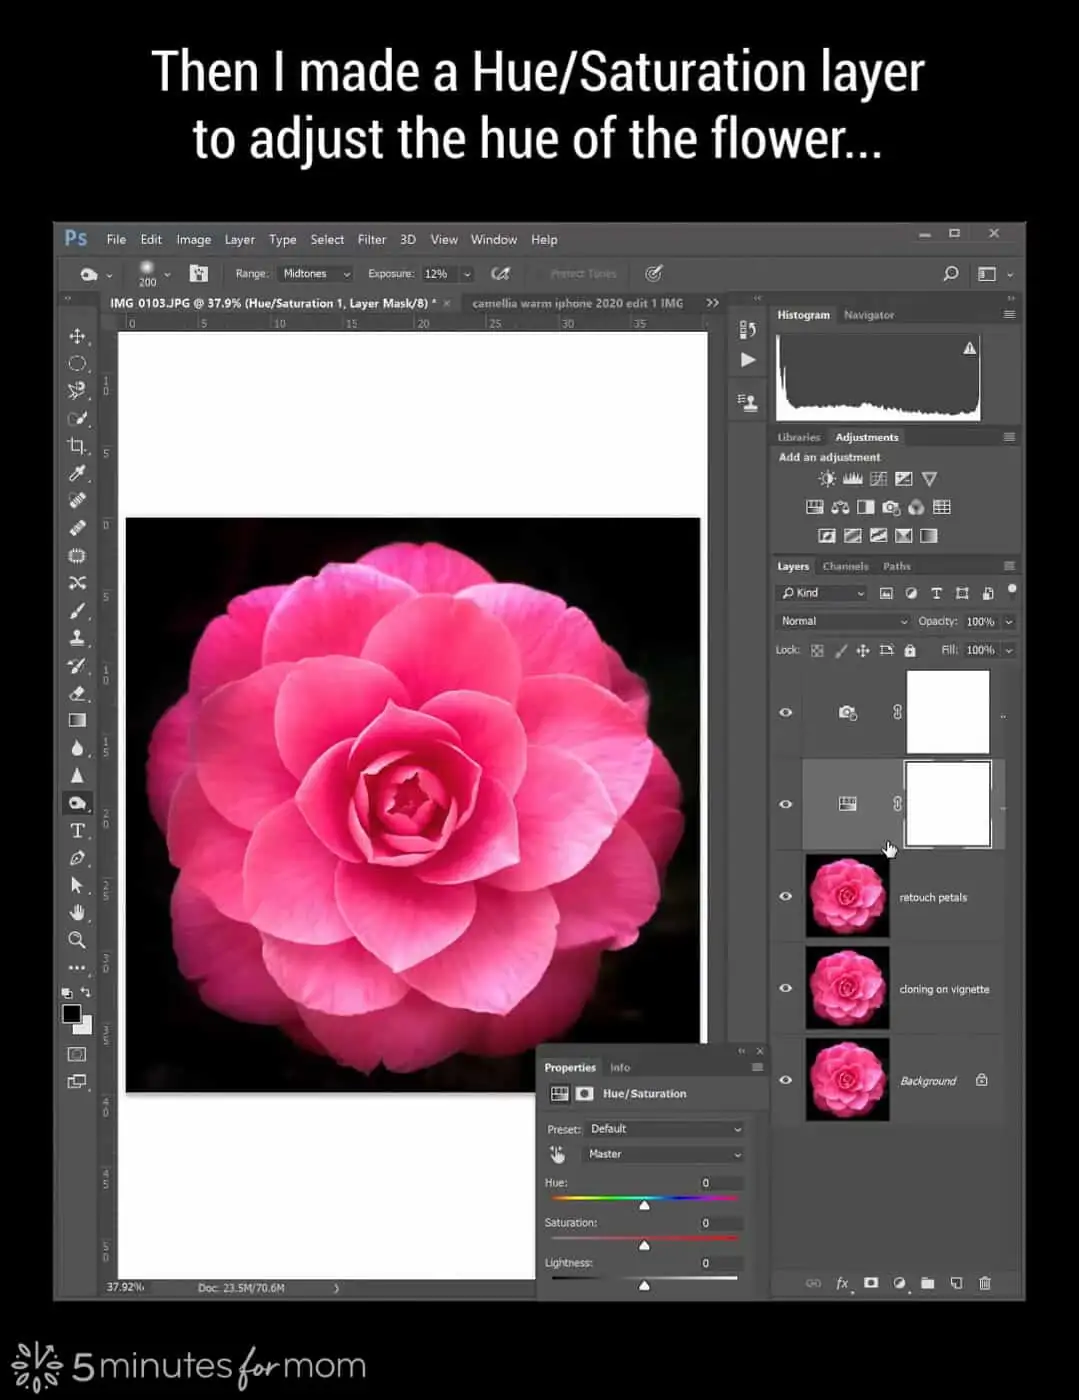
Adjusting the Hue/Saturation of an image can be so much fun. You can make radical changes if you want.
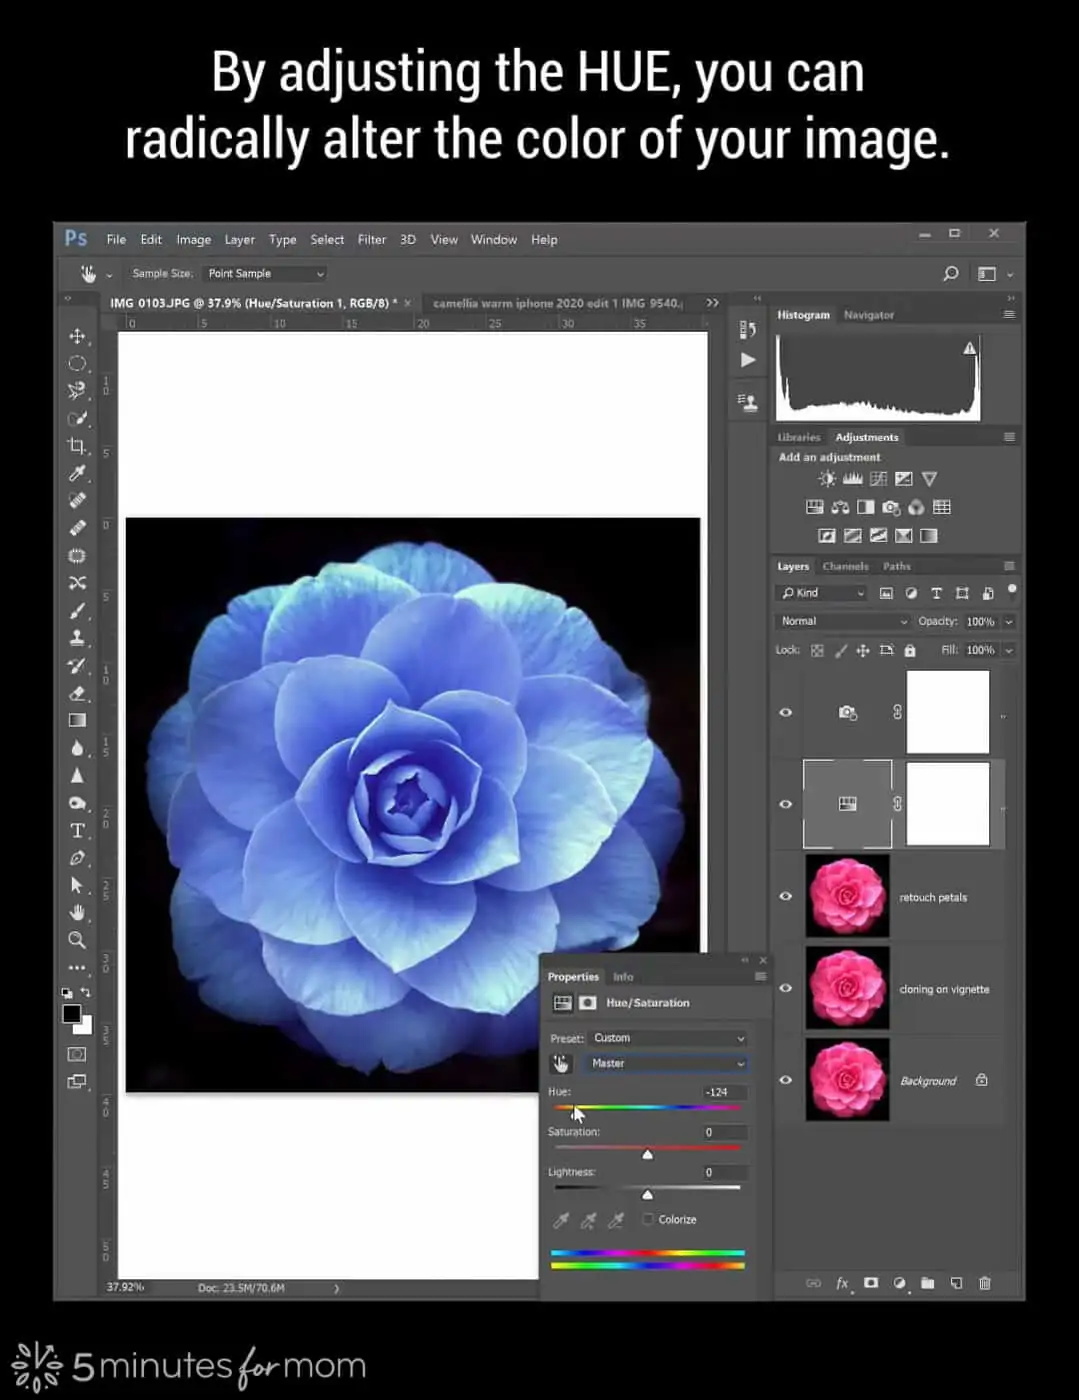
But I stuck with a very subtle adjustment.
One thing that really bothered me was the problem that the tips of some of the top petals were a brighter pink than the rest of the petals.
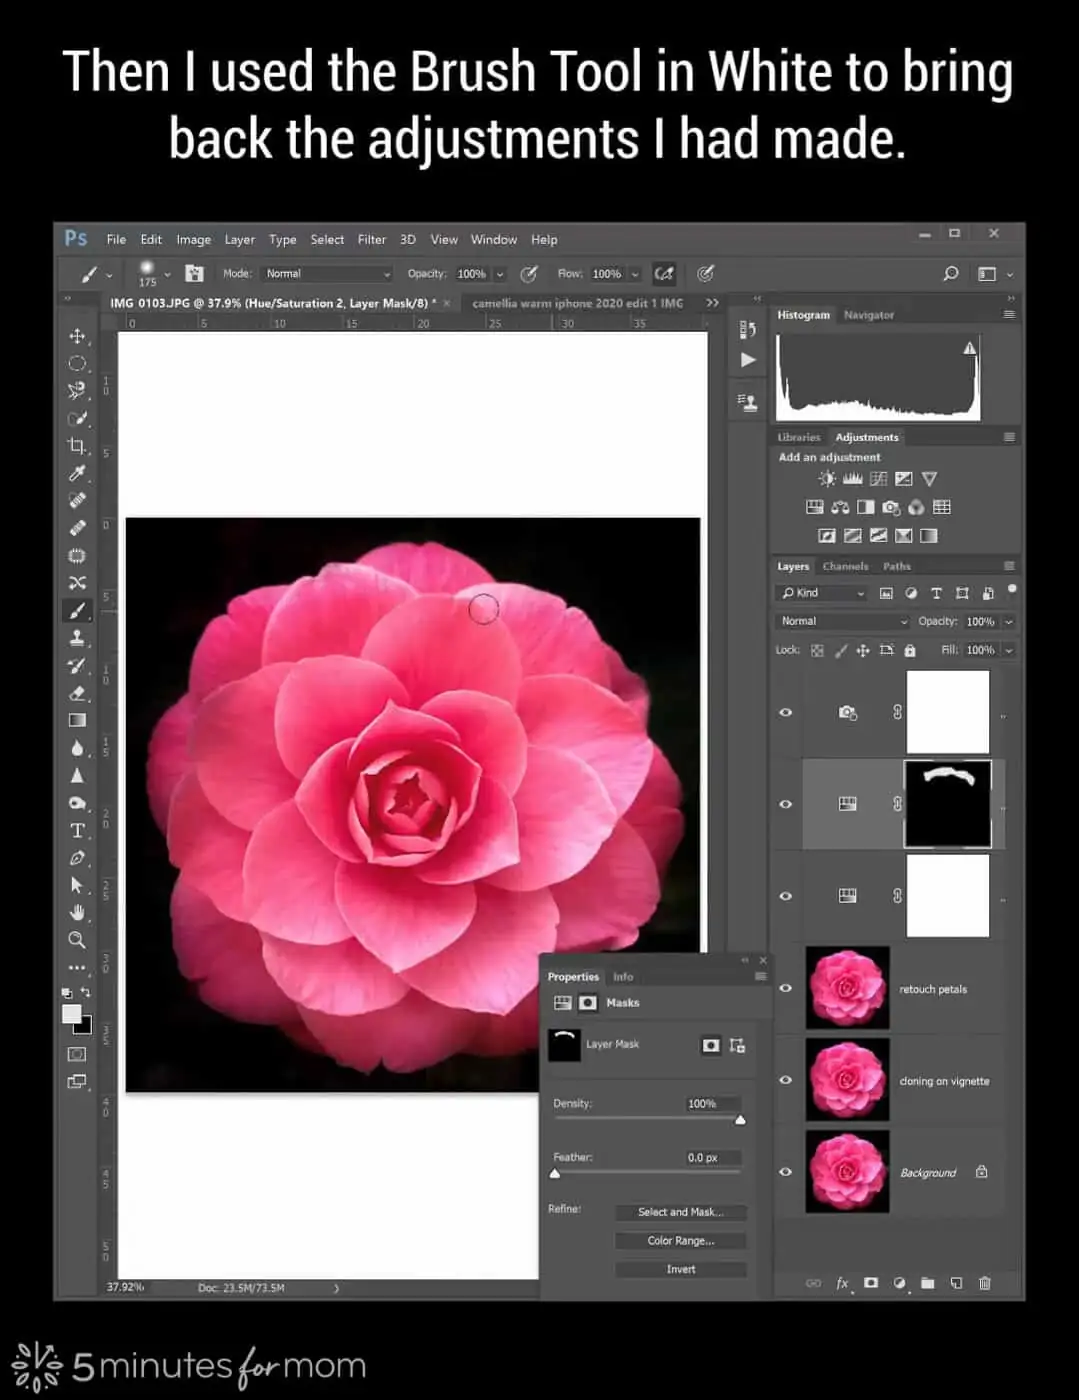
So to fix the problem, I made another Hue/Saturation adjustment layer and used the mask to make changes to just the tips of the petals that were too bright of a pink.
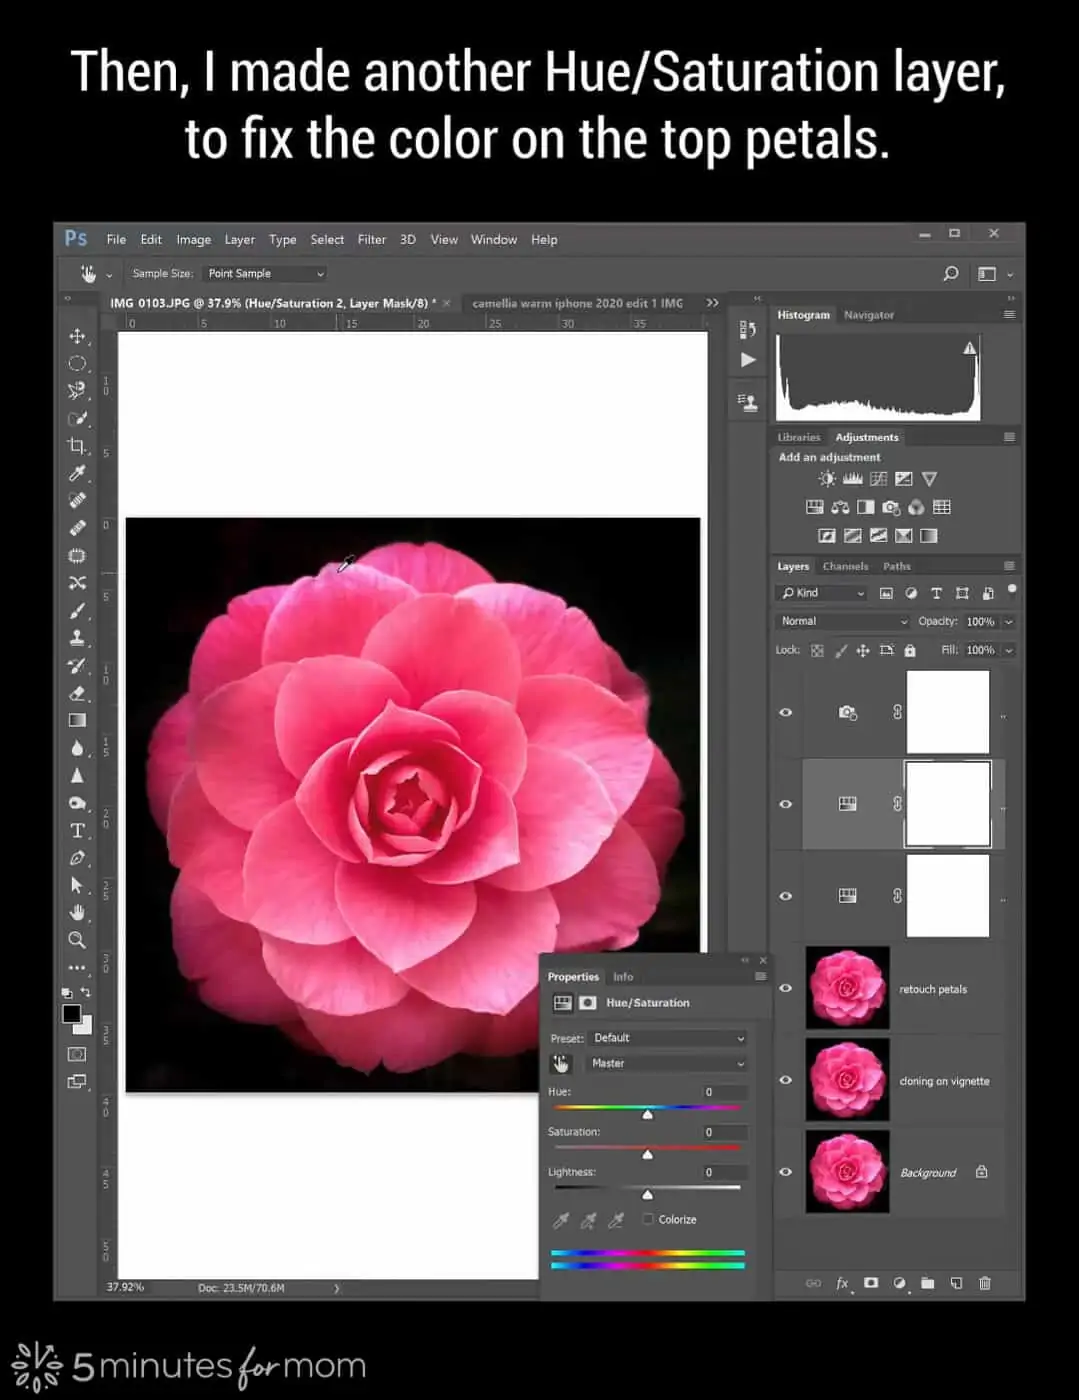
To do this, I selected the magenta color I wanted to alter and made an adjustment to the hue of that selection to make it closer to the color of the rest of the petals.
To use the layer mask to only show where I wanted the adjustments, I used the Paint Bucket Tool in black to blackout my layer mask.
Then I used the Brush Tool in white to paint back on the mask the areas I wanted to show through.
I added one more warm Photo Filter layer to test if I wanted to warm up my image a bit more.
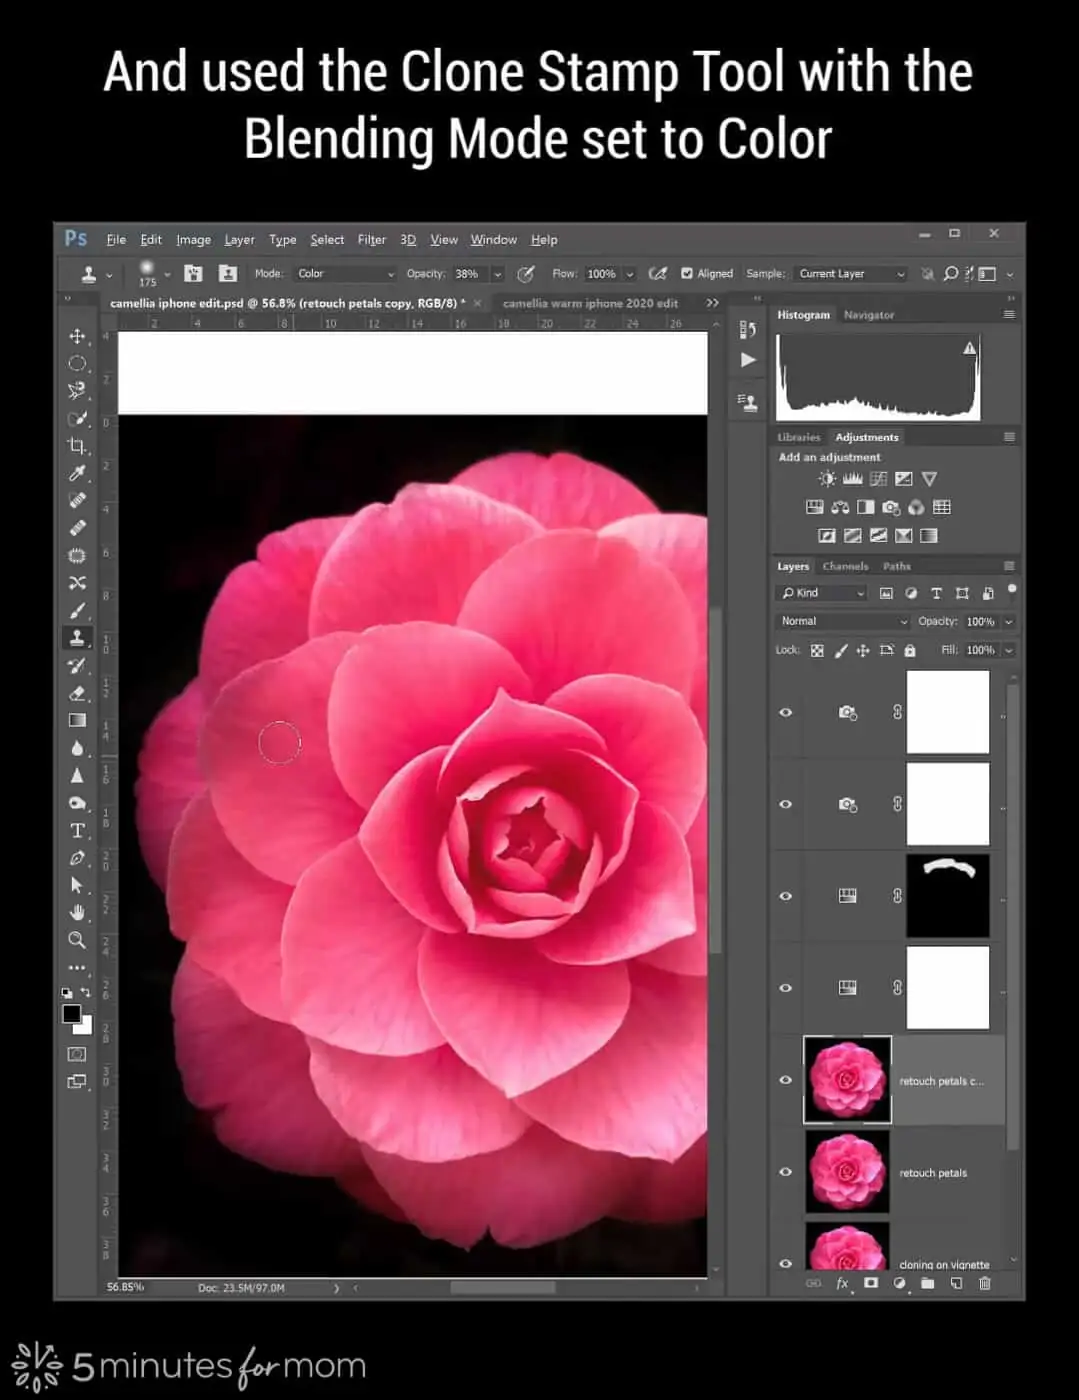
Then I decided to fix a small shadow on one of the left side petals.
To do this, I first made a copy of my retouching petals layer. Then I selected the Clone Stamp Tool and set the Blending Mode to Color to remove the darker color on the petal without removing the texture.
Final Image
And here is the final image:
I hope this tutorial inspires you to experiment with your photos!
Pin it for Later
Written by Janice Croze, co-founder of 5 Minutes for Mom
Talk with me: @5minutesformom and Facebook.com/5minutesformom
Pin with me at pinterest.com/5minutesformom