Are you trying to lose weight after having a baby? Getting in shape after having children can be a struggle and many women (myself included) get frustrated trying to get rid of the extra fat on our bellies. If you’re like me, you spend many of your days comfy in Lularoe leggings trying to ignore your mommy tummy even a decade after having babies. But whether you had your babies last month or years ago, today we have fitness expert Alison Marie with us to share her expertise and help us flatten our stomachs.

Ah, the postpartum mommy tummy. We all get it! As weeks go by and we are cleared for exercise, for many of us, our first thought is to get rid of it! So naturally we start doing crunches right? Wrong!
Endless crunches are not going to flatten your mommy tummy AND they could be making it worse. Keep reading to learn what the mommy tummy REALLY is and how you can go about fixing it.
Understanding What the Mommy Tummy Is:
As we all know all too well, during pregnancy our belly grows and grows. The extraordinary rapid growth combined with wonderful pregnancy hormones causes the connective tissue along the midline to stretch and thin. Thankfully (for many reasons), our baby comes out. Once hormone levels return to their pre-pregnancy levels, that thinning generally improves but the result is dramatically weakened, often separated, core muscles.
Crunches are what people know, so it’s the first thing you think to do when trying to tone those muscles. However, the crunch is probably the worst possible move for this situation. When we crunch, or do anything that forward flexes, it pulls the already stretched piece of tissue apart. Think about what happens to the zipper when you are wearing a zip up shirt and you bend over; the zipper pushed out and folds over itself. Crunches do the same to that stretched out midline, over and over again. It only makes it worse!
In addition to potentially making this gap worse crunches over-focus on surface muscles instead of deep core muscles, critical aspects of the spine, and the stabilization role our core plays in the whole body. Pop culture may have you craving 6-pack abs but building up your core strength after having a baby is so much more than that. Weak core (including pelvic floor muscles) also comes with:
- Low back pain – repeatedly picking up and holding your little one is bad enough, a weak core only makes it worse!
- Loss of bladder control – don’t forget to cross your legs when you sneeze 😉
- Pelvic instability – results in bad balance and increased probabiliy of injury… ain’t no mamma got time for that!
Bottom line: if you want real strength that heals the damage of child rearing and truly supports the body in motion, go deeper.
Engaging Your Core:
Ok, so crunches are out. What do you do?
The number one thing to do is to learn how to properly engage your core while you move your body all day everyday! That’s right, it’s not even an ab exercise. Consistently engaging your core will not only help rebuild those deep core stabilizers that seem to go missing after having a baby, it will help improve your posture and help you burn more calories in everything you do.
Engage your core while you are cooking dinner, folding laundry, vacuuming the living room…AND while you are exercising, but how?
First, let me dispel myth that “engage†means to “suck in.†Think about what you would do if your angelic little one was running at you full blast to jump on or tackle you. You wouldn’t suck in your belly button right? You would brace yourself. That’s what it mean to engage your core.
The goal is to engage your core for stability, in all that you do, to protect your abdomen and lower back. Use your abs to pull UP on your pelvis, not in or bearing down. Gently push out your abdomen in all directions and then add in a little Kegel action. DO NOT hold your breath or bear down.
Now I’m sure you’re like, ummmm what the heck does that all mean. Here are a few ways to get a feel for what it means to “engage†your core.
- Imagine you are about to be tackled or punched in the stomach (something say your toddler might do to you without warning), use quick forceful grunt to mimic bracing yourself.
- Cough or laugh (engaging your core occurs naturally with these functions). You’re looking for the feeling that takes place in your core just before any cough or laugh actually occurs.
- Rest your hands on either side of your abdomen and try to push them away using only your abdominal muscles, while you pull the rest up and in.
You don’t need to imagine yourself being punched in the gut 24/7 (although it doesn’t hurt to be prepared with a toddler), but you should always be engaging your core in daily life and exercise. Bracing in this way will help burn extra calories, cause your muscles to work more effectively together, and protect your lower back from injury.
You can start using this trick right now! Without adding any more time to your day, just this can make a huge difference. Hint: Put some post-its around your house or at your desk at work that say “engage your core.†The more you remind yourself, the more it will become second nature.
Strengthening Your Core:
Once you have mastered engaging your core, you can properly train your core. The CORE is made up of you abs AND your hips spine, and glutes… basically everything that connects your lower body to you upper body. Efficiently and effectively strengthening your core means making sure all of these parts work TOGETHER!
These are my 3 go to core moves. They all use your core the way it was designed to function, to brace the movement of your body. Each one braces movement in a different plane of motion. Therefore, all three together train the whole core.
Be sure to pay close attention to the breathing pattern in these moves. Using your breath appropriately will deepen your core strengthening.
Bridges
- Lie face up on the floor, with your arms straight, palms down. Bend your knees so that your feet are flat on the ground a few inches from your fingertips.
- Inhaling: With your weight in your heels, use your hips to lift your butt off the ground until your knees, hips and shoulders form a straight line. Squeeze those glutes and engage your core as described above. Pause at the top.
- Exhale as you ease back down.
- Repeat. Begin with 8-12 reps.
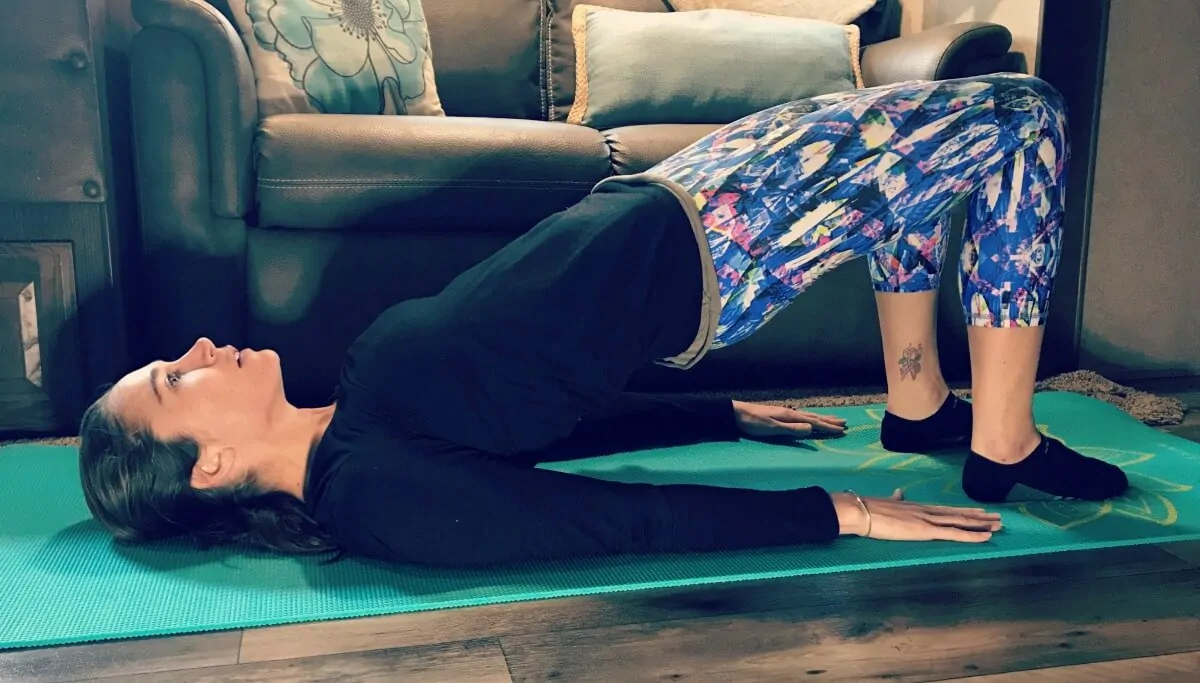
*Take it to the next level with a little vacuum: Follow steps 1 and 2 as written, but before you lower down come up onto the balls for feet and pull your belly button in towards your spine. As you exhale roll down one vertebrate at a time. Return to flat feet and repeat.
Dead Bug
- Start laying flat on your back. Bend your knees up so that they make a 90 degree angle with your lower leg parallel to the ground. Hold your arms straight up and out from your body. Press your lower back into the floor and keep it pressed throughout the whole motion.
- Exhale as you lower your right leg down, straight out. Try to get your heel as close to the ground as possible while keeping the lower back pressed.
- Inhale as you pull it back up to the starting position (keeping the lower back pressed).
- Repeat, alternating legs. Begin with 8-12 reps on each side.
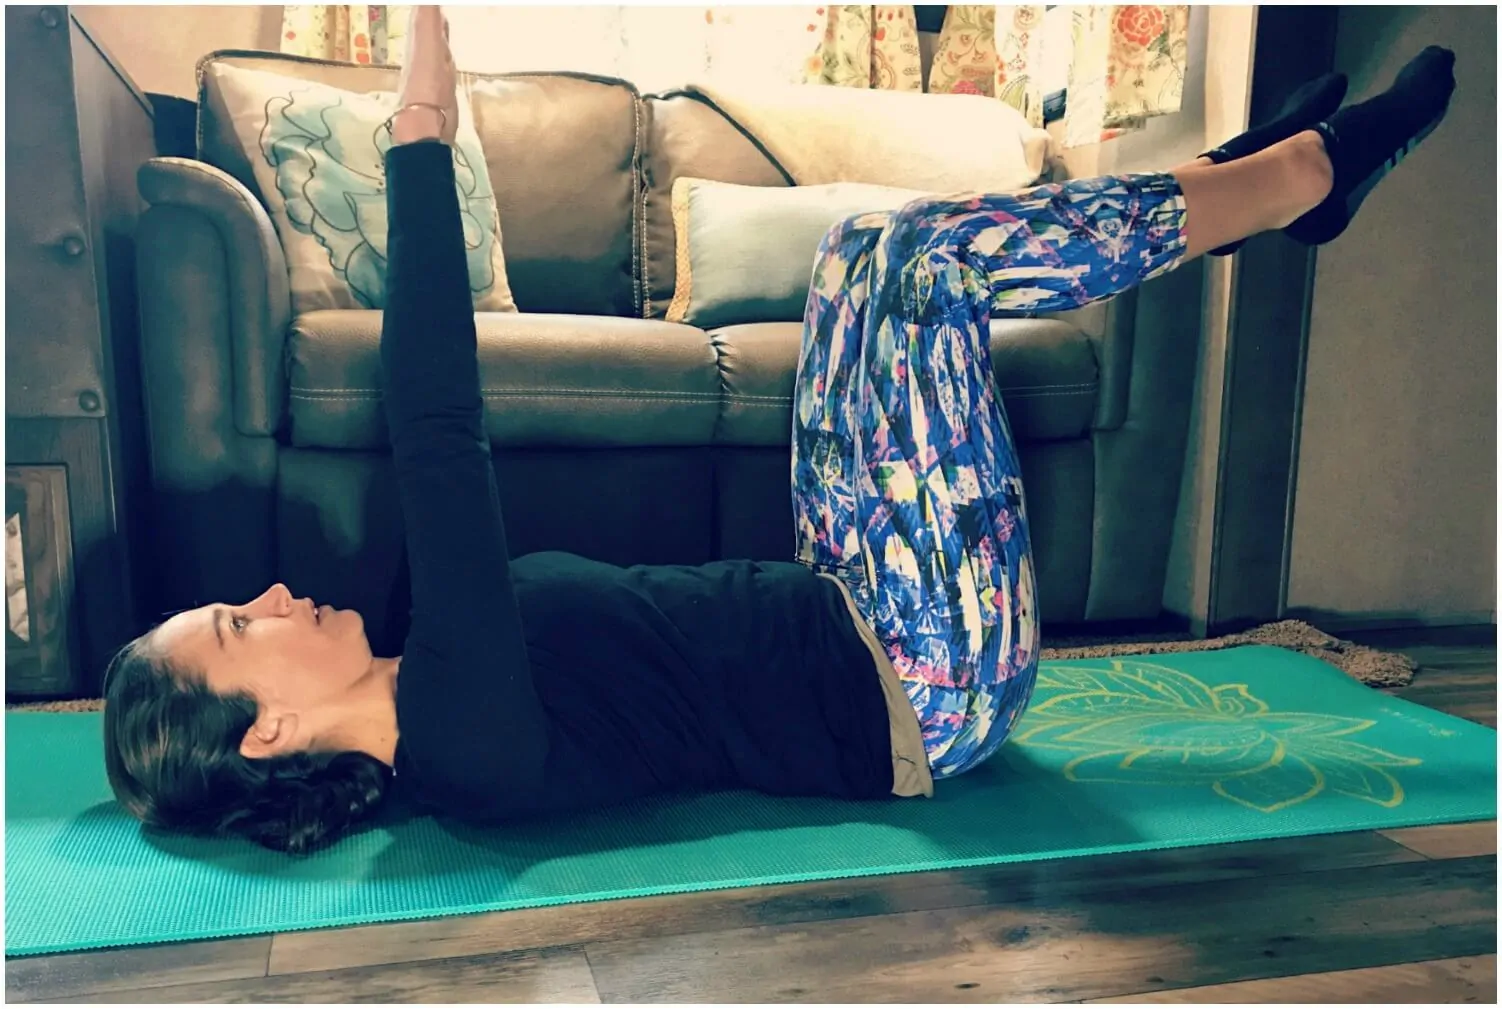
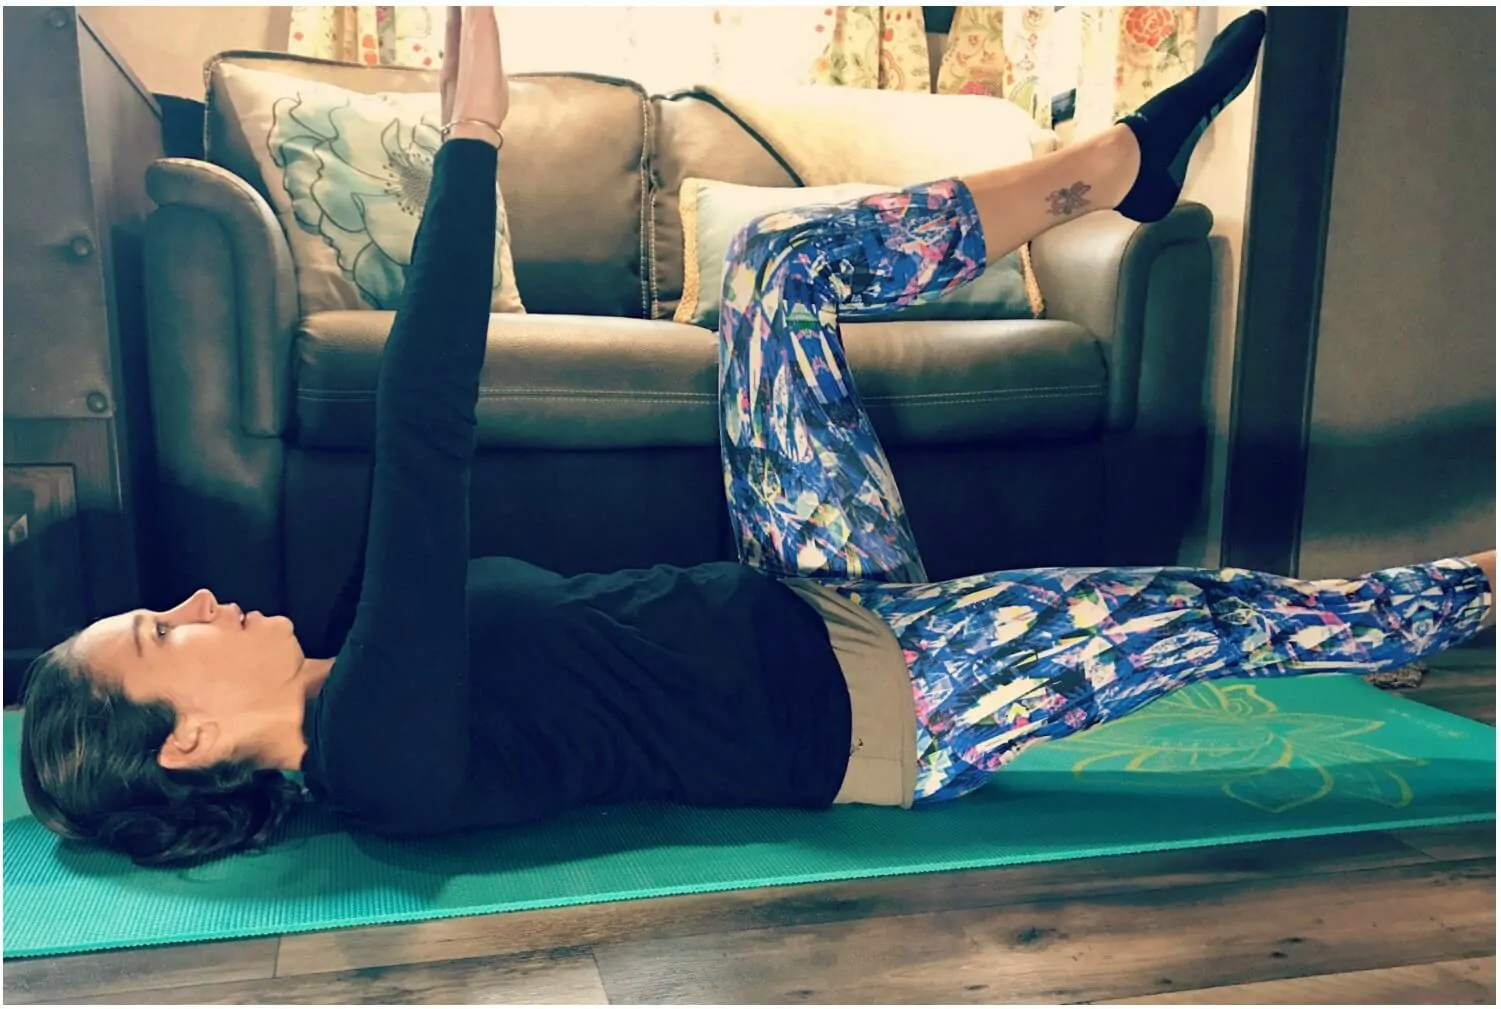
*Take it to the next level by adding in your arms: Lower the opposite arm straight down over your head at the same time as the leg (eq. right leg/left arm).
Palloff Press
This move requires resistance bands (anchored to the door or wrapped around a pole). If you don’t have a band, you can substitute side planks as a close second.
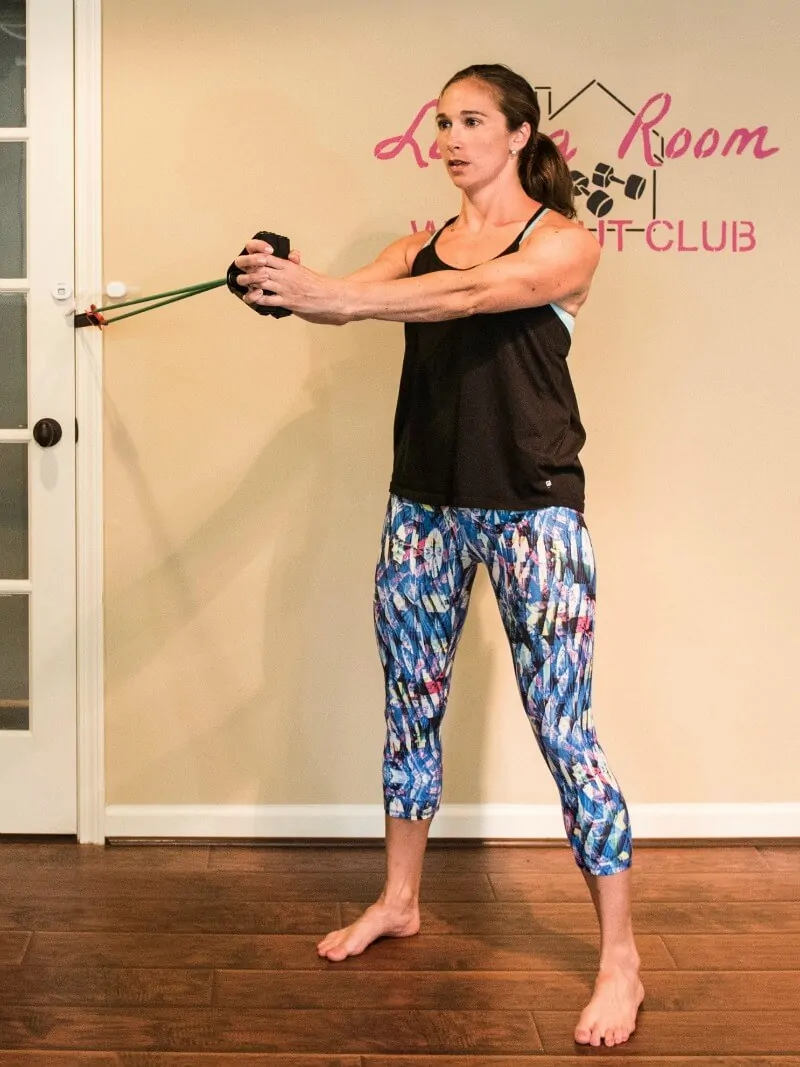
- Stand with your side to the bands. Clasp both handles in both hands, the furthest hand from the band over the other. Position yourself a few feet away from anchor point to add tension. Make sure your feet are hip-width apart and your knees are just slightly bent.
- Bring the handles up to the center of your chest.
- Exhale as you press straight out. Move slowly with control. Extend your arms fully. Your body will want to turn or lean towards the band. Don’t let it.
- Inhale as you return your hands to your chest.
- Repeat for 8 to 12 reps on each side.
*Take it to the next level with an isometric hold: Follow steps 1-3 above, but after you press out hold for a count of 5-10 (breathing deeping through the nose) before returning to step 4.
In all of these moves, the abs are working in conjunction with the rest of the core muscles and you avoid the bludging/forward flexing motion of crunches. While, avoiding crunches is only necessary until the midline completely heals, these three core exercise are more than adequate to maintaining a strong healthy core for years to come.
Recap:
- The deep core stabilizers need the most attention.
- Learn to effectively engage your core in all that you do.
- Perform core exercises that work the whole core with the rest of the body and avoid the bludging/forward flexing motion of crunches.
Above all give yourself time. Pregnancy changes your body, it takes time to heal… but look what you created!
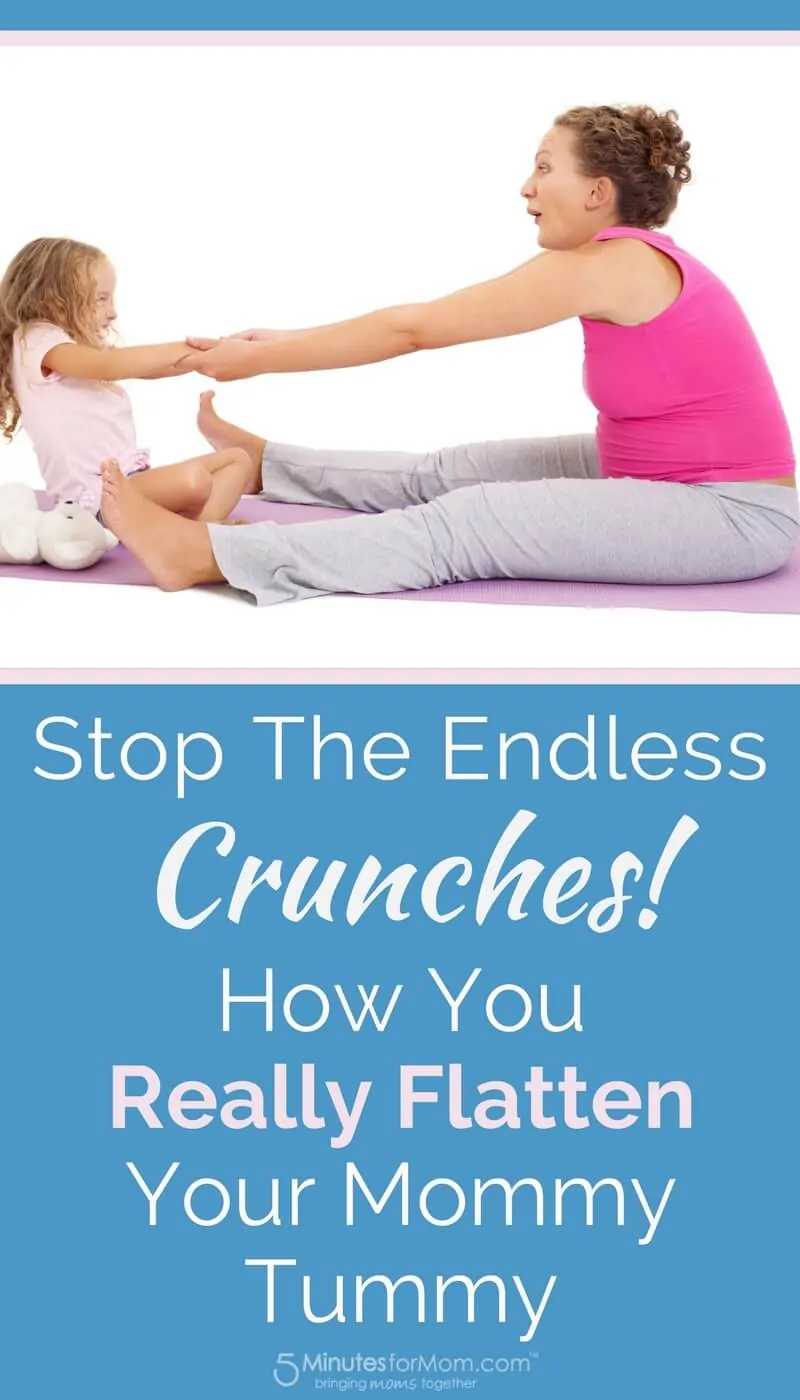
Pin it for Later
 Written by Alison Marie from livingroomworkoutclub.com.
Alison Marie is a fitness expert working with busy moms who are looking for real simple solutions.
She is also a busy, homeschooling, full time RV traveling mom.