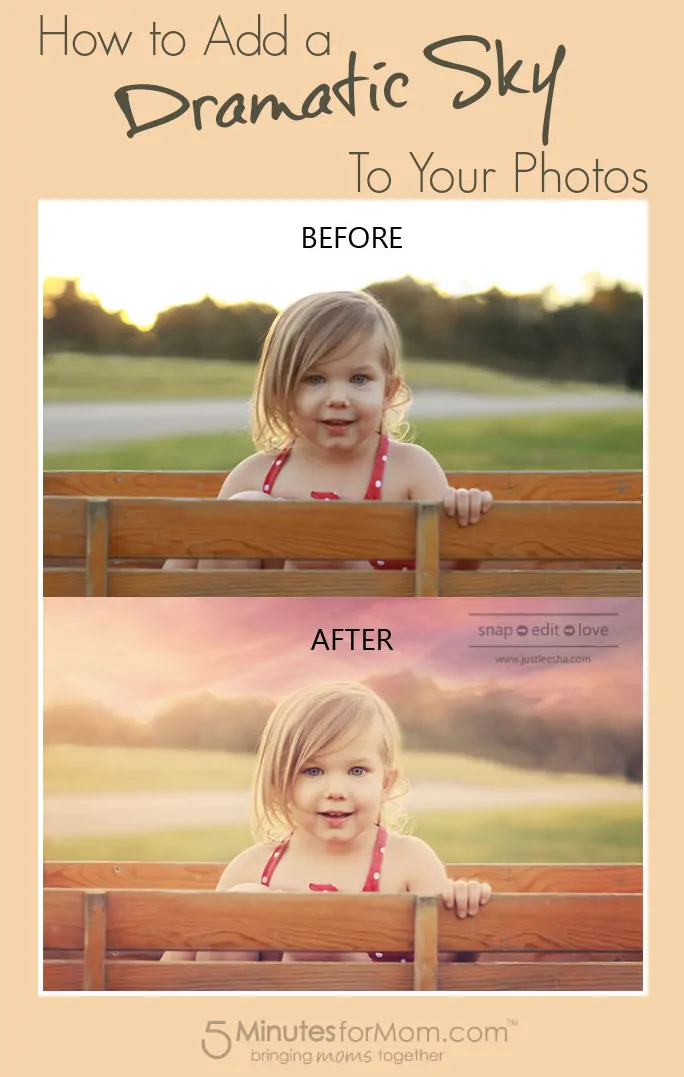
Want Clouds? Make Clouds! Alishia Osborn, from Just Leesha, is here with a Photoshop tutorial to show you how to add a dramatic sky to your photos.
With a few steps in Photoshop, you can add drama to your photos when Mother Nature doesn’t offer it.
How?
By adding a beautiful sunset when there isn’t one.
So I recently added a new weekly feature to my blog called Fix it Friday. You can read more about it here. Last week I was sent in a photo for the feature that was beautiful, but the background was cluttered and the sky was blown out. After removing the clutter in the background I decided to really get creative and add a dramatic sunset.
This tutorial will show you how to add clouds and drama to your photos.
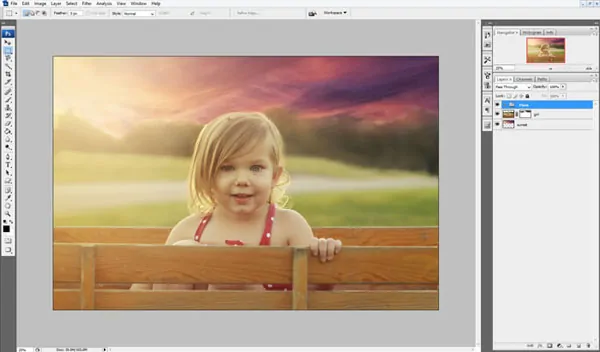
After straightening the image and removing the homes from the background, this is what the photo looks like:
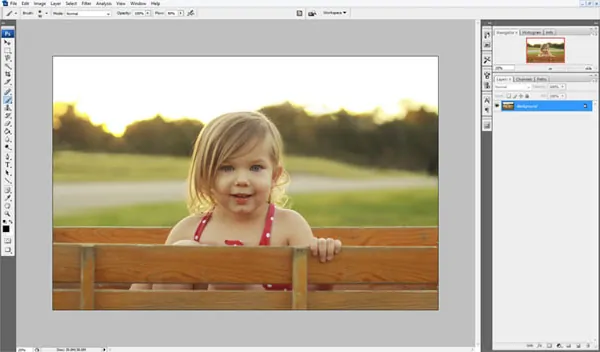
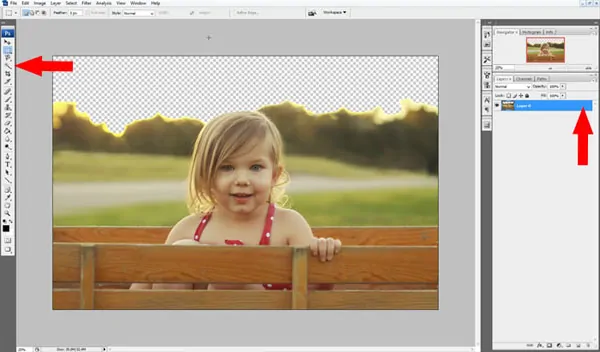
The first thing I want to do is delete the blown out sky. I select my Magic Wand tool, click on the sky, and push delete. This technique may not work if you have variances of color in the sky, as the Magic Wand tool will only select like colors. If this is the case, you may just need to use the tool to select each separate color to get rid of your sky.
It’s also important that you don’t have your imaged locked, or a transparent background won’t be possible. There shouldn’t be a lock symbol where arrow is pointing on the right hand side. So if you have one, double click to remove.
Once I have my sky removed I need to add my sunset. This is the fun part! You can add whatever kind of clouds and weather you want. From beautiful sunrises, to stormy skies, even tornadoes! The possibilities are endless. All you need is a cloud image. (Use your own, find free textures on Flickr or get a subscription to websites like Shutterstock that offer high res images for individual and business use.)
To add my sunset image, I simply drag it to my photo and arrange it how I think it looks best in contrast to the original photo.

I then swap positions of the images and put the sunset behind the photo.
I add a layer mask to the original photo and using a low opacity brush blend the tree background into the new sky.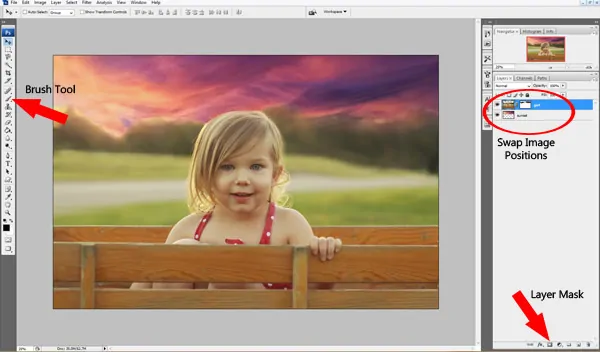
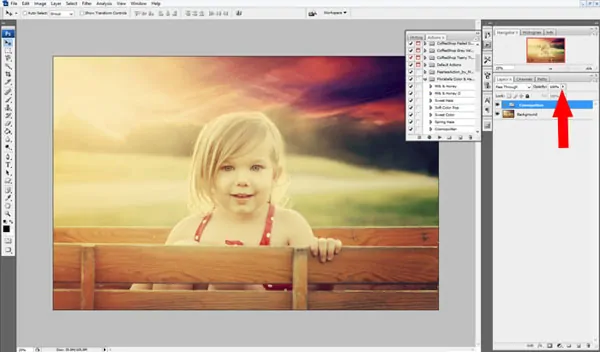
From the looks of the original photo the sun is setting on the left hand side. I want to bump that up a bit so I add a flare. You can read how to do that here.
Once my flare is added I run an action called Cosmopolitan by Florabella.
Yikes!
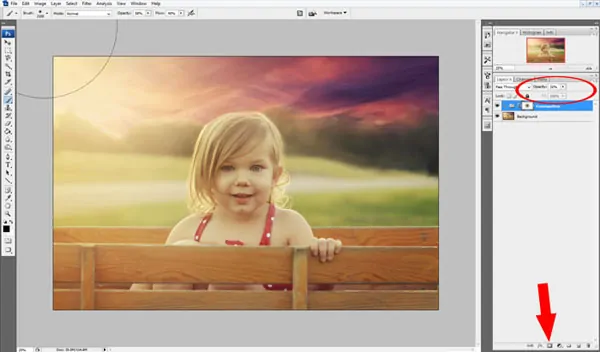
It’s a little much! But have no fear, we can always adjust the opacity (which I do quite often with actions since they are sometimes a bit over the top.)
Once I have my Cosmopolitan Action toned down I add a Layer Mask and remove a bit of it from her face.
Now I want to add a little bit of haze to the image. To do that I head back to my trusty Actions and play Sheer Haze, also available from Florabella.
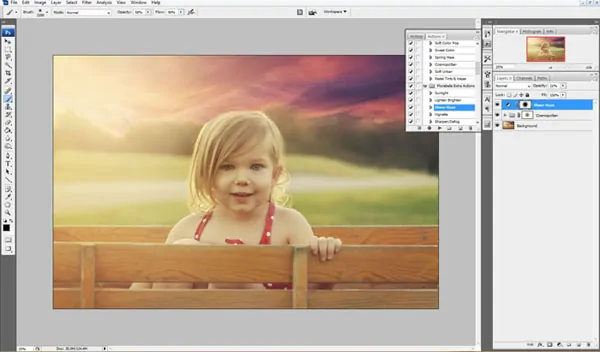
I decide I want a little more haze and duplicate my haze layer. (right click>duplicate)
I also would like to remove the haze from her face, so just like with the Cosmopolitan action, I use a Layer Mask and Paint Brush to paint away what I don’t want visible.
Next, I want to warm the image up a bit so I add a filter and name it Sunlight. You can read how to add filters here.
I also want her eyes to stand out more so I run ‘Bring on The Eyes’ action by Pioneer Woman. (Her actions are free and can be found here.) Just be careful with this particular action, you can go from making the eyes pop to making your person look like they have alien eyes if you don’t use your opacity to tone it down. I also use her ‘Sharpn This!’ action to sharpen up her face a tad.
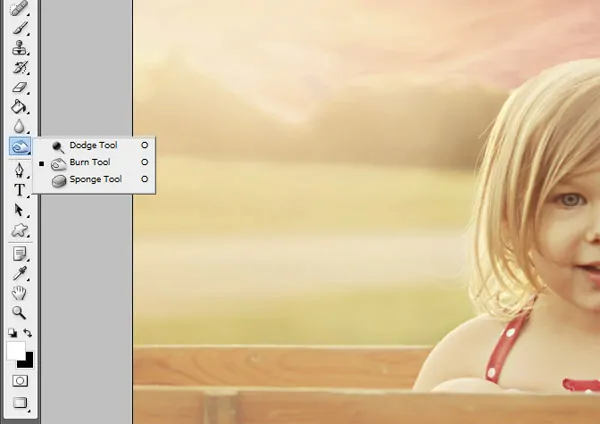
Sometimes with a lot of editing on a photo, depth can get lost. To remedy that, I use the Burn and Dodge tools on a duplicated Background Layer to bring out more of the highlights and shadow. (Burn and Dodge simply put means darken and lighten.)
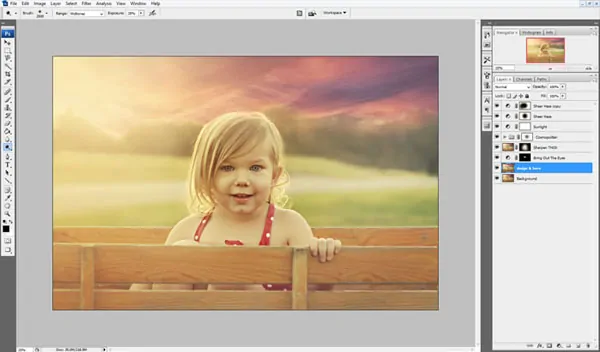
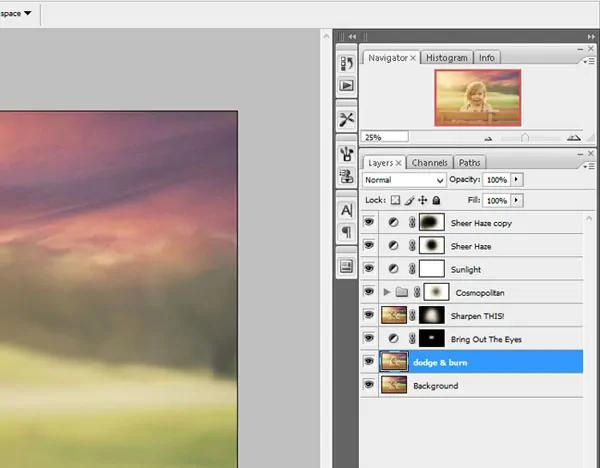
After completing all those steps my Layers Pallet looks pretty busy.
Here is a close up view:
Lastly, I add a watermark. You can learn how to make one here. (It will take less than a minute and is worth branding your images to prevent online photo theft!)
Here is the final result:
 A big thank you to Jess from Keep it Together for submitting her photo for my Fix it Friday! If your looking for a photo fix, please contact me and you could be my next feature!
For more Photoshop tutorials and photography tips, please visit my site www.justleesha.com.


Thanks Janice for the tutorial! I have been wanting to get into photo editing. This is a good starting point.
Thanks for explaining how you changed the background.. What a useful tip. Thank you
This is a great tutorial. I’m behind on photoshop and editing programs so this is super helpful. Thanks!
Thanks for your feedback Nikki! So glad it helps. 🙂