This post may contain affiliate links. Read my disclosure policy here.
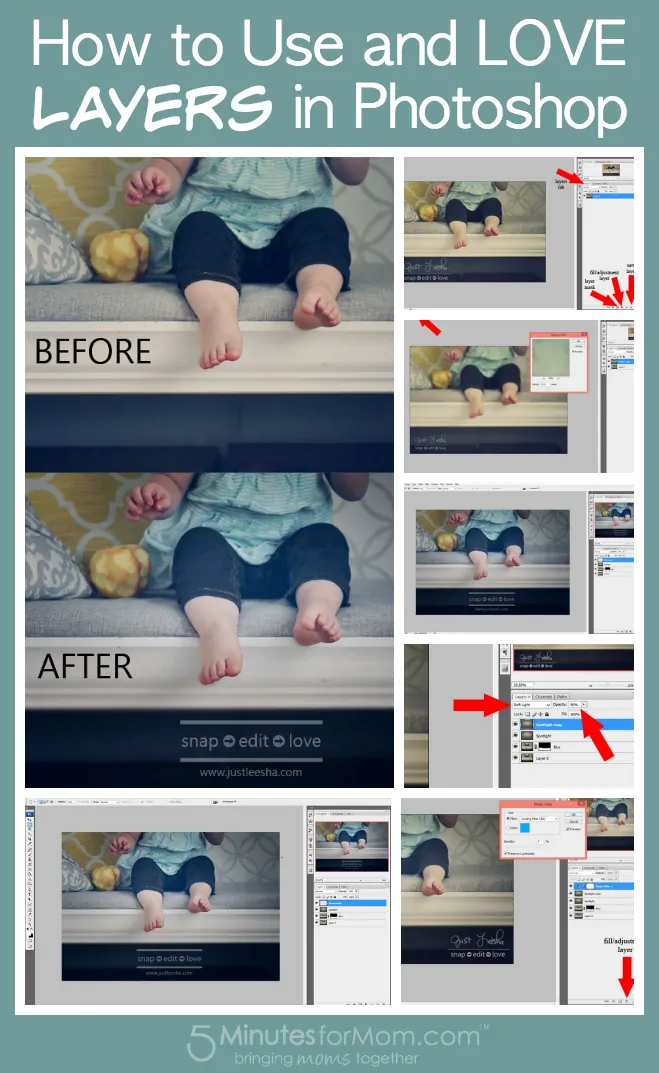
To edit photos in Photoshop, you must learn to use layers. What are layers? Simply put, they are photo adjustments you can stack on top of your picture.
You can add as many or as few as you like.
They also give you the option of adjusting their opacity, painting parts away while keeping others, cooling down or warming up your image, and stream lining your work space by pairing in groups.
Confused yet?
Don’t worry, layers are your friends!
In this quick and easy tutorial I will show you how to use layers and layer masks to add to your editing prowess!

Blurring Part of the Photo
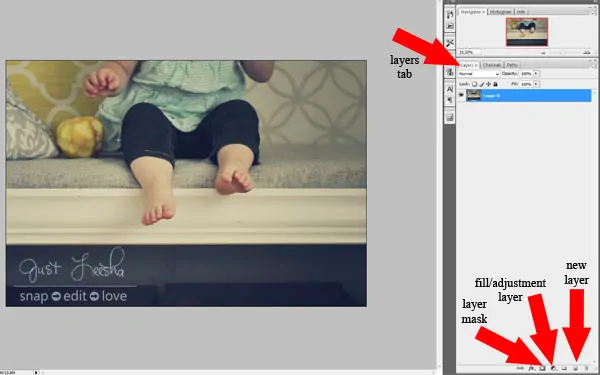
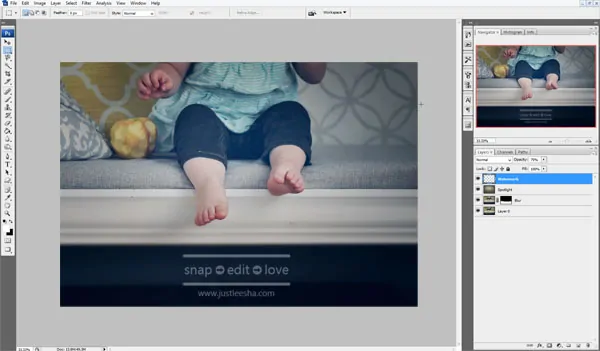
In order to draw the eye to my daughter’s feet I want to blur the bottom part of the photo. I do that by duplicating the bottom layer.
Right click > Duplicate Layer.
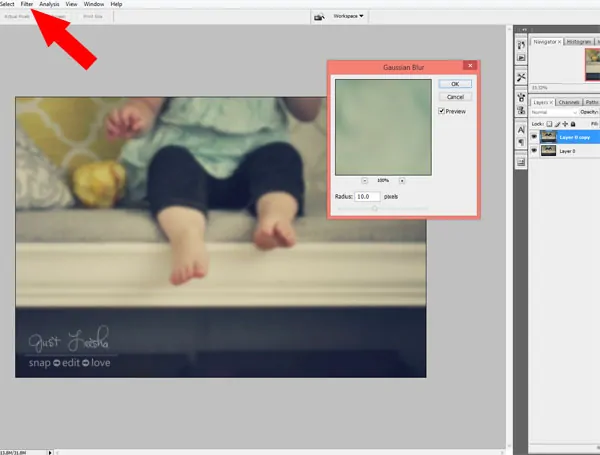
I’m going to blur the layer by going to Filter > Blur > Gaussian Blur
As you can see above, I had my Radius set to ten pixels.
The higher the number the more blur it will generate.
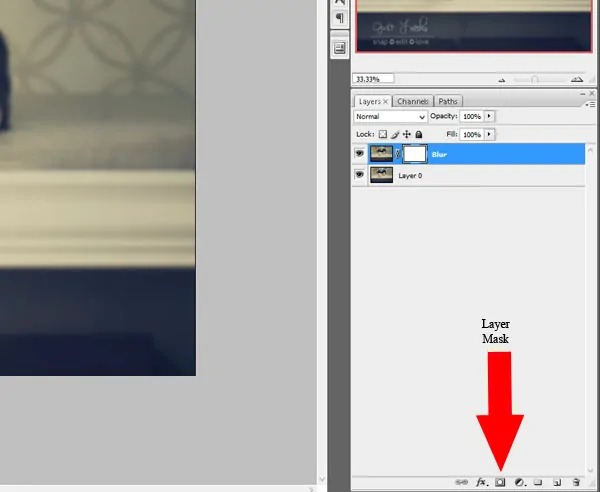
Now I will add a Layer Mask to my newly blurred layer.
(Appropriately named Blur)
To do that, I click on the Layer Mask icon while my Blur Layer is highlighted (tinted blue).
The Layer Mask will appear as a white box next to the blurred photo.
Now I don’t want my entire photo blurred, so I need to paint some of it away.
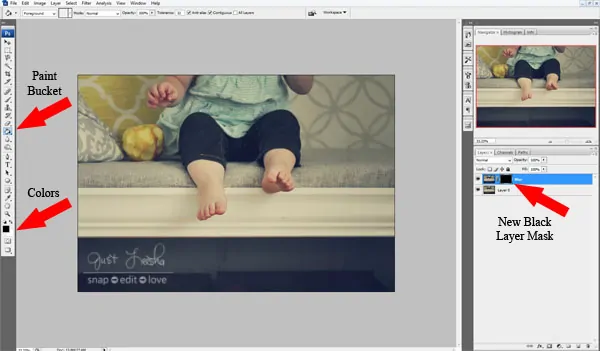
To do that I click on my newly made layer mask and change my pallet color to black.
I then use the spill bucket to change my Layer Mask from white, to black by clicking on my photo.
See what that did?
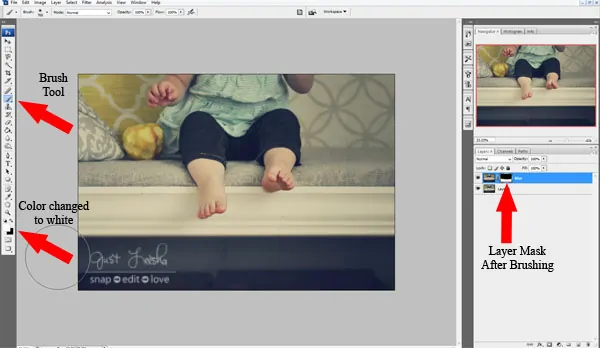
The blur is now hidden and I get to paint with a white brush the places I want the blur to appear in my photo.
After I paint the bottom half of my Black Layer Mask I now have the subtle blur I was going for.
Adding a Spotlight Layer
Now I’m going to add a Spotlight layer.
This can be done many ways.
By adding a Lens Flare Layer, as seen in this tutorial.
Or by taking an image and laying it over my photo, which is what I’m going to do.
This particular image is from Love that Shot’s Illumination Veil Collection.
It has quickly become one of my favorite go-to’s when editing.
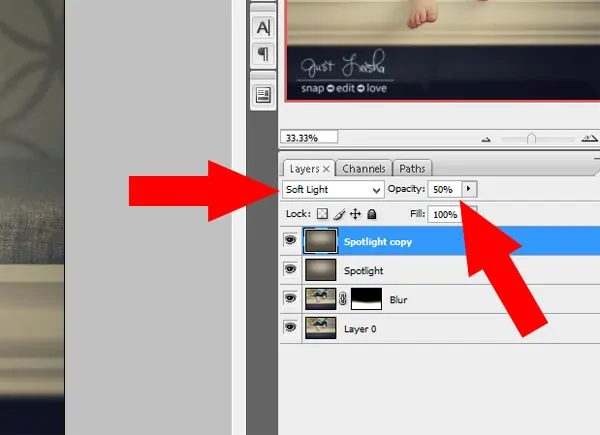
Once I open the Spotlight Image I lay it over the top of my photo, change the settings from Normal, to Soft Light.
After adding one layer at 100% opacity, I think I want a little more of a dramatic effect.
So I’m going to duplicate my Spotlight Layer and adjust my copy to 50% opacity.
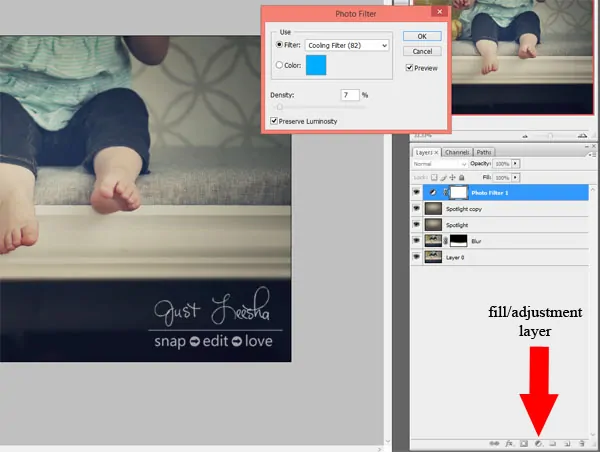
Now that I have my spotlight layers completed, I think I would like to tone down the overall yellow tint of the photo.
To cool it down, I’m going to add a Photo Filter from the Fill and Adjustment Layer.
I chose Cooling Filter (82) set at 7% opacity. It doesn’t take much to tone down the yellow.
Adding a Watermark
Last, but not least I want to watermark my photo.
My watermark is a simple brush I made with my blog’s logo.
You too can create your own watermark by following this tutorial on my site.
When adding a watermark to my final image, I will add a new transparent layer, grab my watermark brush and stamp it on the photo.
I can then adjust the opacity of that layer to my liking.
So remember, layers are an easy way to control and manipulate your images.
You can add, duplicate, adjust, and delete them as you wish with little effort.
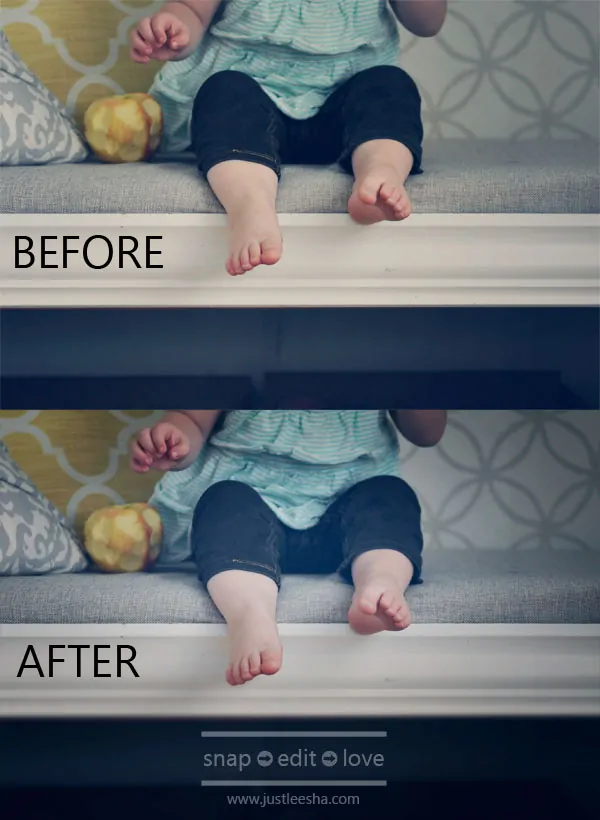
And after a few minutes you have a newly transformed image!
How easy is that?
So go snap, edit and love your photos!
For more Photoshop tutorials and photography tips, please visit my site www.justleesha.com.
Written by Alishia Osborn, from Just Leesha. You can find her on Facebook, Instagram, Twitter and Flickr.
Find More
Find more photography tips and tutorials in our Photography Category and on our Photography Pinterest Board.
Follow all our Pinterest boards at pinterest.com/5minutesformom


jose done says
nice tutorial 🙂