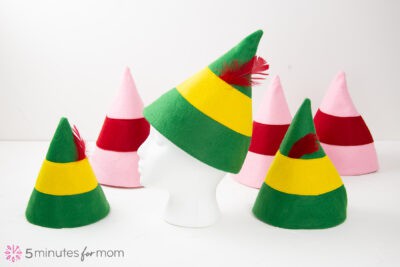
Buddy the Elf Hat
How to make a Buddy Elf Hat out of felt using our free pattern that includes 10 sizes, from Newborn to Adult XL. Instructions include 3 options: using a sewing machine, hand sewing or no-sew using a fabric glue or craft glue and a stapler.
Yield: 1 Hat
Materials
- Elf Hat Pattern
- 1/4 yard Green Felt (Elf) or Pink Felt (Jovie) Felt by yard usually comes 72" wide
- 7 x 17 inches Yellow Felt (Elf) or Red Felt (Jovie)
- Coordinating Thread
- 1 Red Feather (Elf) not required for a pink Jovie hat
- Sewing supplies needles, pins, scissors, etc.
- Tape to attach paper pattern pieces together
- Iron optional
- Glue optional: for the NO-SEW version you will need either fabric glue or white/school glue and a stapler
- Hobby Knife or X-Acto Knife optional
- Cutting Mat optional
Instructions
Print, Tape, and Cut Pattern
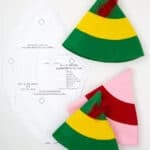
- Download the free pattern and print out your preferred pattern size. Click on the link to the free downloadable pattern in the blog post.Elf Hat Pattern
- Tape the paper pieces together, matching rectangle notches. You may wish to cut or fold along the right side and the bottom side of the pages to see and match the notches. Please note, you don’t need to cut/fold all the edges of the pages, just one of the pages needs to be trimmed for them to be matched and taped together.Tape
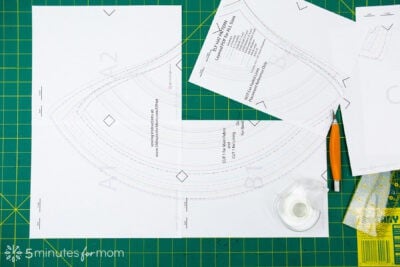
- Cut out paper patterns.I highly recommend using an X-acto or hobby knife and cutting mat to cut out the pattern. It is so much faster and usually produces the best results.Remember, cutting paper with sewing scissors dulls your good sewing scissors. So it is always best to cut your paper pattern out with paper scissors or an X-Acto knife (hobby knife).As well, cutting your pattern before your fabric creates a more precise cut on your fabric. But, of course, most of us have probably cut out a pattern at the same times as our fabric when we were in a rush. So no worries. It happens.Sewing supplies , Hobby Knife or X-Acto Knife, Cutting Mat
Cut Fabric Pieces
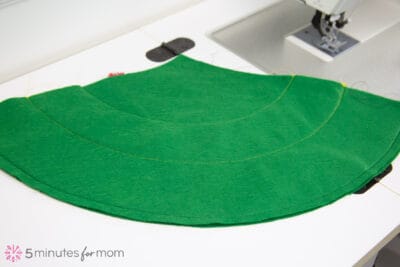
- Place pattern pieces on felt and secure with pattern weights or pins and cut out with a rotary cutter and cutting mat or fabric scissors.1/4 yard Green Felt (Elf) or Pink Felt (Jovie), 7 x 17 inches Yellow Felt (Elf) or Red Felt (Jovie)

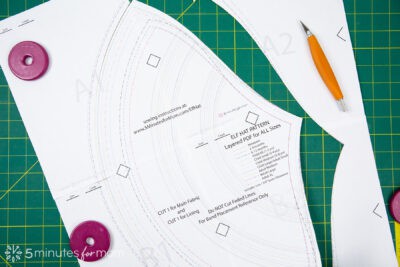
- SEWING MACHINE Option: Cut TWO main hat pieces in your main color (green or pink) and ONE headband piece in contrasting color (yellow or red.)NO-SEW or HAND SEW Option: Cut only ONE of the main hat pieces and trim off 3/8″ or 1 cm along the rounded bottom edge to remove the pattern’s seam allowance.
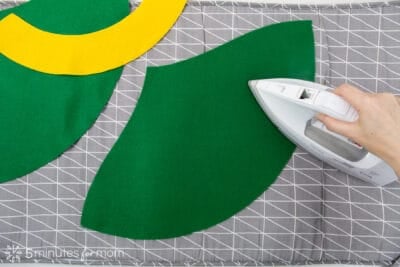
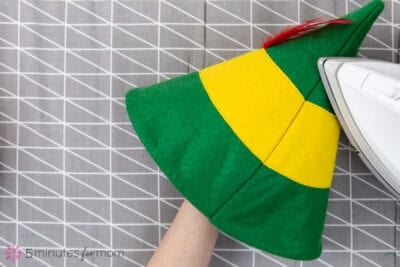
- Press felt pieces to remove any creases, ensuring iron is set to a low-medium heat suitable for synthetic fabricIron
Attach Headband Piece to Main Hat Piece
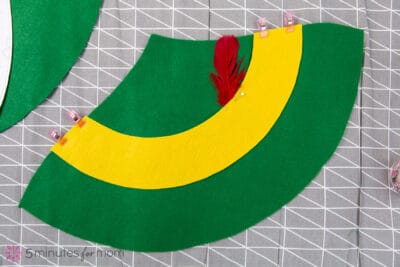
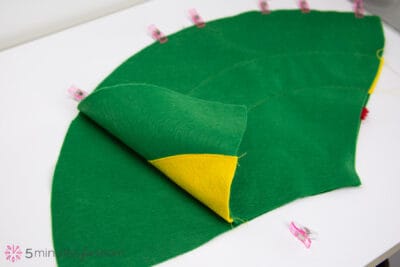
- Position the headband piece of fabric onto the main hat piece of fabric, using the pattern for placement reference if necessary. Pin in place.BUDDY HAT: If creating the Buddy the Elf hat version, position the red feather so the bottom is tucked under the top edge of the band on the left side of the hat. (It will be the right side when you are looking at the pattern piece.) Pin in place.1 Red Feather (Elf)
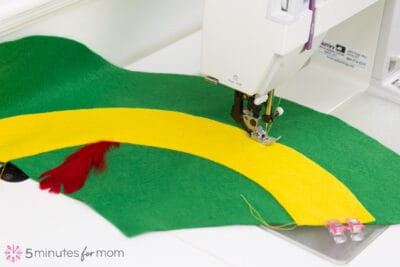
- SEWING MACHINE Option: Topstitch the headband in place with a small, straight stitch 1/8″ from the edge of the band along the top and the bottom of the band.Coordinating Thread
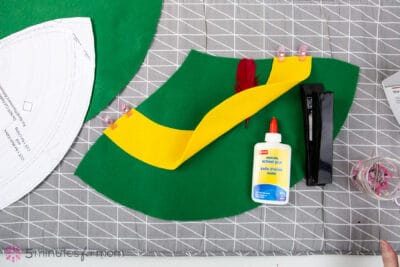
- NO-SEW or HAND SEW Option: If you do not have a sewing machine and you are doing the No-Sew or hand stitching option, you can use fabric glue or even regular school or craft glue to attach the band piece to the hat piece. You may want to reinforce the feather in place with a staple.Glue
SEWING MACHINE Option: Sew Lining and Main Hat Pieces Together
- NO-SEW or HAND SEW Option: If you are making the No-Sew or Hand Sewn versions, you can SKIP this entire group of steps.
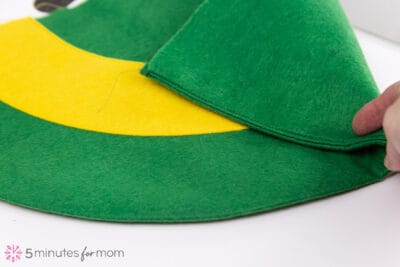
- If you are sewing the lined hat version (you cut out TWO piece of main hat fabric) you are now going to attach the lining felt piece to the main hat piece (the piece on which you just sewed the head band.)Place the two felt pieces RIGHT sides together so that the headband is sandwiched inside the two pieces. (The RIGHT side of fabric means the “good†side. Felt is a solid fabric and doesn’t really have a right and wrong side. But you may prefer one side to the other.)
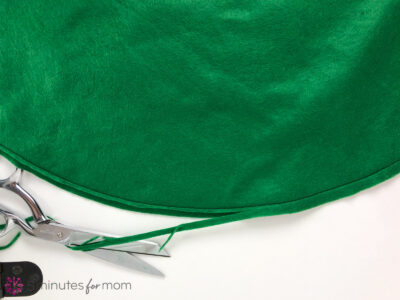
- Sew the main fabric and lining piece right sides together with a straight stitch along the bottom rounded edge with a 3/8″ or 1cm seam allowance. (Do not sew the sides – ONLY the bottom rounded edge.)
- Then, to reduce bulk in your finished project, you can “grade†the seam allowance by trimming the seam allowance. Trim the lining fabric seam allowance to about 1/8″ and the main fabric seam allowance to about 1/4″ – see photo below.(You can skip this step if you are in a hurry.)
- Press the seam allowance towards the lining and then UNDERSTITCH the seam allowance to the lining.If you are intimidated or confused by the concept of UNDERSTITCHING – I have great news! It is actually pretty simple and helps create a polished, professional edge.Understitching is the process of stitching the seam allowance to the lining or facing to prevent the lining or facing from rolling over and showing on the right side of your finished garment or project.Unlike topstitching, you can not see the understitching from the right side. It only shows along the inside of the garment/project.To understitch, press your seam allowance towards the lining and then stitch the seam allowance to the lining with a straight stitch 1/16″ to 1/8″, or 2-3mm, from the original seamline.
- Then PRESS the seamline, taking care that the finished edge is even with the lining and the understitching is neatly hidden away on the inside of the hat.Understitching may seem like an unnecessary step – but it adds such polish and perfection to our projects.
Sew Back Seam
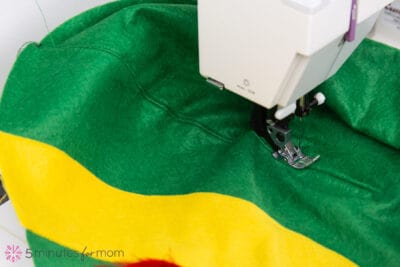
- Now all you need to do is close the back seam.Fold your hat with right sides together, lining up the raw edges on the two sides. This will be the back seam of the hat.
- Pin or clip your hat, making sure that the bottom of the two sides of the hat are lined up. Also try to make sure that the top and bottom of the headband matches on each side.
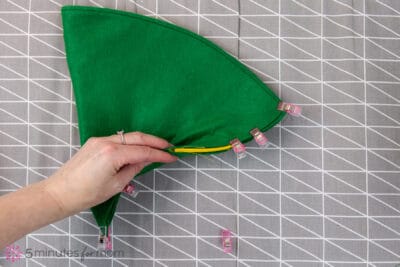
- With these right sides matched and pinned or clipped together...SEWING MACHINE Option: Sew with a straight stitch 3/8″ or 1cm from the bottom of the hat to the top. HAND SEW Option: Use a basic running stitch, making sure to back stitch securely at the bottom and the top to reinforce the stitching.NO-SEW Option: You can actually STAPLE this seam together! Yes, this is just an elf hat and a good old stapler will work. Simply staple instead of stitching with the same 3/8″ or 1cm seam allowance. Staple two rows closely together so that the staples can withstand the pressure on the seams.
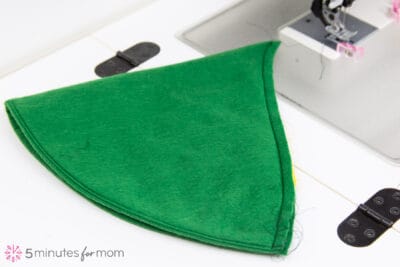
- Trim the seam allowance to about 1/4″ to reduce bulk and clean up the edges – especially at the top tip of the hat. Steam and press the seam.
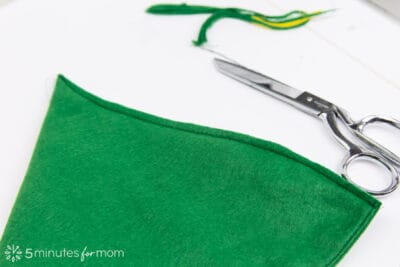
Turn the Hat Right Side Out
- You are all done sewing! Make sure you have trimmed your seam allowance, ensuring the top tip of the hat is trimmed quite close to the seam line.
- Turn the hat right side out and steam and press to polish and shape your hat perfectly.
- Celebrate! You have made your very own Buddy the Elf Hat – or Jovie the Elf Hat.