This post may contain affiliate links. Read my disclosure policy here.
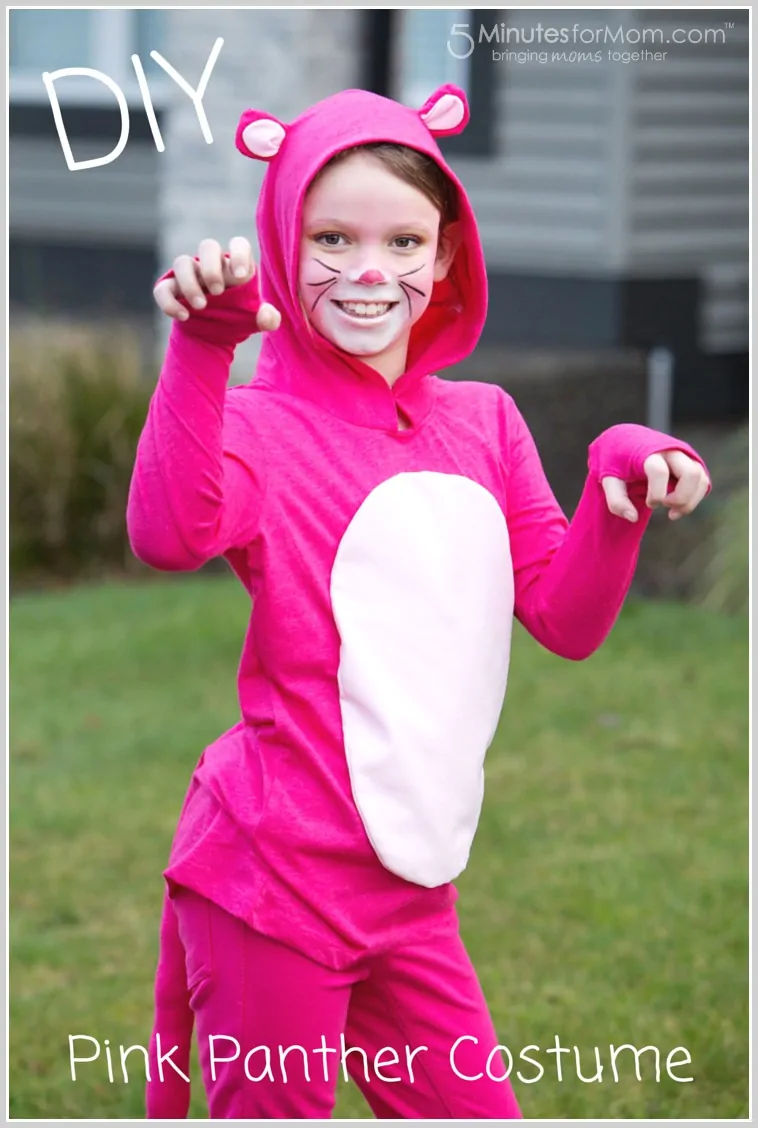
Where does a mom find a Pink Panther costume in a hurry? She makes it. Janice made this step by step tutorial of how she made a DIY Pink Panther costume for her daughter’s “character” day at school a few years ago. This Pink Panther costume is perfect for Halloween and year-round pretend play.
One day a few years ago, my seven year old, Olivia, had “Character Day” at school.
Yes, a costume day in January. You know – when the stores are just full of ready-made costumes.
But, Halloween off-season or not, Olivia had a very specific costume in mind that I wouldn’t be able to find at a store anyway. Olivia wanted to be the Pink Panther.
Thanks to the miracle of Netflix, my daughter is obsessed with Pink Panther. She has watched every episode countless times over the past few years. So when the school announced “Character Day,” Olivia immediately announced that she was going to be the Pink Panther.
“You can sew it, Mom,” she explained to me as if I had nothing else to do for the next five day besides sew a costume.
But, I am a softie and my kiddos come before my to do list. So, as Barney from “How I Met Your Mother” would say, “Challenge accepted!”
Since I had made Olivia and her cousins, Julia and Sophia, black cat costumes for Halloween, I already had a pretty good idea how I could whip together a Pink Panther costume. (I made a video tutorial for that cat costume if you want a video step by step DIY tutorial.)
I knew the first thing I wanted to do was get a “ready made base” for my costume — a top and pants that I could customize into the pink panther.
But where was I going to find matching PINK pants and a long sleeved pink shirt?
At first I considered a pink leotard and tights, but dance clothes aren’t cheap and Livvie no longer fits into her pink ballet leotard and tights from a couple years ago. I didn’t want to drop serious cash for this costume.
So, I went searching for matching pink pants and shirts. After a futile trip through the mall, I went to Target. Now WHY didn’t I go to Target first?
I was able to get exactly what I needed — bright pink jeggings and matching long sleeve shirt.
I also bought an extra shirt to use as additional fabric to make the tail and the hood.
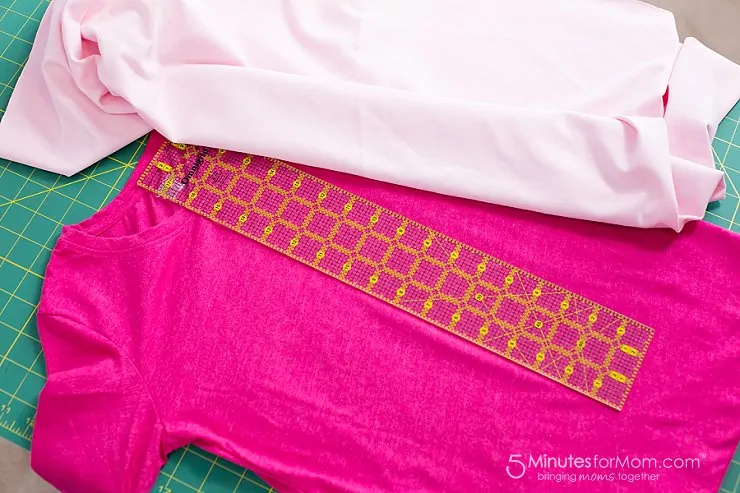
For the tummy panel and inner ears, I was lucky and happened to have some knit fabric in my sewing room that I had bought online to line a dress for Livvie, but it had been too heavy of a knit.
I couldn’t believe my luck — this costume was coming together. (If you are making a Pink Panther costume and you aren’t as lucky as I was to find matching pink shirts and pants, you could use a white shirt and white leggings and dye them pink.)
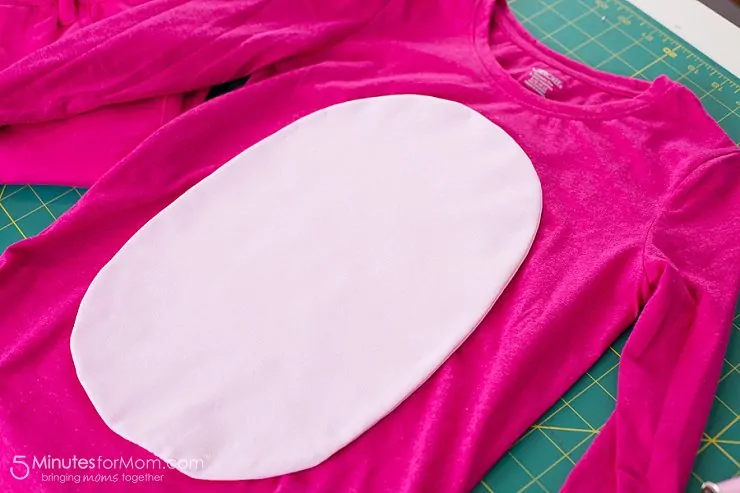
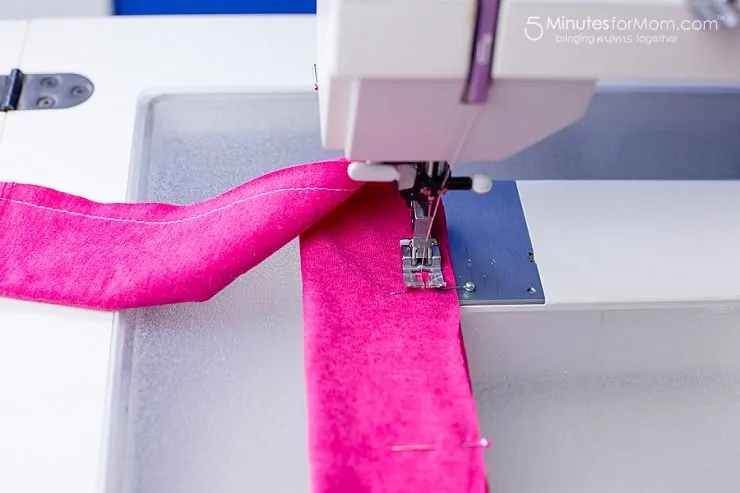
Step 1 – The Tummy Panel
Once I had my fabric all sorted out, my first step was to measure the size I wanted for the tummy panel. I tried the shirt and pants on Livvie, marked on the shirt where I wanted the tummy, and then measured.
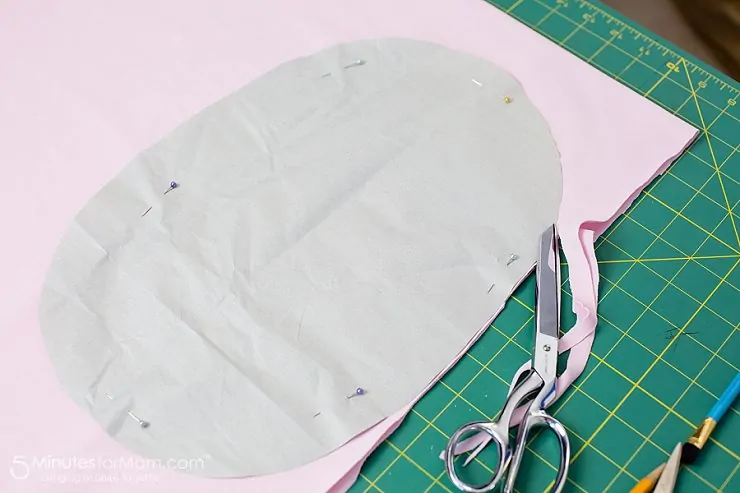
I drew a simple oval pattern to pin and cut out the tummy panel.
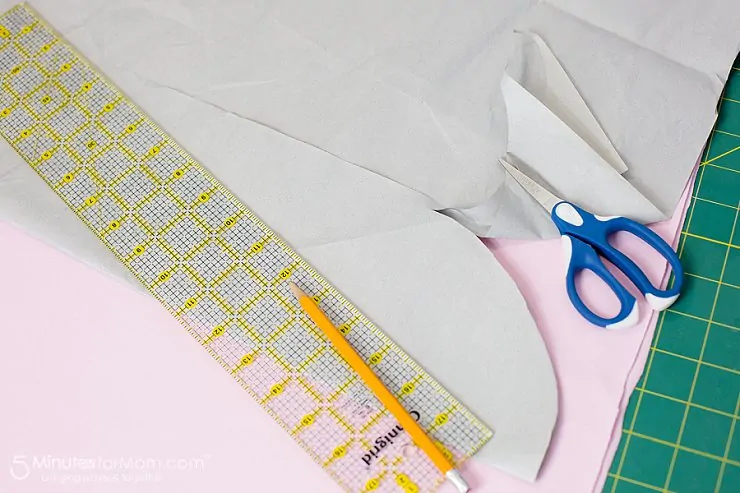
I folded the fabric and cut. I cut TWO tummy panel pieces to sew together to make a nice, finished panel.
Then I sewed the two pieces, right sides together, leaving a two inch opening. (Gotta love my old sewing machine — my parents bought it for me when I was 18 and started taking sewing night classes. It isn’t fancy, but it still does the job.)
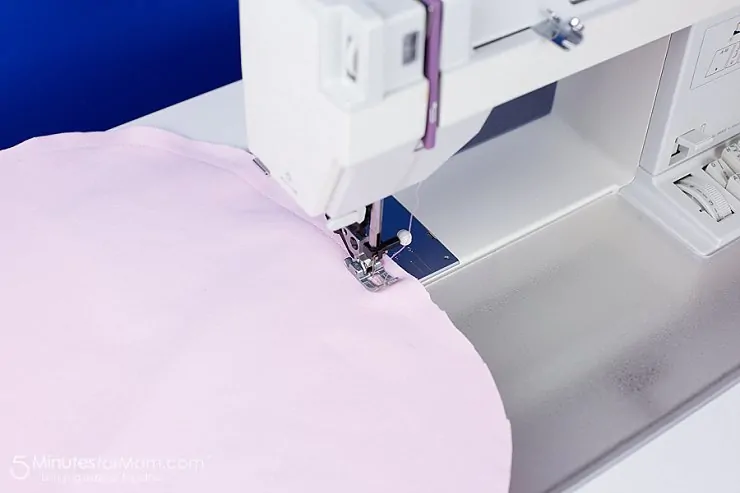
After stitching them together, I turned the panel right side out and hand stitched closed the opening.
Next, I pinned the tummy panel in place on the shirt…
… and hand sewed it in place, making sure that I only sewed through the back layer of the tummy panel.
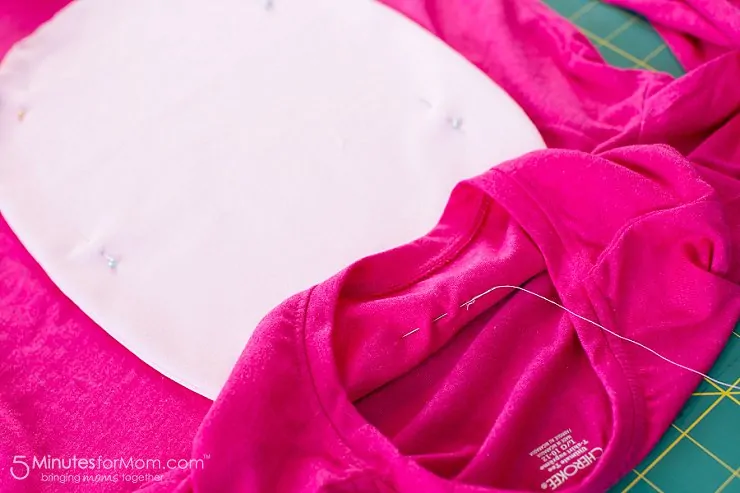
I just did a quick basting stitch, because I wanted to move quickly and I am terrible at hand sewing.
Ta da — tummy panel sewed on with no stitches showing.
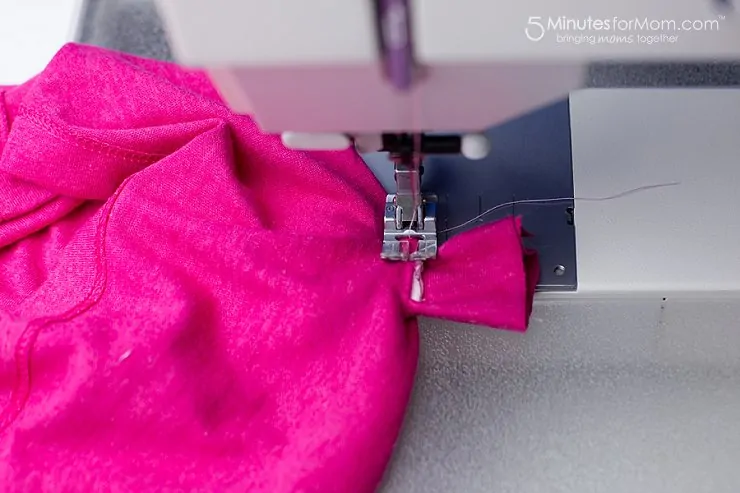
Step 2 – The Tail
The next step was to make and sew on the tail.
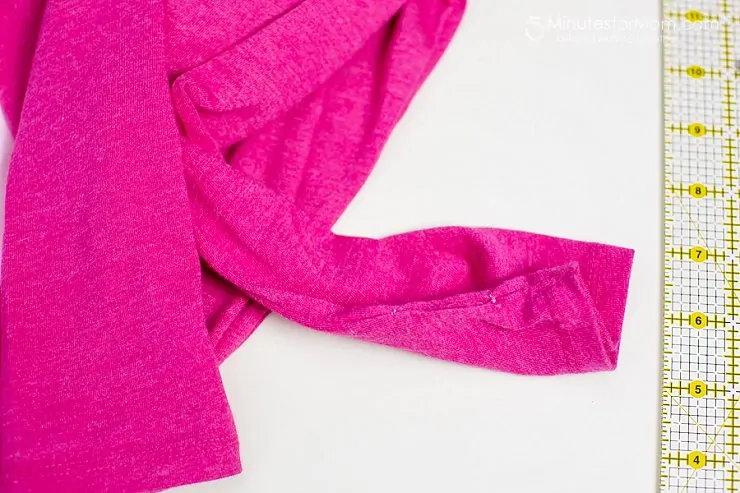
Using the additional shirt for fabric, I cut out two 2.5 inch long pieces to build my tail. Since the Pink Panther has a long, skinny tail, I made it quite skinny and as long as I could considering I was using a shirt for fabric. I used one of the sleeves so I could get the longest piece possible while keeping enough fabric for my hood and ears. It worked out well.
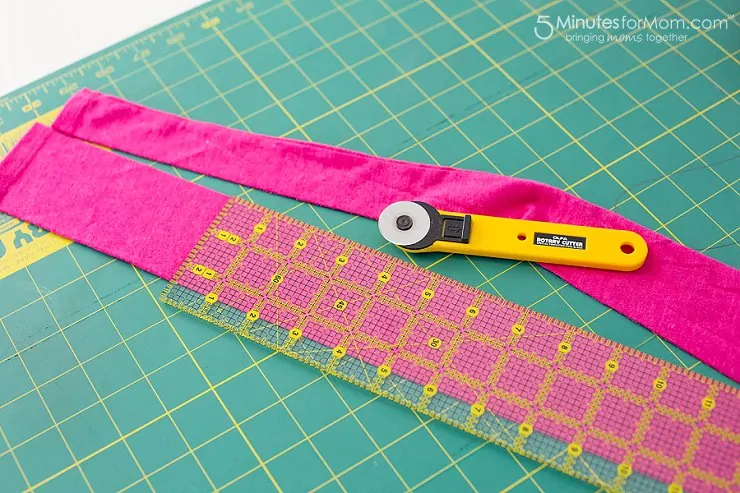
I sewed the pieces together, right sides together, leaving one end open for turning right side out. I only did one line of stitching and used a regular medium length stitch. In hindsight, I should have done a double layer of stitching to reinforce the stitches and used a smaller stitch length.
Livvie’s tail was quite popular at school, with the kids pulling and playing with it, and a couple places the stitches didn’t hold and fluff started to escape. So make sure you reinforce your tails.
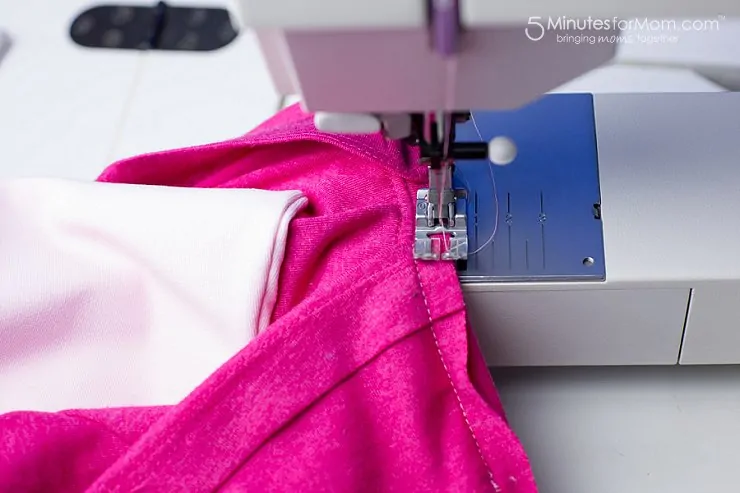
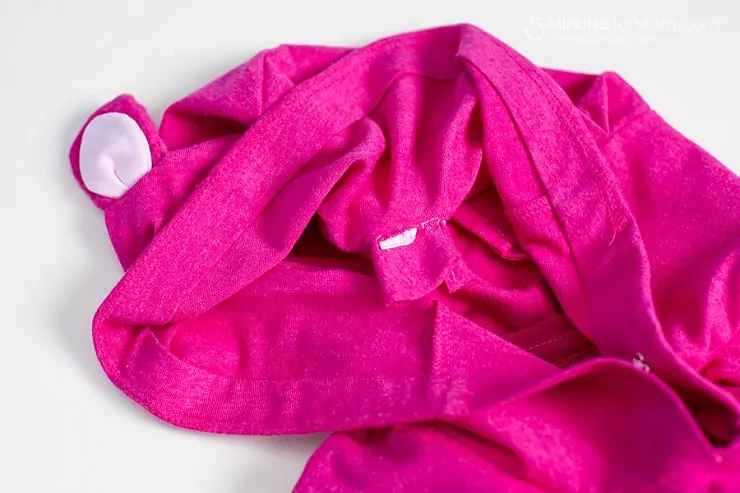
After stuffing the tail with polyester fill, I sewed the tail on to the bottom of the shirt. (I had made note of where I wanted to place the tail when I tried the shirt on Livvie and marked the tummy panel position.)
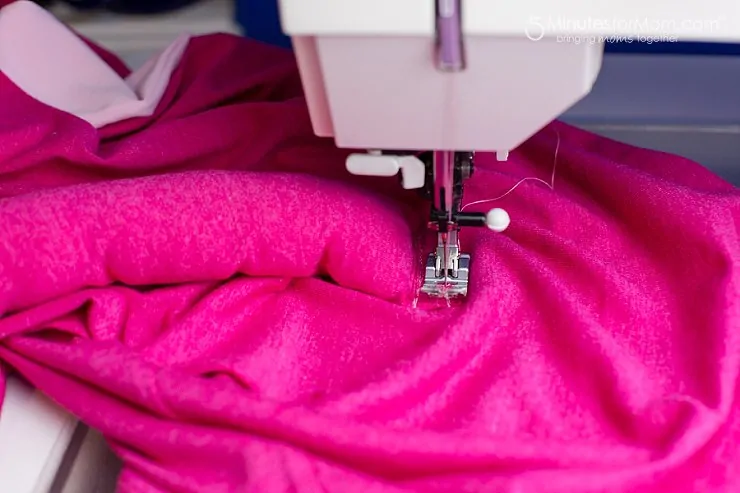
I made sure to firmly stitch on the tail, using a couple rows of stitches and a zig zag stich too.
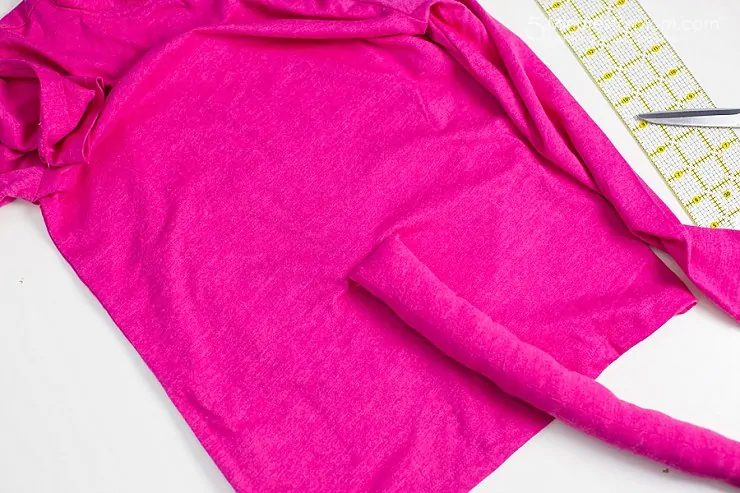
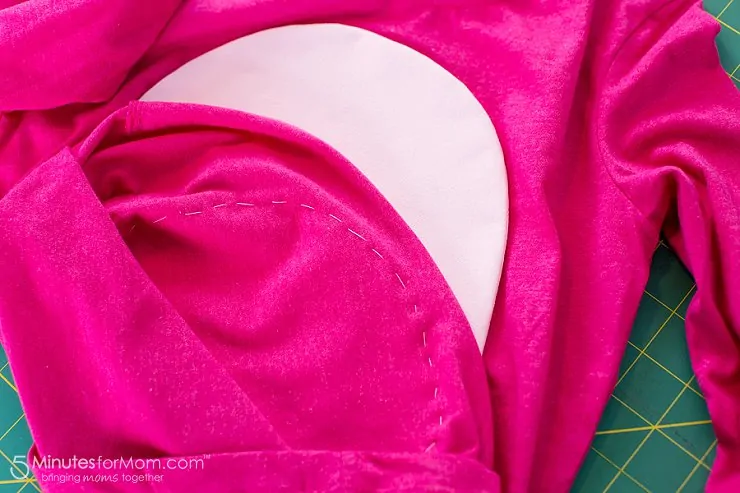
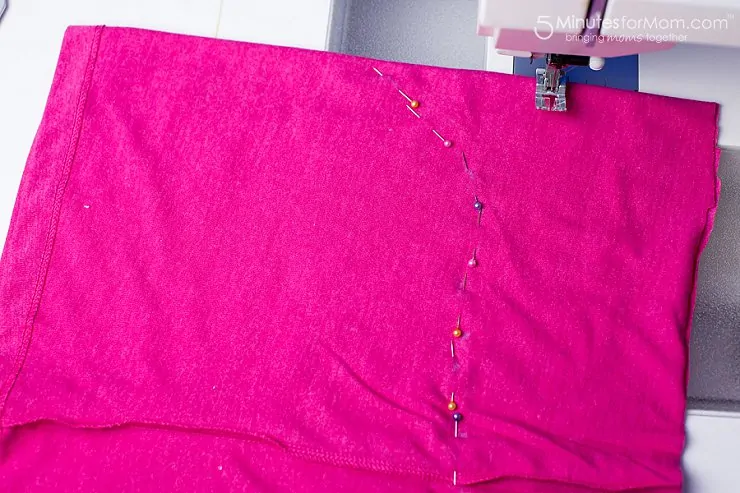
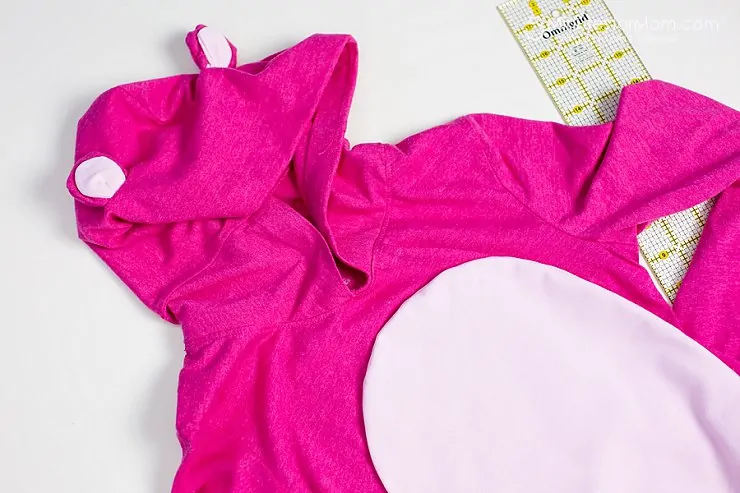
Step 3 – The Hood
Once my tummy panel and tail were finished, I tackled the hood.
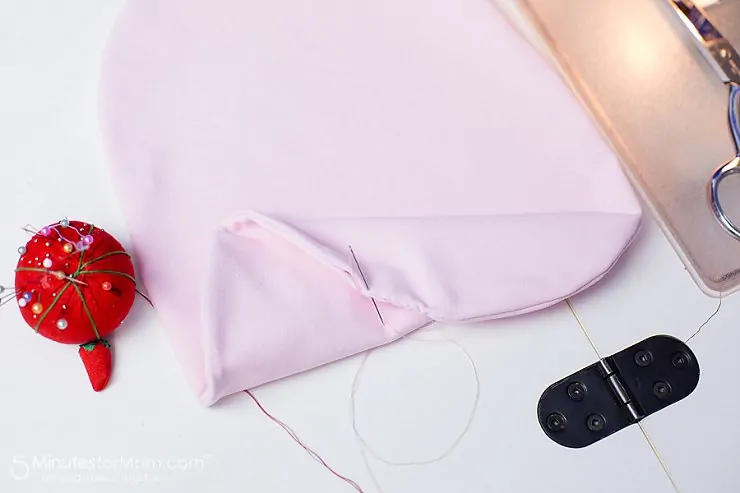
To save time, I decided to use the bottom hem of the shirt as the top hem of the hood. (However, once I had finished the costume, I thought the hood was too big and went out too far, so I did a quick invisible hem using some Stitch Witchery iron on hemming tape.)
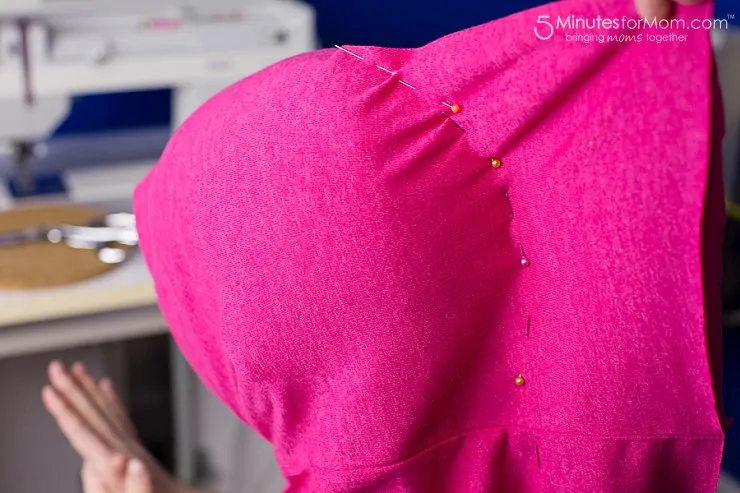
I tried the hood on Livvie and marked with pins where I would sew
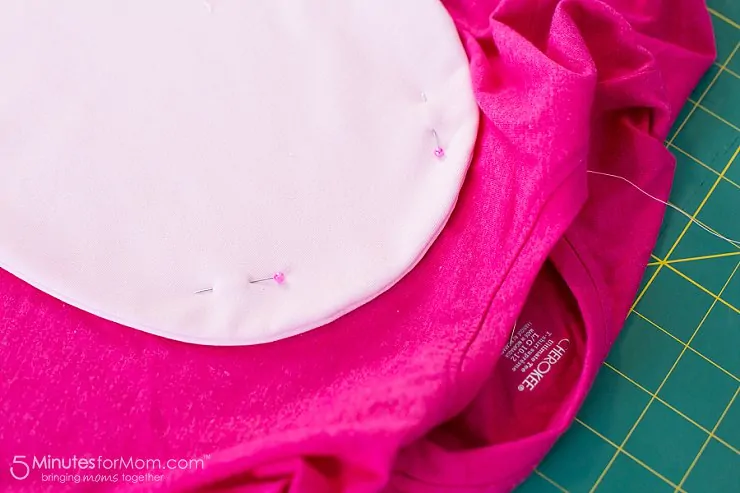
Once I sewed the hood, right sides together, I cut off the extra fabric.
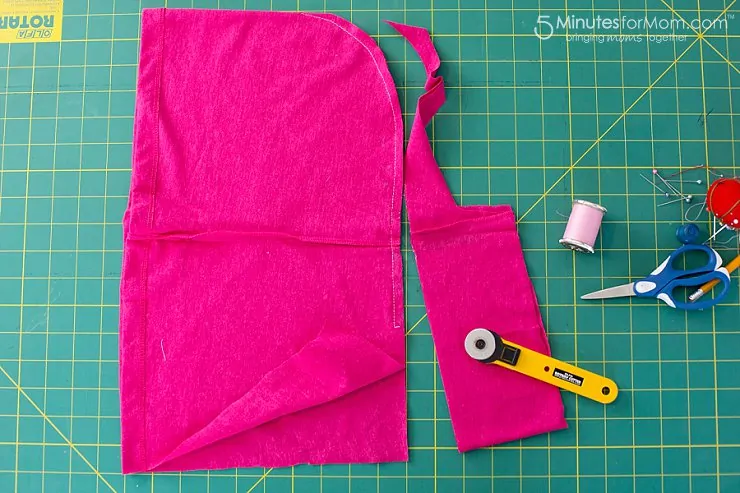
Then, I put the hood inside the shirt, (so that the right sides and raw edges were together,) and sewed the hood onto the shirt.
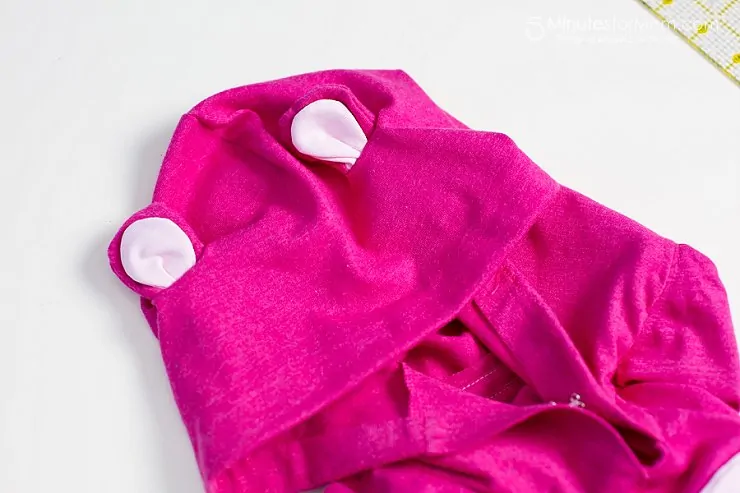
Step 4 – The Ears
To make ears, I drew a simple ear shaped pattern that had extra space at the bottom for stitching into the hood. As I did with the tummy panel, I cut on folded fabric to make two pieces to sew together.
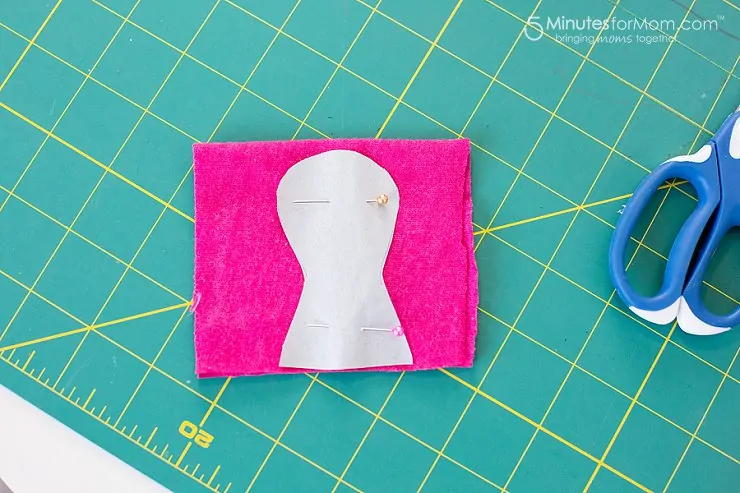
After cutting out the fabric for two ears (four pieces total) and cutting out smaller pieces in the light pink fabric to make inner ear pieces, I sewed them right sides together and turned right side out. Then I hand stitched the inside ears onto the larger bright pink ear pieces.
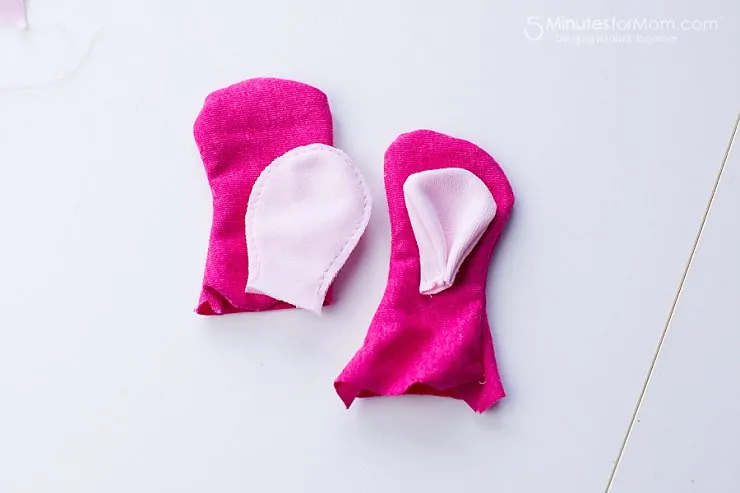
Then I stuffed the ears with a small amount of polyester fill. Next, I cut two slits where I wanted the ears, poked them through the fabric and sewed securely.

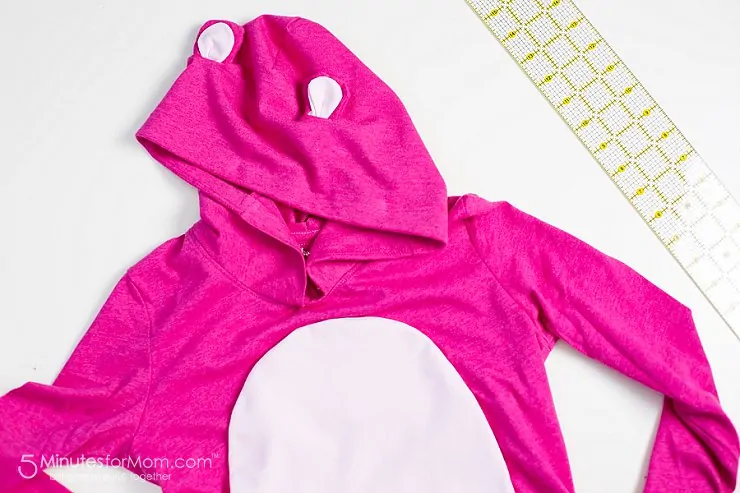
The ears didn’t match perfectly, but at this point it was about 2am, and they were good enough for a very tired mom.
Step 5 – Paws
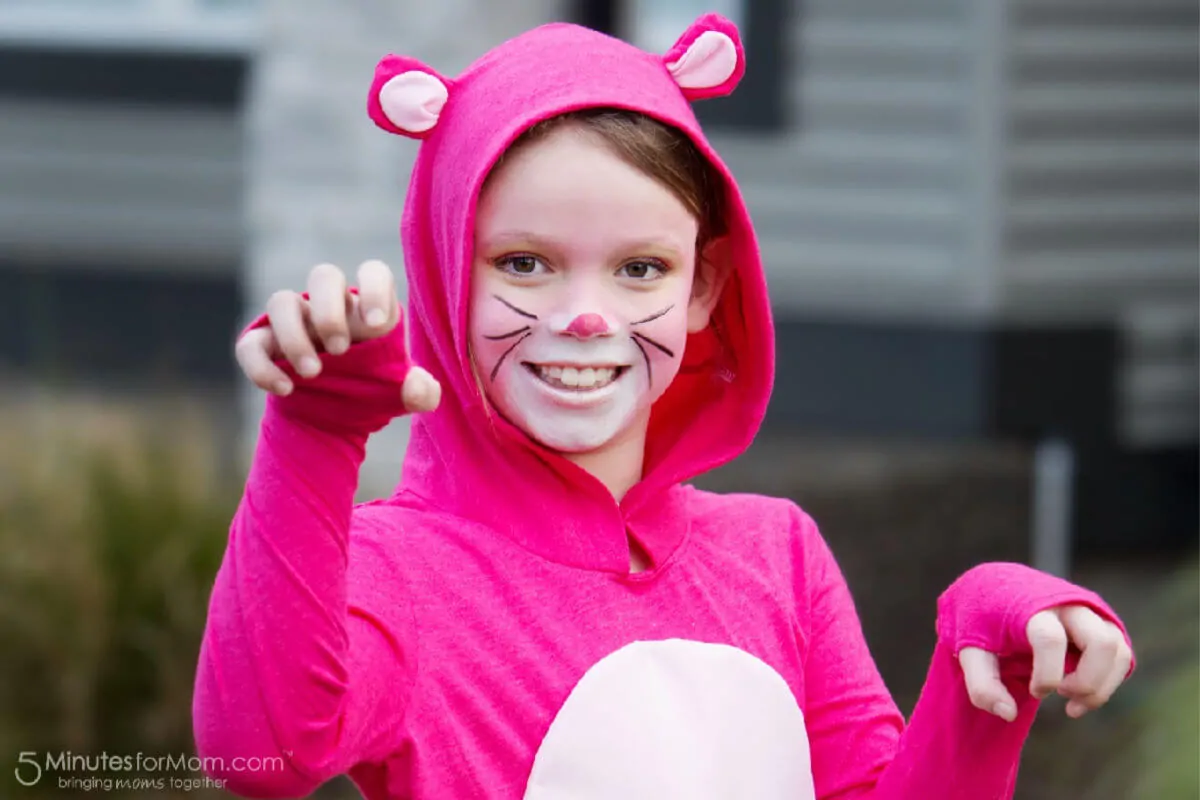
The Pink Panther was almost complete — but to add “paws” while still allowing Olivia to do her school work, I simply made “thumbholes” so her sleeves would cover her hands, but free up her fingers.
Step 6 – Final Touches
Finally, I put a small hook closure at the nape of the neck to hold the hood a bit more snuggly around Olivia’s face.
FINISHED — I had to stay up until the wee hours finishing up this fun project, but it was all worth it when Livvie woke up to her Pink Panther costume.
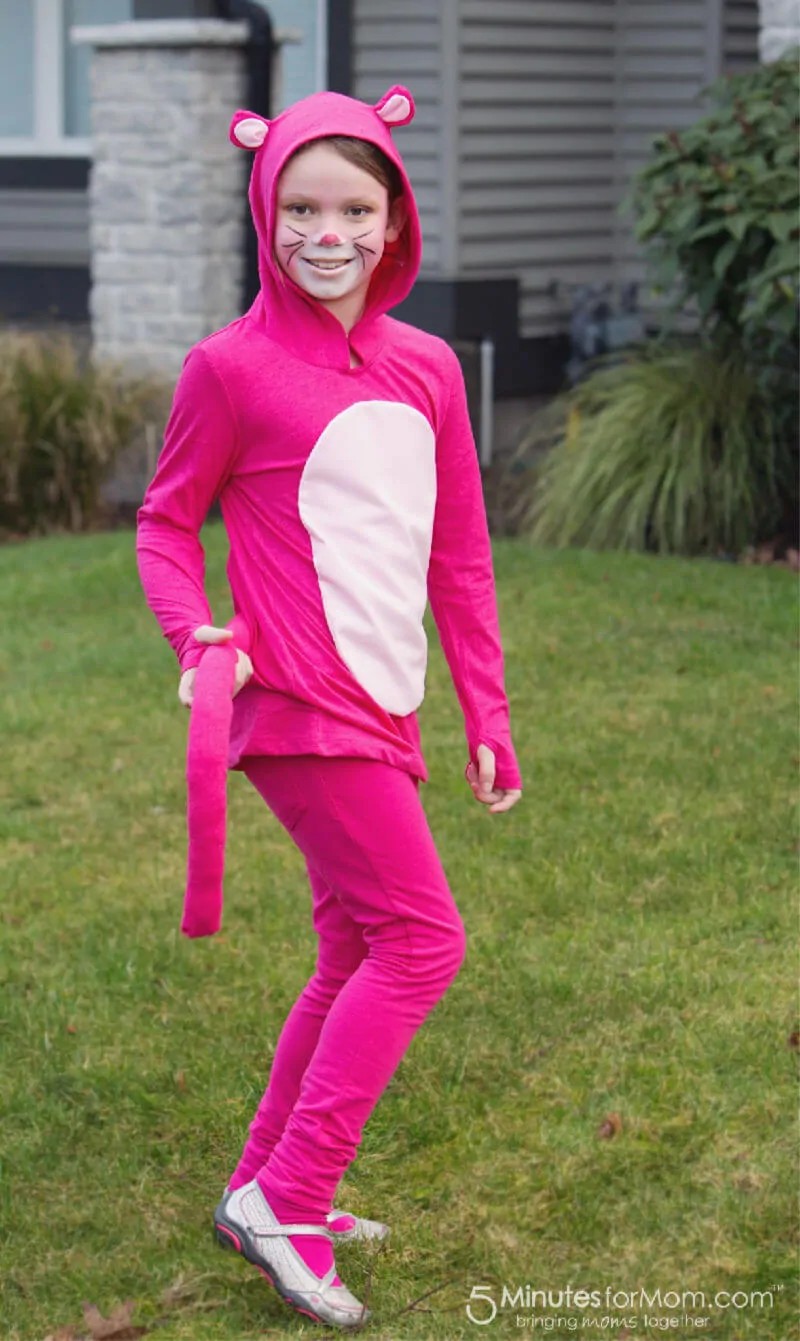
It fit beautifully and Olivia even sat perfectly still for me in morning for some Pink Panther make up and posed for a quick picture before school. It was a super Pink Panther day indeed!
Pin it for Later
More DIY Costume Ideas
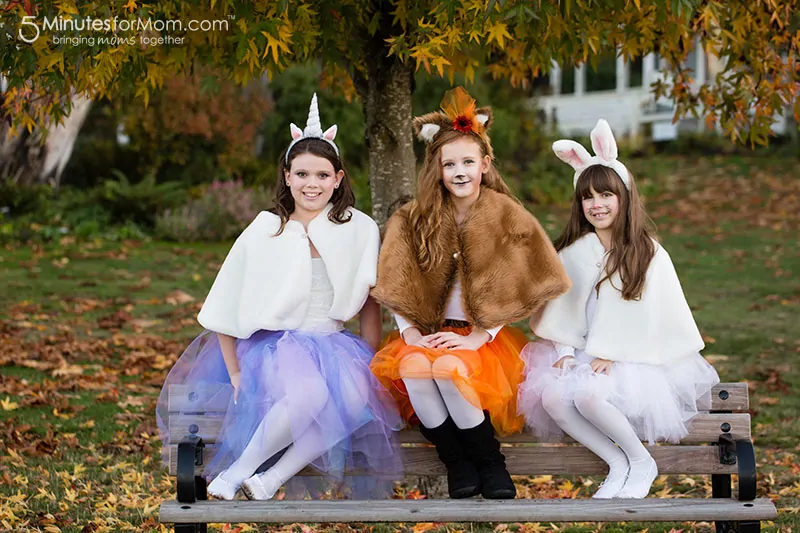
We love making DIY costumes for our girls!
Here are some more DIY costumes we made for girls last year, including a pretty unicorn, a fancy fox, and a sweet bunny.
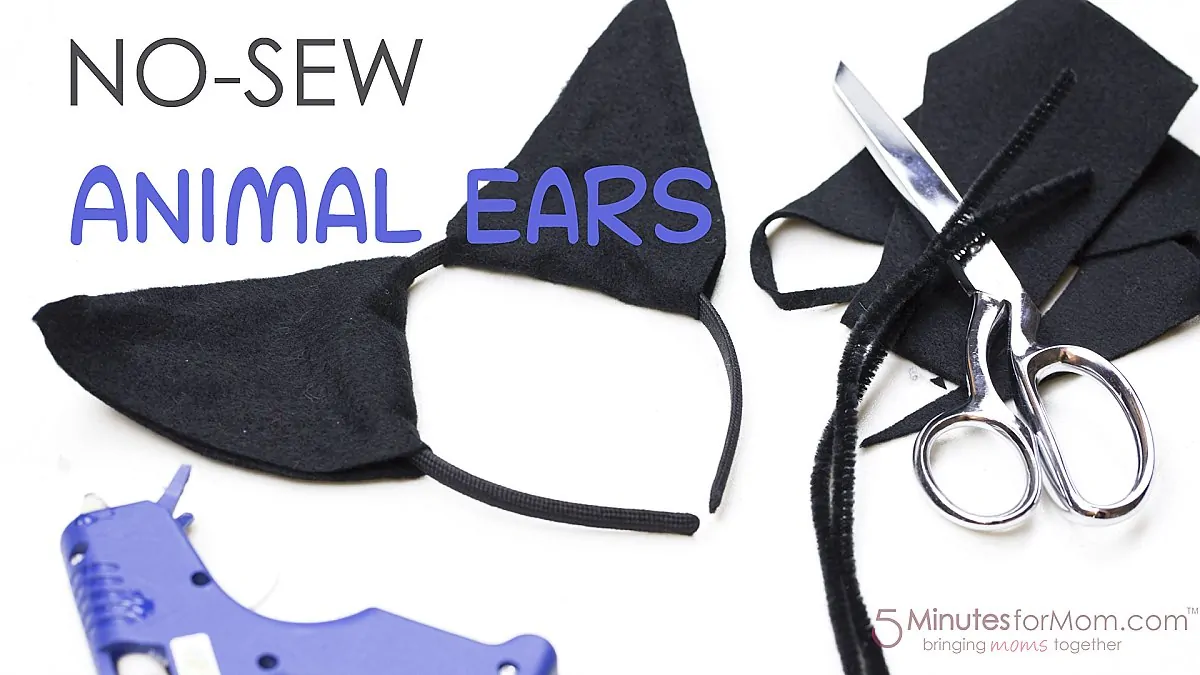
Animal ears are great for costumes and pretend play. If you want an easy way to make ears for a costume, check out how to make no-sew animal ears in this video tutorial.
Here are even more DIY costume ideas that we’ve made…
- DIY Fawn Costume
- Women in STEM Halloween Costumes
- Easy Unicorn Costume for Kids
- DIY Cat Costume with Video Tutorial
- Poop Emoji Costume
We originally published this post on Feb 24, 2015.
Written and photography by Janice Croze, co-founder of 5 Minutes for Mom
Talk with me: @5minutesformom and Facebook.com/5minutesformom
Pin with me at pinterest.com/5minutesformom


Summary Story says
Great costume and great idea! I work as a writer and write short reviews on all kinds of literary works and films for students and not only. An interesting fact: director Blake Edwards decided to create an animated character “Pink Panther” for the title credits, which would set the comedy tone for the entire film. Blake Edwards selected the image of a panther he liked from a hundred of options developed by artists. The animal turned out to be so memorable that a year later it healed with “its life” in a separate series of short animated films.